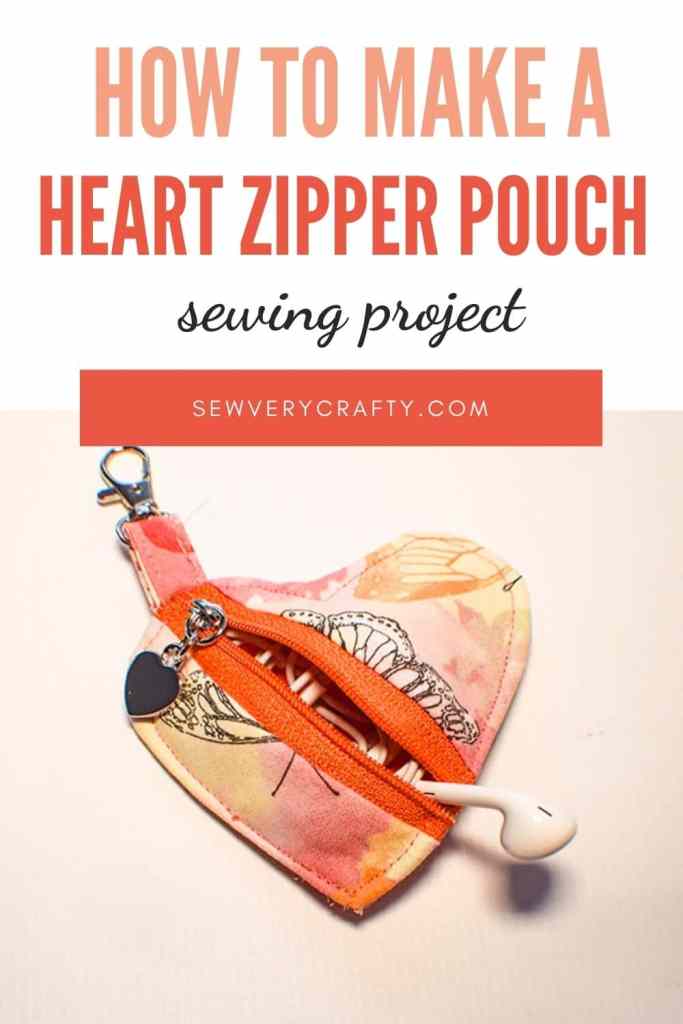
How to Make a Heart Zipper Pouch

I love making zipper pouches. This little heart zipper pouch is a fun little pouch you can attach to your keys, backpack or purse for coins, headphones or other small items that you want close by. This is a super simple little pouch to make and it is cute too. It only takes basic sewing skills and can really help your zipper sewing skills as well. Believe me when I tell you that zippers are not as intimidating as they may seem. Just use the zipper foot that comes with your machine and you can insert it with no problem at all. This heart zipper pouch only requires a small zipper so you can shorten a standard zipper or use a continuous zipper like I did. Either way it is a short easy to sew zipper for this adorable little project.
I used scraps of fabric for this project that I like bought at Joann’s or Hobby Lobby but you could head to fabric.com or onlinefabricstore.net if you don’t have any scraps or remnants in your stash. You really don’t need much fabric for this project but you will need some fusible fleece that you can get at any o those locations. This post contains affiliate links that if you click on them and make a purchase I may receive a small commission at no extra cost to you.
If you would like a video tutorial of this project head over to YouTube and check out my video. While you are there subscribe to my free YouTube channel.

What you will Need: How to Make a Heart Zipper Pouch
- Pattern you can get by clicking on this link
- Scraps of outer and lining fabric
- Scraps of fusible fleece
- Zipper that measures 4 3/4″
- Key ring or swivel clip

Step 1: Cut the Fleece of your Heart Pouch
Using the pattern piece cut two pieces of fusible fleece. Measure up 1 1/8″ from the right bottom rounded edge and draw a straight line. Measure 3/8″ from that line and draw another line. Cut along both lines and remove the center part.


Step 2: Cut the Heart Pouch Fabric
Cut an outer and lining piece of fabric that measures 5 1/2″ x 5 1/2″. Cut an outer and lining piece of fabric that measures 4 3/4″ x 4 3/4″ and one outer piece that measures 2″ x 2″ for the ring tab.
Step 3: Fuse the Fleece
Fuse the uncut fleece piece to the smaller outer piece and the cut fleece pice to the larger outer piece making sure that when you fuse the fleece that you leave enough for a 1/4″ seam allowance between the two pieces on each side.

Step 4: Cut out the Fabric Pieces
Trace a 1/4″ seam allowance around all fleece pieces. Place the corresponding lining pieces with the outer pieces and cut them out along the seam allowance lines you just drew.

Step 5: Add the Zipper
Find the center of the zipper and make a mark. Find the center of the larger outer cut piece and make a mark. Do the same for the corresponding lining piece. Place the outer piece right sides up on your work table. Place the zipper right sides down on the outer piece. Then place the corresponding lining piece right sides down on the zipper making a zipper sandwich. Make sure to line up all of the center markings. Using your zipper foot stitch the zipper through all layers. Repeat for the smaller outer pieces. Top stitch along both sides of the zipper. Trim off any excess zipper.
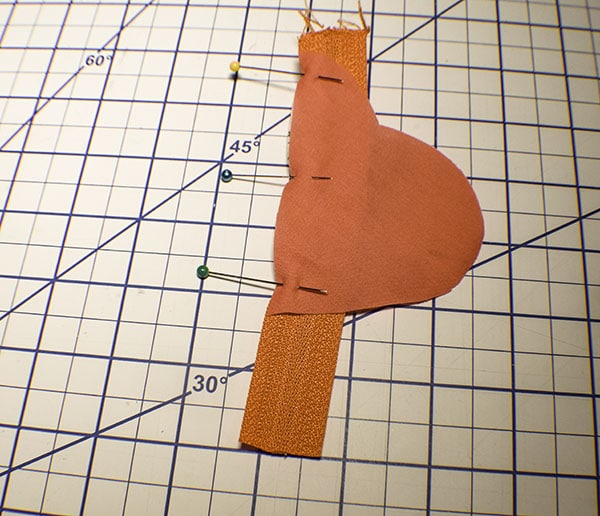

Step 6: Create the Ring Tab
Take the tab piece and fold the long sides into the center and press. Fold in half to enclose the raw edges. Stitch on both sides of the tab piece. Fold the Tab in half. If you are using a swivel clip add it here. Place the tab on the top part of the zipper and stitch to secure in place.


Step 7: Stitch the Back to the Front
Place the two back heart pieces wrong sides together with the outer piece facing up. Place the front piece onto the pack piece right sides together and pin all layers. Make sure the zipper is half way open when you do this. Stitch all the way around the heart using a 1/4″ seam allowance. I used a zig zag stitch because these edges will be raw on the inside of this pouch.

Step 8: Turn Right Sides Out
Turn right sides out through the half open zipper and press. Topstitch all the way around the heart zipper pouch. You have finished your heart zipper pouch.

I hope you enjoyed this heart zipper pouch project. If you would like more sewing and crafting projects sign up for our newsletter and receive access to our free printables library
If you would like video tutorials of some of Sew Very Crafty’s most popular posts subscribe to our free YouTube channel here