
How to Make a Watercolor Zipper Pouch
 I make a lot of zipper pouches here at Sew Very Crafty. But I have never actually painted on my pouches before. I came across this idea on YouTube and thought it was fantastic and had to share it with you. It was amazing to me that painting on fabric this way was an option. Of course painting on fabric has been around forever but this technique was new to me and it looks fantastic. Julia from Stitches by Julia inspired me to use water colors on this project. If you are unfamiliar with Julia and her work she does amazing things so check out her blog and YouTube channel if you get some time. There are some specialty techniques in this project so it is more of an intermediate project but a strong beginner could give this project a try.
I used a linen look fabric for my outer fabric and cotton for the lining. I purchased both at JOANN Fabric & Craft Stores but of course you could head to Hobby Lobby, Fabric.com, or Onlinefabricstore.net to get exactly what you need for your project. The water colors were purchased at Michael’s but Hobby Lobby and the larger JOANN Fabric & Craft Stores
like the one near me should have them as well. Keep in mind that I am not an artist and this was a simple project for me so I know you can do it too. This project contains affiliate links that I you click on them and make a purchase I may receive a small commission at no extra cost to you.
What you will Need: How to make a Watercolor Zipper Pouch
- Pattern
- Flower Pattern
- Remnant or larger outer fabric – I used linen look
- Remnant or larger lining fabric
- Fusible fleece like Pellon TP971F
- 12″ Zipper or larger depending on size of pouch
- Water color kit
- Frixion heat erasable pen
- Standard sewing supplies

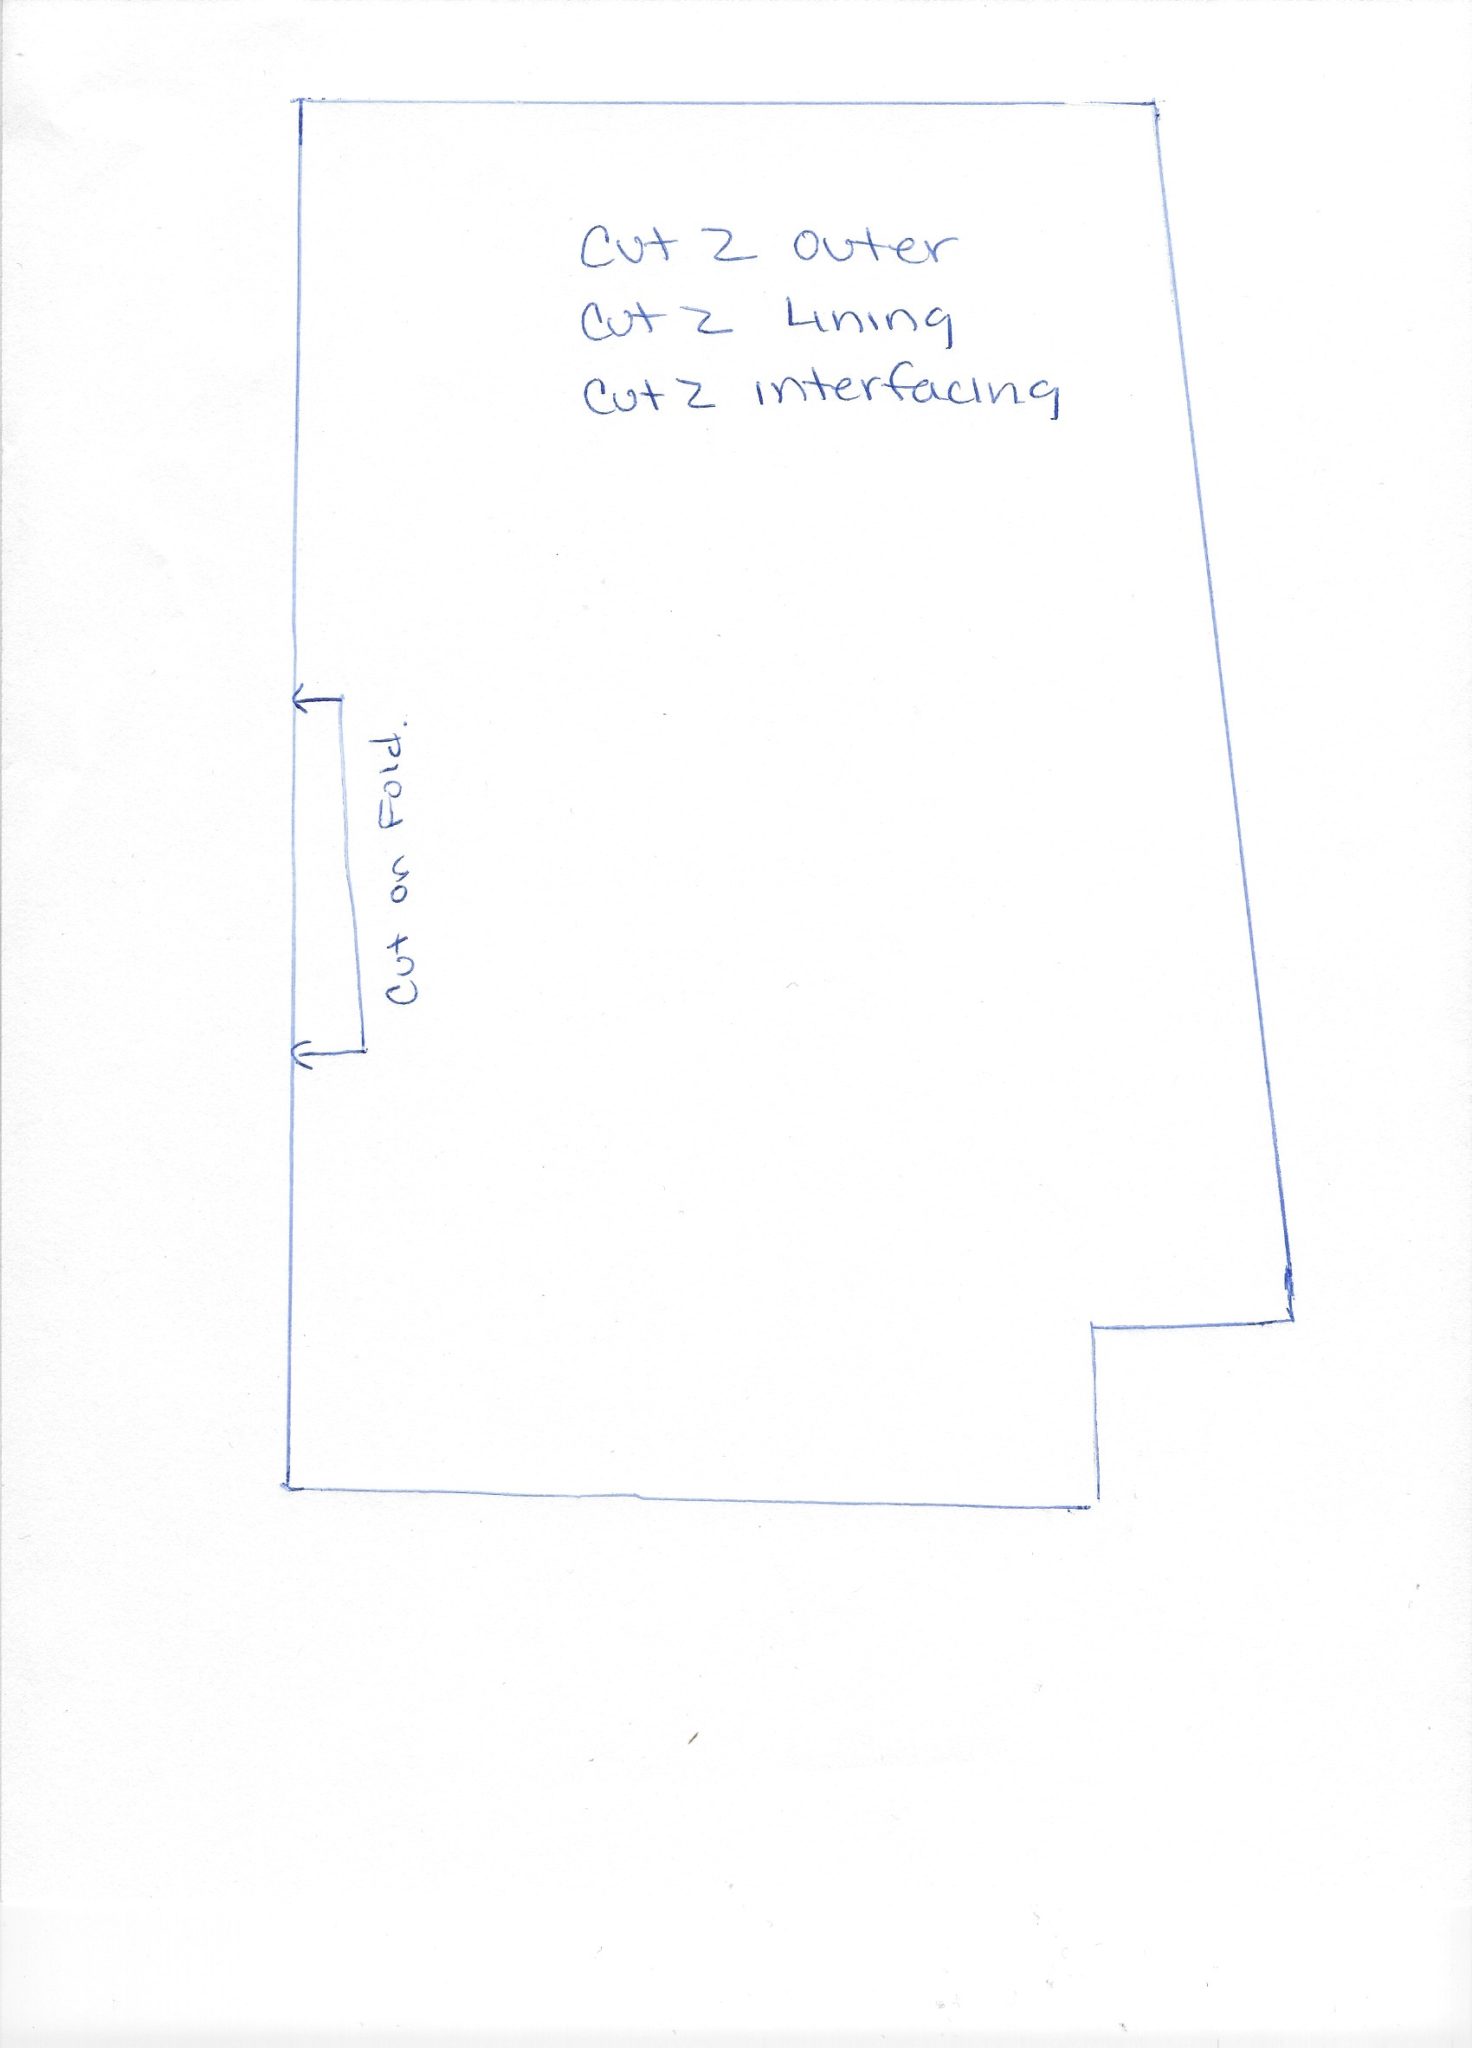
Step 1: Create the pattern
Create the pattern. You can use the pattern that I have included or use it as a template for a larger or smaller pouch. The pattern includes a 1/4″ seam allowance and results in a finished bag that measures 9″ wide, 5 1/2″ tall, and 3″ deep. From this pattern cut out two of the outer fabric, two of the lining fabric and 2 of the fleece.

Step 2: Fuse the Fleece
Fuse the interfacing to the wrong side of the outer fabric following the manufacturer’s instructions.

Step 3: Draw the flowers
Trace out the flower shapes evenly and centered across the body of the outer fabric on both pieces. I used three flowers on each piece. I also used a Frixion heat erasable pen for this purpose so that I could simply iron off the marks when I was finished.

Step 4: Paint your flowers
Using your water colors paint your flowers the colors that you like. I used a variety of colors for my flowers because I love all different colors.
Step 5: Free motion stitch around the flowers
Using matching thread and a free motion foot stitch around the flowers several times so that it looks random. Remember that you will have to drop your feed dogs for this process. If you have never done this before I recommend that you follow the manufacturer’s instructions on how to drop them and practice a few times before you stitch on your project. Free motion stitching has an odd feeling to it so if you have never done it before it will feel a little out of control. Do this for all of your flowers. Splatter paint flecks over the pouch for interest.

Step 6: Add the zipper
Lay one piece of the outer fabric right side up on your table. Place the zipper face down and centered on the top edge of the pouch lining up the edges. The zipper will be longer than the fabric. Place the lining fabric on top of that. Pin. Using a zipper foot sew the zipper sandwich near the zipper teeth. Repeat for the other side of the zipper with the remaining outer and lining pieces. Top stitch along the zipper on both sides.


Step 7: stitch the pouch
Unzip the zipper about half way. This is an important step or you will not be able to turn the bag. Place the right sides of the outer fabric together and the right sides of the lining fabric together. Using a 1/4″ seam allowance sew up both sides of the bag sewing over the zipper being careful not to break your needle. Sew the bottom of the outer fabric leaving the corners open. Sew the bottom of the lining fabric so that there is an opening at the bottom and the corners. You will need an opening at the bottom to help with turning the pouch.

Step 8: box the corners
Box the corners by pinching the corners. Pinch the bottom to the side matching the bottom seam to the side seam. Pin. Do this for all four corners. Lay flat and sew across each corner using a 1/2″ seam allowance.


Step 6: turn the pouch
Clip off any excess zipper. Turn the bag through the opening in the lining and the zipper. Sew the opening in the lining bottom closed using ladder stitch or your machine. Push the lining into the outer bag and zip. You have now completed your water color zipper pouch.


I hope you enjoyed this water color zipper pouch. If you would like more sewing and crafting projects sign up for our newsletter and receive your free eBook of 15 handbag patterns and tutorials taken from the blog.
If you would like video tutorials of some of Sew Very Crafty’s most popular posts subscribe to our free Youtube channel here.


