
How to Make an Easy DIY Pillow Case Dress
How to Make an Easy DIY Pillow Case Dress


I love sewing for children. I love the bright colors and patterns that I can use in children’s clothing. With this in mind, I decided to make this super simple DIY pillow case dress that is perfect for the beginner sewer. I also love beginner sewing projects. I want to get a new generation of people interested in sewing. Most schools no longer offer sewing in the classroom so there needs to be resources available for the beginner sewer. This pillowcase dress is the perfect beginner sewing project.
This pillowcase dress requires just a little bit of fabric, some ribbon and some bias binding and beginner sewing skills to complete. The little girl in your life will love this classic little girls dress. It can also be used as a top over a little pair of pants by just making the dress shorter.
I used my remnant stash once again for the fabric for this project but you can go to Hobby Lobby or Fabric.com to get exactly what you need. I like using remnants whenever I can because they are always at least 50% off and can contain as much as a yard of fabric. I used a remnant for this project because I had an entire yard of this fun polka dot fabric.
I chose cotton fabric for this pillowcase dress because it is lightweight, washable, and breathable. It is the perfect fabric for this type of project.
I also used pre-packaged bias binding in this pillowcase dress. You could make your own bias binding to match your fabric by following my tutorial on how to make bias binding. The reason to use bias binding for this project is to enclose the raw edges. Bias binding is cut cross way or on the bias of the fabric. The reason for this is that the crosswise grain stretches more than the straight grain in woven fabrics. If you have ever tried to stretch the straight grain you will notice that there is very little if any stretch. On the other hand if you pull the fabric from the corners you will notice the stretch.
Because the arm holes are rounded you will want to use bias binding so that it stretches and lays flat when it is sewn. Straight grain binding will result in puckers and will not go around the rounded part of the armholes and lay flat like you would like. The bias binding will be seen in this project so it is important that it lays flat when it is sewn.
What you will Need:
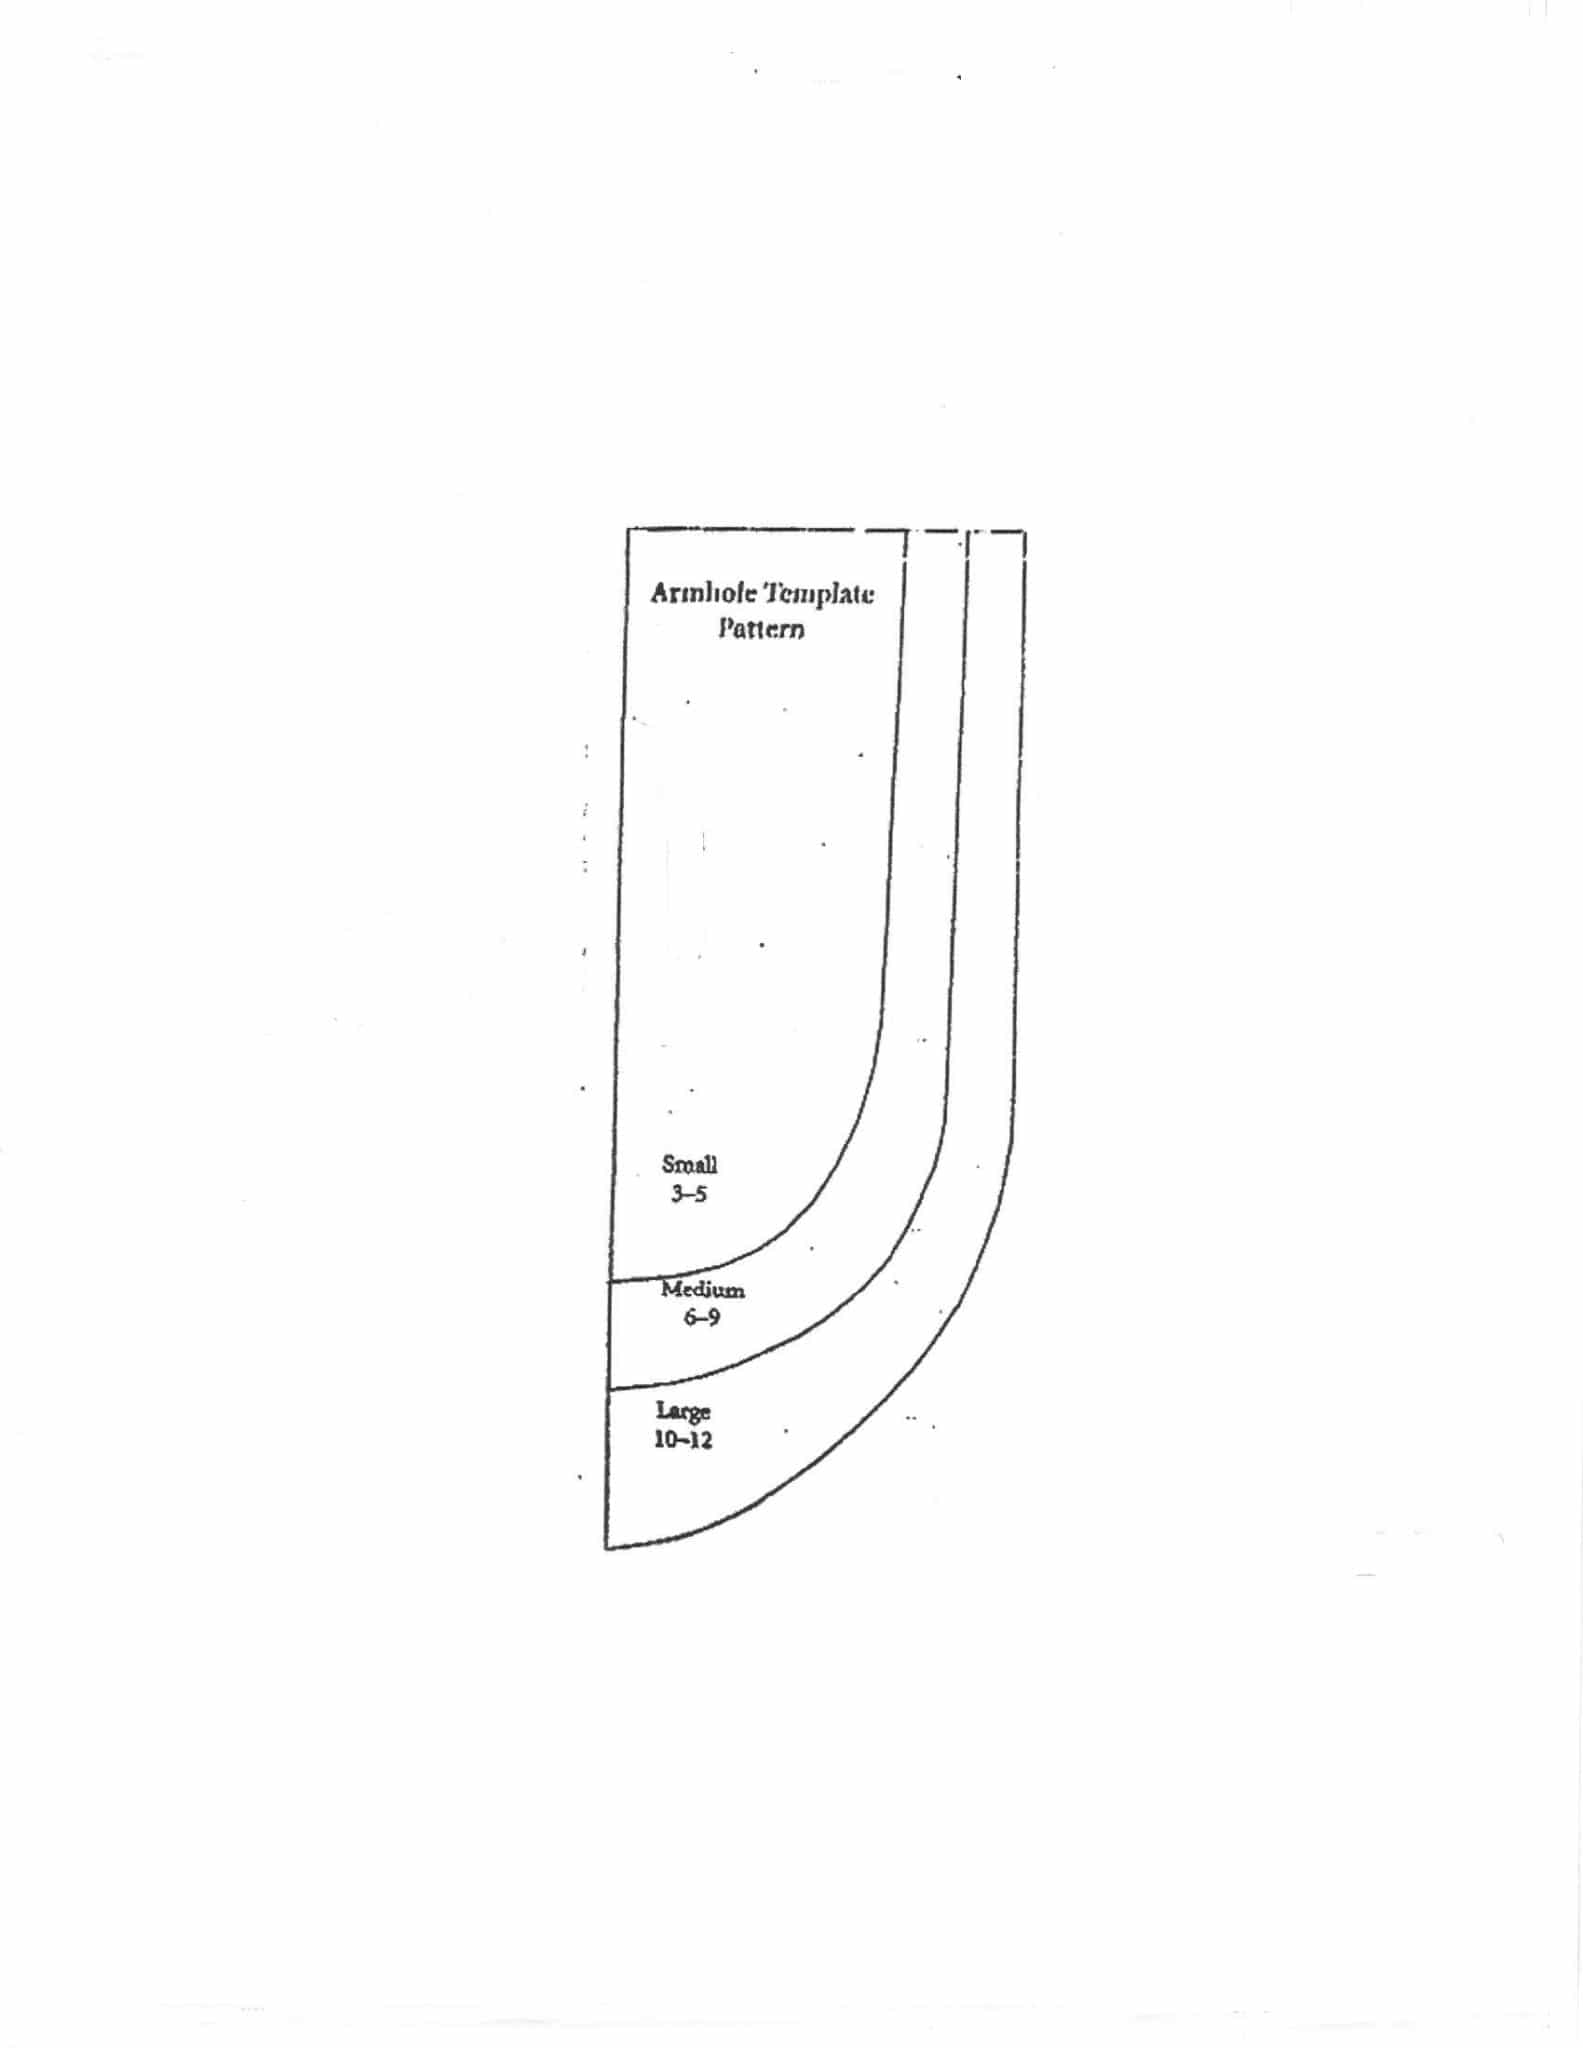
- Armhole pattern
- 1 Yd. Cotton Fabric
- 2 yds of satin ribbon for the bow and to add over the hem as detail
- 1 Package of pre-made double fold bias binding
- Standard Sewing Supplies

Step 1: How to Make an Easy DIY Pillow Case Dress
Wash and press your fabric. Cut two panels of fabric 21″ wide x the length that you want your dress to be. I made a dress that fits a 4 year old so my measurements were 21″ x 23 1/2′. Lay the 2 pieces wrong sides together and right sides facing up. Fold the two pieces in half lengthwise.
Step 2: How to Make an Easy DIY Pillow Case Dress
Using the armhole pattern for the size you want, cut out the armholes remembering to place the pattern on the raw edges. I used the medium sized armhole for my dress. This method ensures that both armholes are the same size. The last thing you want is for your armholes to be wonky. They should be symmetrical and cutting them all at the same time results in nice matching arm holes.

Step 3: How to Make an Easy DIY Pillow Case Dress
Sew the two panels together at the sides with right sides together. Do not sew the arm holes. I used a 5/8″ seam allowance for this project.

Step 4: How to Make an Easy DIY Pillow Case Dress
Add the bias binding to the armholes. Line up the edge of the seam binding with the edge of the fabric, right sides together. Sew along the first fold using the fold as your guide. If you are not comfortable sewing bias binding check out my tutorial on how to sew bias binding.

Step 5: How to Make an Easy DIY Pillow Case Dress
After you finish sewing the first step, fold the bias tape over to enclose the raw edges and sew. Sew along the original seam making sure to catch the folded edge underneath. Repeat for the other armhole. Don’t worry about the raw edges because they will be taken care of in the next step.

Step 6: How to Make an Easy DIY Pillow Case Dress
Turn the top of the dress down by 1 1/2″ and press. Fold the raw edge under by 1/4″ and press again. Sew along the turned under edge using a 1/8″ seam allowance to create a casing on both the front and back of the dress. Your ribbon will fit through this casing to form the shoulders and the bow.

Step 7: How to Make an Easy DIY Pillow Case Dress
Hem the dress by folding up the bottom of the dress by 1/4″ then another 1/2″ and sew. I generally hand sew my hems but in this instance you can sew by machine because the ribbon will be covering the seam line of the hem. Add the ribbon to the hem of the dress and sew using your machine on the top and bottom of the ribbon using matching thread.

Step 8: How to Make an Easy DIY Pillow Case Dress
Using a safety-pin attached to the ribbon thread the ribbon through the casing you made at the top of the dress. Create shoulder straps and a bow. Use pinking shears and fray check to prevent the ribbon from fraying. You have now completed this adorable and easy DIY pillow case dress.

If you would like more sewing and crafting projects sign up for our newsletter and get your free list of sewing room must haves.


