
How to Sew a DIY Backpack Purse
How to Sew a DIY Backpack Purse

How to sew a DIY backpack purse. I love backpack purses. DIY Backpack purses are so convenient and easy to carry especially on a day out. This diy backpack purse is simple to sew if you have the basic swing skills set out in my previous lessons on how to sew a straight line and how to sew curves and corners. Just follow the step-by-step instructions and you will have your own DIY backpack purse. This idea was modified from simply sewing magazine’s “The City Backpack” pattern
I used a beautiful leaf motif canvas fabric for my exterior fabric that I obtained from Fabric.com and a faux leather remnant that I had in my stash that you can also get at Fabric.com for this project. If you use a lighter weight fabric you will need to interface it with an interfacing like Pellon 808 to add that additional weight to your fabric but I highly recommend a heavier weight fabric for your exterior fabric like canvas for this project. I used a quilting weight cotton for the lining from my stash but you can get yours from Fabric.com or Hobby Lobby to match your project. This post contains affiliate links that if you click on them and make a purchase I may receive a small commission at no extra cost to you.
What you will Need:
- Pattern
- 1/2 Yd of Canvas for the main bag fabric
- 1/2 yd of faux leather or secondary canvas fabric for the base of the bag
- 1 1/2 Yd of lining fabric
- 1 Yd fusible fleece
- 1/2 yd Interfacing
- 2 1/2 yds of cotton webbing
- 2 1″ D-Rings
- 2 1″ Rectangle Rings
- 2 1″ triglides
- 1 7″ Zipper
- 2 Kam Snaps
- Fray Check
- Standard Sewing Supplies

Step 1: How to Sew a DIY Backpack Purse
Cut the Fabrics as follows: All measurements are vertically x horizontally
- Outer Canvas Fabric
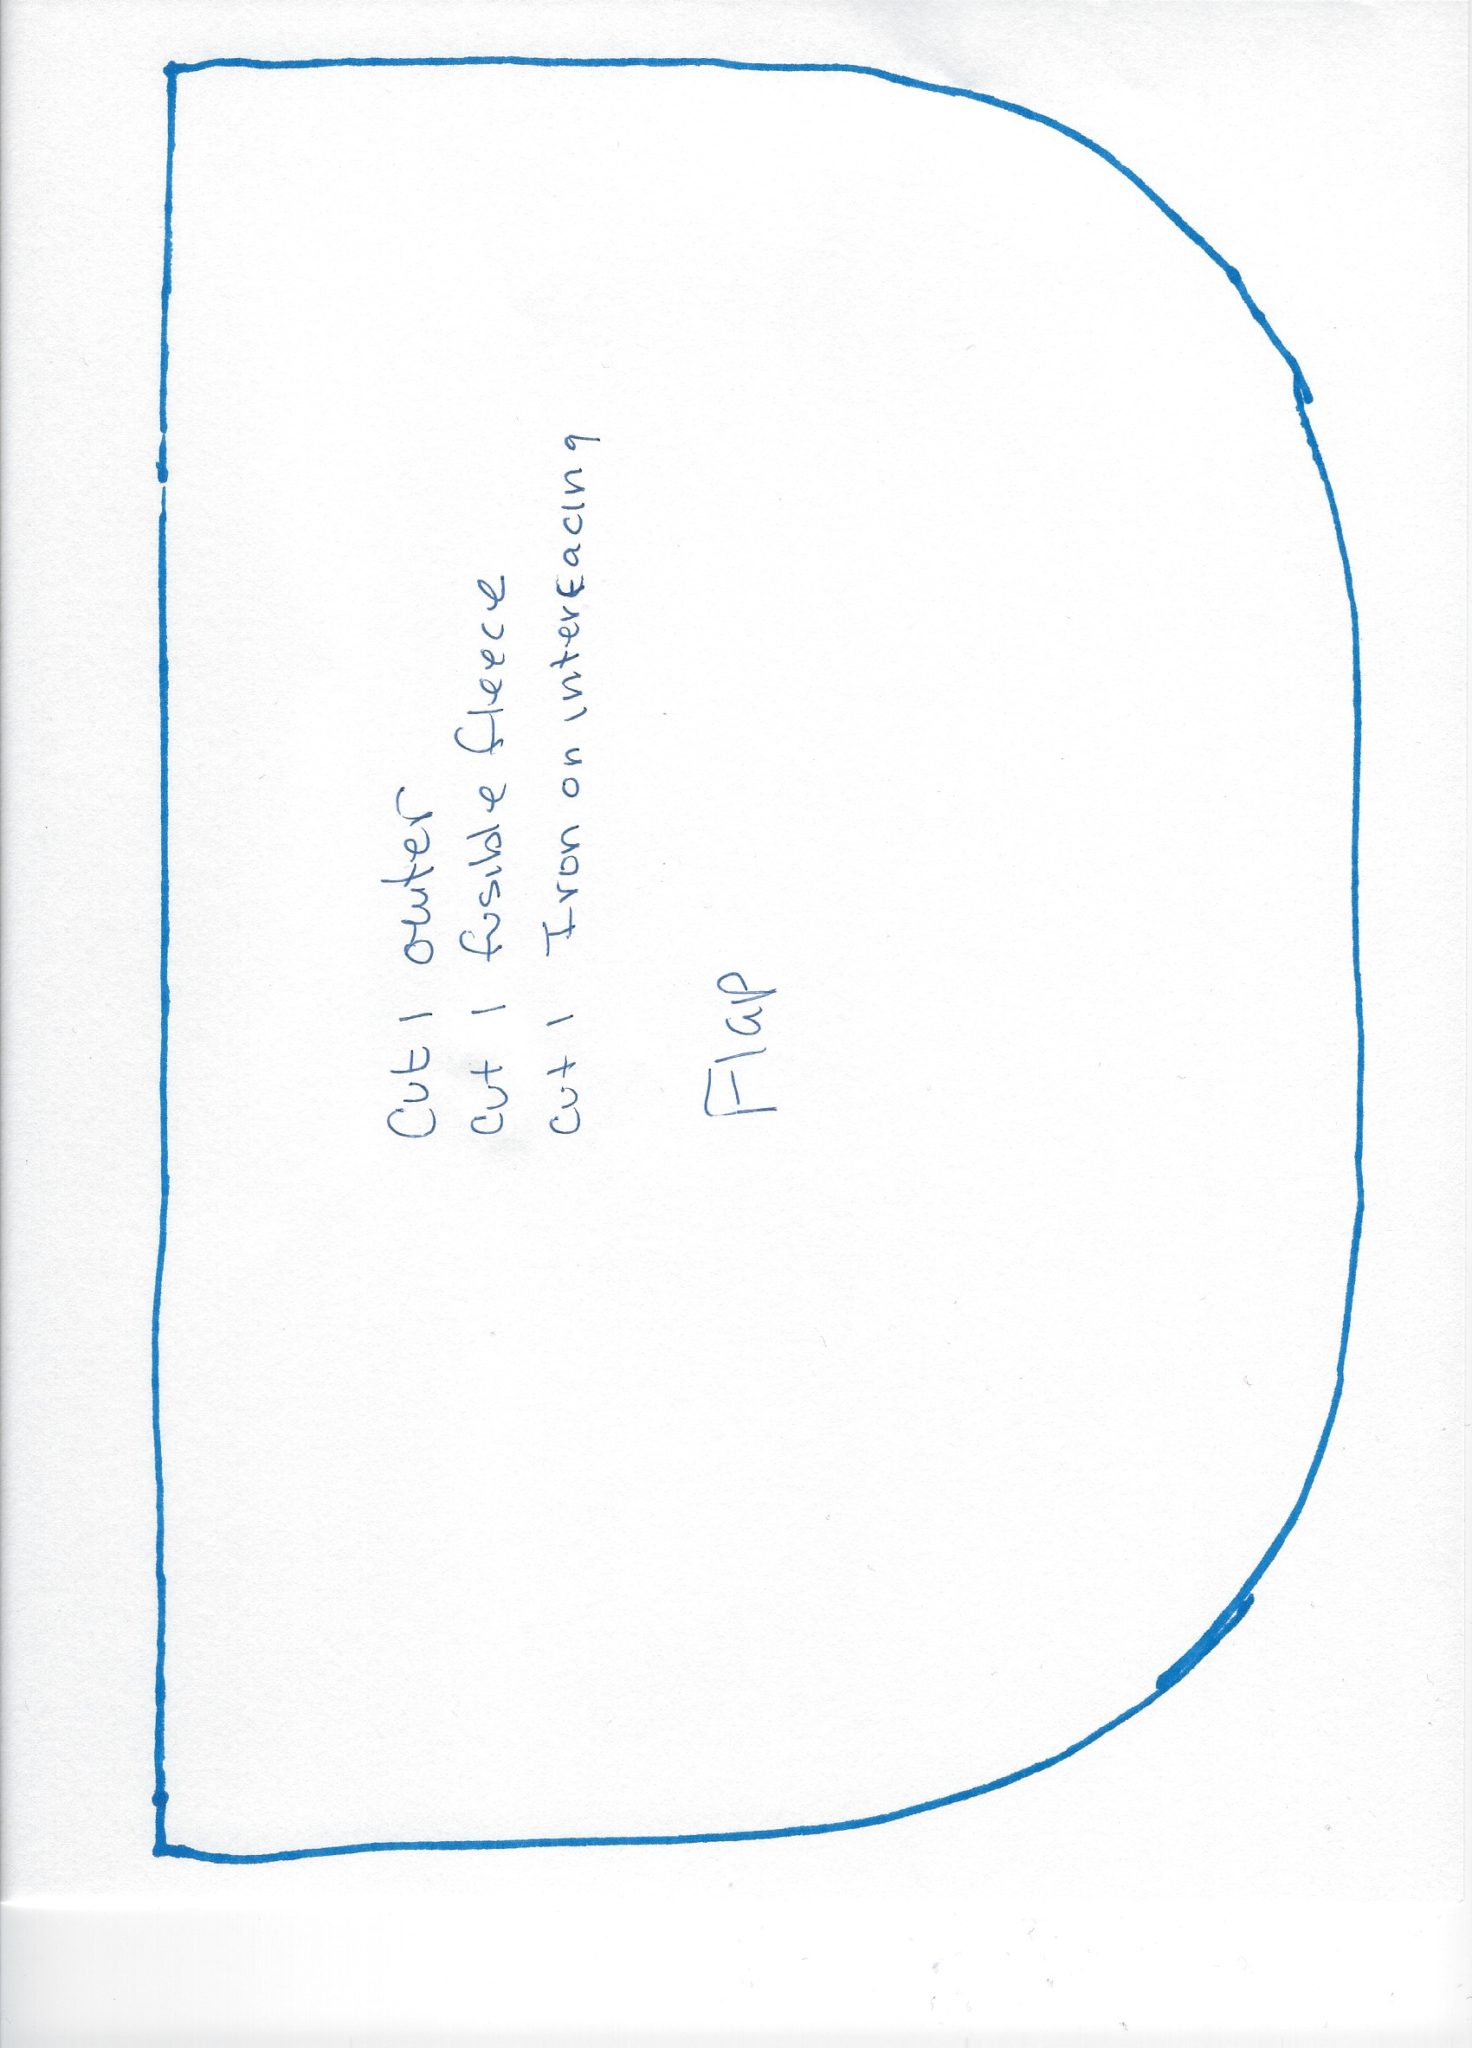
- one Flap
- Front and Back 2 – 8 3/4″ x 16 1/8″
- Base Faux Leather
- Base 2 – 7 1/8″ x 16 1/8″
- Cross Strips 2 – 1″ x 16 1/8″
- Front Tab 1″ x 4 3/4″
- Lining
- One 7 1/2″ x 11″
- Front and Back 2 – 15 x 16 1/8″
- Pocket 9″ x 13 3/4″
- One Flap
- Fusible Fleece
- One flap
- One 7 1/2″ x 11″
- Front and Back 2 – 15 1/2″ x 16 1/4″
- Interfacing
- One Flap
- Webbing
- Handle 8″
- Adjustable Strips 2 – 28″
- Ring Tabs 2 – 2 1/2″
- Front Strap 14″
Step 2: Add the Ring Tab
Fold one of the ring tab webbing pieces around one of the rectangle rings and stitch the raw ends together. Repeat with the second ring tab piece and rectangle ring. All seam allowances are 1/4″ unless otherwise stated.

Step 3: Add the D-Rings
Fold the Faux leather front tab strip around the 2 D-Rings and stitch the short ends together to hold.

Step 4: Add the TriGlide
Make the adjustable straps. First treat all of the raw edges of the cotton webbing using fray check. Let dry. Fold one end of the adjustable strap around the middle bar of the triglide and stitch in place and repeat with the other strap.

Step 5: Make the Flap
Make the Flap. Press the fusible fleece to the outer fabric on the wrong side. If you are unfamiliar with fusible fleece or fusible interfacing generally the instructions come with it when you purchase it but it is quite easy to use. The interfacing or fleece has a glue side and a non glue side. Place the glue side on the wrong side of the fabric and press with a hot iron so that the glue fuses with the fabric and the two pieces can now be treated as one.
First press the flap fleece to the flap outer and then fuse the flap interfacing to the flap fleece. You will now have three layers of the flap.
Step 6: Create the Flap Lining
Take the flap lining piece and fuse the 7 1/2″ x 11″ fleece and interfacing to it in the same way that you did the previous flap piece. Do not trim the interfacing yet.
Step 7: Add the D-Ring Piece
Take the front tab piece from step 3 and place it right sides together with the flap outer piece and center it on the curved edge with the raw edge extending slightly beyond the flap. Stitch in place close to the edge.

Step 8: Combine the Flap Outer and Lining
Place the flap outer right sides together with the flap lining tucking the D-rings inside. Sew around the sides and curved edge using a 1/4″ seam allowance leaving the back open. Trim off the interfacing and notch the curves so that the flap lays flat. Do not trim the tab ends. Turn the flap right side out and press so that the seam lies right on the edge. Top stitch around the sides and curve.


Step 9: Stitch the Front
Make the Front. Take the front outer piece and lay it right sides together with the faux leather piece lining up the lower long edge of the front with the upper long edge of the base leather piece. Fuse the front fleece to the joined pieces. Trim the fleece if necessary. Press using a press cloth. If you do not use a press cloth the faux leather will melt and ruin your iron and the faux leather. Topstitch on the right side 1/4″ above the seam.

Step 10: Add the Webbing Strap
Place the front webbing strap in the center of the front base piece matching the raw edges. Topstitch on both sides until you have reached 1/4″ into the canvas fabric. The rest of the strap should remain loose. This strap will be used to secure the flap through the D-Rings on the front of the bag.

Step 11: Create the Back
Make the Back by joining the back fabric to the faux leather in the same way that you did the front.

Step 12: Add the Cross Strips
Lay one of the cross strips that you previously made and lay it across the back base 5″ up from the bottom. Place the raw ends of the webbing of the back rectangle ring tabs under the cross strip 5 1/4″ from each edge.. Topstitch along both long edges of the cross strip to secure the tabs.

Step 13: Add the Adjustable Straps
Thread the free ends of the adjustable straps through the bottom rectangle rings and back through the triglides then tack the free ends to the bag 5 1/4″ from the sides and 1 5/8″ from the top of the bag. Remember to keep the triglide on the outside of the adjustable strap so that you will be able to adjust the straps.

Step 14: Add the Handle
Tack the handle in between the adjustable strap ends so the raw ends are in line. Place the other cross strip across the ends of the handle and adjustable straps and topstitch into place.

Step 15: Add the Zipper to the lining
Create the lining. At this point you are going to add a zippered pocket to your lining. It is far more intimidating than it is to actually do. You can follow my tutorial on how to add a zippered pocket to add one to this bag.
For this bag, you will add your zippered pocket to one of the lining pieces so that the box for your 7″ zipper measures 3/8″ x 7 1/8″ and will be 1 1/4″ down from the top of the pocket. The top of the pocket is 1 3/8″ down from the lining top.
Step 16: Create the Lining
Place the two lining pieces right sides together and sew the sides and the bottom leaving an opening in the bottom for turning. Cut squares from the bottom corners of the lining that measure 2 3/4″ x 2 3/4″. Box the corners by matching the bottom seam and the side seam and sewing using 1/4″ seam allowance. You will notice that the lining of this bag changed half way through. Unfortunately I mismeasured my lining fabric and because I used something from my stash I didn’t have any more of the original fabric I had chosen but this one works well enough. Unfortunately I had already completed the flap using the other fabric. Oh well. It all still looks and functions great.

Step 17: Assemble the Bag
Assemble the bag. Place the outer front and back bag right sides together along the sides and the bottom. Cut the corners like you did for the lining and box them.
Step 18: Add the Flap
Place the flap right sides together with the top of the back matching the raw edges and it is placed in the center. Stitch the flap in place.

Step 19: Add the Lining to the Bag
Place the outer bag inside the lining bag so that they are right sides together and the side seams are line up. Stitch around the top through all layers. Turn the bag by pulling it through the opening you left in the lining. Sew the lining closed sing ladder stitch.


Step 20: Topstitch
Push the lining inside the bag and topstitch all around the top.
Step 21: Add the KamSnaps
When this bag is not full it can get a little floppy so to solve this problem add a couple of snaps or kam snaps to the top edge about 1 1/4″ from the side seams and a 1/2″ from the top to help. I used Kam Snaps for mine because they are so easy to install. You can buy them in a kit with complete instructions.

I hope that you have enjoyed this terrific bag sewing project. There are quite a few steps but it is really rather simple to make just follow the steps and you will have a terrific DIY backpack purse.

If you would like more sewing and crafting projects sign up for our newsletter and receive your free eBook of 15 handbag patterns and tutorials.


Hi there, what are measurements of the flap pattern? I don’t have a printer at home, so I’m a bit stuck. .. Would really appreciate your help with this.
If you cut a rectangle that is 8 3/4″ x 5 3/4″ and then round the bottom corners you should be fine. Let me know if you have any other questions.
Thx so much!
Hi, I was wondering what the total dimensions of the finished bag are. Thank you.
The bag is about 11.5″ wide and 12.5″ high and 5″ deep. I hope this helps.
Is there a bottom or is it just the front anf back pieces sewn togethet?
The front and back pieces are sewn together but the bottom is boxed so it is as if it has a bottom. I hope this helps.
Thanks for this clearly written pattern, great small back purse! I made a small change and attached the back straps to the upper part of the band going across. Also I feel the kam snaps should be 2 inches in (not 1 1/4). Would have loved to attach a photo.
Thank you so much for trying out the project. You can always attach photos on the Facebook page.
The dimensions for the flap you gave someone in an earlier post seem small compared to the size of the bag. My question is did I miss the step for attaching the handle at the top? Thanks for this pattern. It’s just what I was looking for.
I printed out the pattern and measured again and the measurement is correct so you should be alright using that measurement if you cannot print the pattern.
Hi, I’m getting ready to put the zipper in but am a little confused. Does the zipper get attached to the lining fabric so that it is on the inside or is it attached to the outer fabric? Thanks
The zipper gets attached to the lining. You are creating a zipper pocket inside the lining of the bag. You will follow the tutorial I linked to to create the zipper pocket. Let me now if you have any more questions.