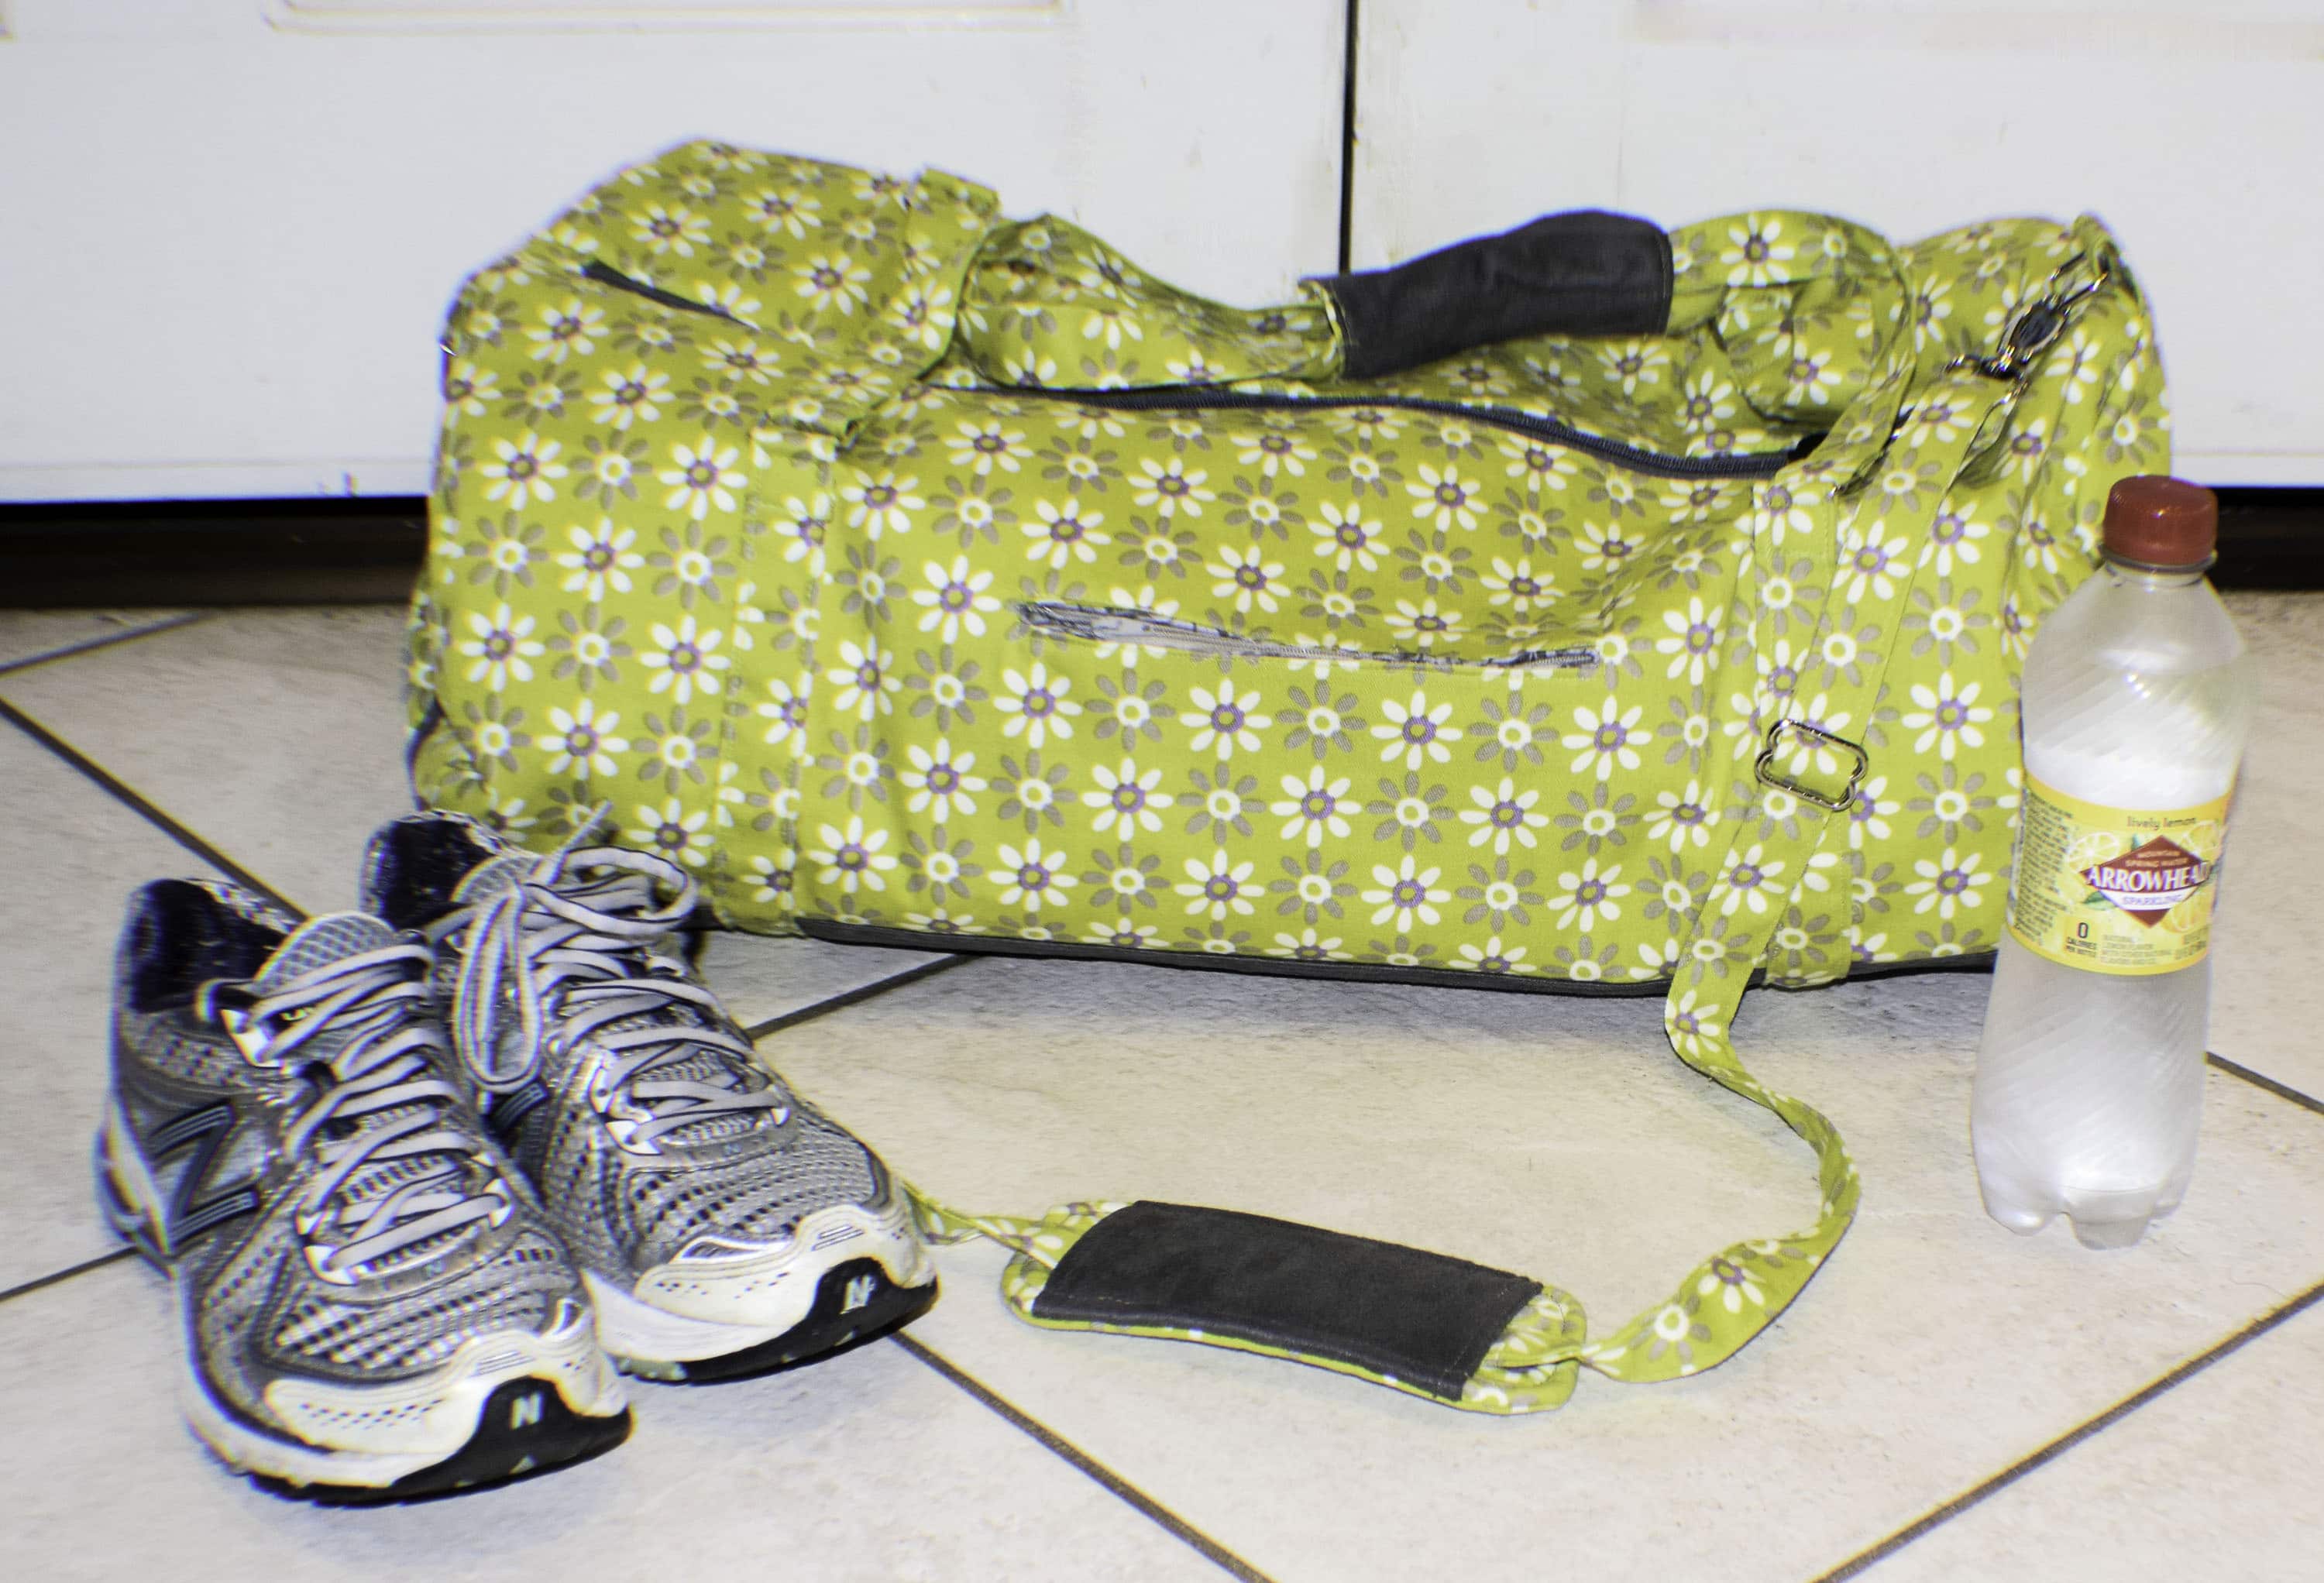
How to Make a Custom Gym Bag

The New Year is just around the corner and I, like many people, will decide that this is the year that I will really set up an exercise plan. I will go to the gym and give it my best effort. I could go out and buy a generic gym bag to take all of my exercise equipment in but then again I can make a custom gym bag just for me. Guess what I decided to do? You guessed it. I decided to make a custom gym bag from some super inexpensive red dot fabric I had in my stash for years and some remnants. This is not a beginner sewing project but requires intermediate skills to complete
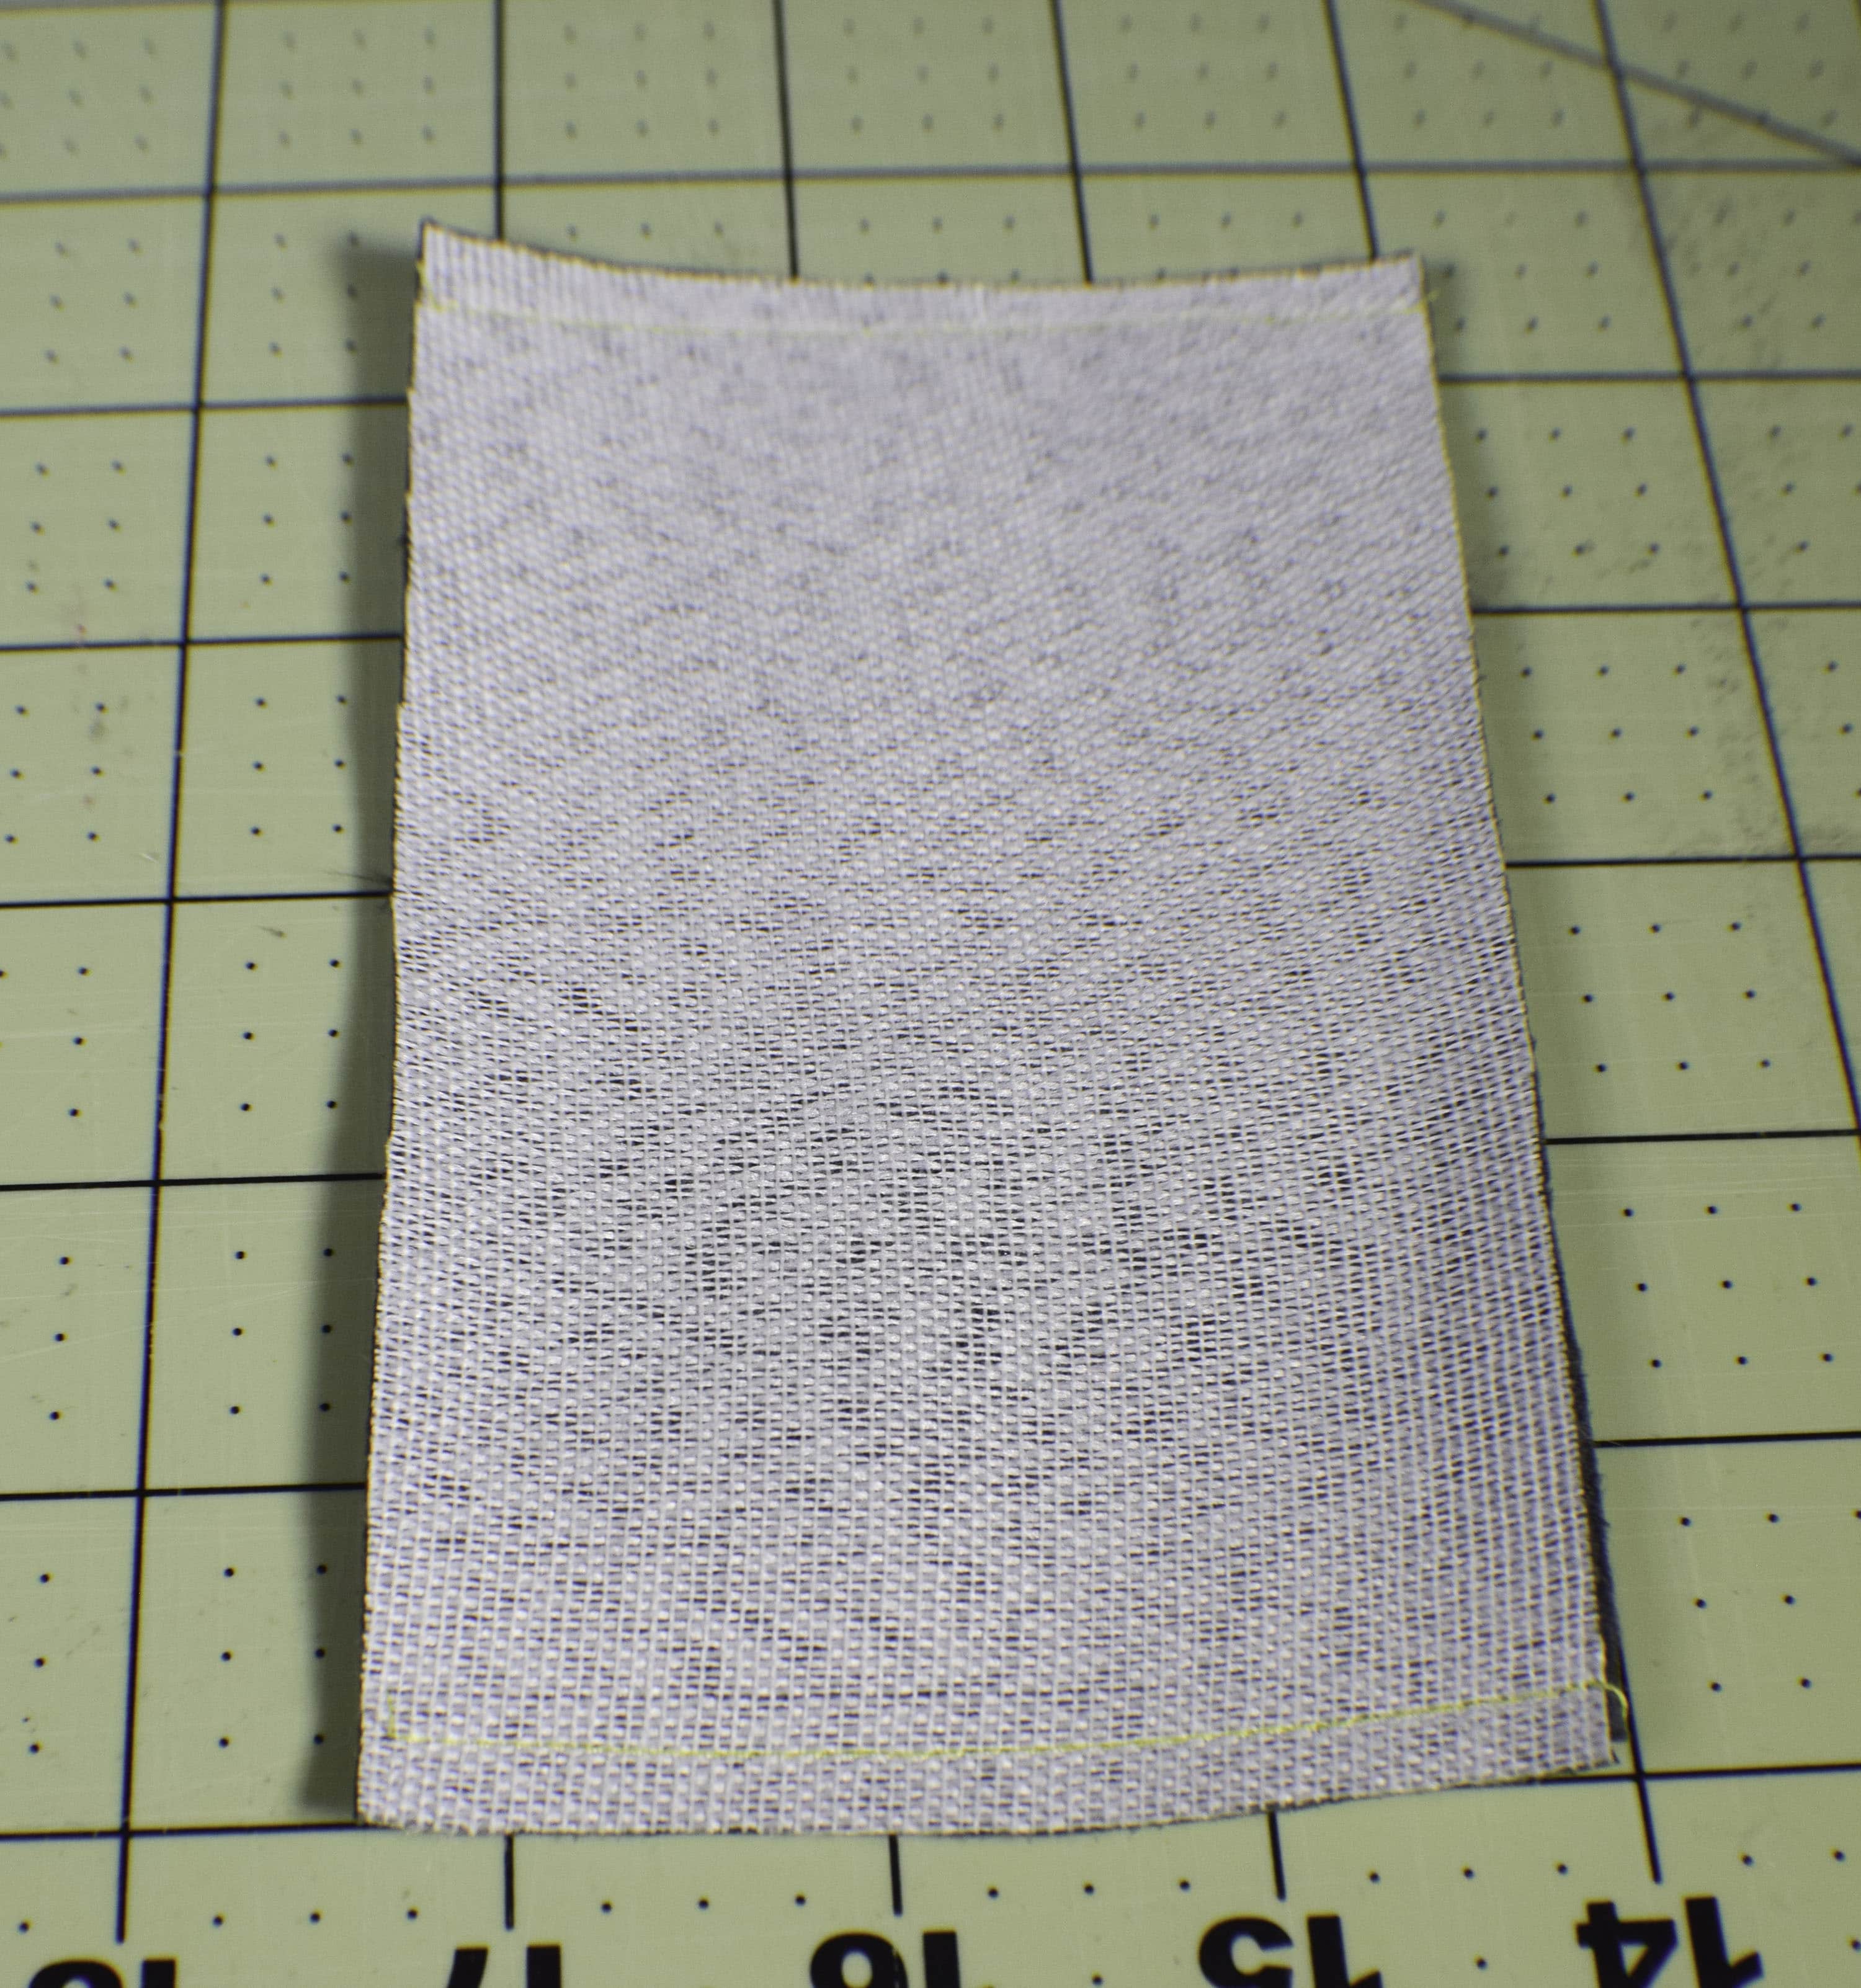
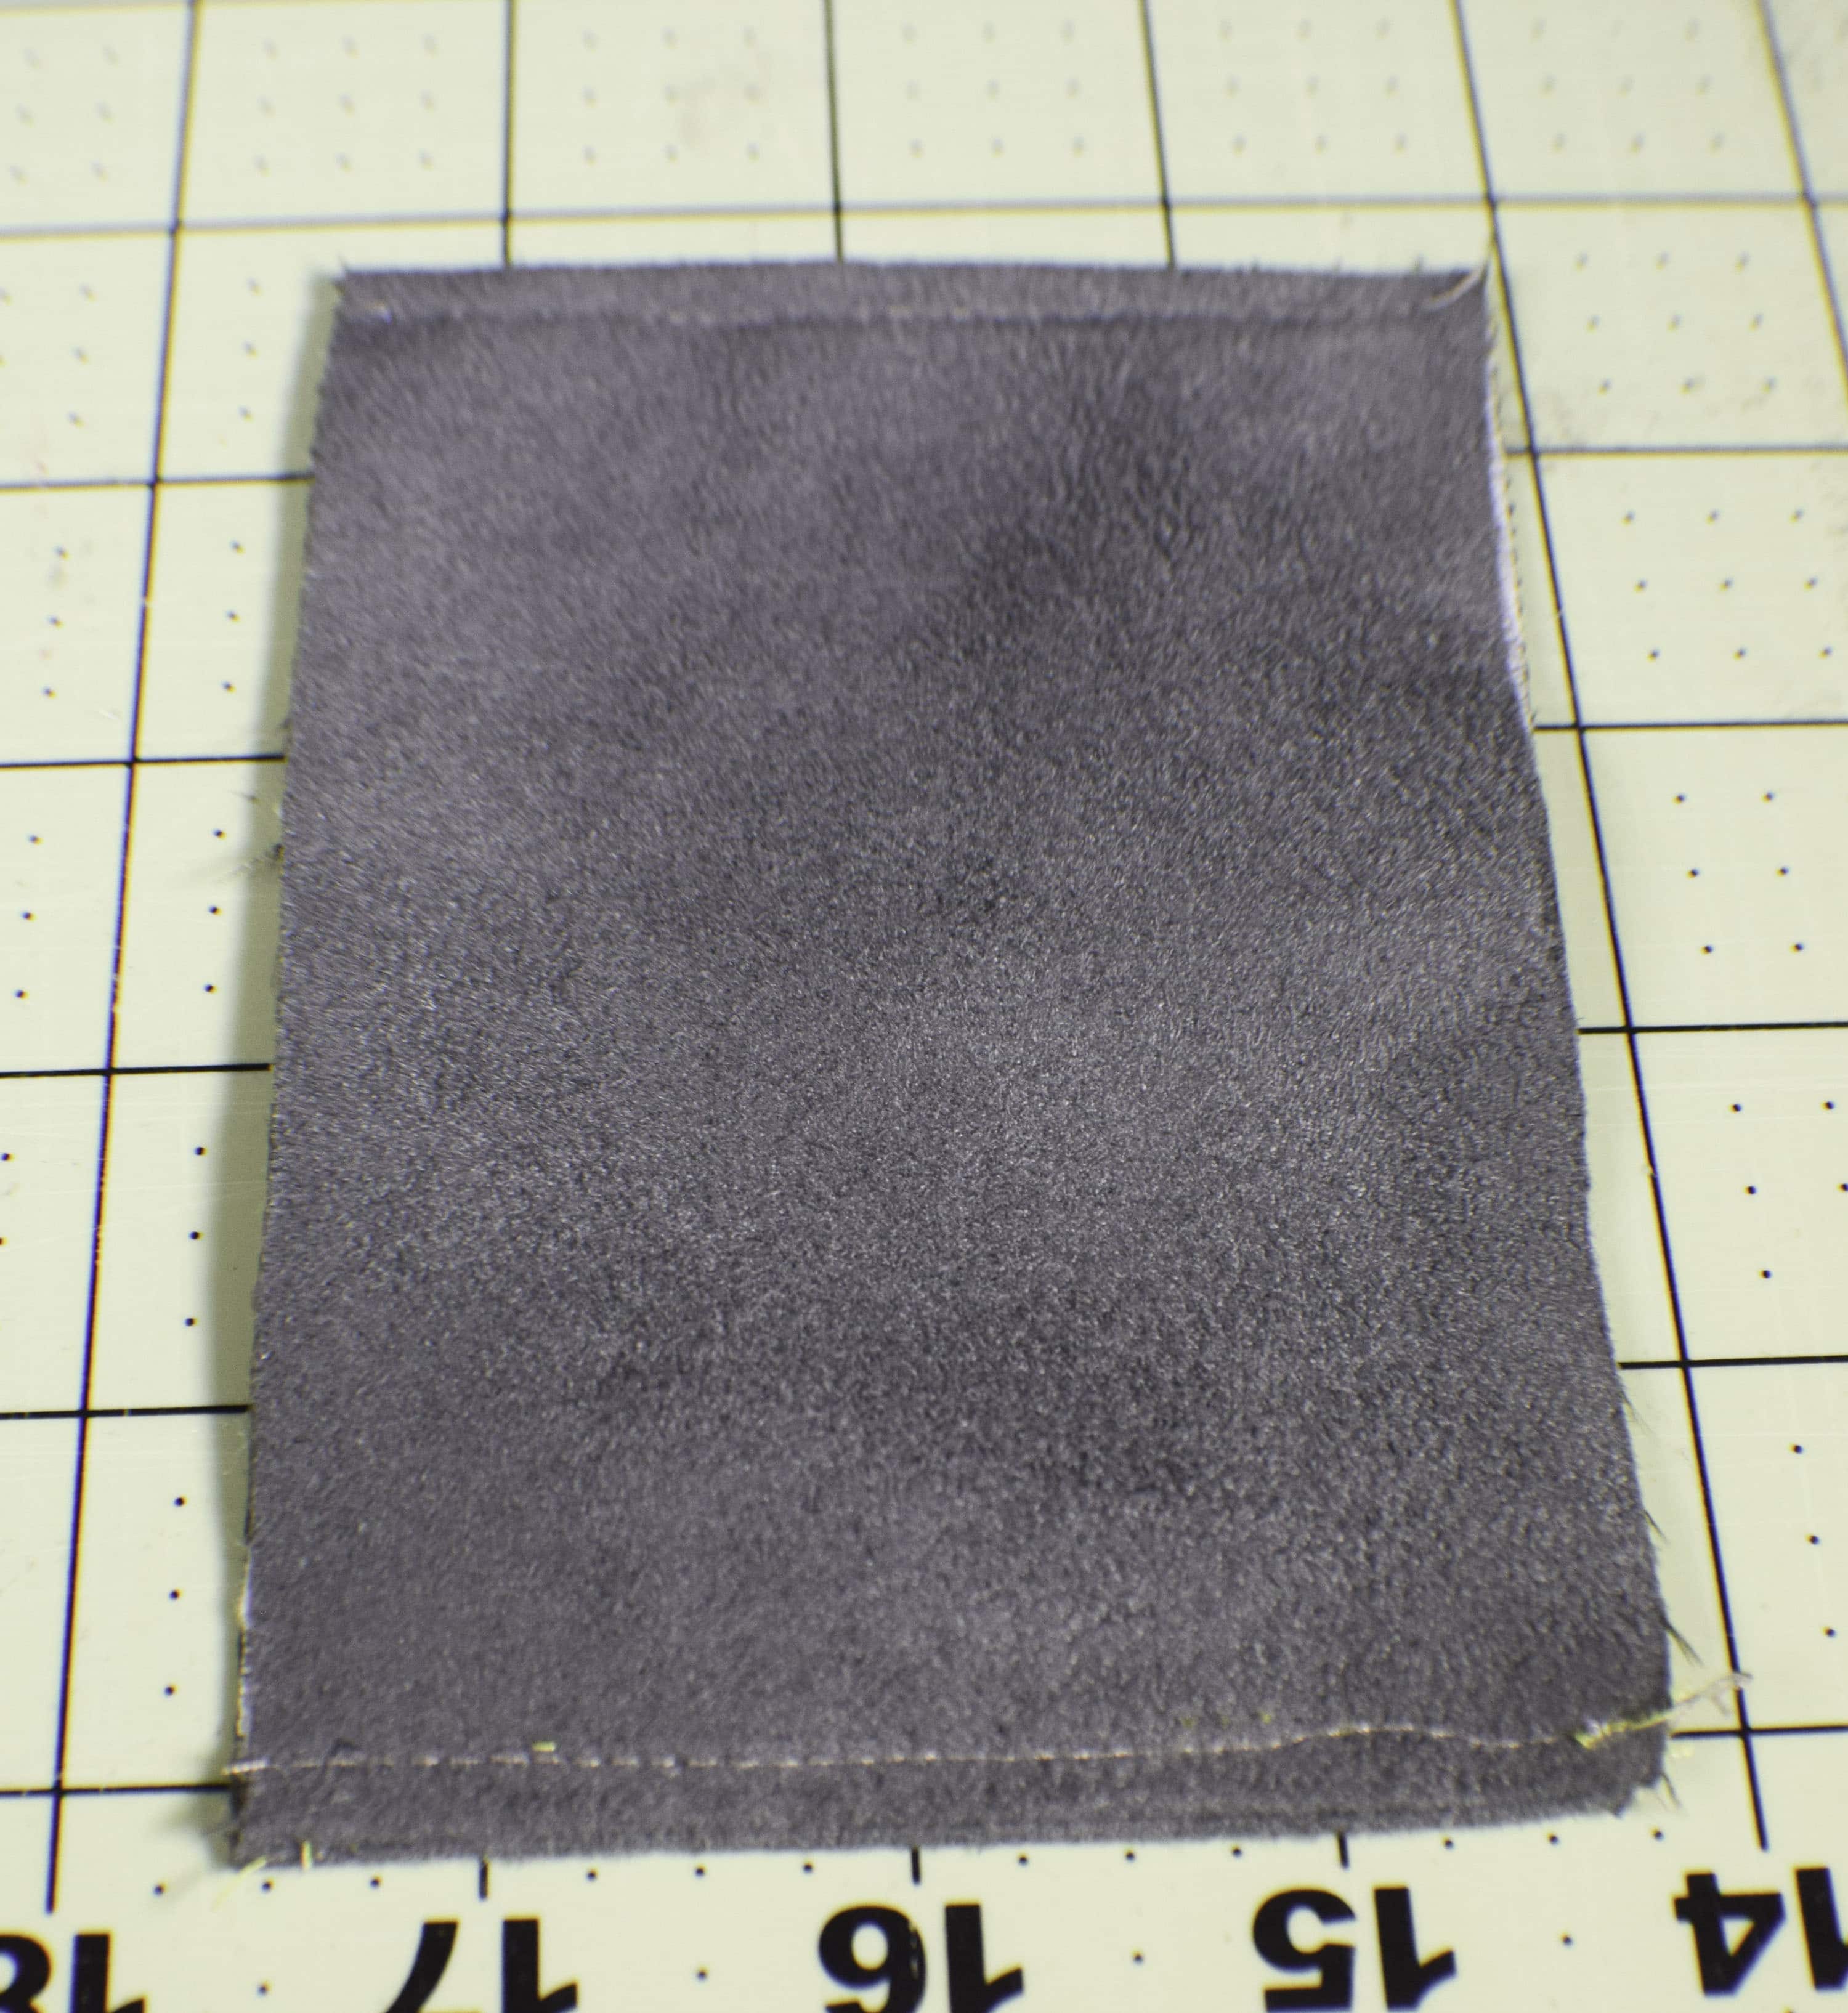
This bag takes a little time to make and requires intermediate sewing skills but is a great project to get you ready for the upcoming exercise season. If you don't have the fabrics on hand that you need I recommend that you head over to Hobby Lobby or Fabric.com to get exactly what you need. These online fabric stores have a wide selection of fabrics to choose from so you can get the perfect fabrics for your custom made gym bag. I used decorator weight fabric and faux suede for the exterior of my bag and quilting cotton for the lining. You could use a water proof fabric like rip stop nylon for your bag if you are concerned about getting it wet. I really wasn't concerned about that so I stuck with the cotton fabrics that I love to work with.
What you will Need:
- Pattern Piece 1
- Pattern Piece 2
- Pattern Piece 3
- 2 yds exterior fabric for top of bag
- 1 yd of faux leather or suede for bottom of bag
- 2 yds of lining fabric
- 1 yd of Pellon 808 or fusible fleece if you want a softer feel to your bag
- Scrap of fusible fleece
- 20″ Bag zipper
- 7″ zipper
- 6 1″ rectangles
- 1″ triglide
- 2 1″ Swivel Clips
- Standard Sewing Supplies

Step 1: How to Make a Custom Gym Bag
Cut your pieces as follows:
- From the Main Fabric
- 2 Pieces 17 3/4″ x 23 5/8″
- 2 Bag ends
- 1 strap Handle
- 2 Shoulder pad bottoms
- 4 Ring Tabs 4″ x 15 3/4″
- 2 Handles 4″ x 28″
- 2 Strap Pieces 4″ x 30″
- Strap Tabs 2 Pieces 4″ x 4″
- Zipper Tabs 2 pieces 3 1/8″ x 2 3/8″
- 2 Kam Snaps
- From the Faux Suede
- 2 Pieces 8 1/4″ x 23 5/8″
- 2 Bag ends
- 1 Strap Handle
- 2 Shoulder pad tops
- From the Lining Fabric
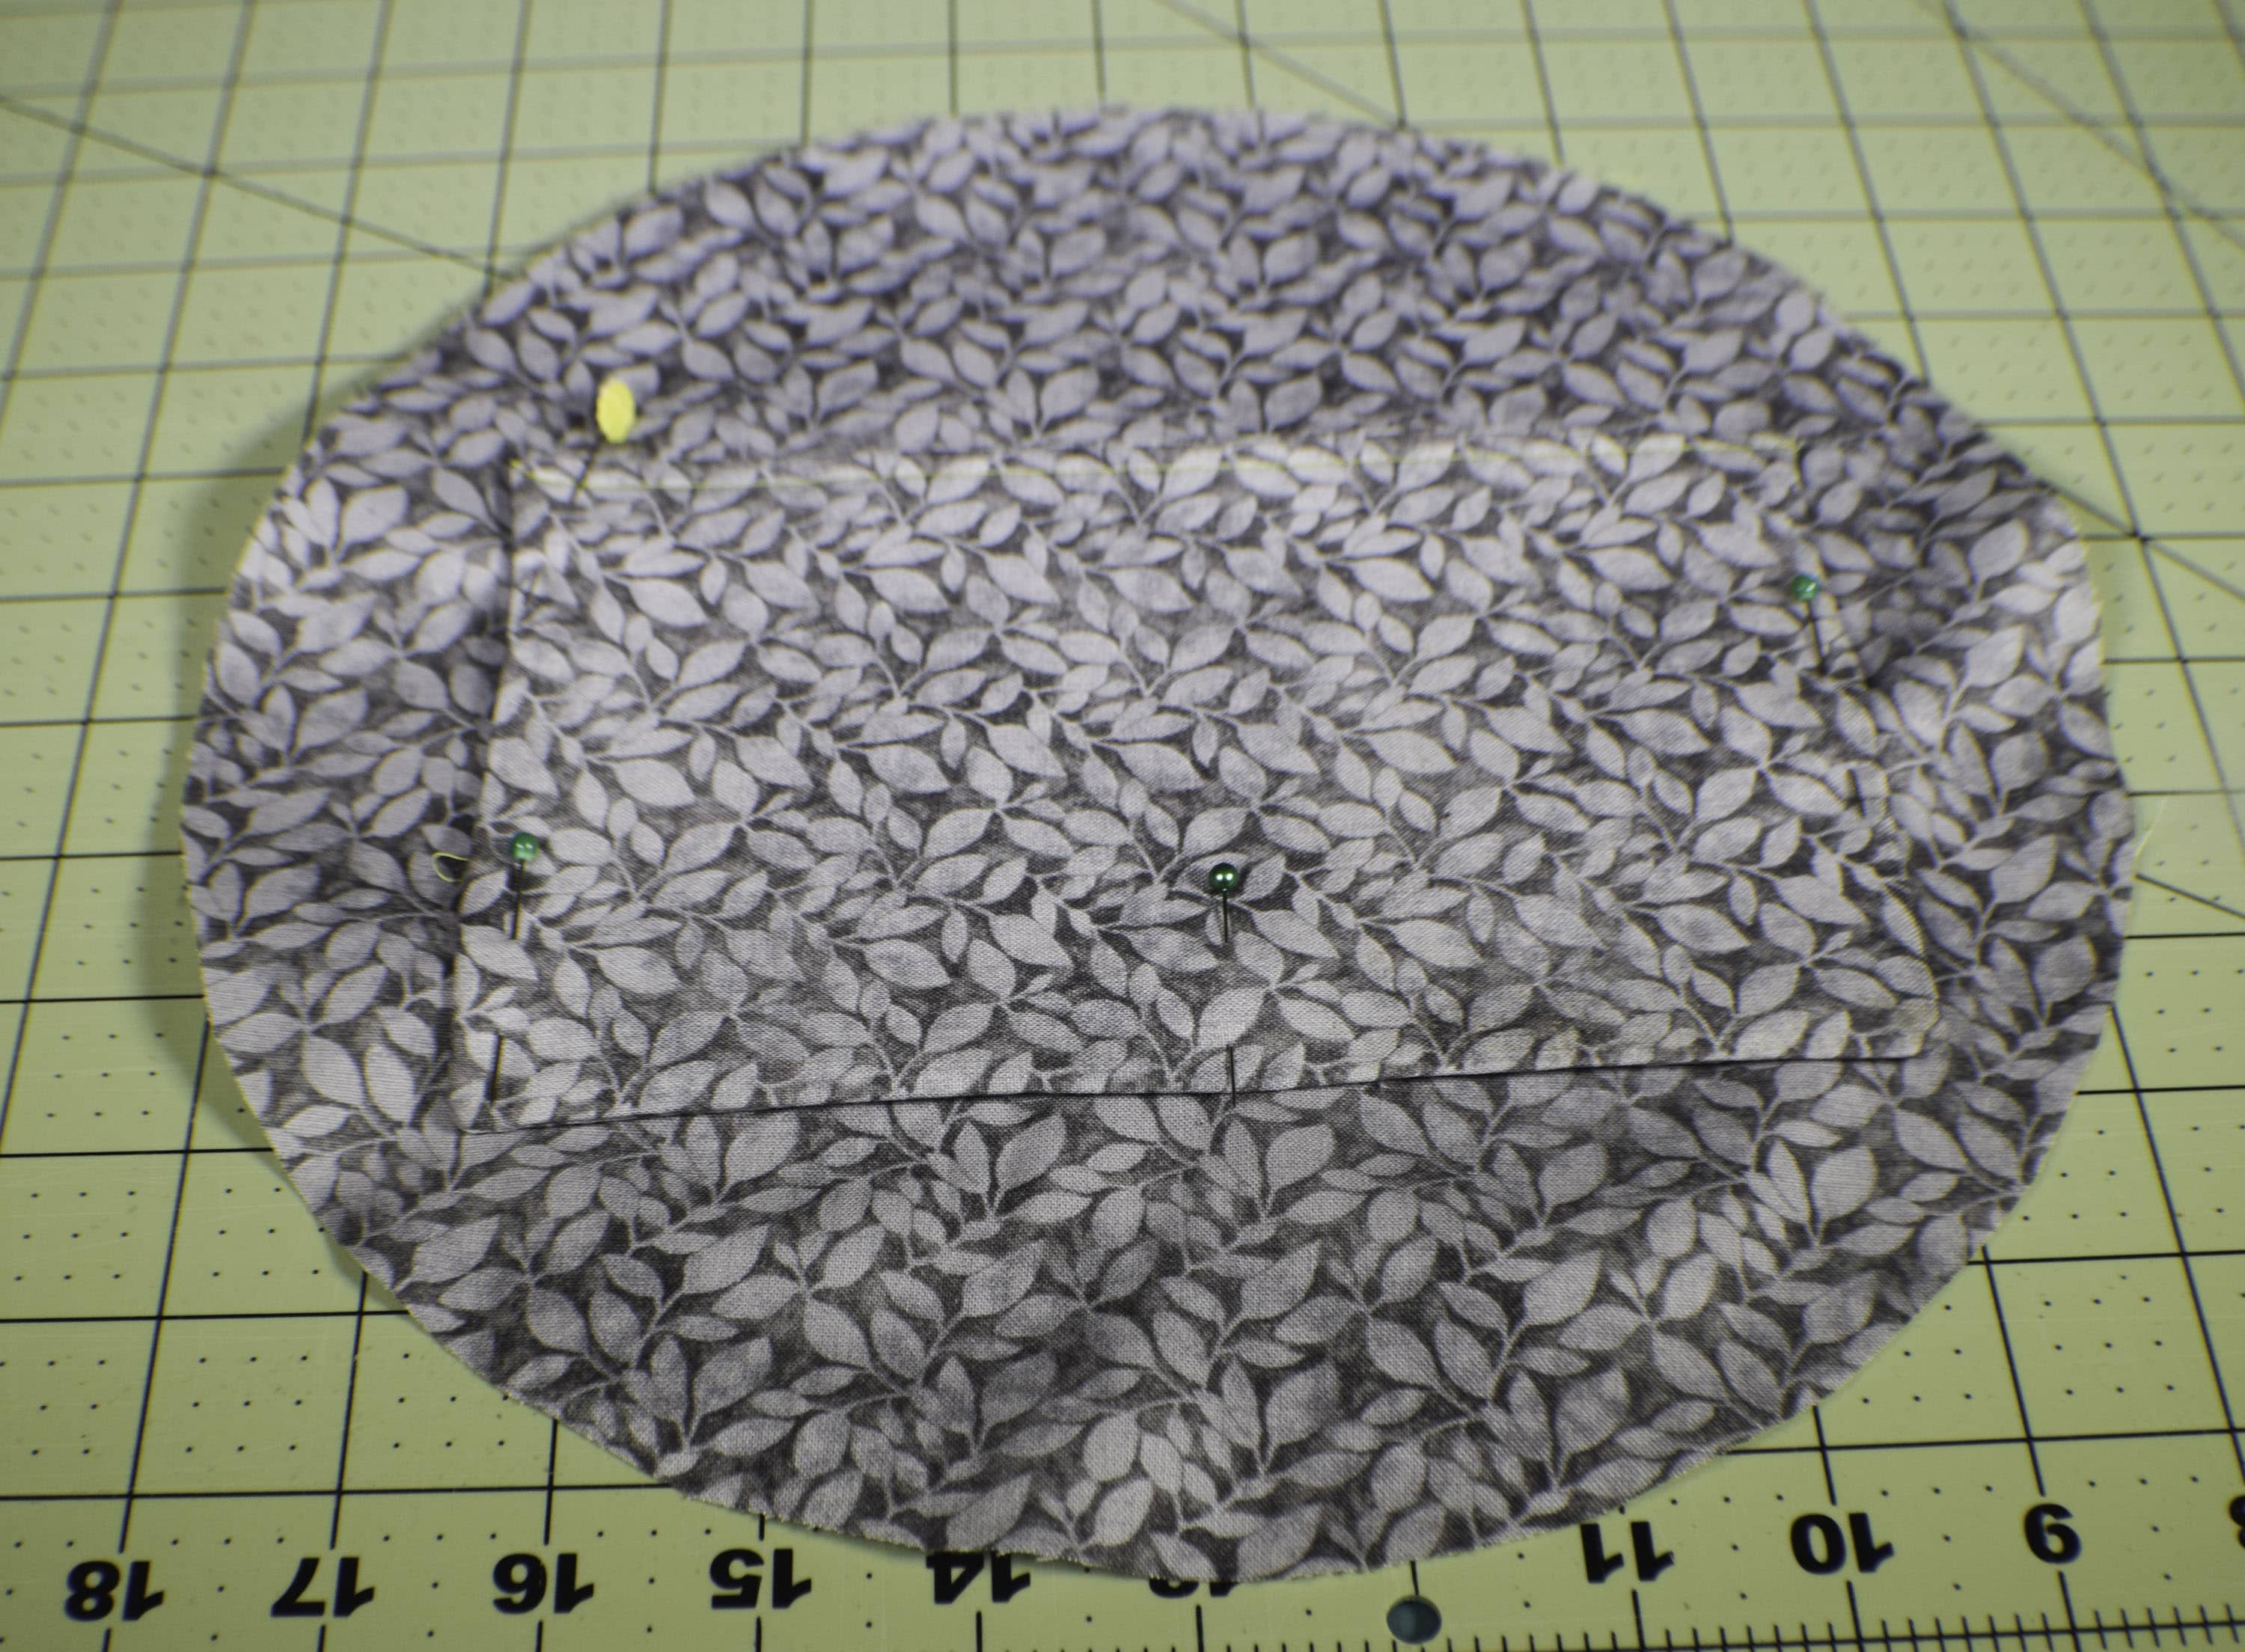
- 2 Pieces 17 3/4″ x 23 5/8″
- 2 Bag Ends
- 4 Pieces 5 1/4″ x 7 7/8″ for Slip Pockets
- 1 Piece 9 7/8″ x 15 3/4″ for the zipper pocket lining
- Pellon 808
- 2 Pieces 5 1/4″ x 7 7/8″ for Slip Pockets
- 2 Pieces 17 3/4″ x 23 5/8″
- 2 Bag Ends
- 2 Pieces 5 1/4″ x 7 7/8″ for Slip Pockets
- Fusible Fleece
- 1 Strap Handle
- 2 Shoulder pad Bottoms
Step 2: How to Make a Custom Gym Bag
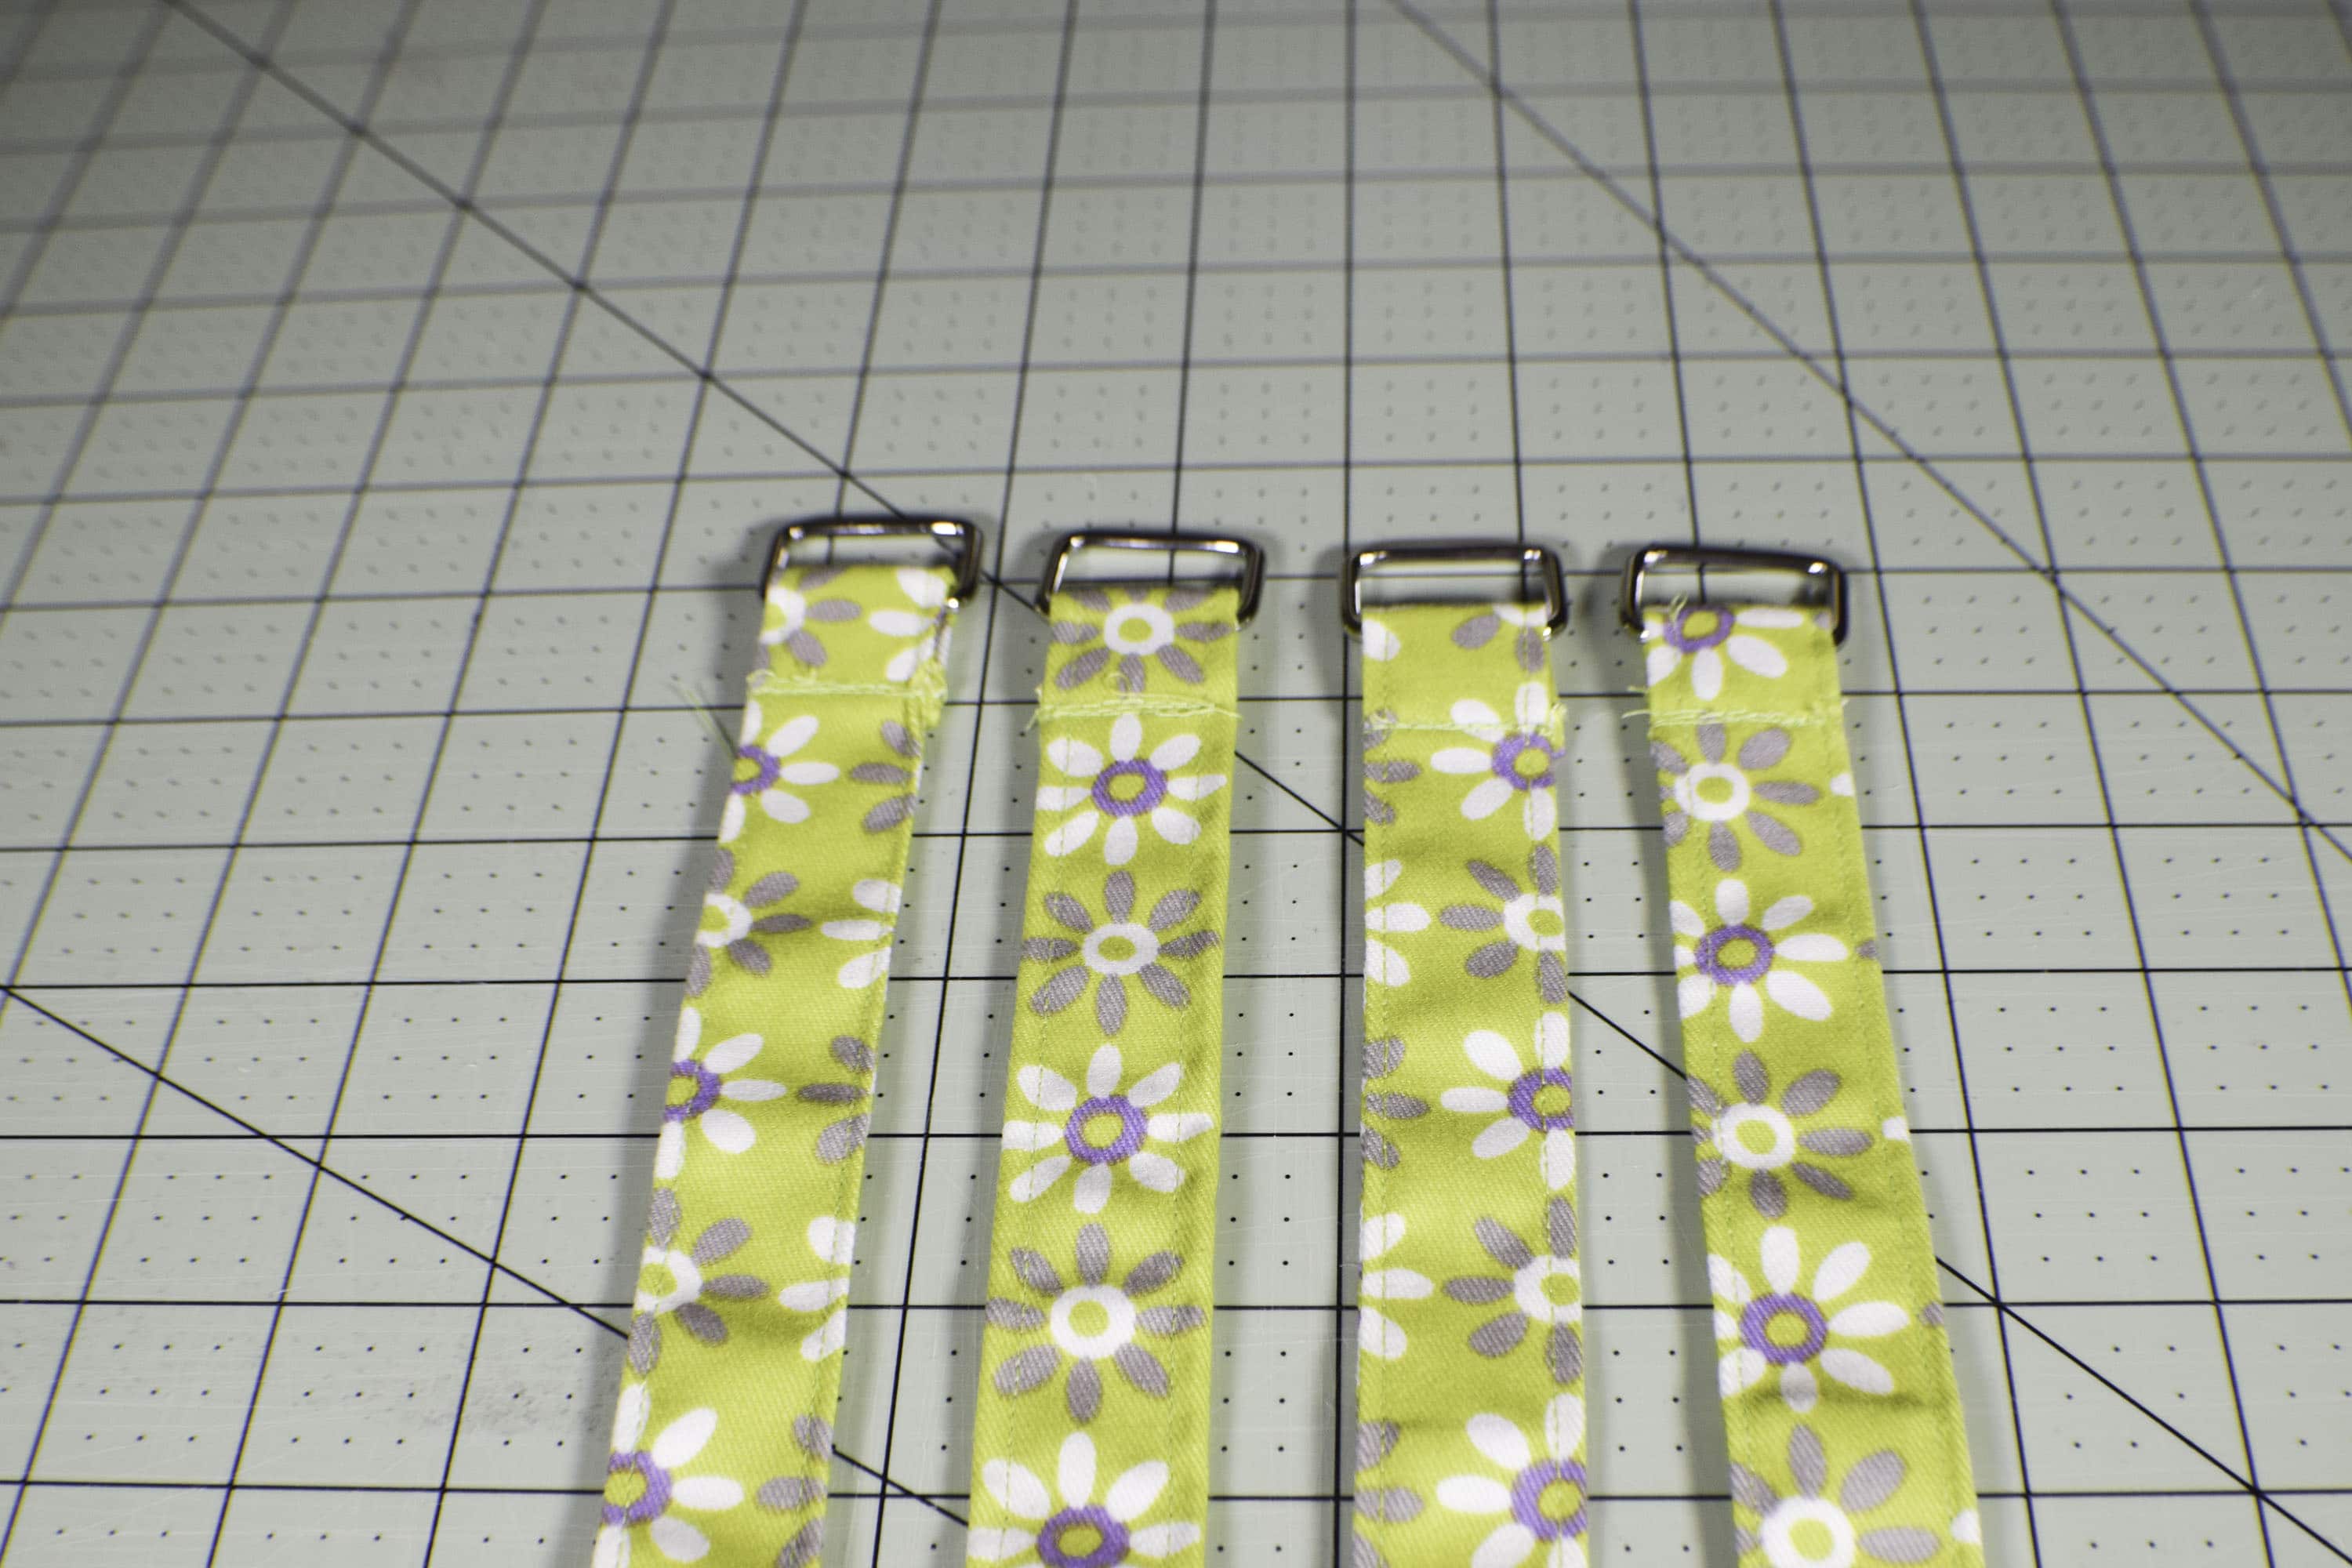
Make the ring tabs. Take the 4″ x 15 3/4″ pieces and fold them in half lengthwise and press. Open the piece and fold the raw edges toward the center fold line and press. Fold in half again so that the raw edges are sealed inside the piece. Top stitch along both long edges of the ring tab. Once the edges have been sewn, add the rectangles. Fold one short end of the tab by 1 1/4″ through the rectangle and fold the raw edge under by 1/4″ and sew. This will secure the ring tab. Do this for all four tabs.
Step 3: How to Make a Custom Gym Bag
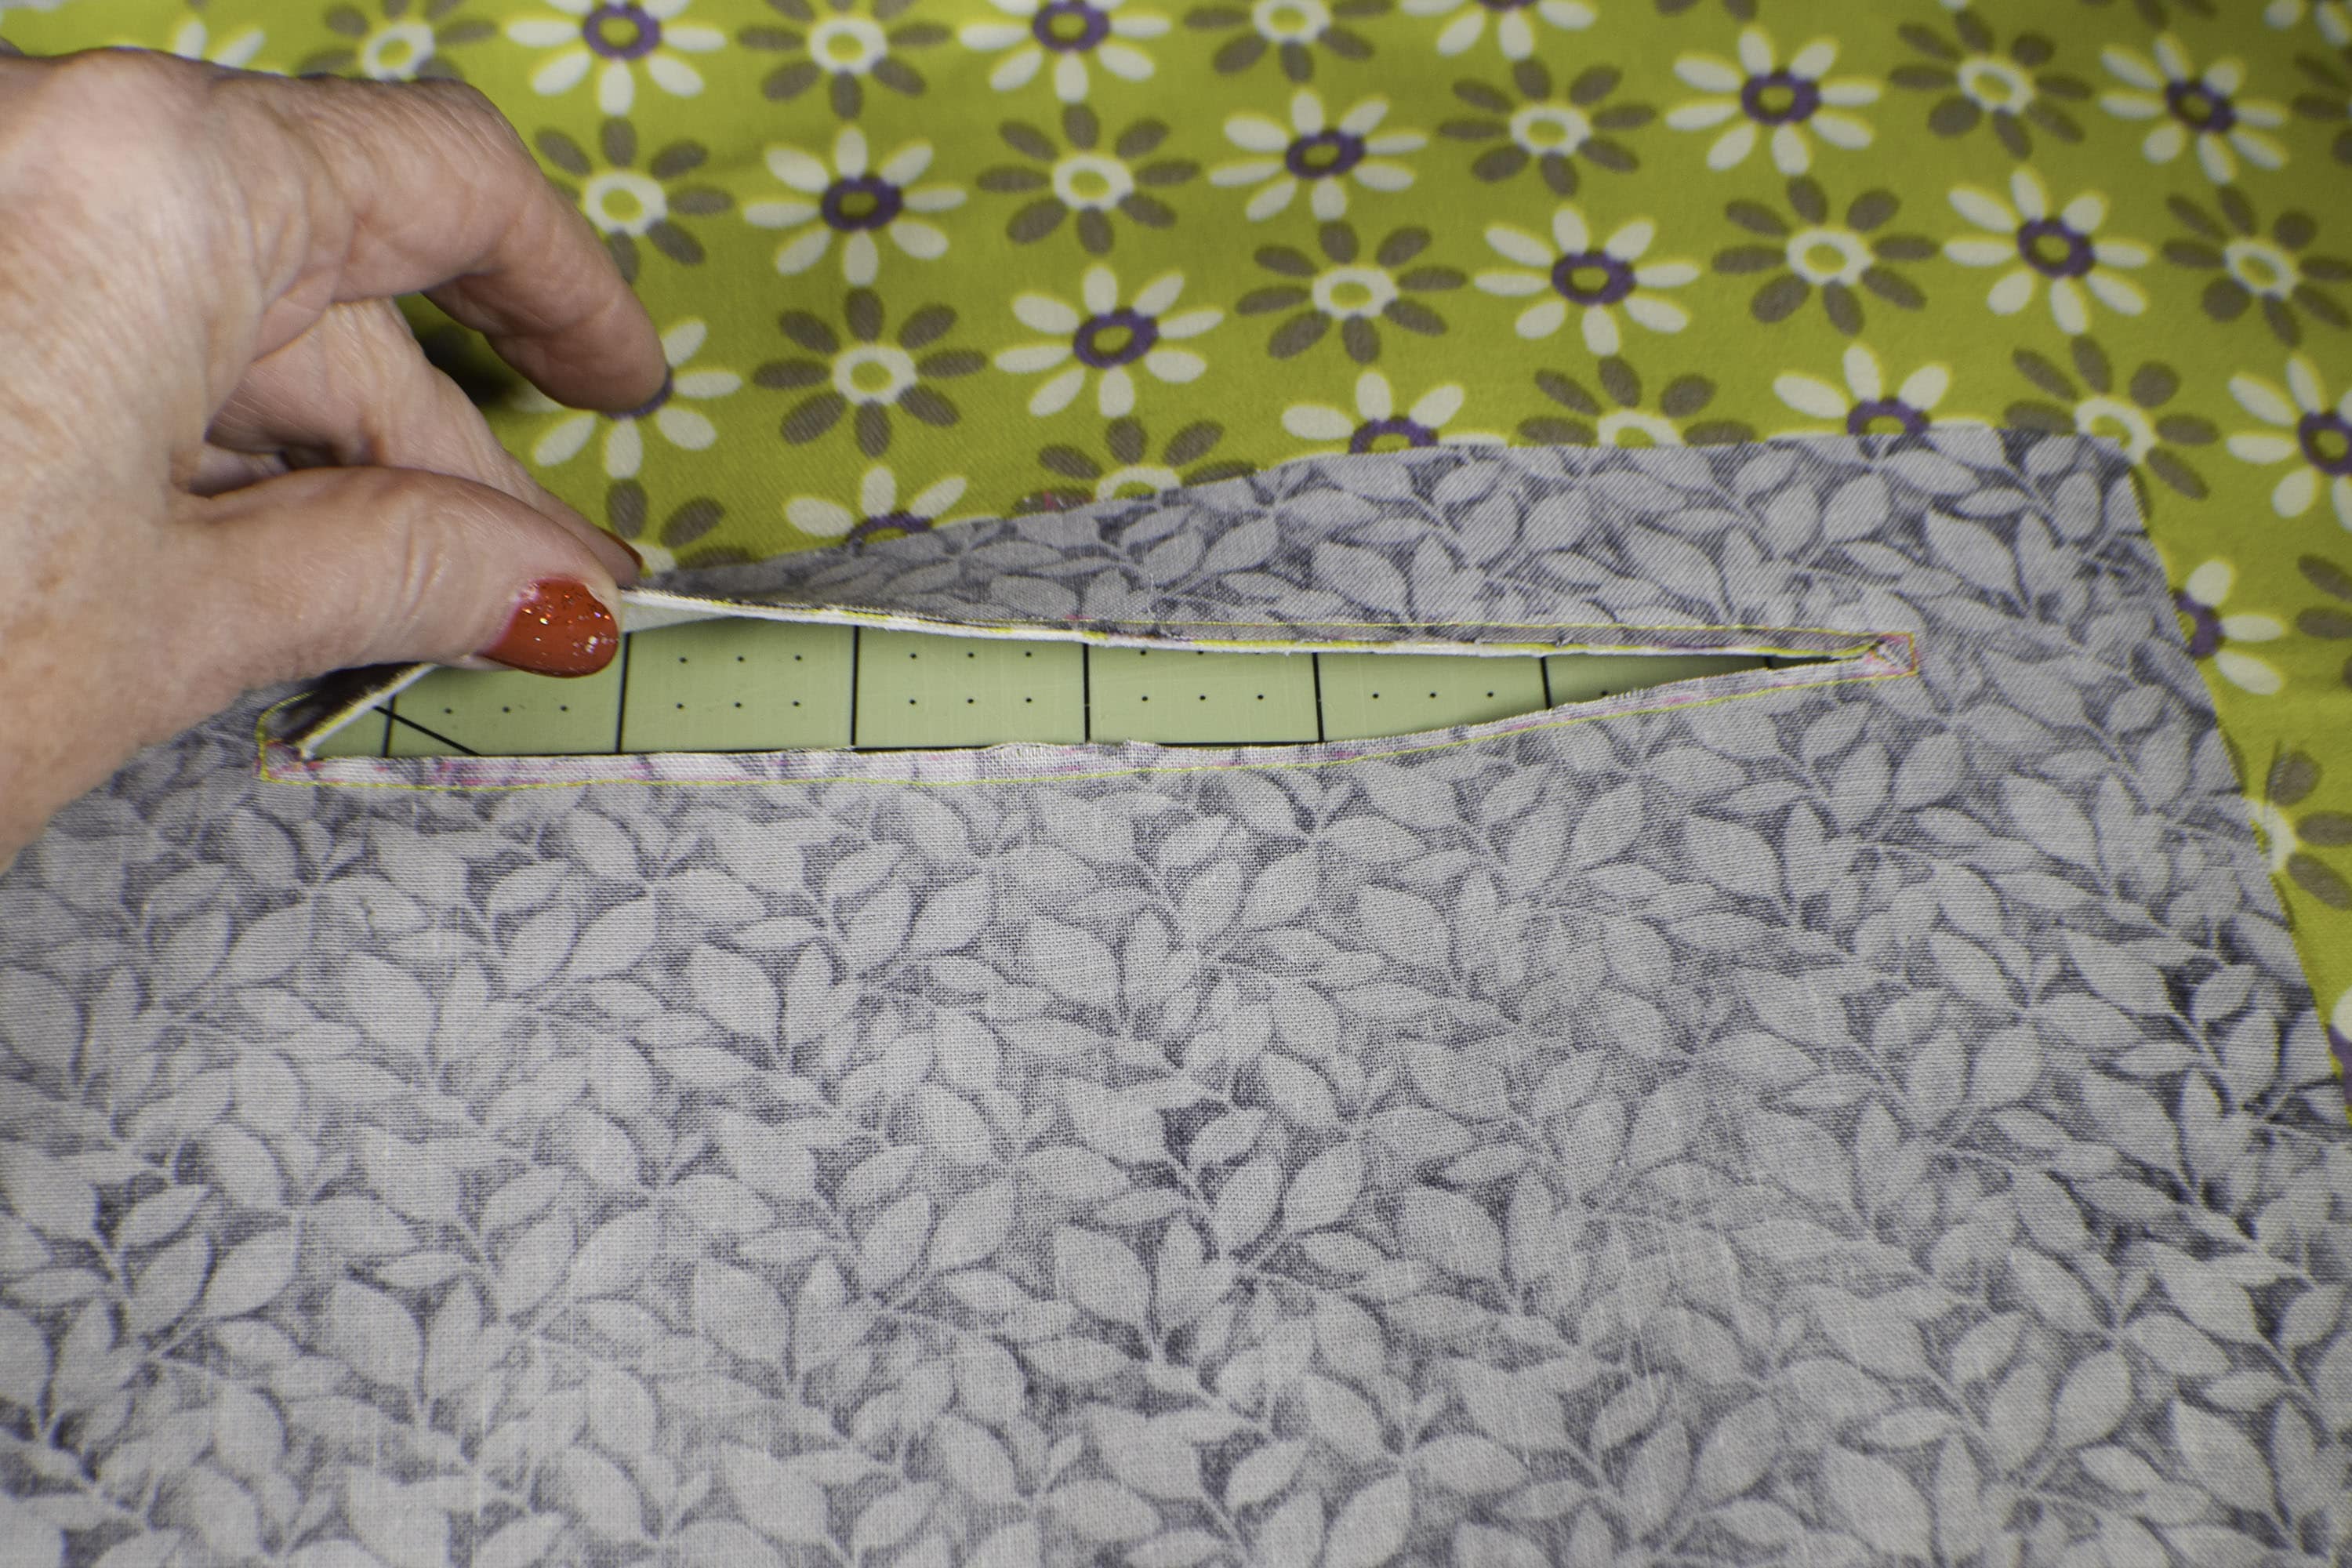
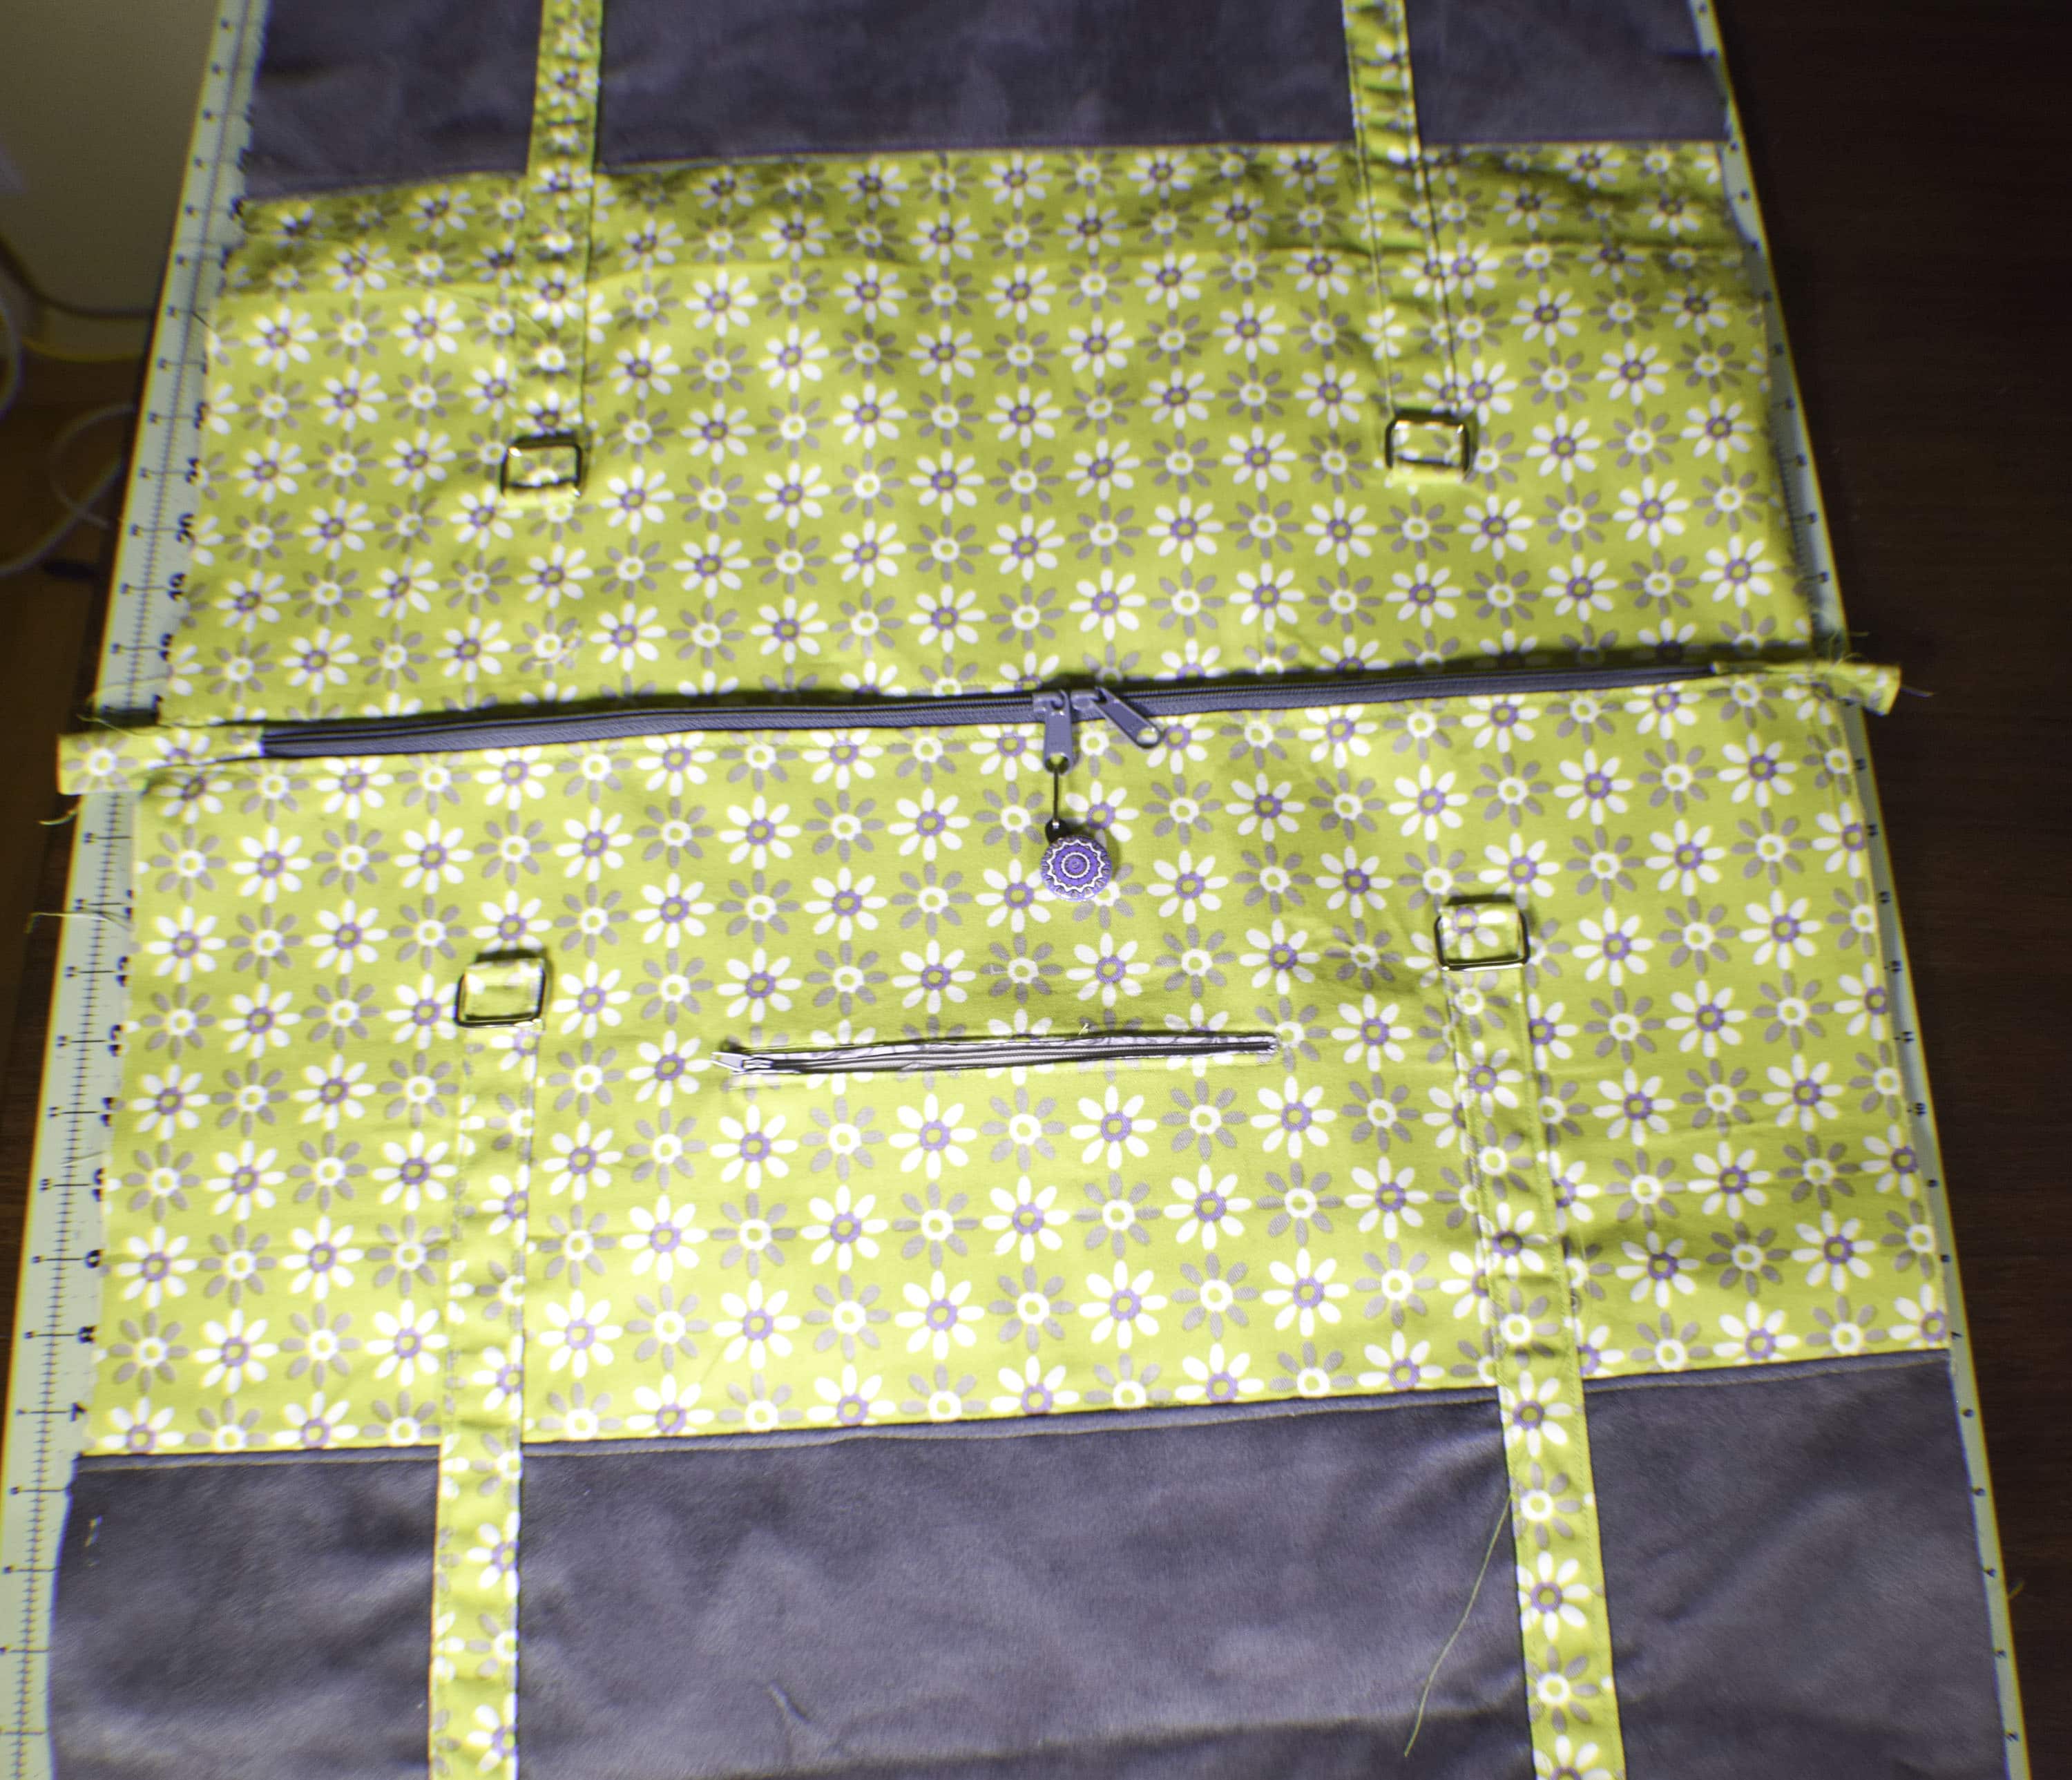
Add the exterior zipper. Fuse the Pellon 808 or fleece to the wrong side of both of the exterior main fabric pieces following the manufacturers instructions. In order to add the exterior zipper take one of the 17 3/4″ x 23 5/8″ main fabric pieces to use for the zipper. Fold the short edges together to find the center of the piece. Once you find the center, measure down 4″ and place a mark using an erasable pen. Lineup the top of the pocket lining piece with this mark right sides together. Pin the lining to the main fabric at the top. Measure down 1″ from the top of the lining and draw a box that measures 7 1/8″ long and 3/8″ wide and that is centered in the lining. After the box is drawn, draw a line through the center that with triangles at the ends.
Step 4: How to Make a Custom Gym Bag
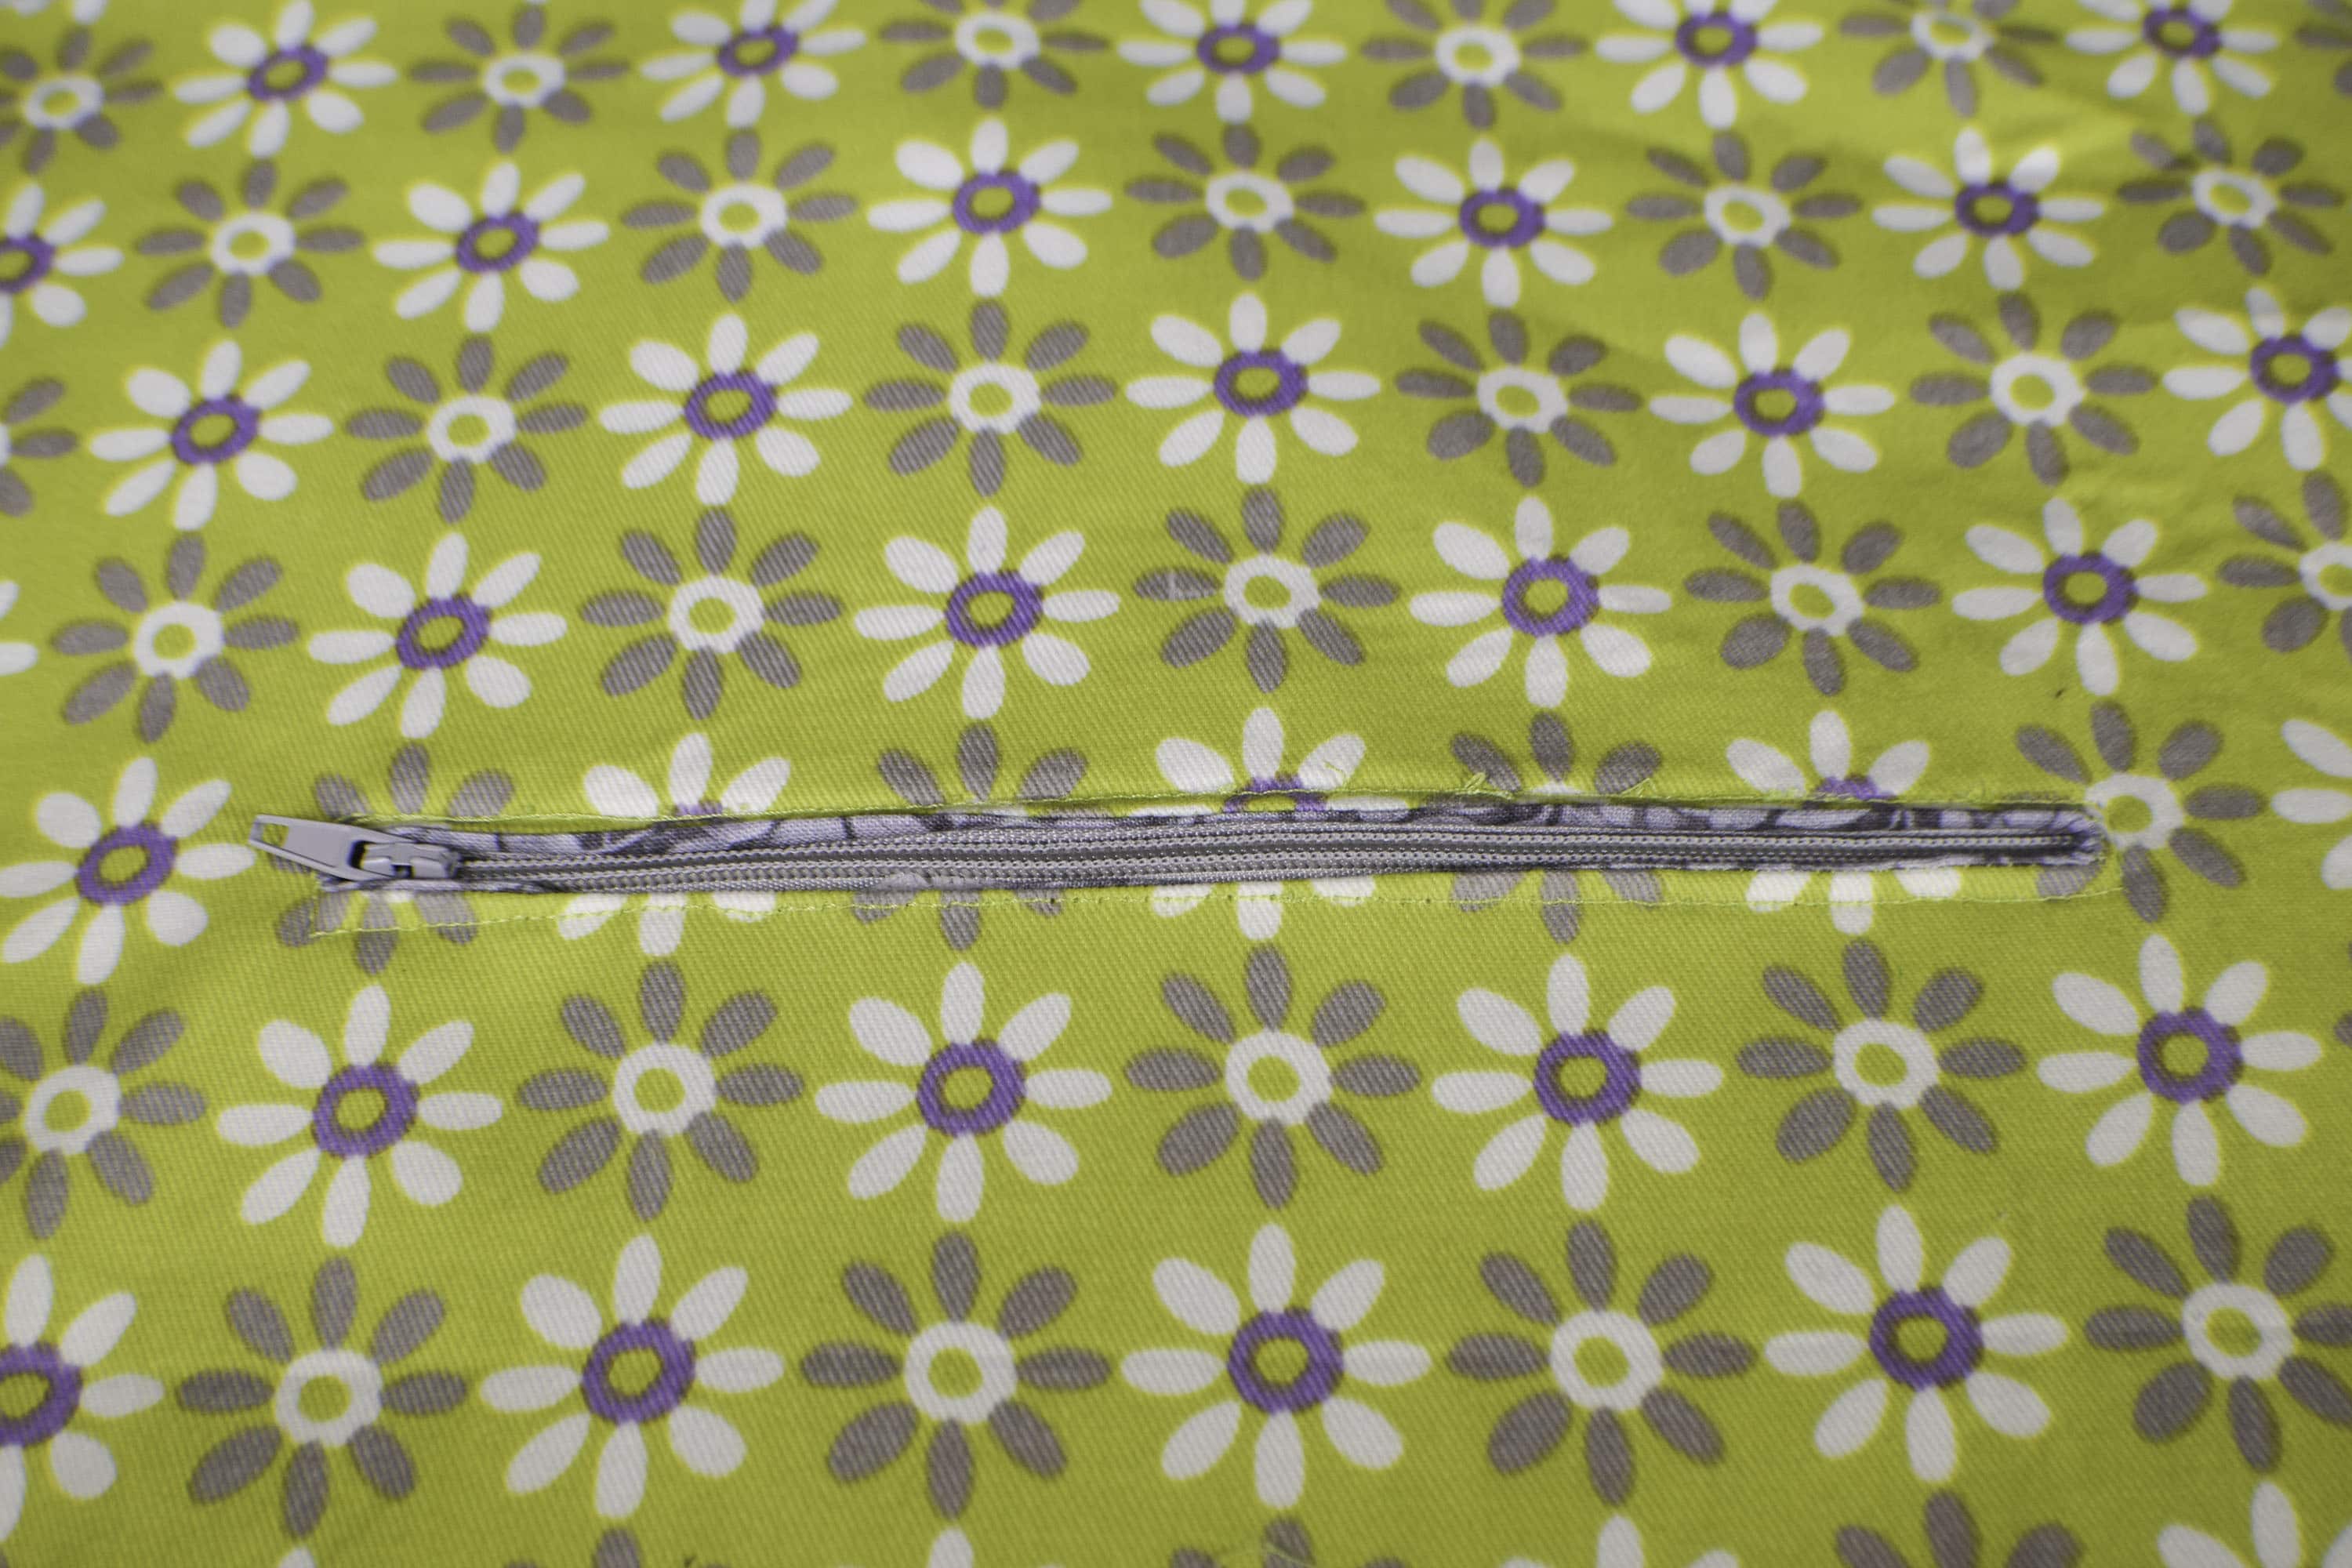
Once the box has been drawn, sew around the box. Once you have sewn around the box, cut down the center line and the triangles. Push the lining through the hole that you have created and press. Place your 7″ zipper behind the opening and top stitch all around the zipper. Fold up the lining and sew around the three raw edges wrong sides together. You have now completed your zipper pocket.
Step 5: How to Make a Custom Gym Bag
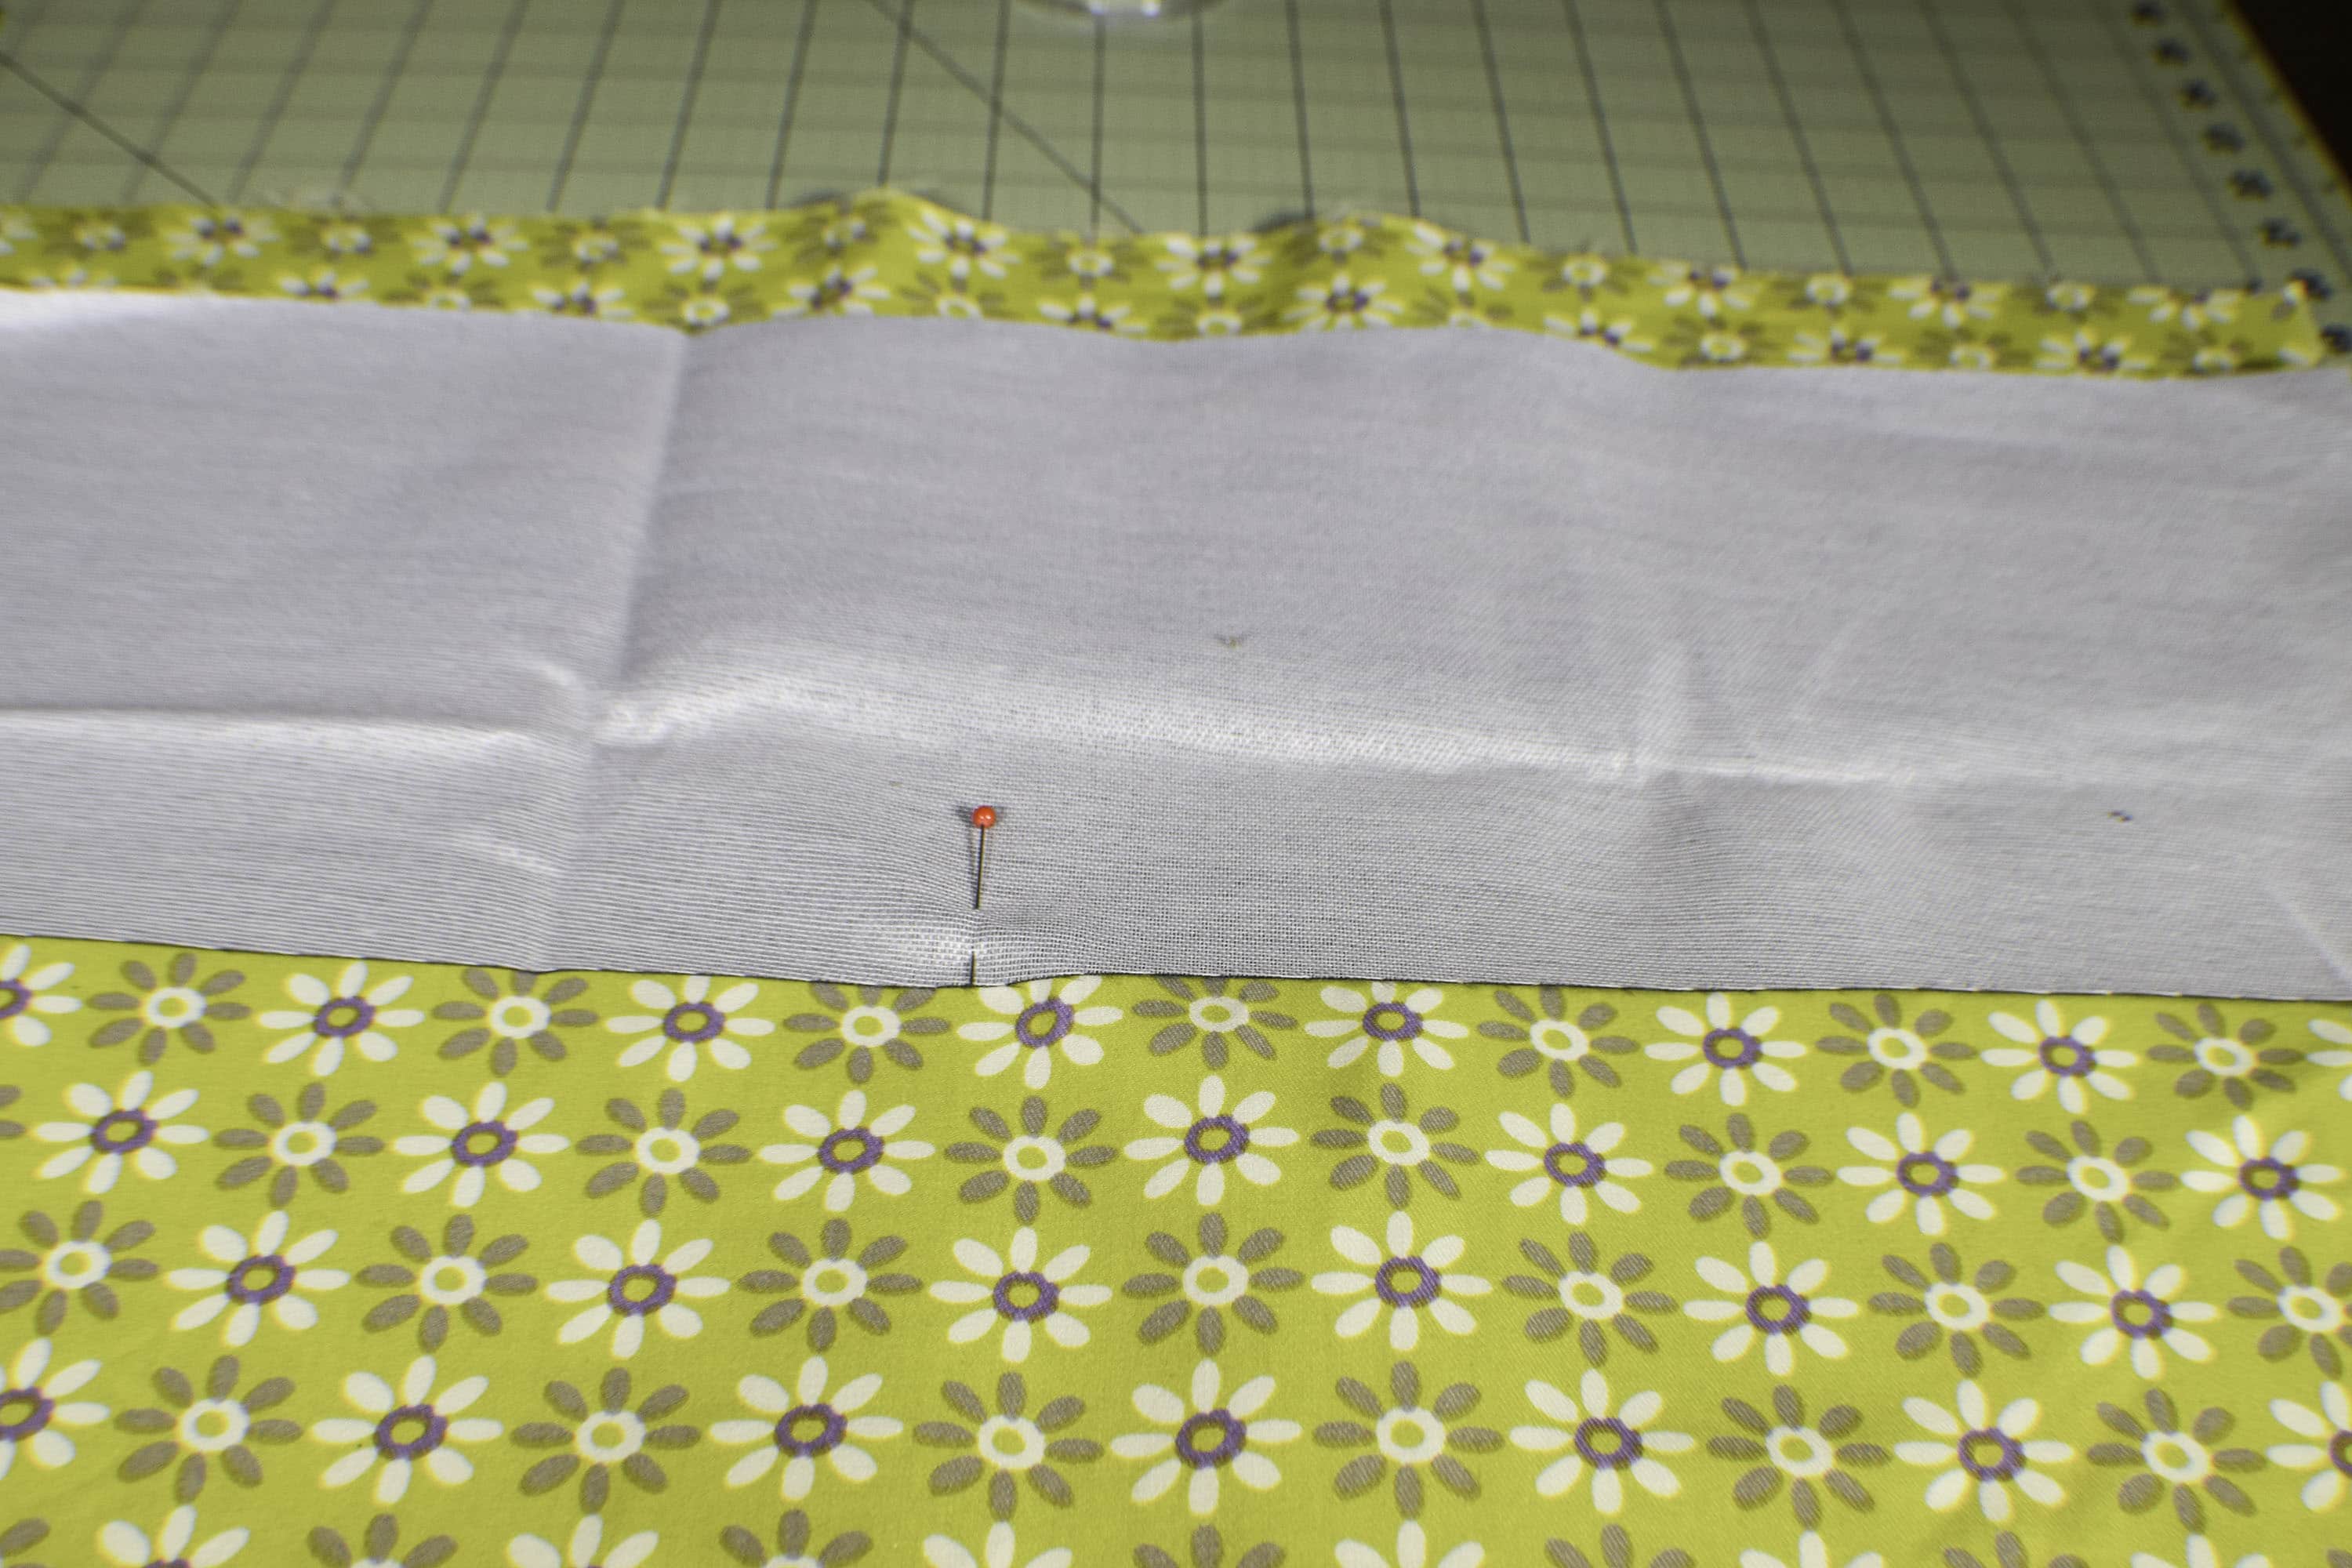
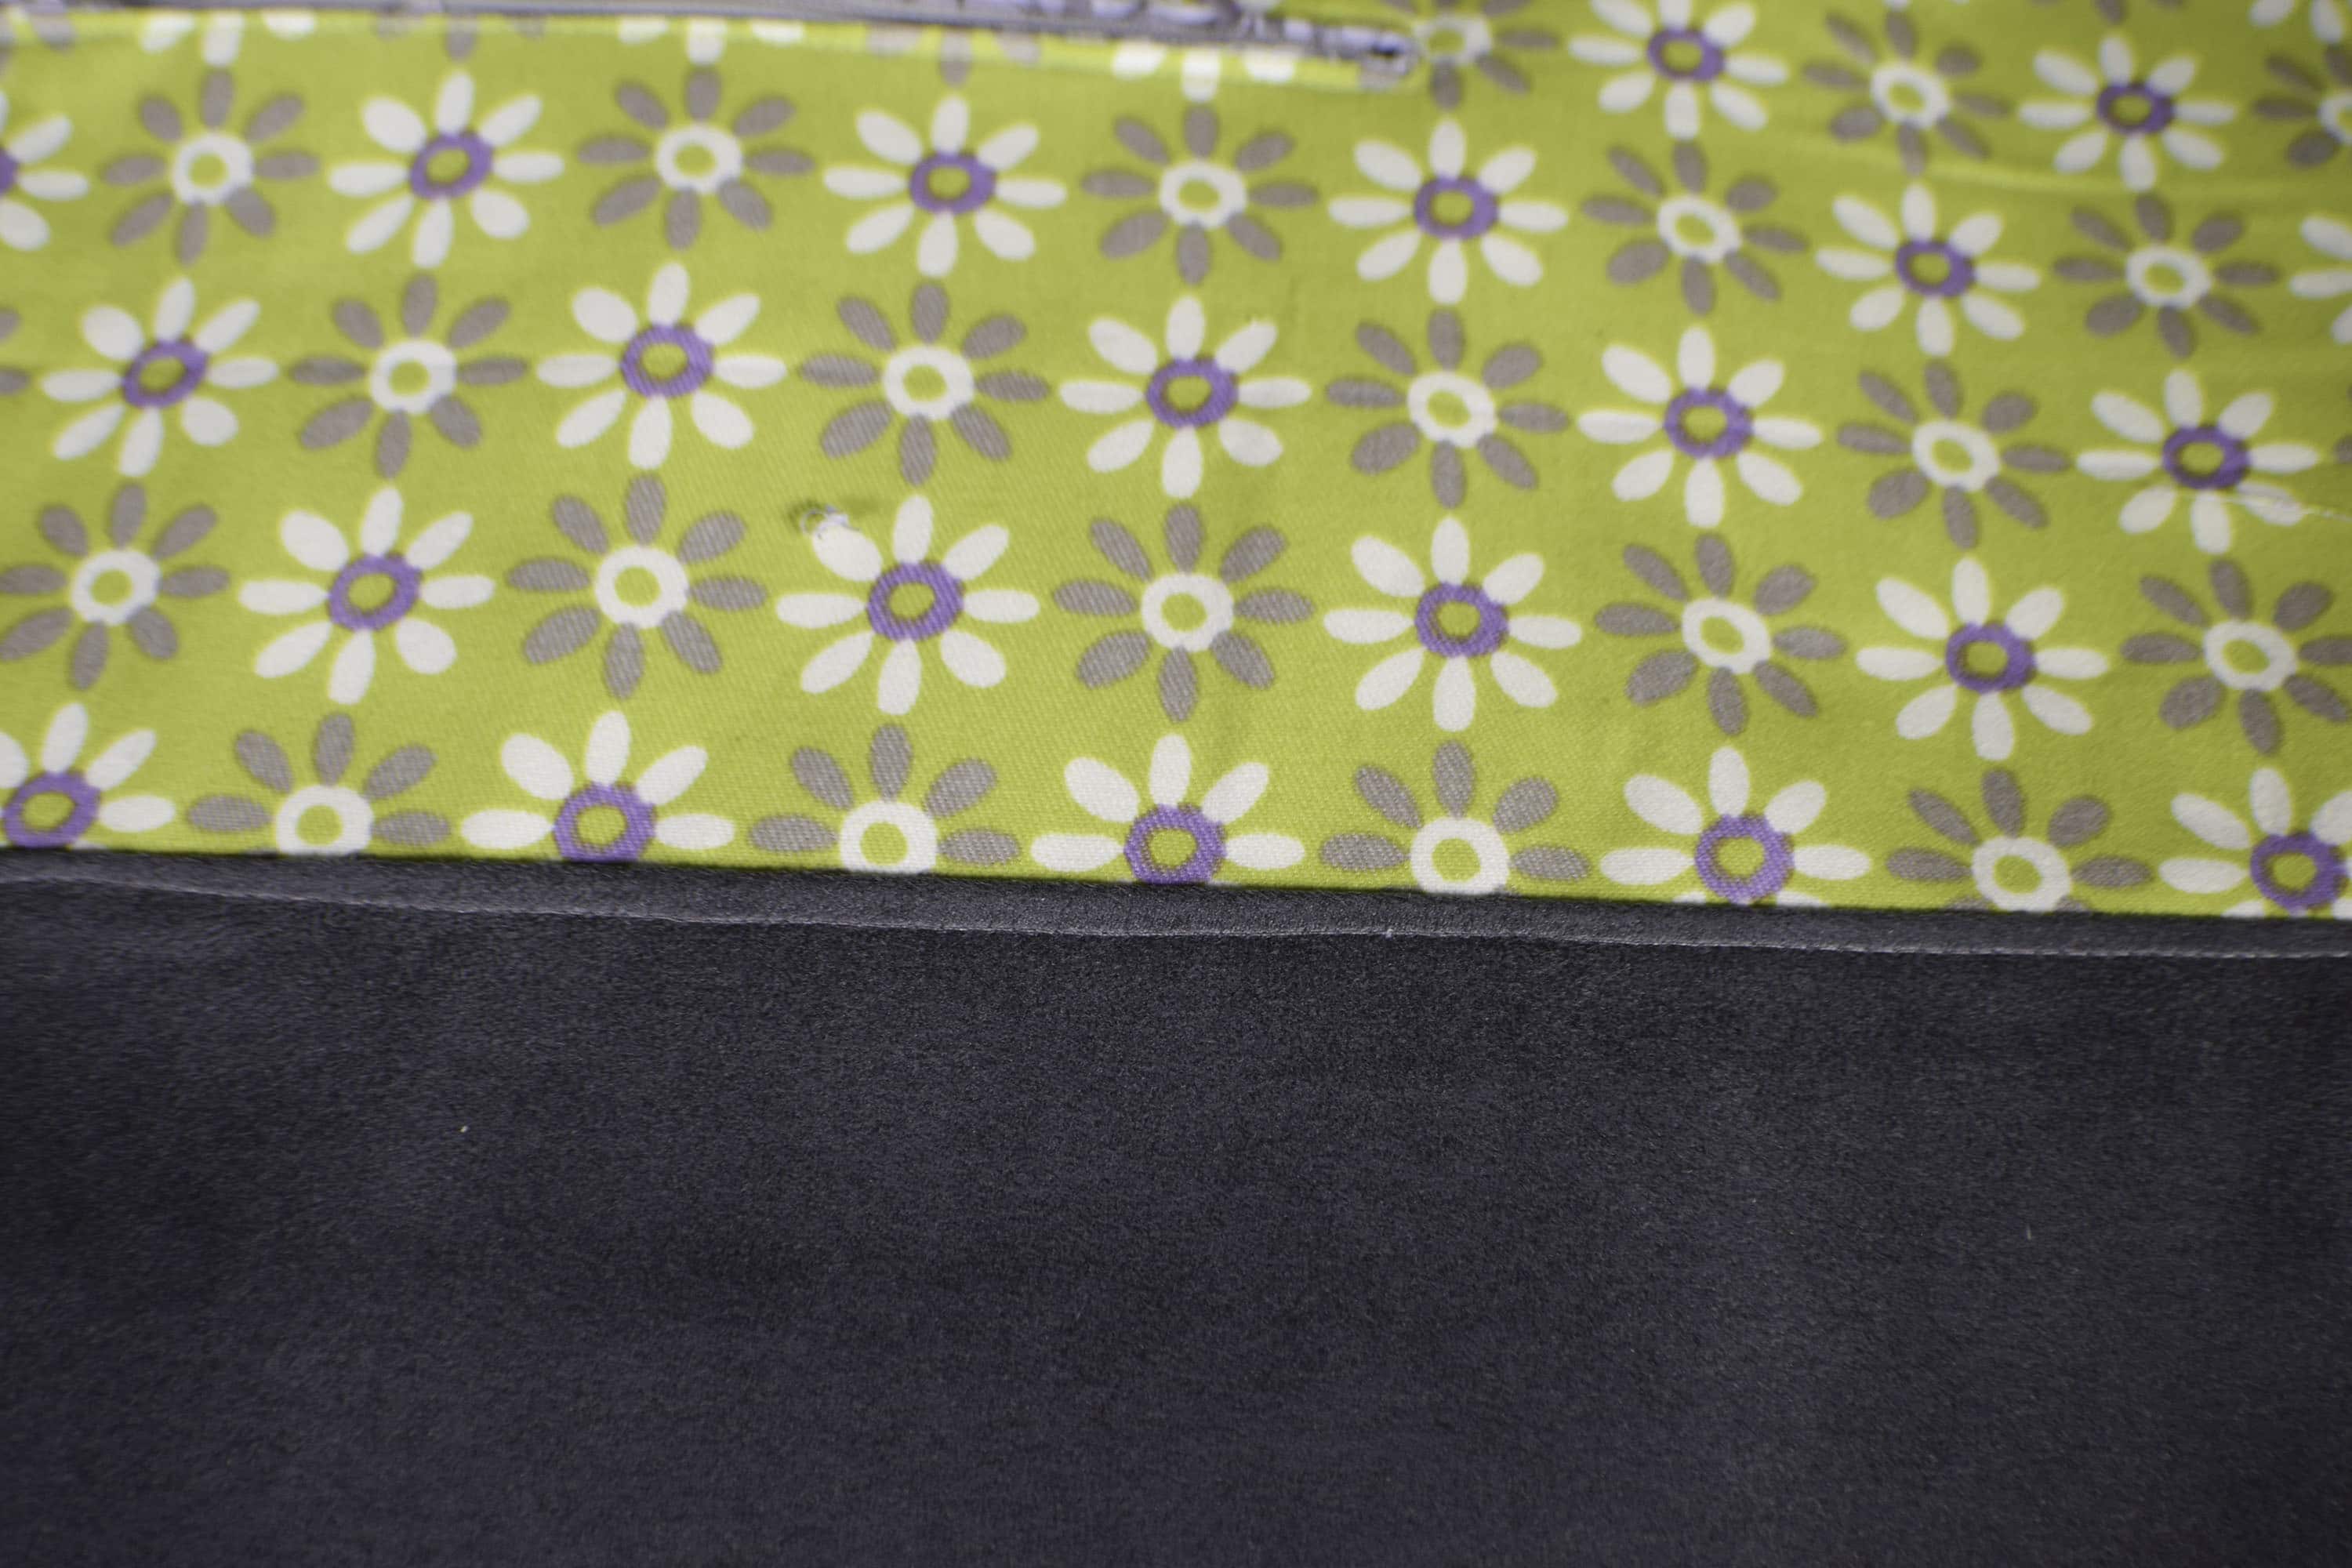
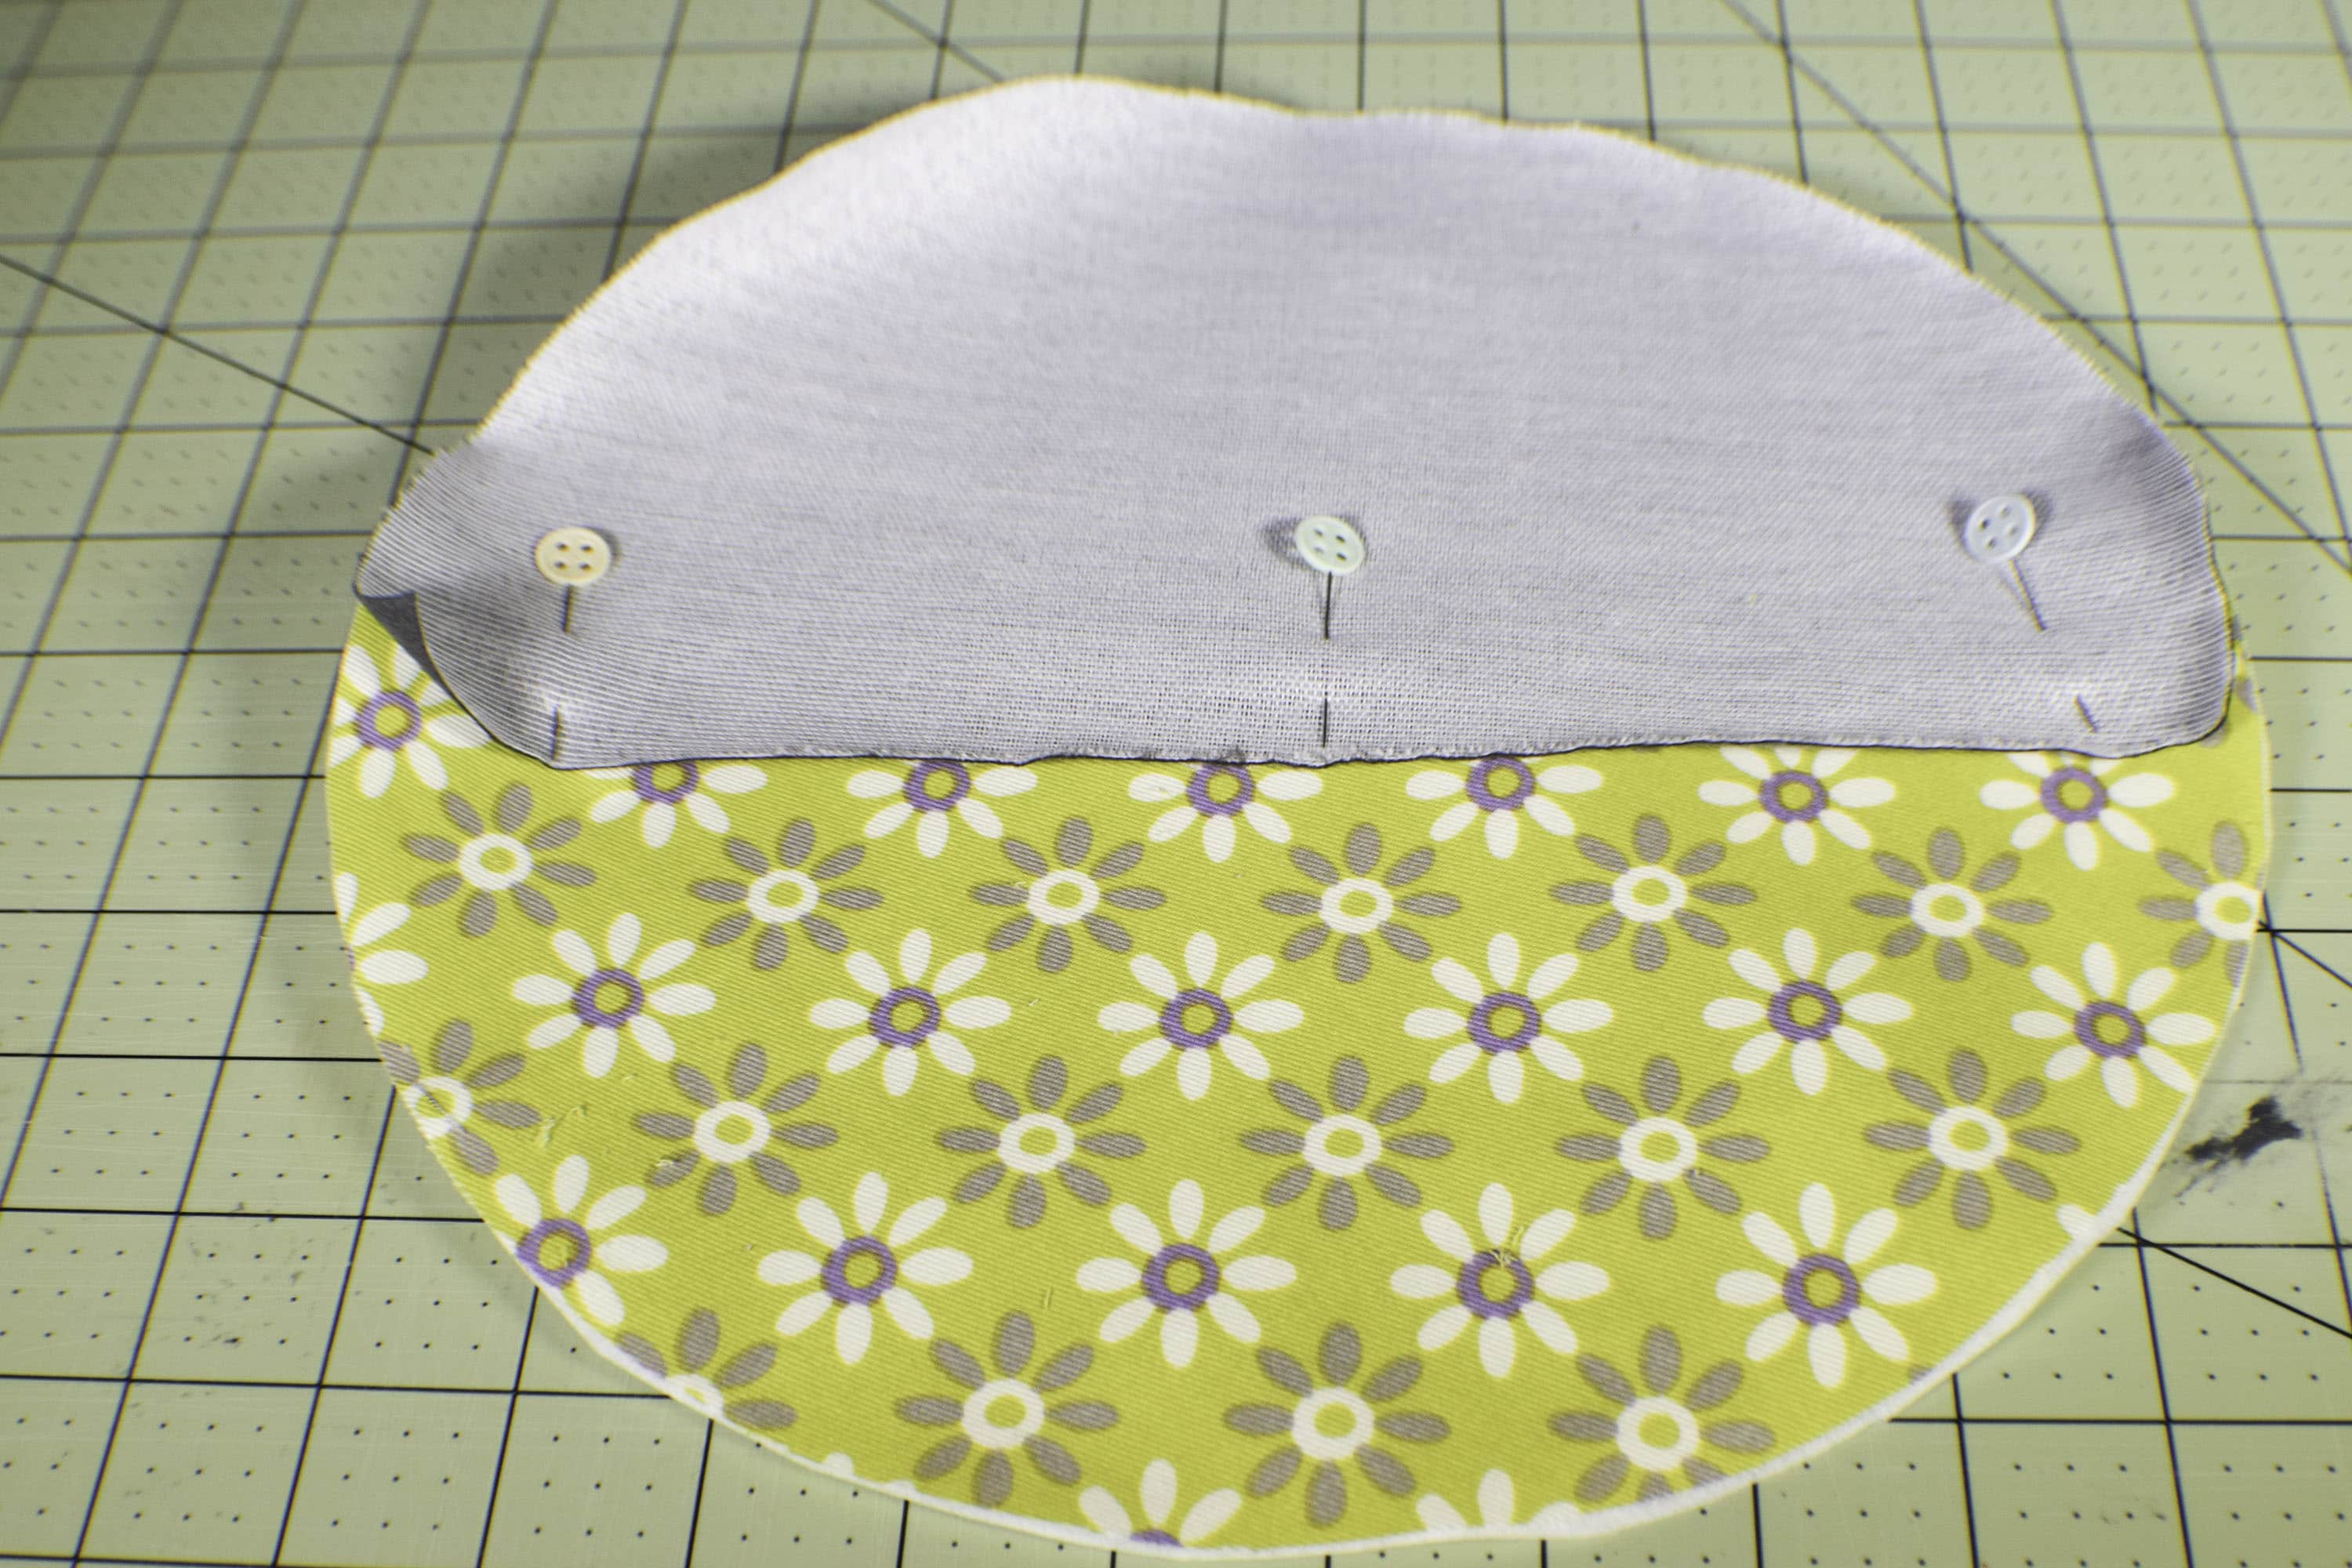
Add the faux Suede. Measure up 7 1/2″ from the bottom of your main fabric and place the faux suede so that it so right sides together with the main fabric. You will want the fabric to be facing up so that after you sew the seam you can flip the piece down and it will be even with the main fabric on the bottom. Sew the faux suede using a 1/4″ seam allowance. Fold down the suede and press. Top stitch along the top edge for a more professional look.
Step 6: How to Make a Custom Gym Bag
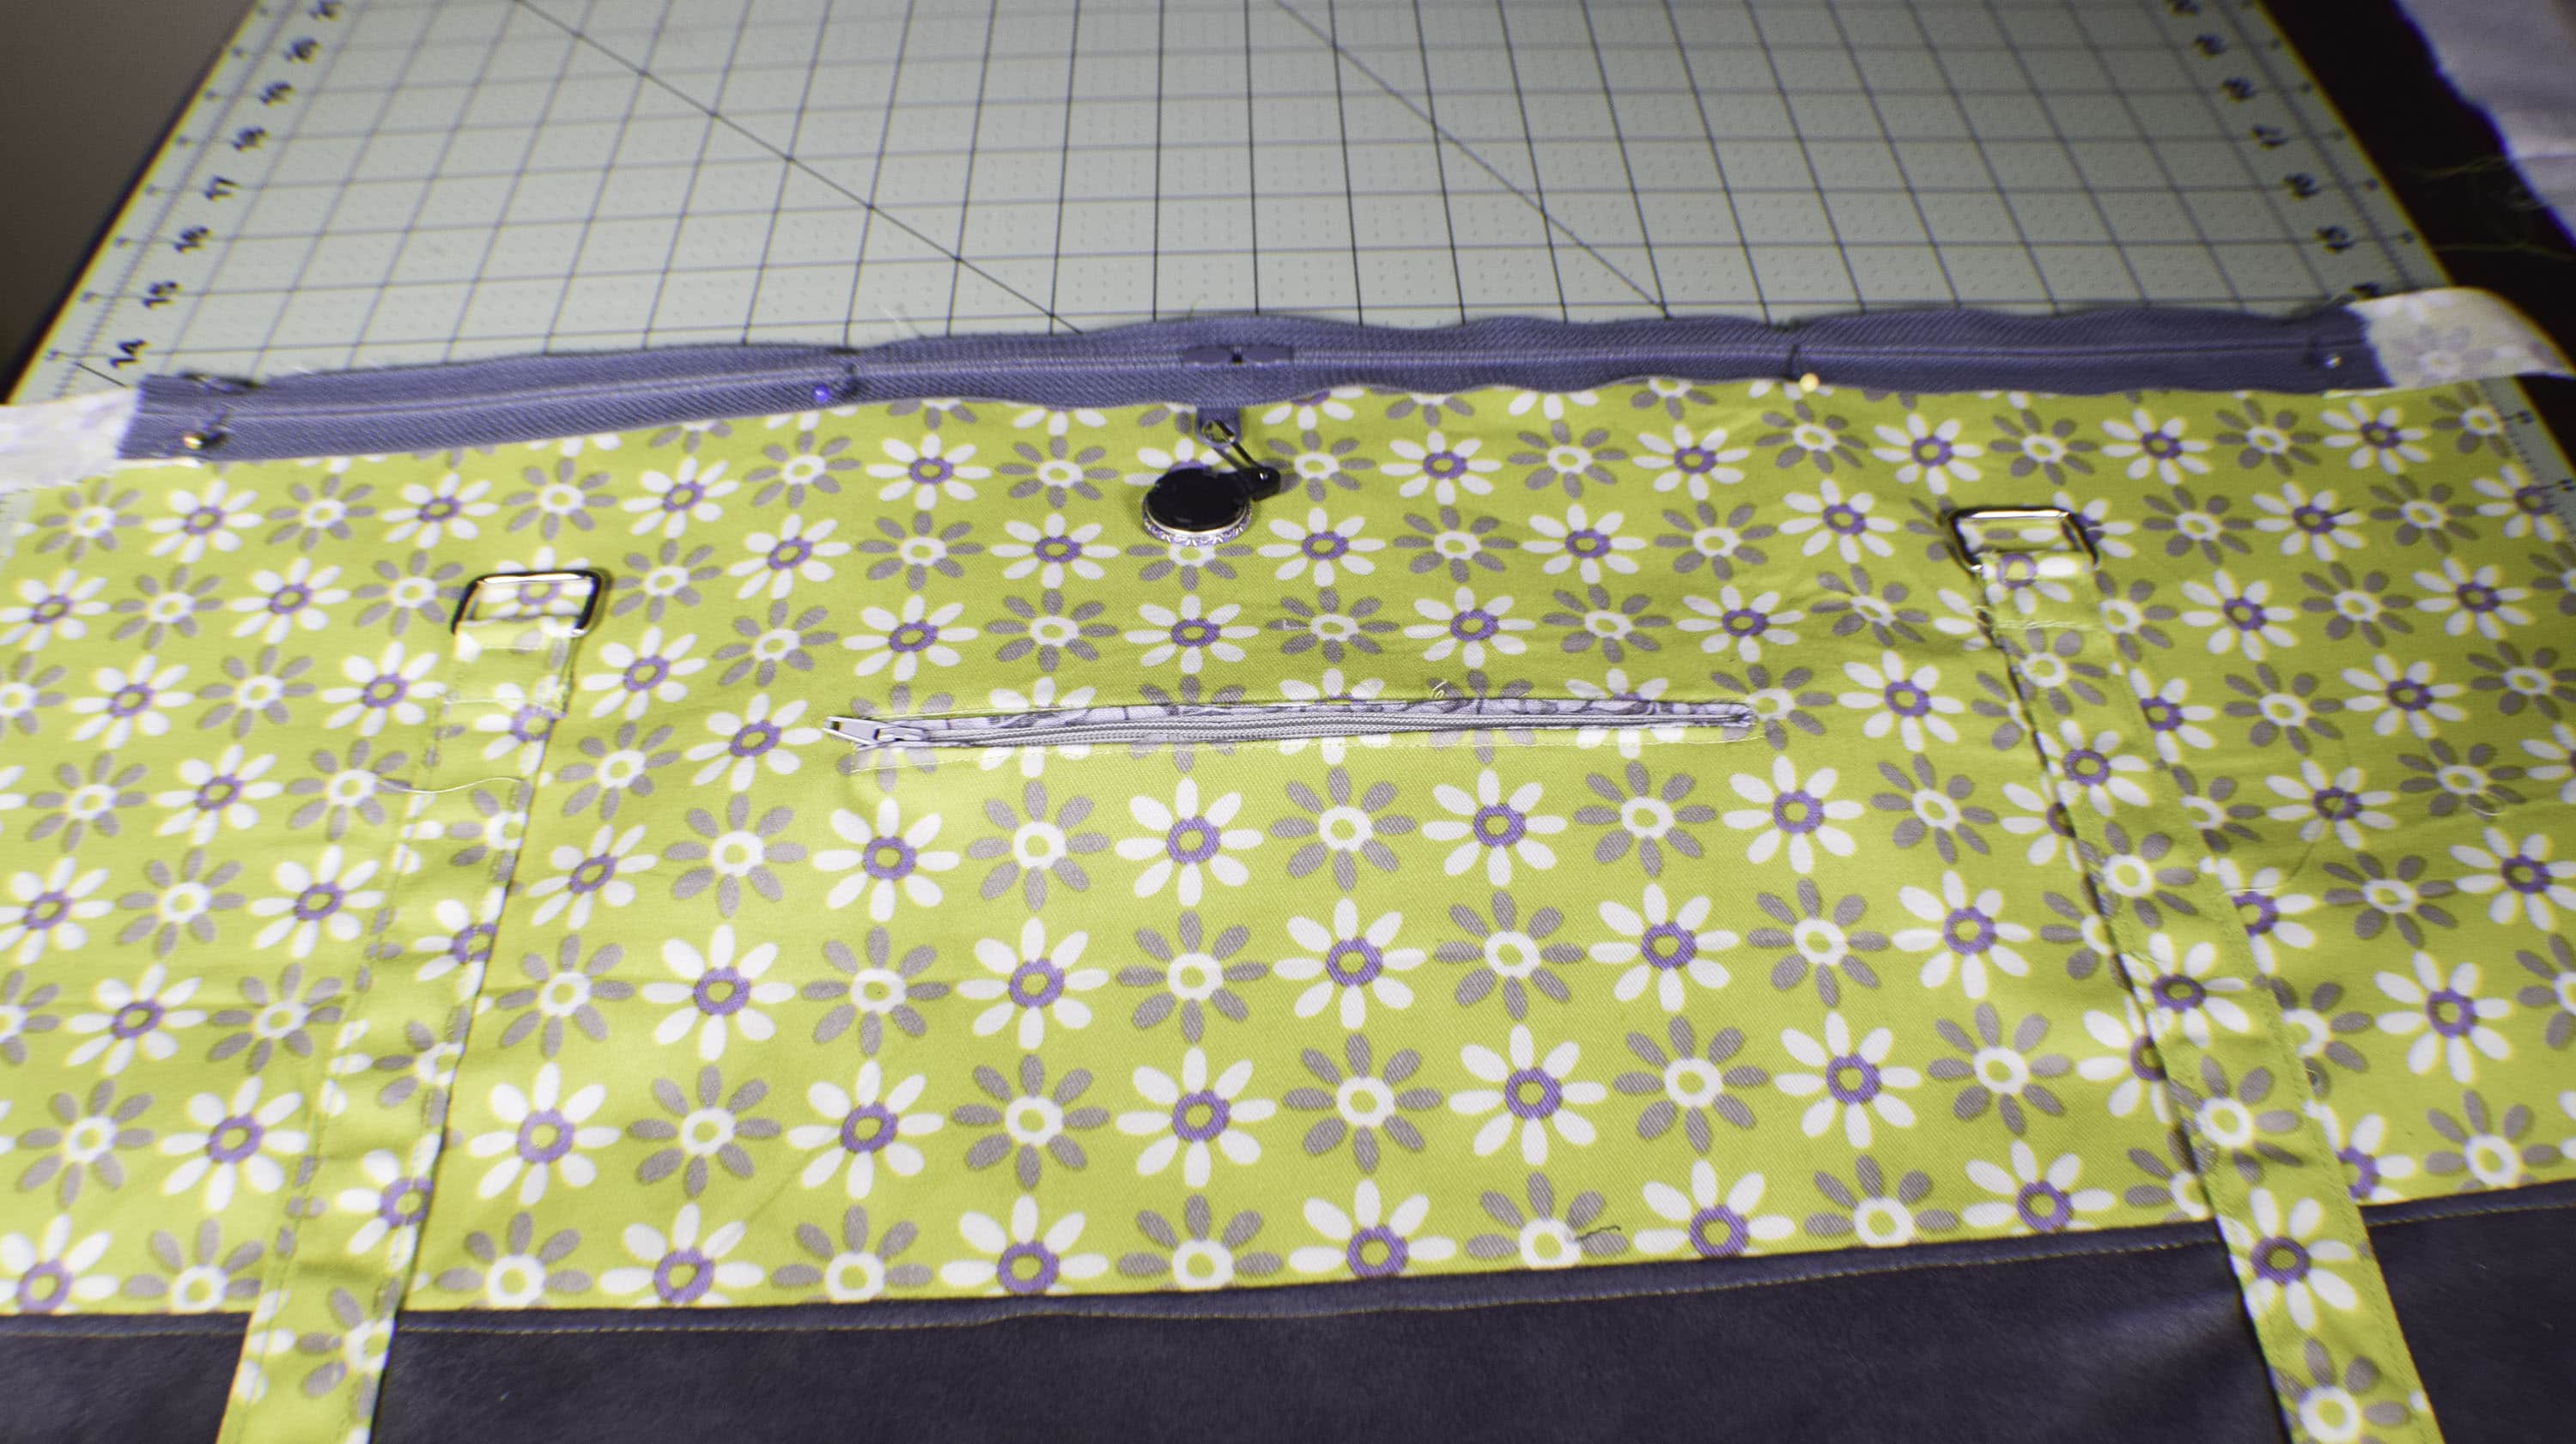
Add the ring Tabs. Measure in 4 3/4″ from each side and line up the short raw edges with the bottom of the bag. Sew along the top stitching on both sides of the ring tab to connect the ring tabs to the bag front and back. When you reach the rectangles sew as close to them as you can get.

Step 7: How to Make a Custom Gym Bag
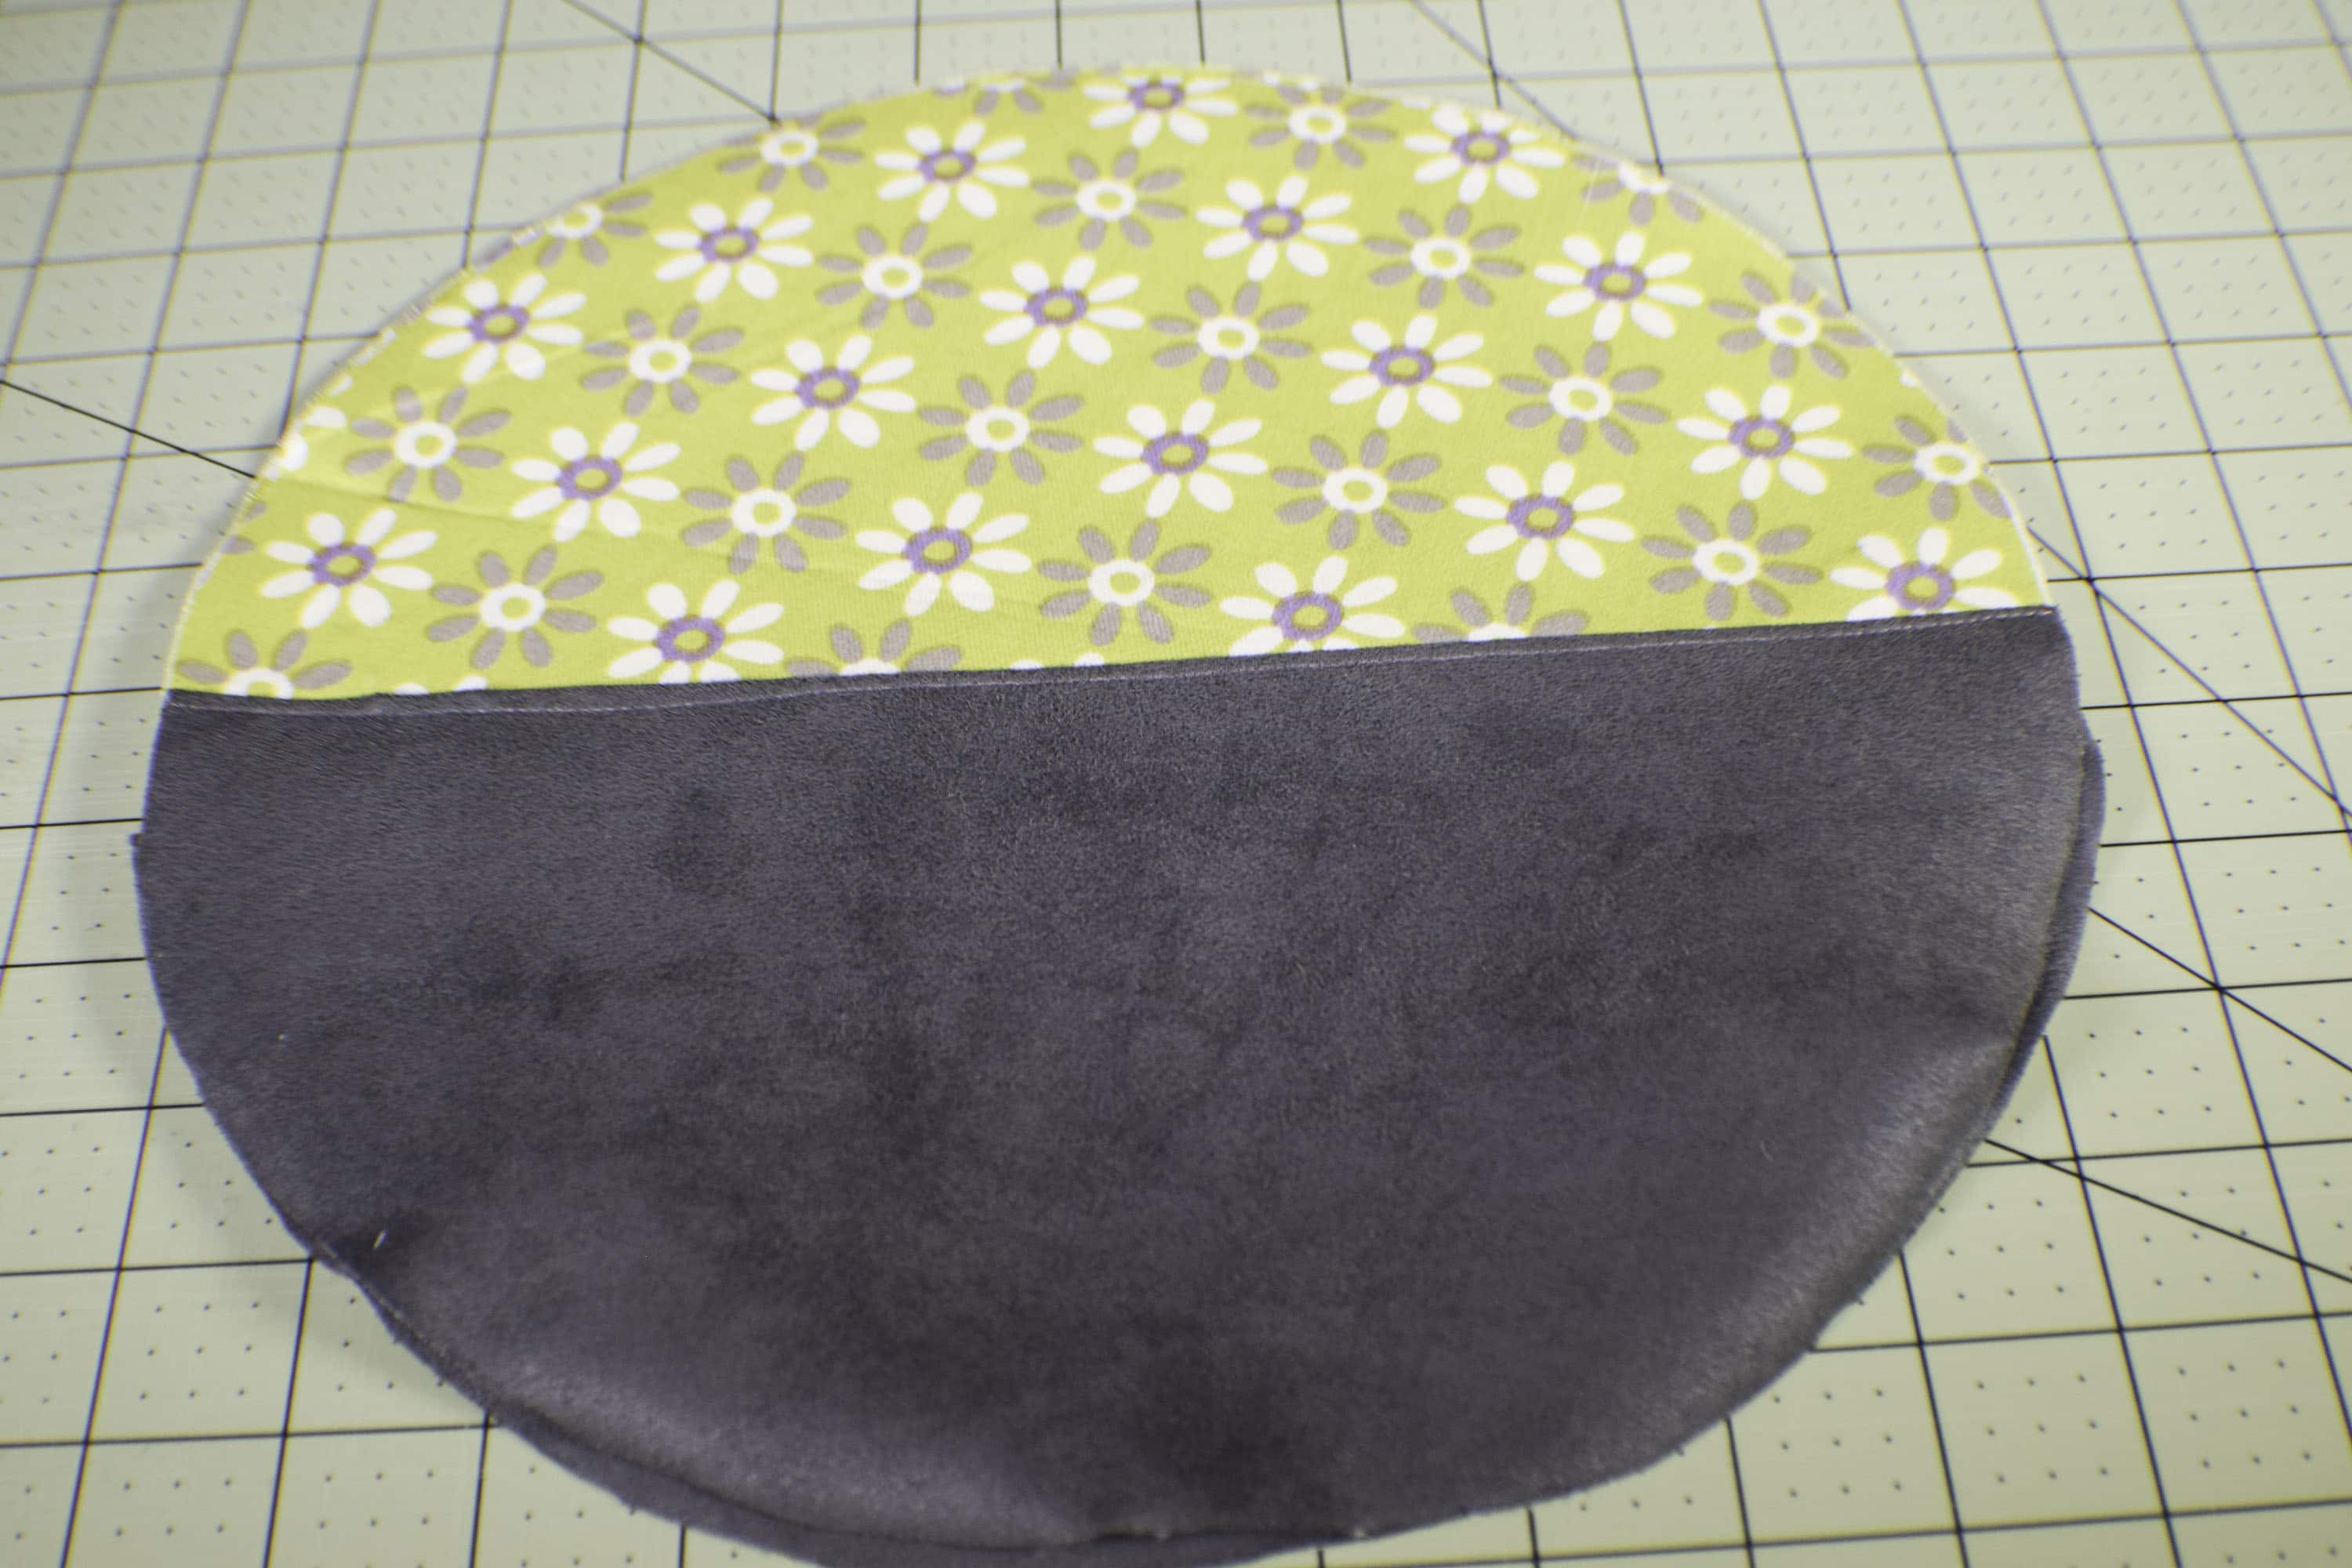
Create the bag ends. Fuse your Pellon 808 to the outer bag ends following the manufacturers instructions. Add the faux suede to the end of the bag in the same way that you did the faux suede in the main bag. In this instance, the faux suede will take up about 1/3 of the outer bottom piece.
Step 8: How to Make a Custom Gym Bag
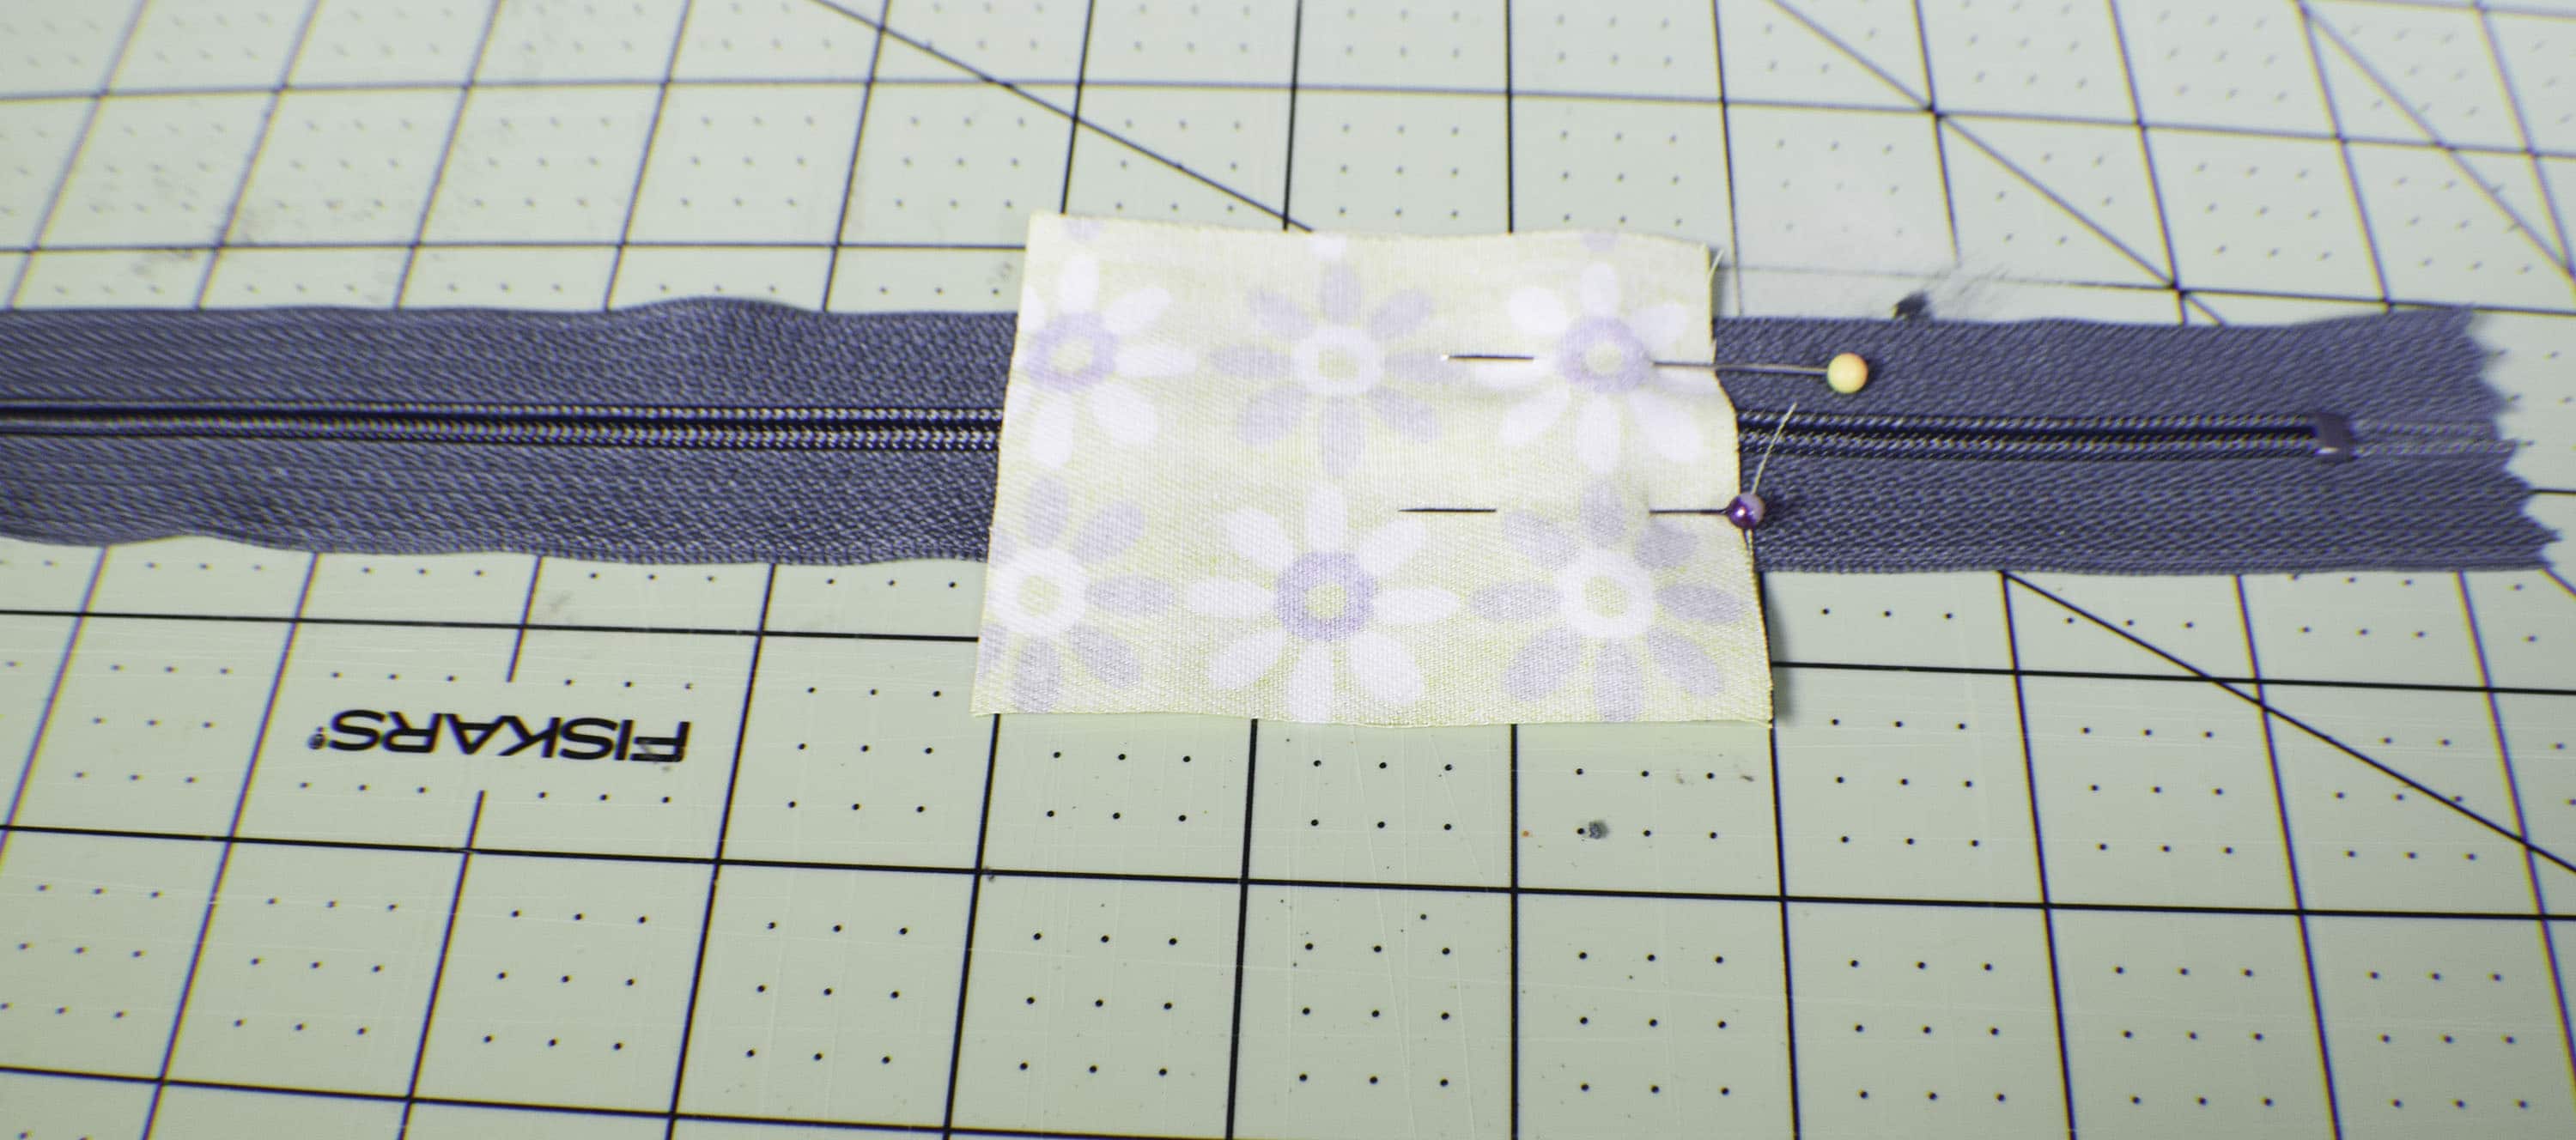
Add the zipper tabs to the top zipper. I was unable to find a grey 20″ double pull zipper for this project so I chose a 30″ double pull zipper and chose to shorten it instead. If you have never shortened a zipper before it is an easy process. In this case I measured my zipper to be 20″ and placed a zipper tab right sides together just outside the 20″ mark and sewed across the tab through the zipper teeth. Take care with this as you do not want to break your needle. Repeat for the other end of the zipper. Trim the sides of the zipper tab to be even with the zipper. Top stitch over the zipper tab close to the zipper.
Step 9: How to Make a Custom Gym Bag
Add the zipper to the body of the bag. Lay one side of the bag face down onto the right side of the zipper and sew. Turn the fabric over and top stitch near the teeth for a more professional look. Repeat for the other side.
Step 10: How to Make a Custom Gym Bag
With right sides together pin the bottom seam. Fit the circle end adjusting the pinned bottom to fit the circle. I found that my bottom seam was much larger than I expected because I used such a large sized zipper. Once you have fit the circle end sew the bottom seam. Trim the seam to 1/4″.

Step 11: How to Make a Custom Gym Bag
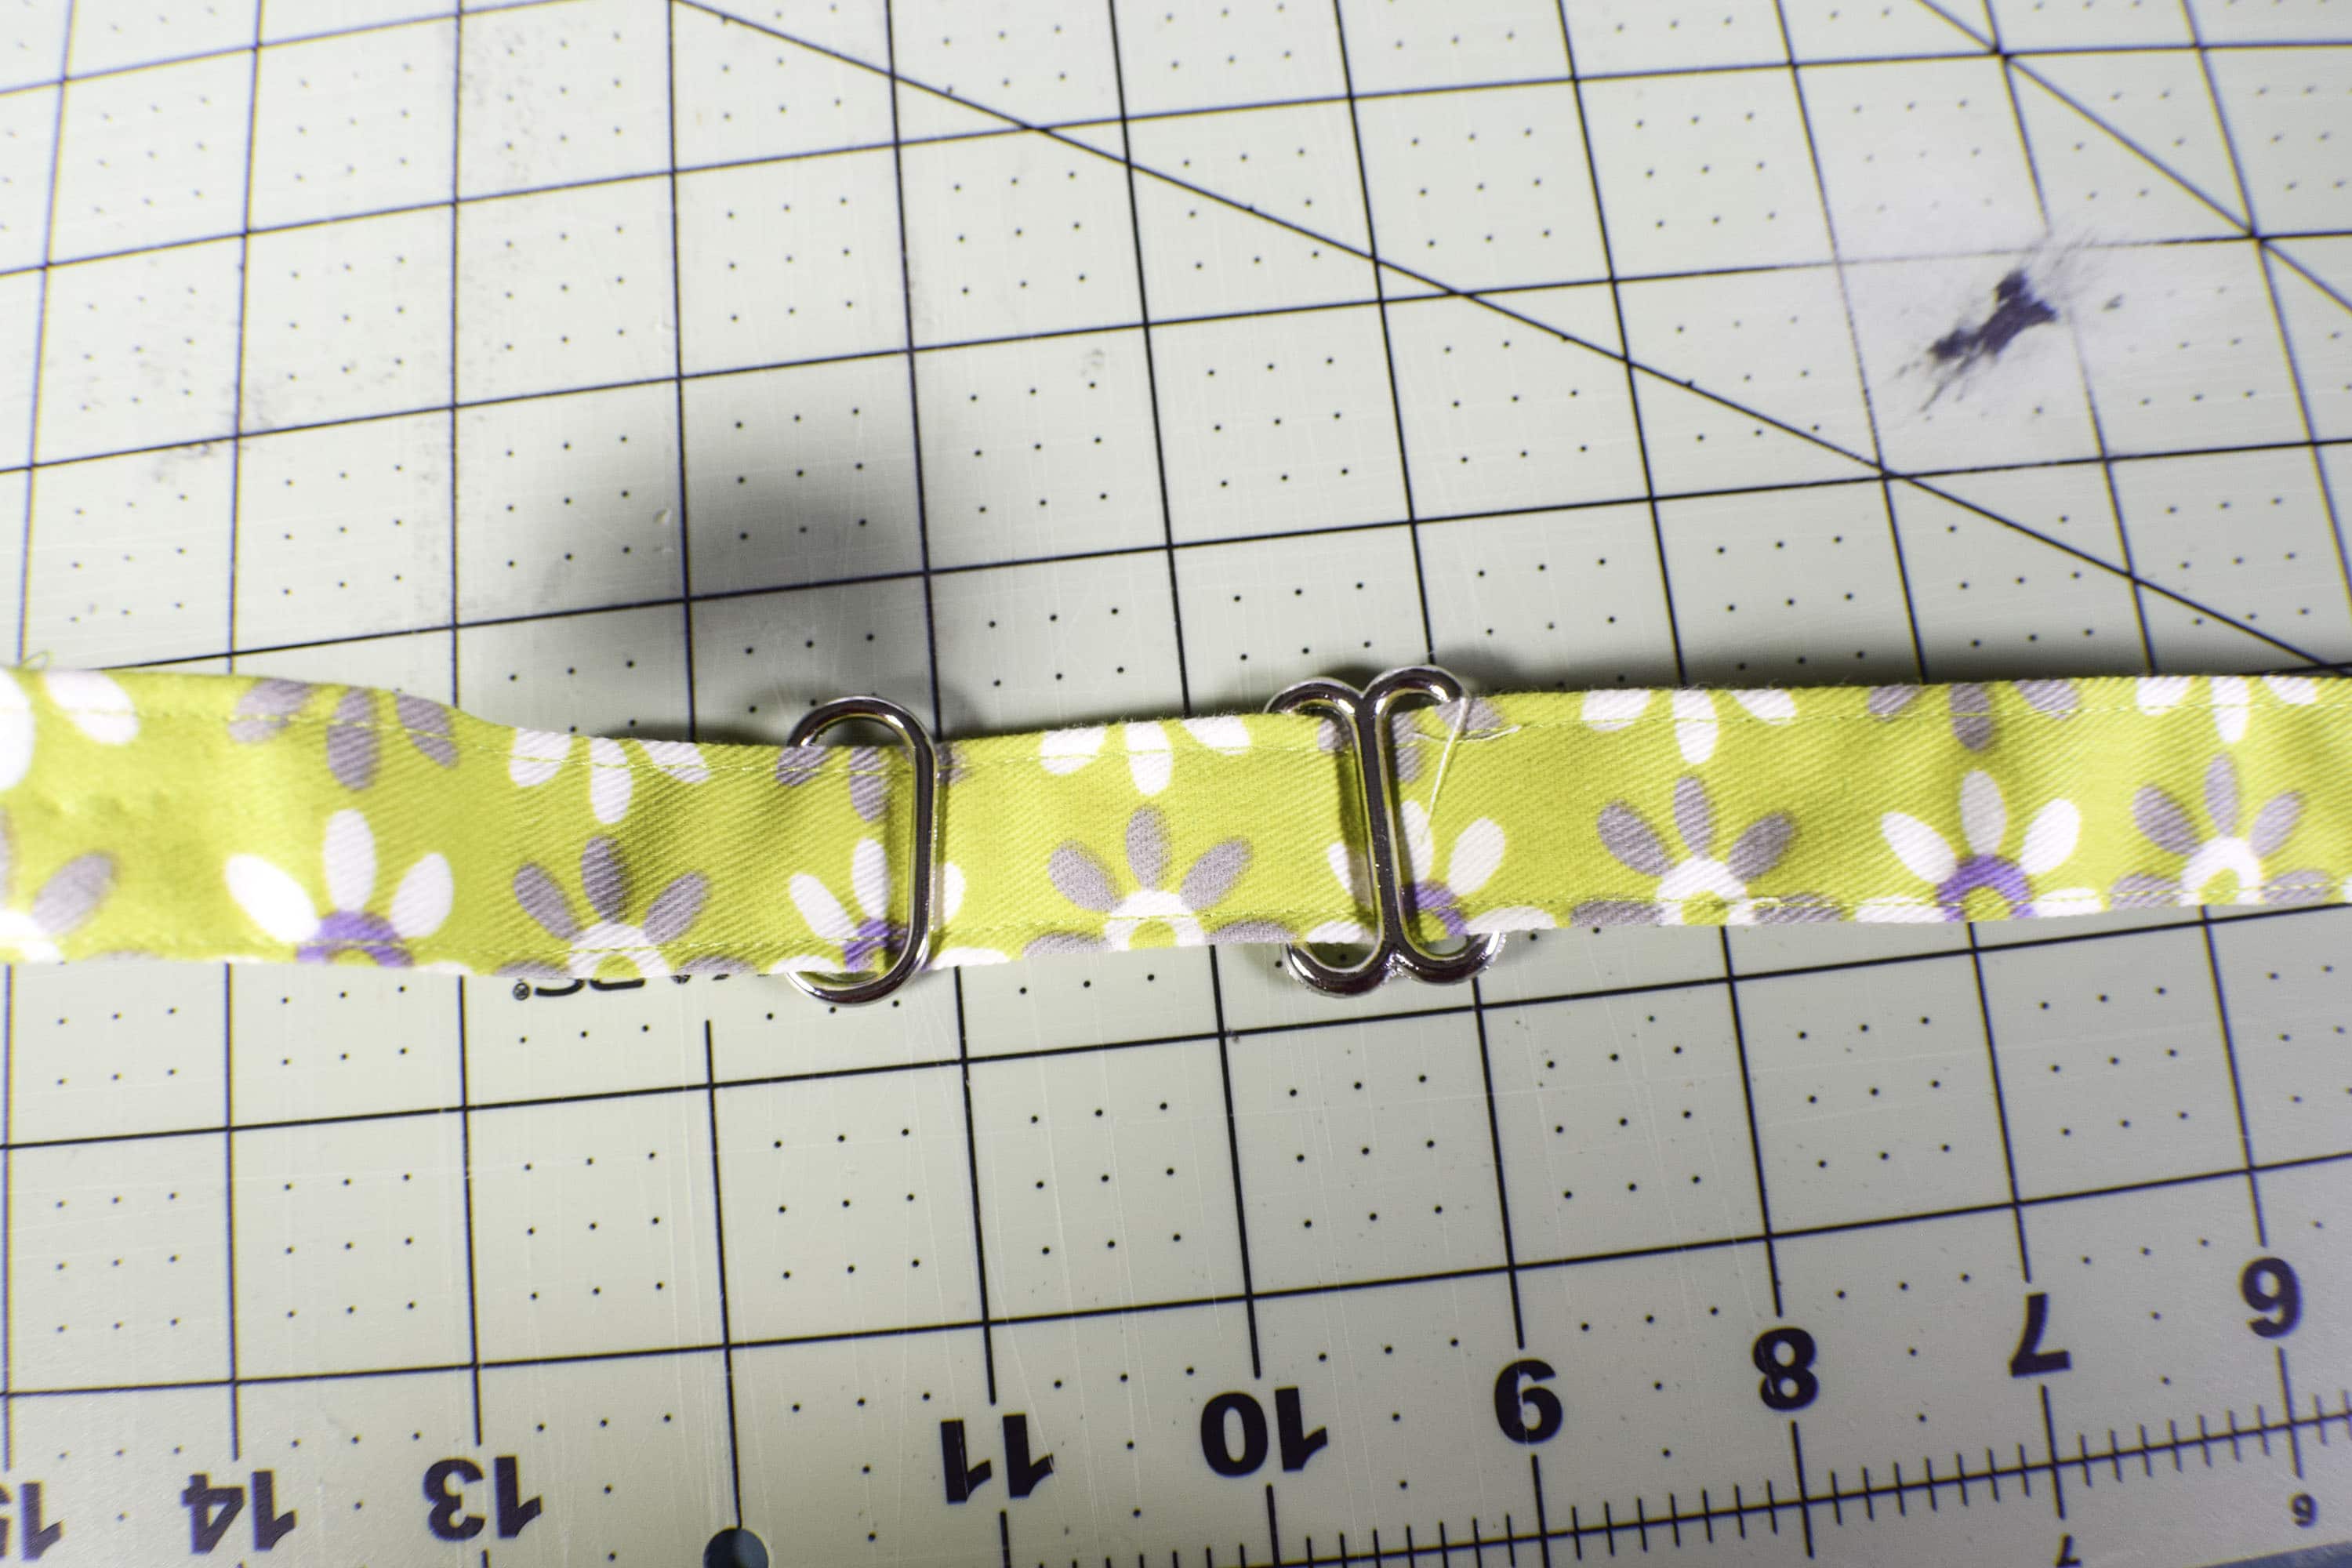
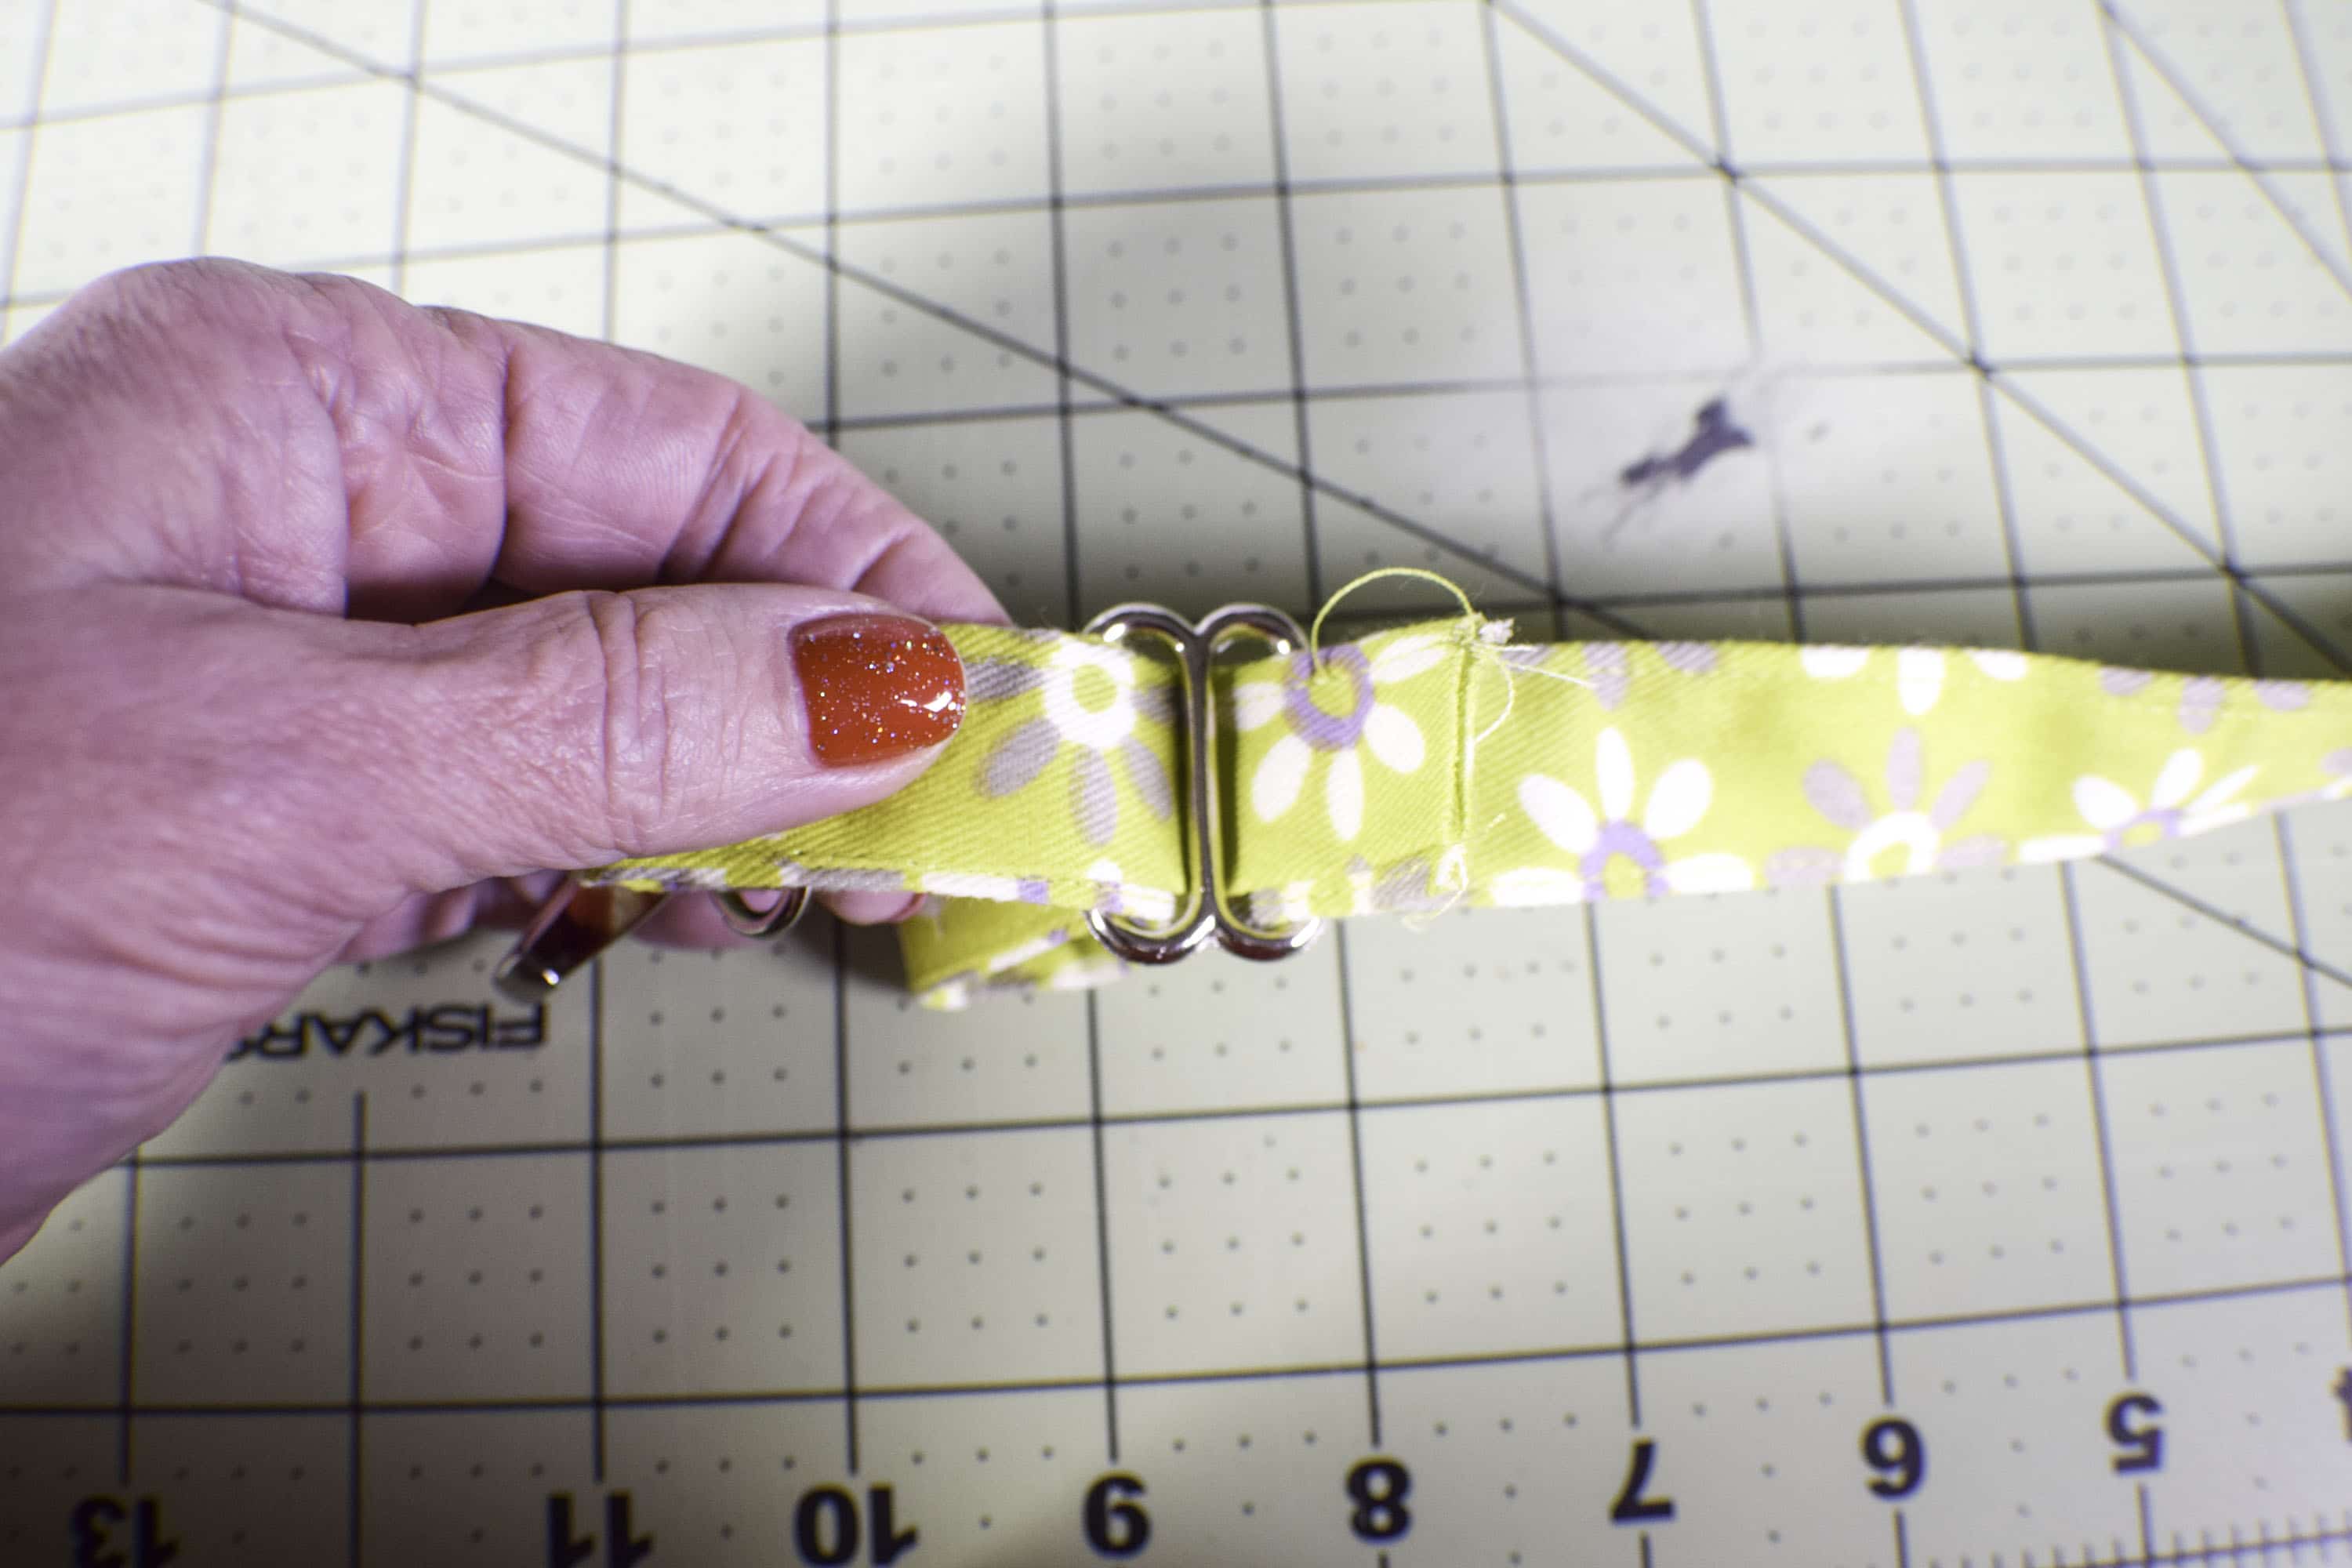
Create the strap tabs using the 4′ x 4″ pieces. You will make these in the same way that you made the ring tabs. Fold the tab in half through the rectangle and tack the raw edges together.
Step 12: How to Make a Custom Gym Bag
Unzip the zipper. Pin the circle ends to both ends of the bag. Use as many pins as you feel you need. Insert the strap tabs between the circle ends and the zipper tab. Sew around the circle ends using a 1/4″ seam allowance. Sew several times over the strap tab as it will be carrying the weight of the bag. Once you have sewn the ends you have completed the outer bag.
Step 13: How to Make a Custom Gym Bag
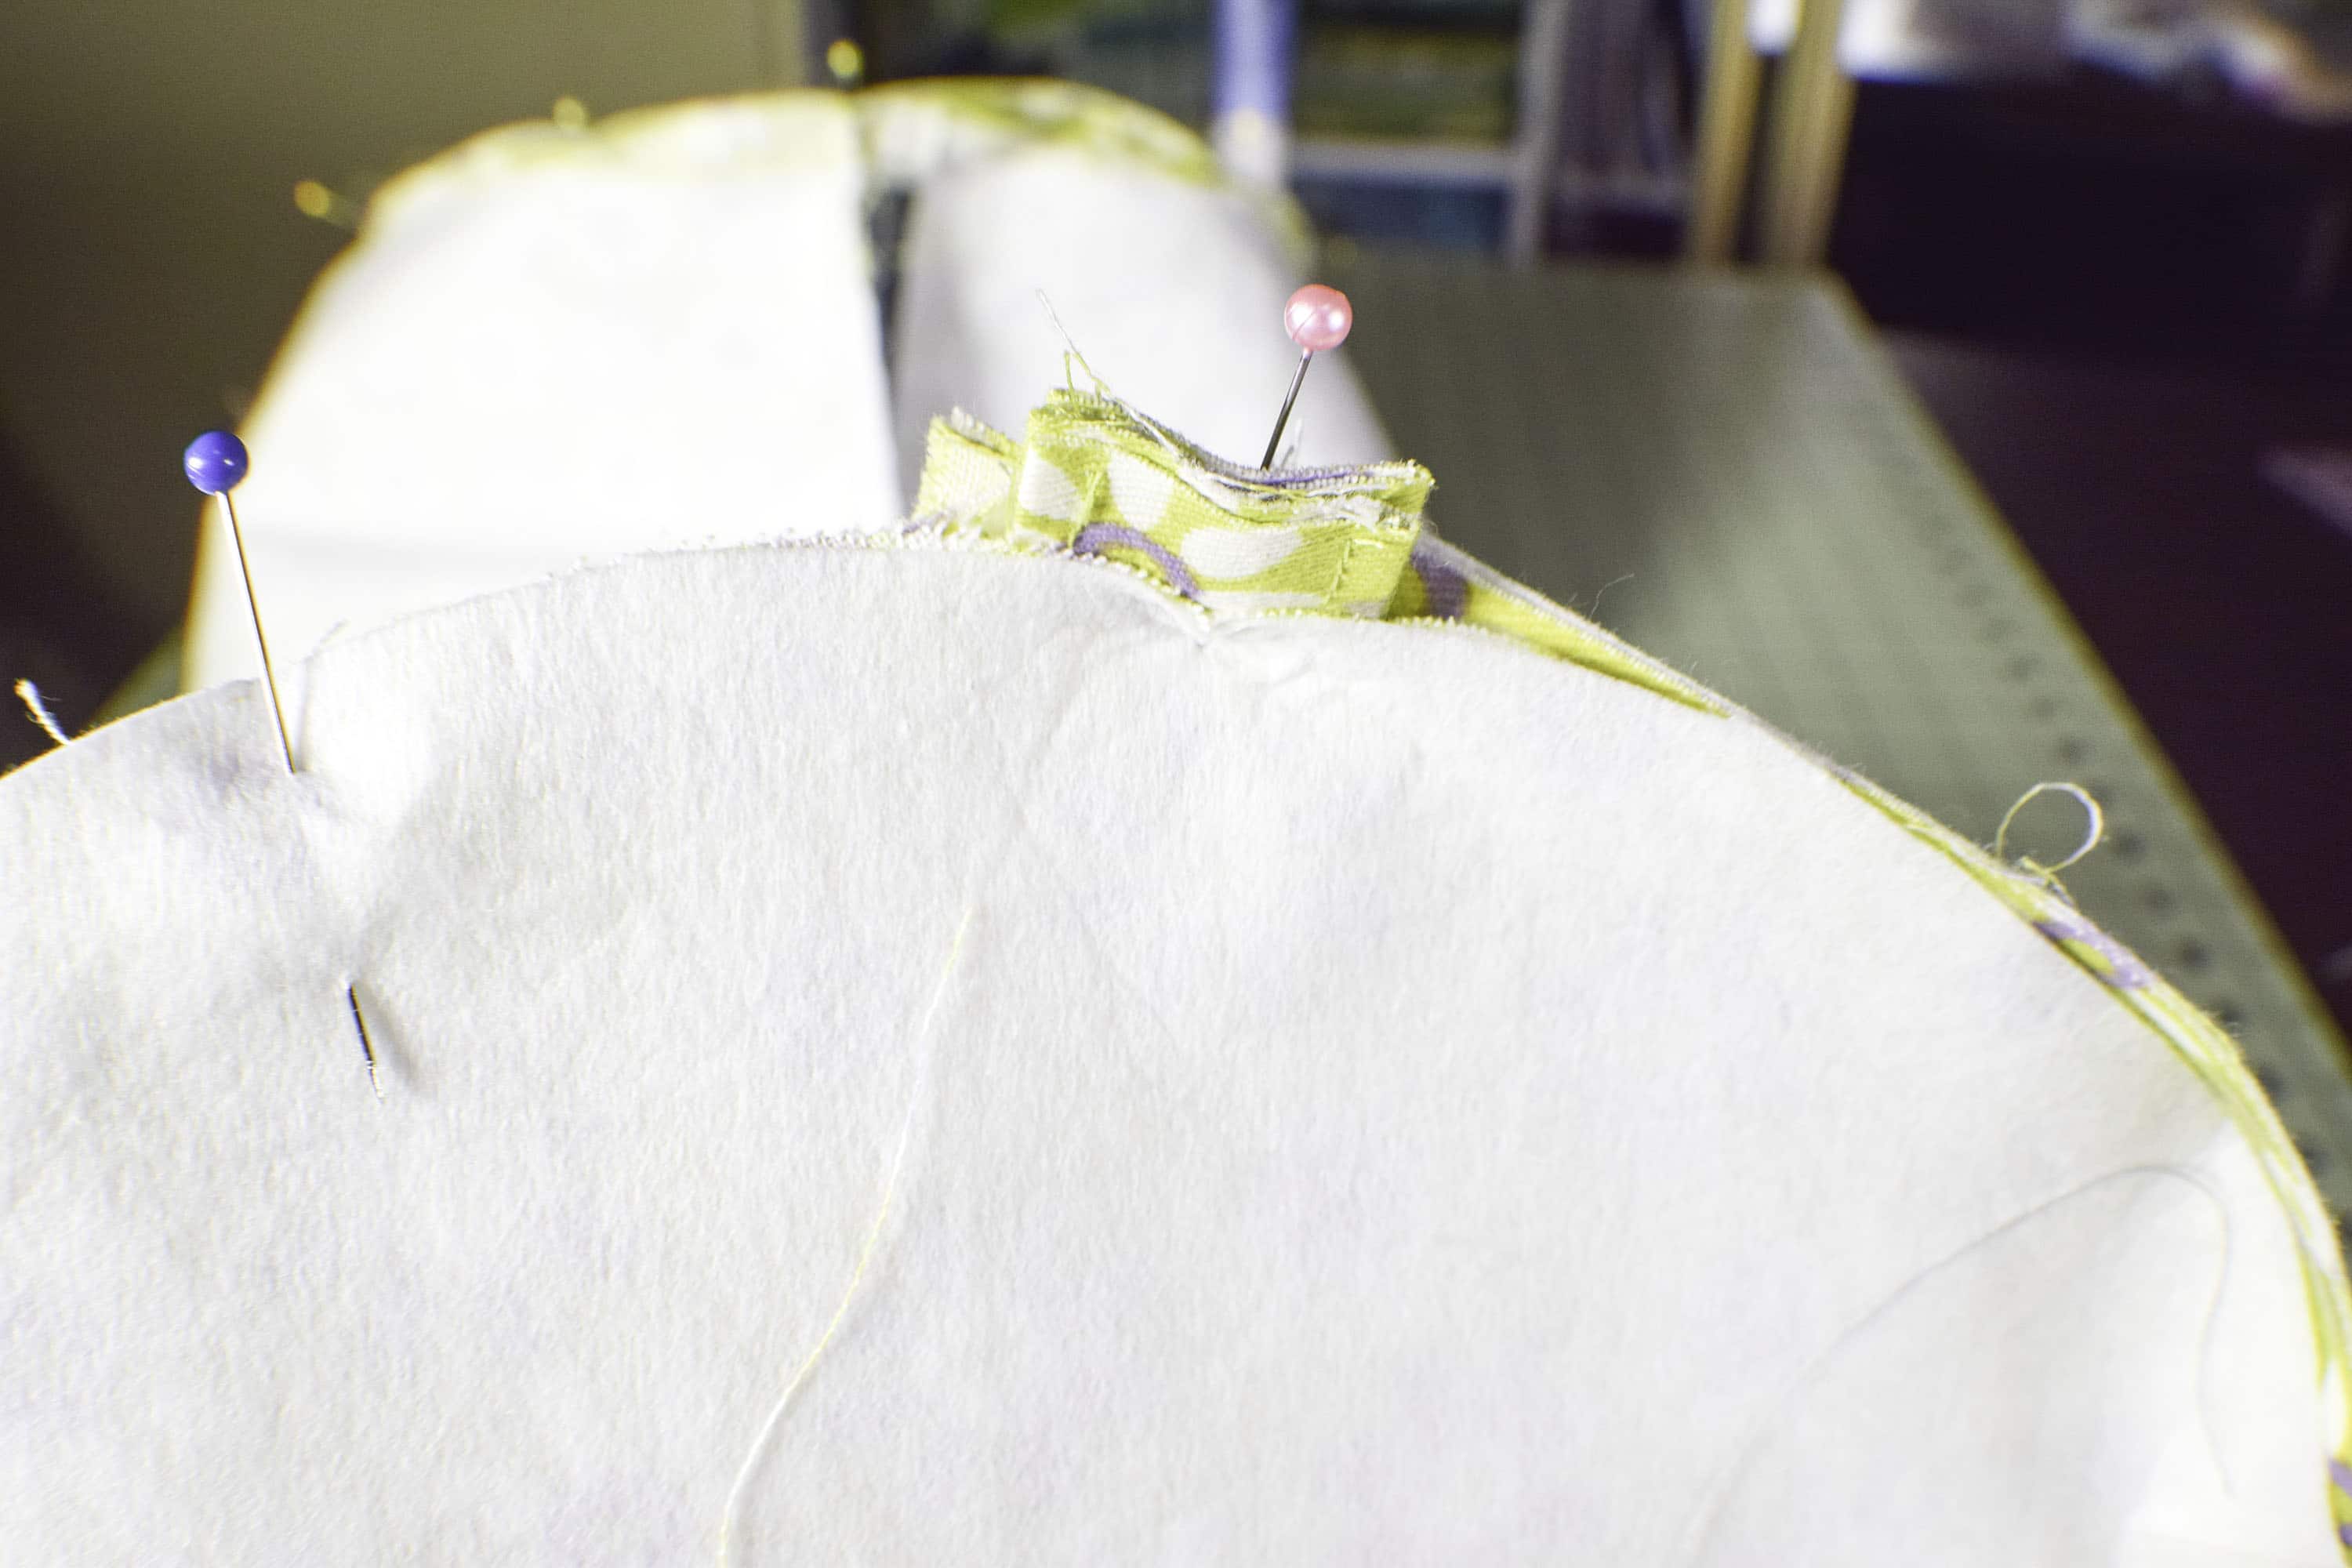
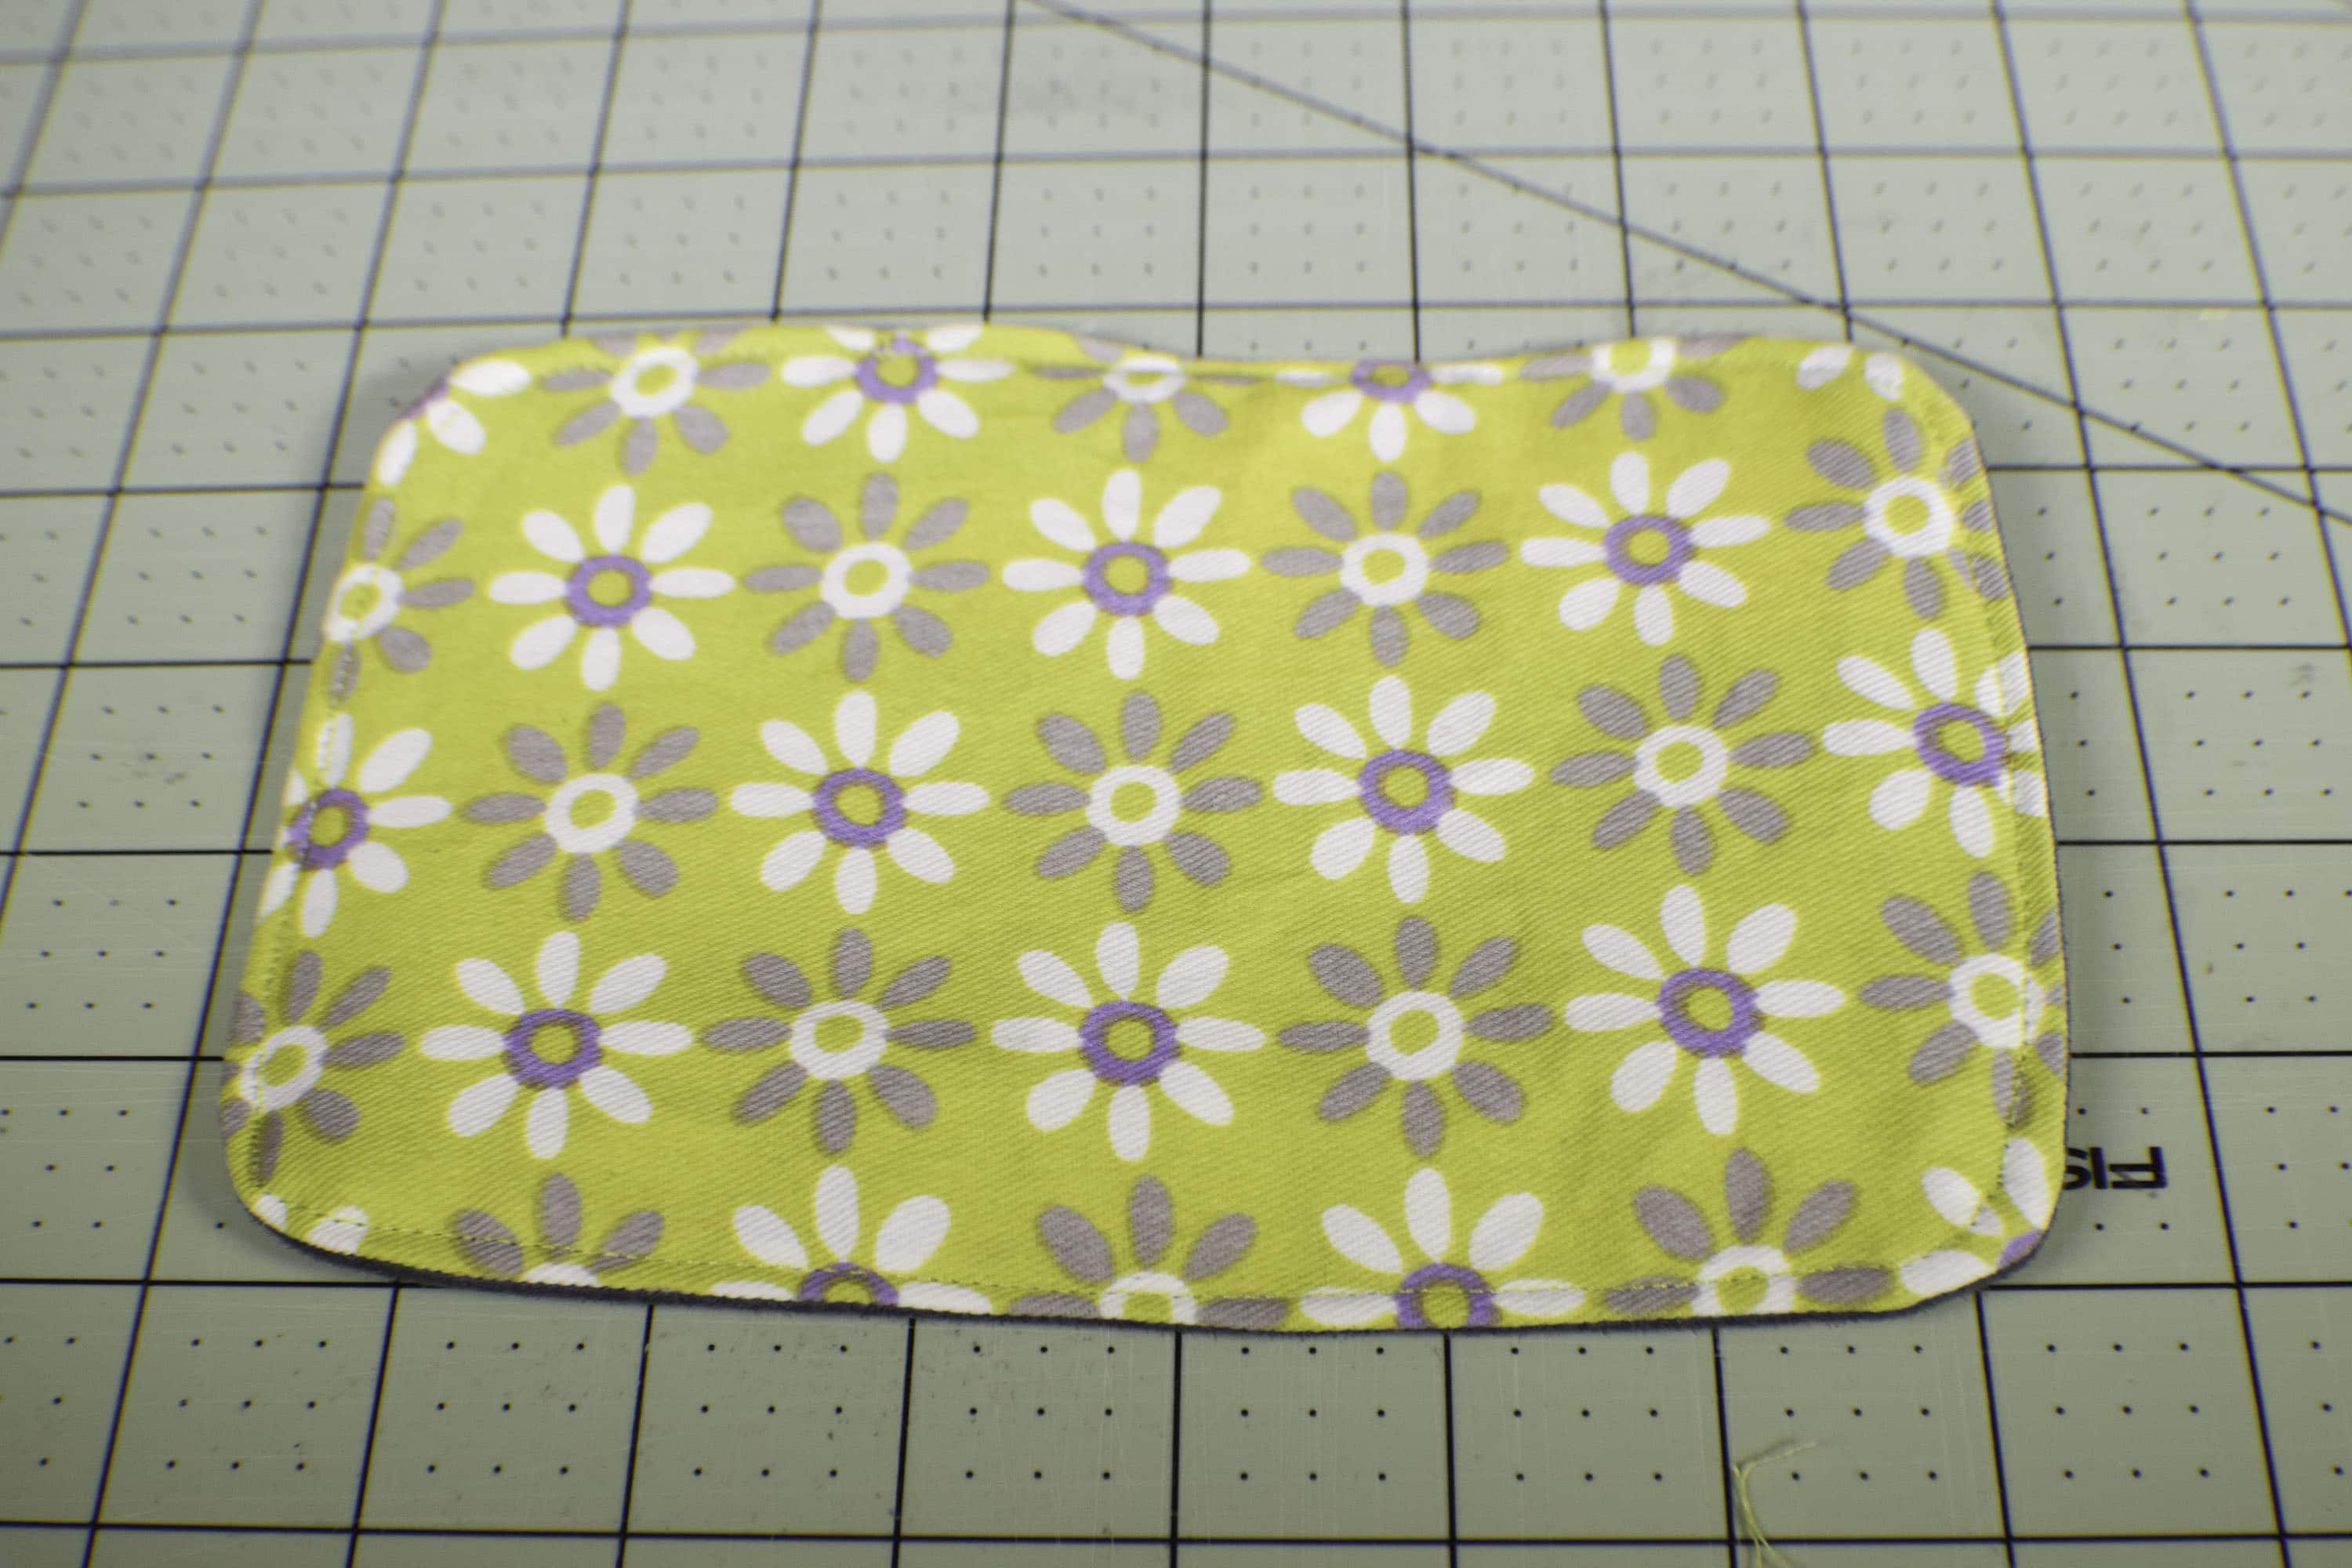
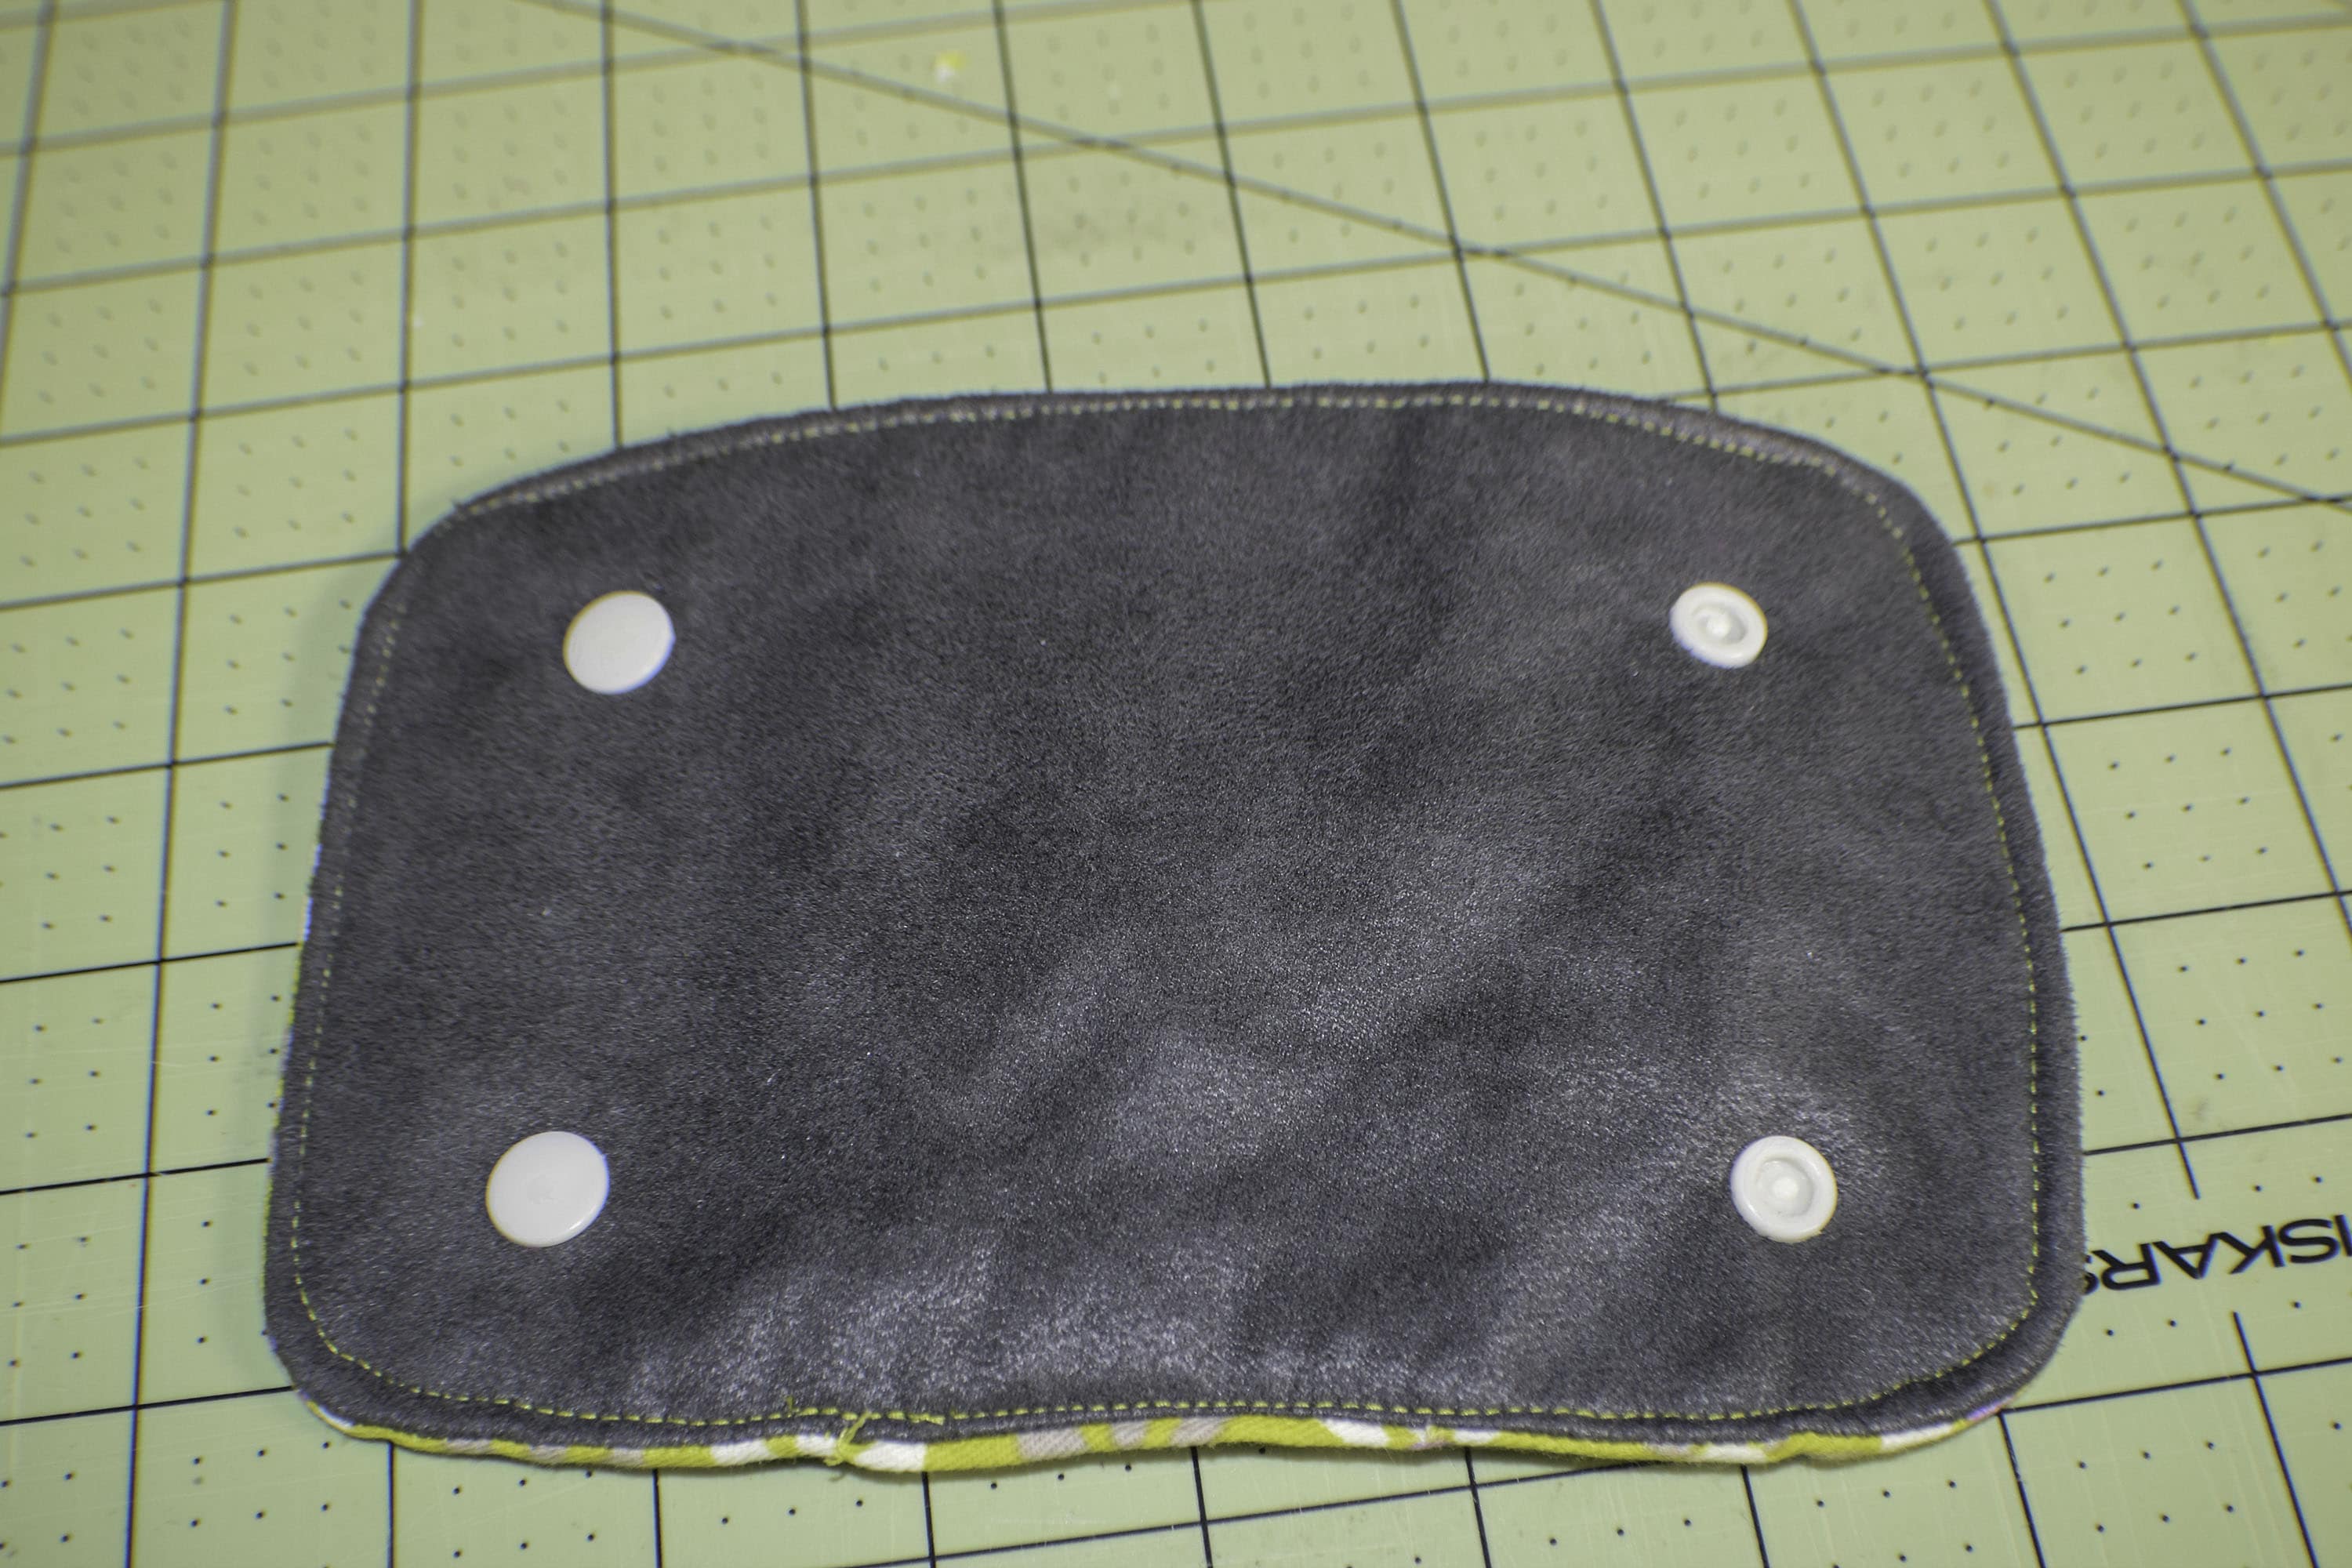
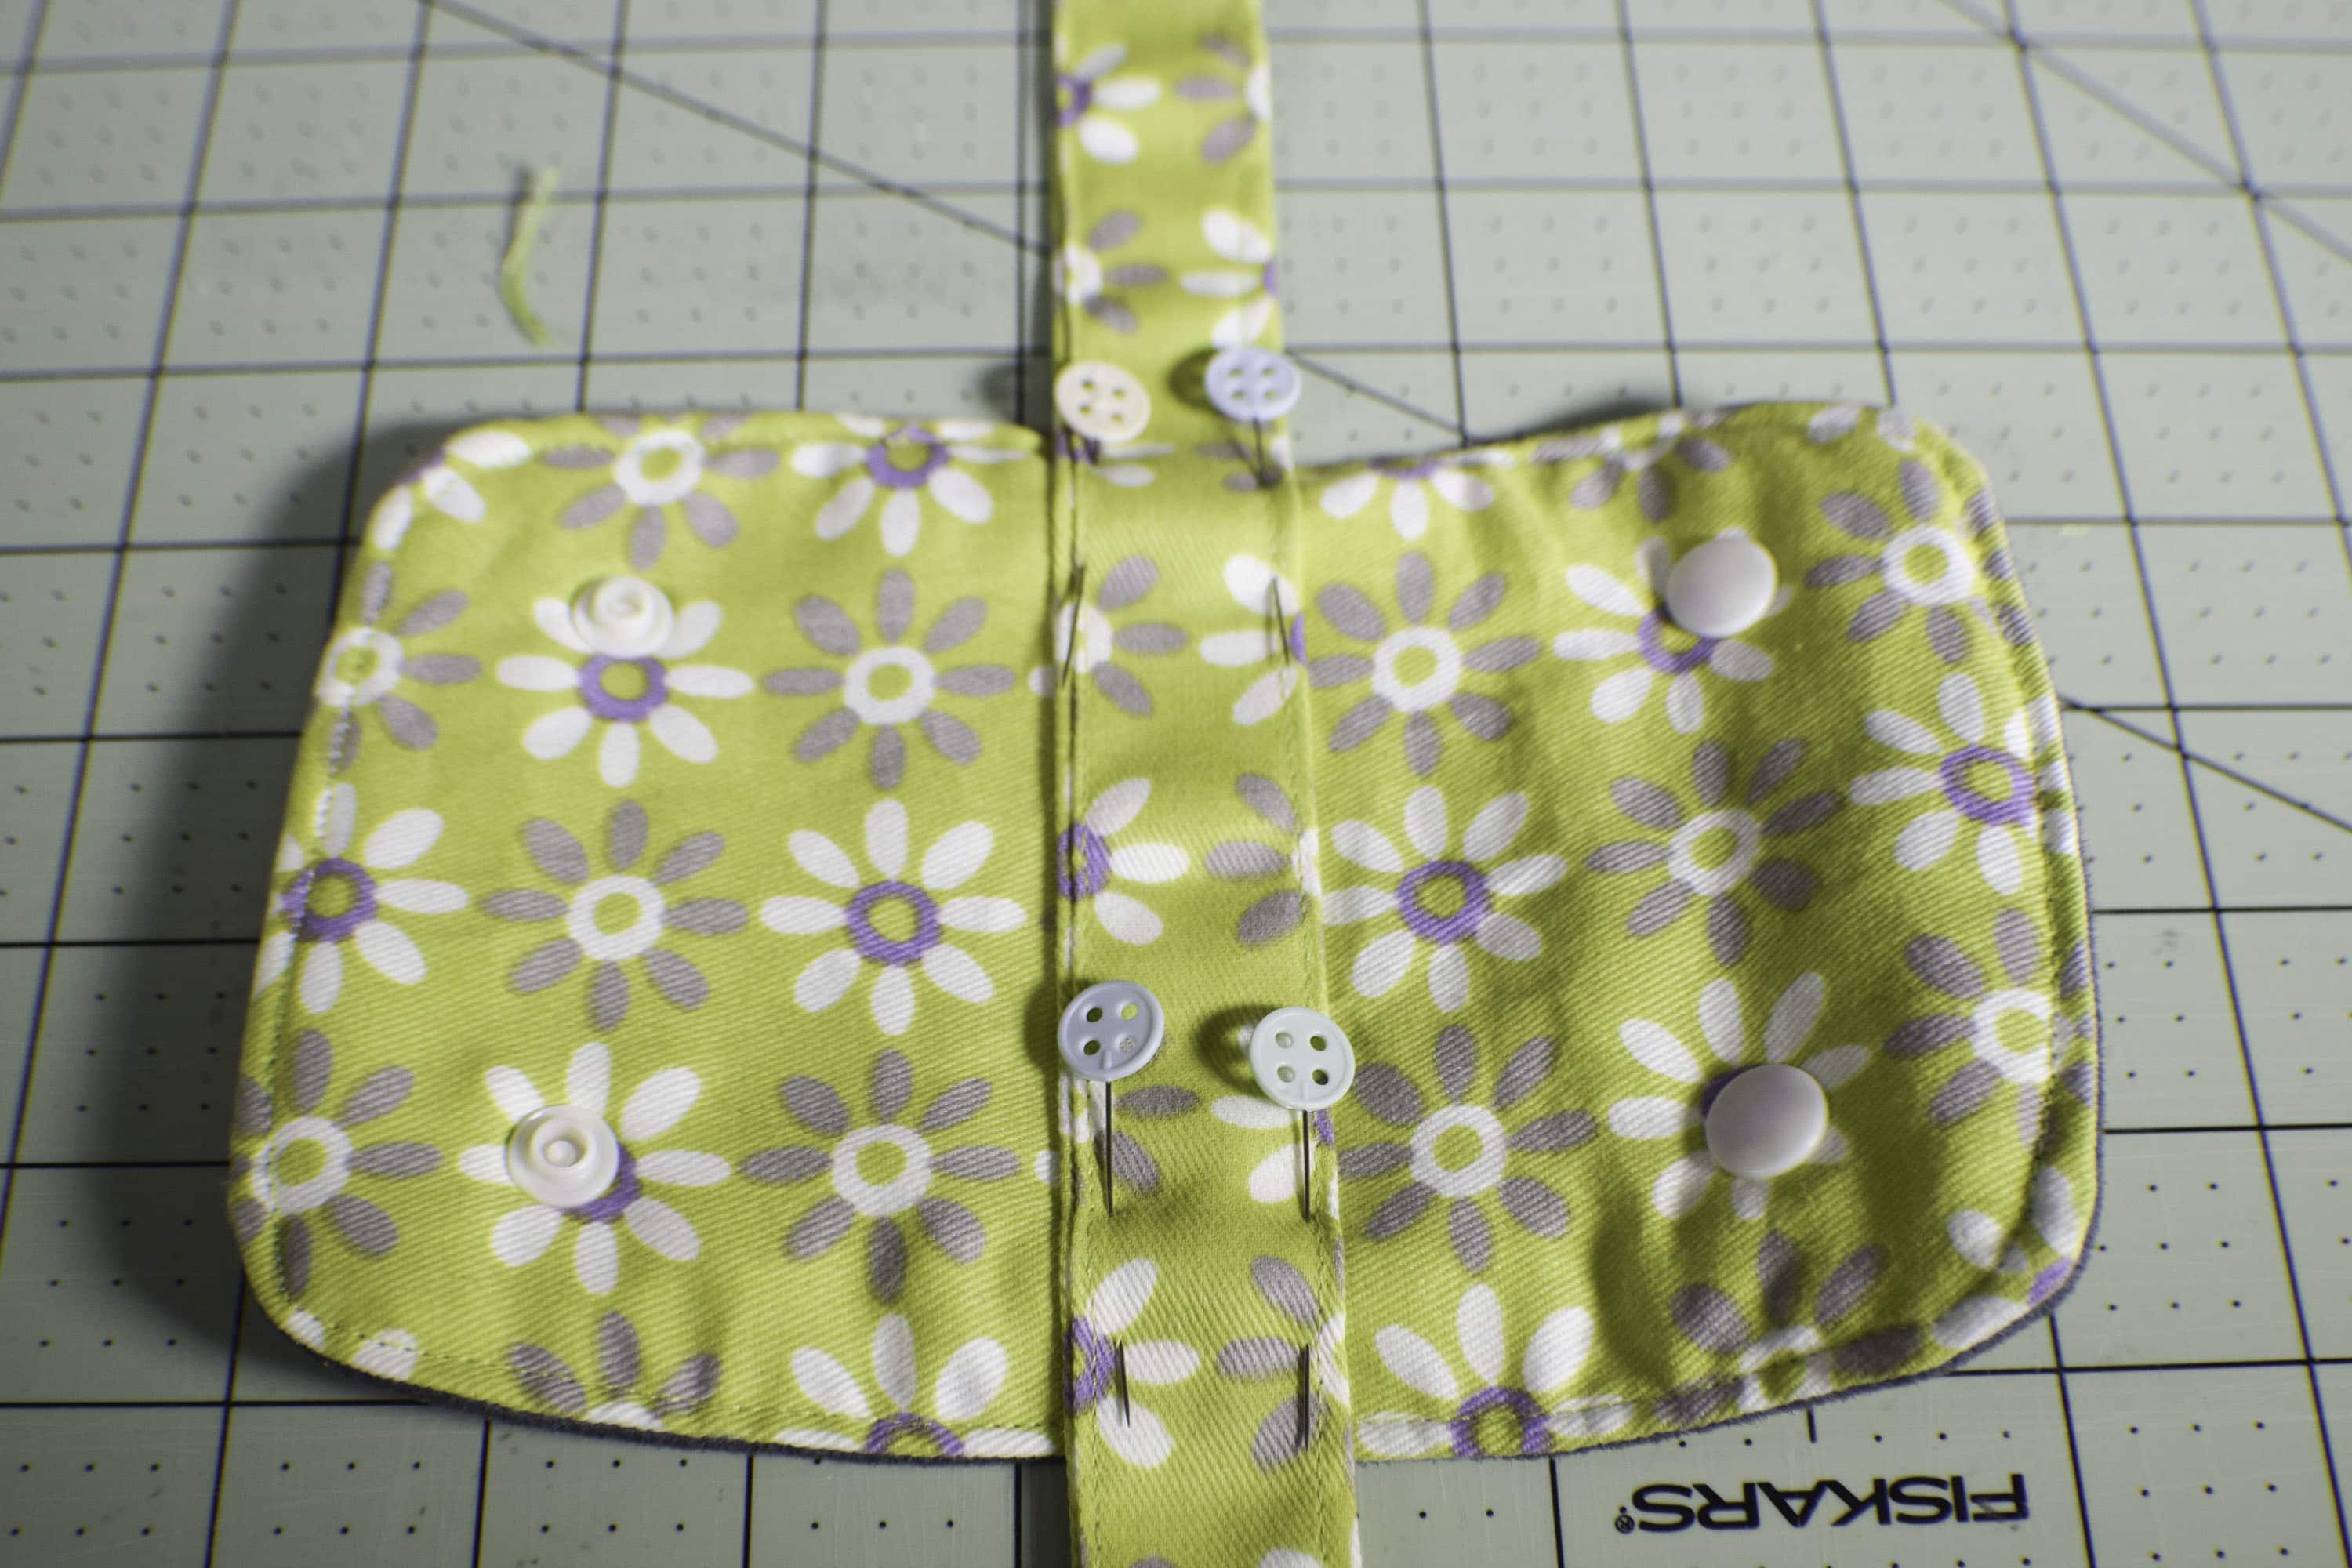
Create the two slip pockets. Fuse a piece of Pellon 8o8 to one piece of each of the slip pocket pieces. Take the non fused piece and sew it right sides together to the fused piece leaving an opening for turning. Repeat for the other pocket piece. Turn the pieces right sides out and press. Top stitch along one long edge of each pocket. Place each pocket piece on the round ends of the lining in the center of each end. Sew around three sides of the pocket leaving the top open. Sew down the center of one of the pocket pieces to create two pockets.
Step 14: How to Make a Custom Gym Bag
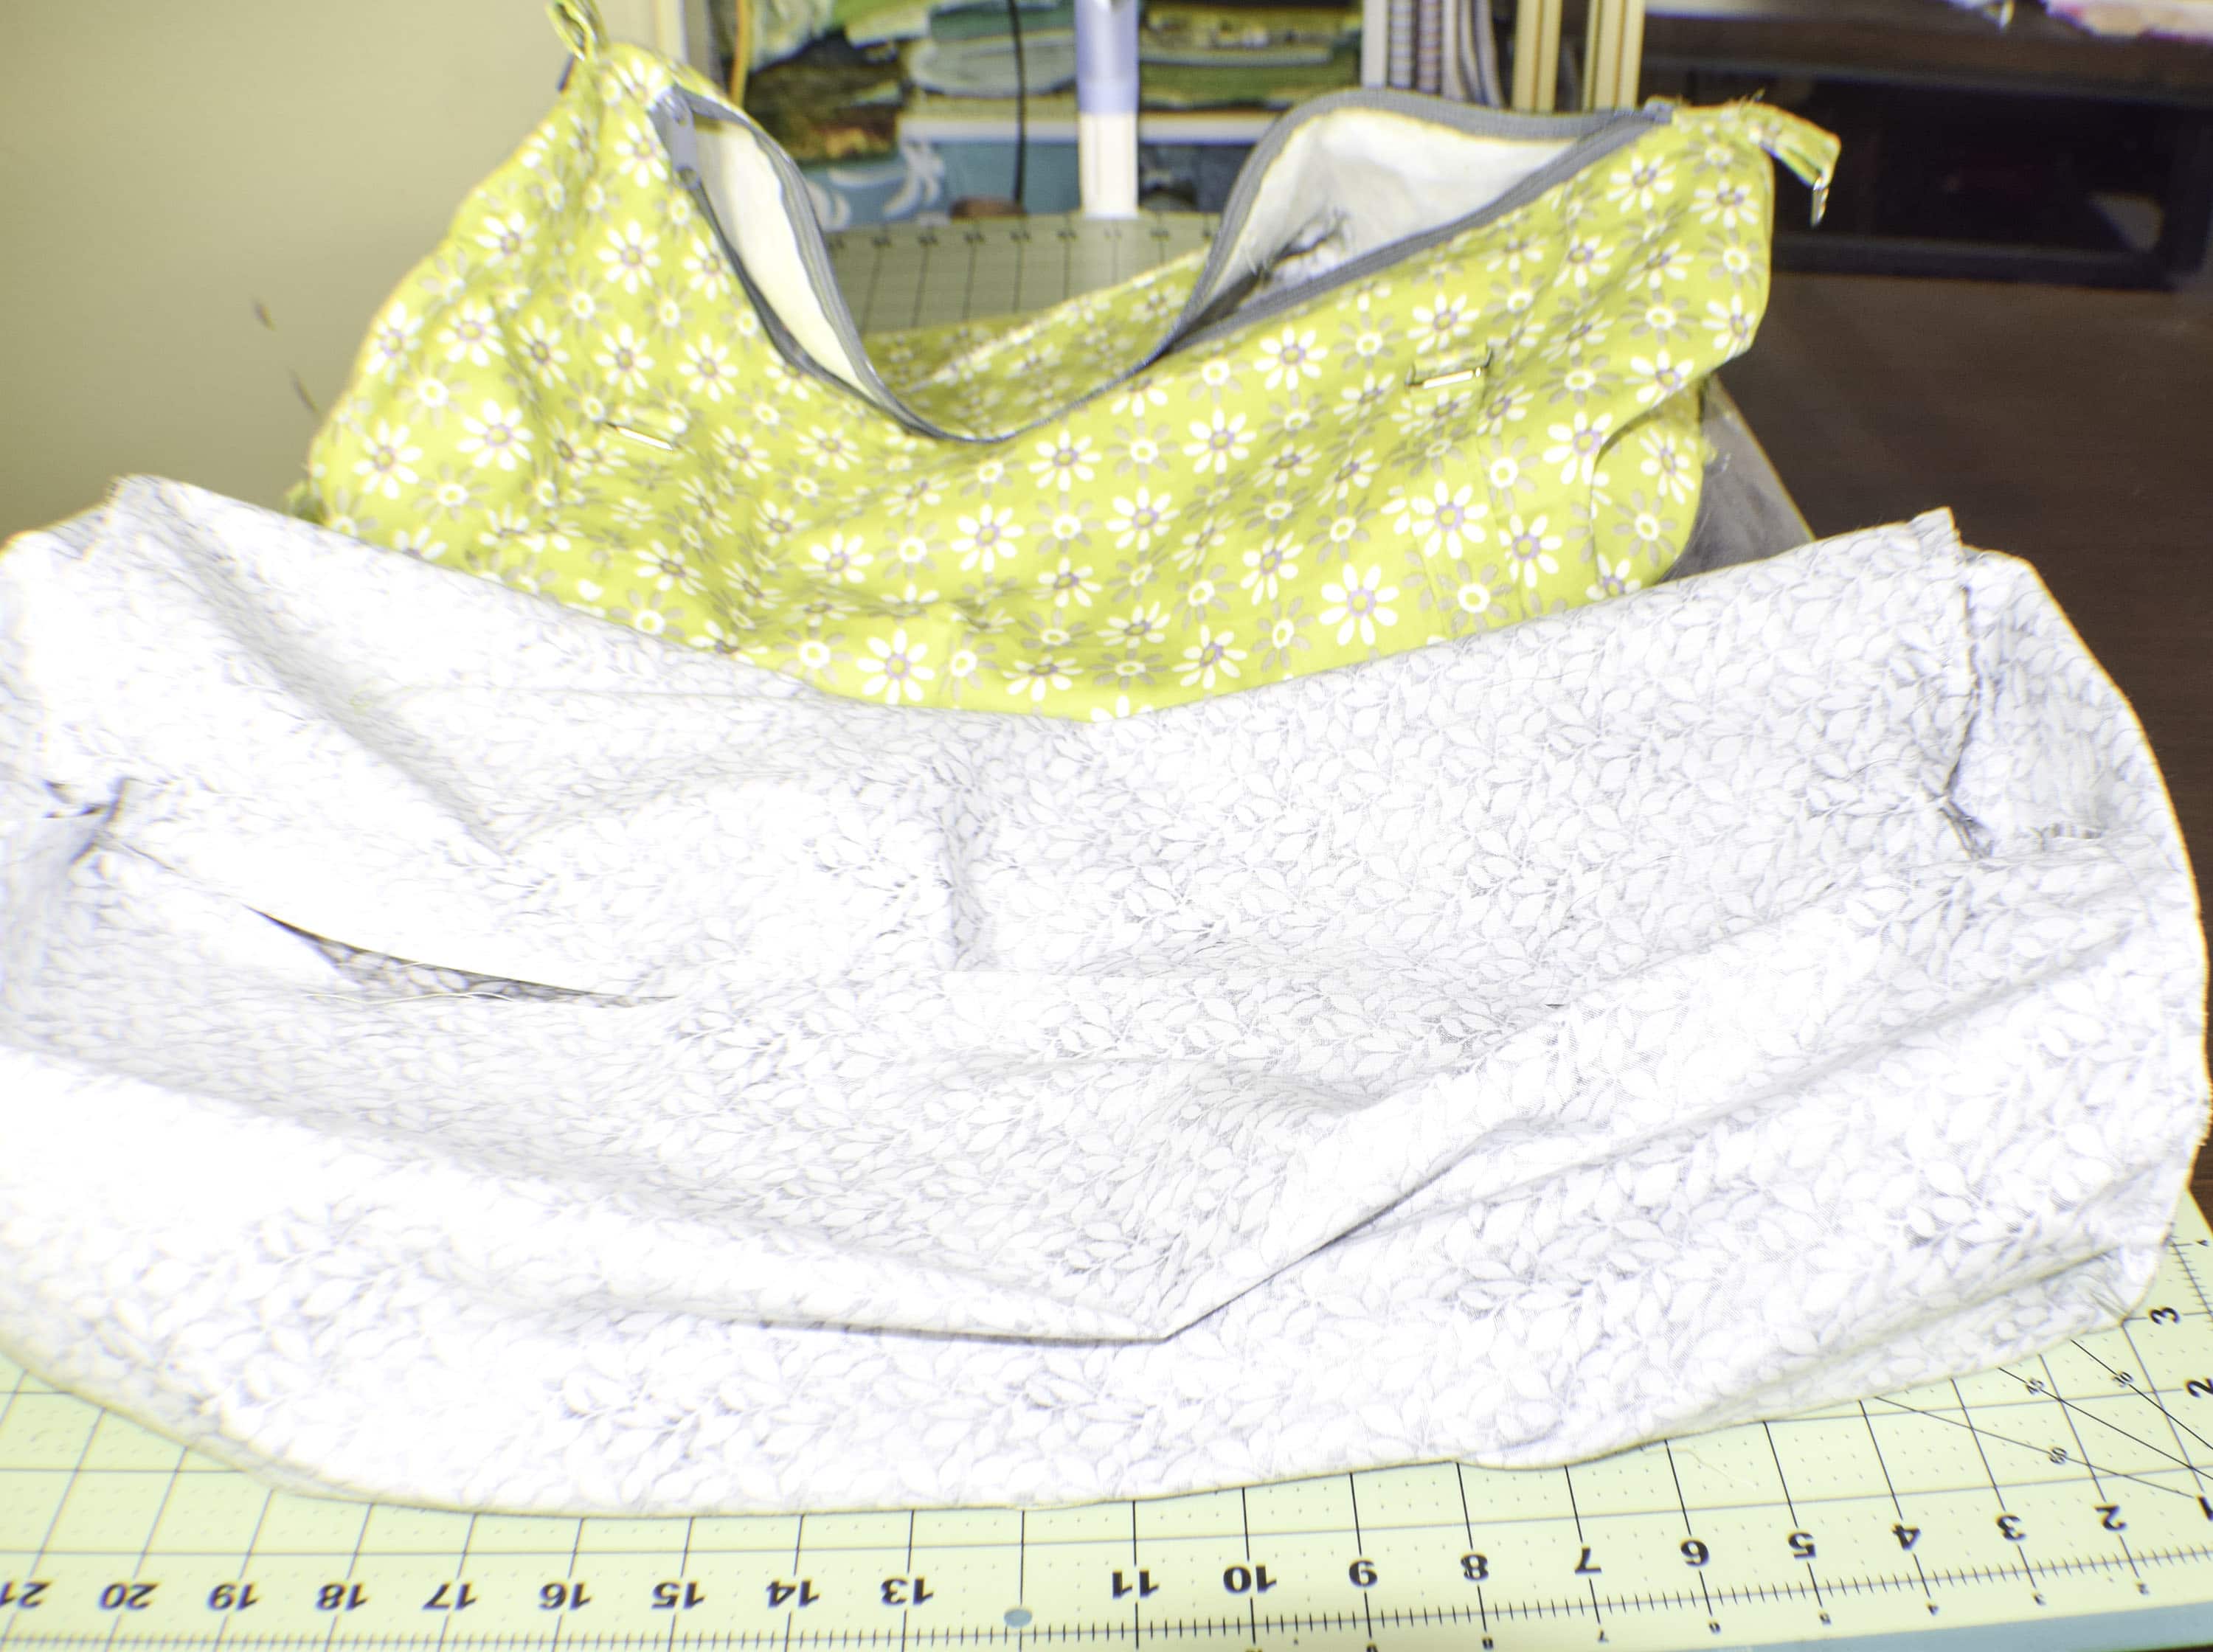
Create the lining in the same way that you created the outer bag except without a zipper or the strap tabs. In the long space where the zipper would be fold the edges under 1/2″ and press. This is a drop in lining so that all of the raw edges are concealed. You should now have an outer bag and a lining bag without a zipper.
Step 15: How to Make a Custom Gym Bag
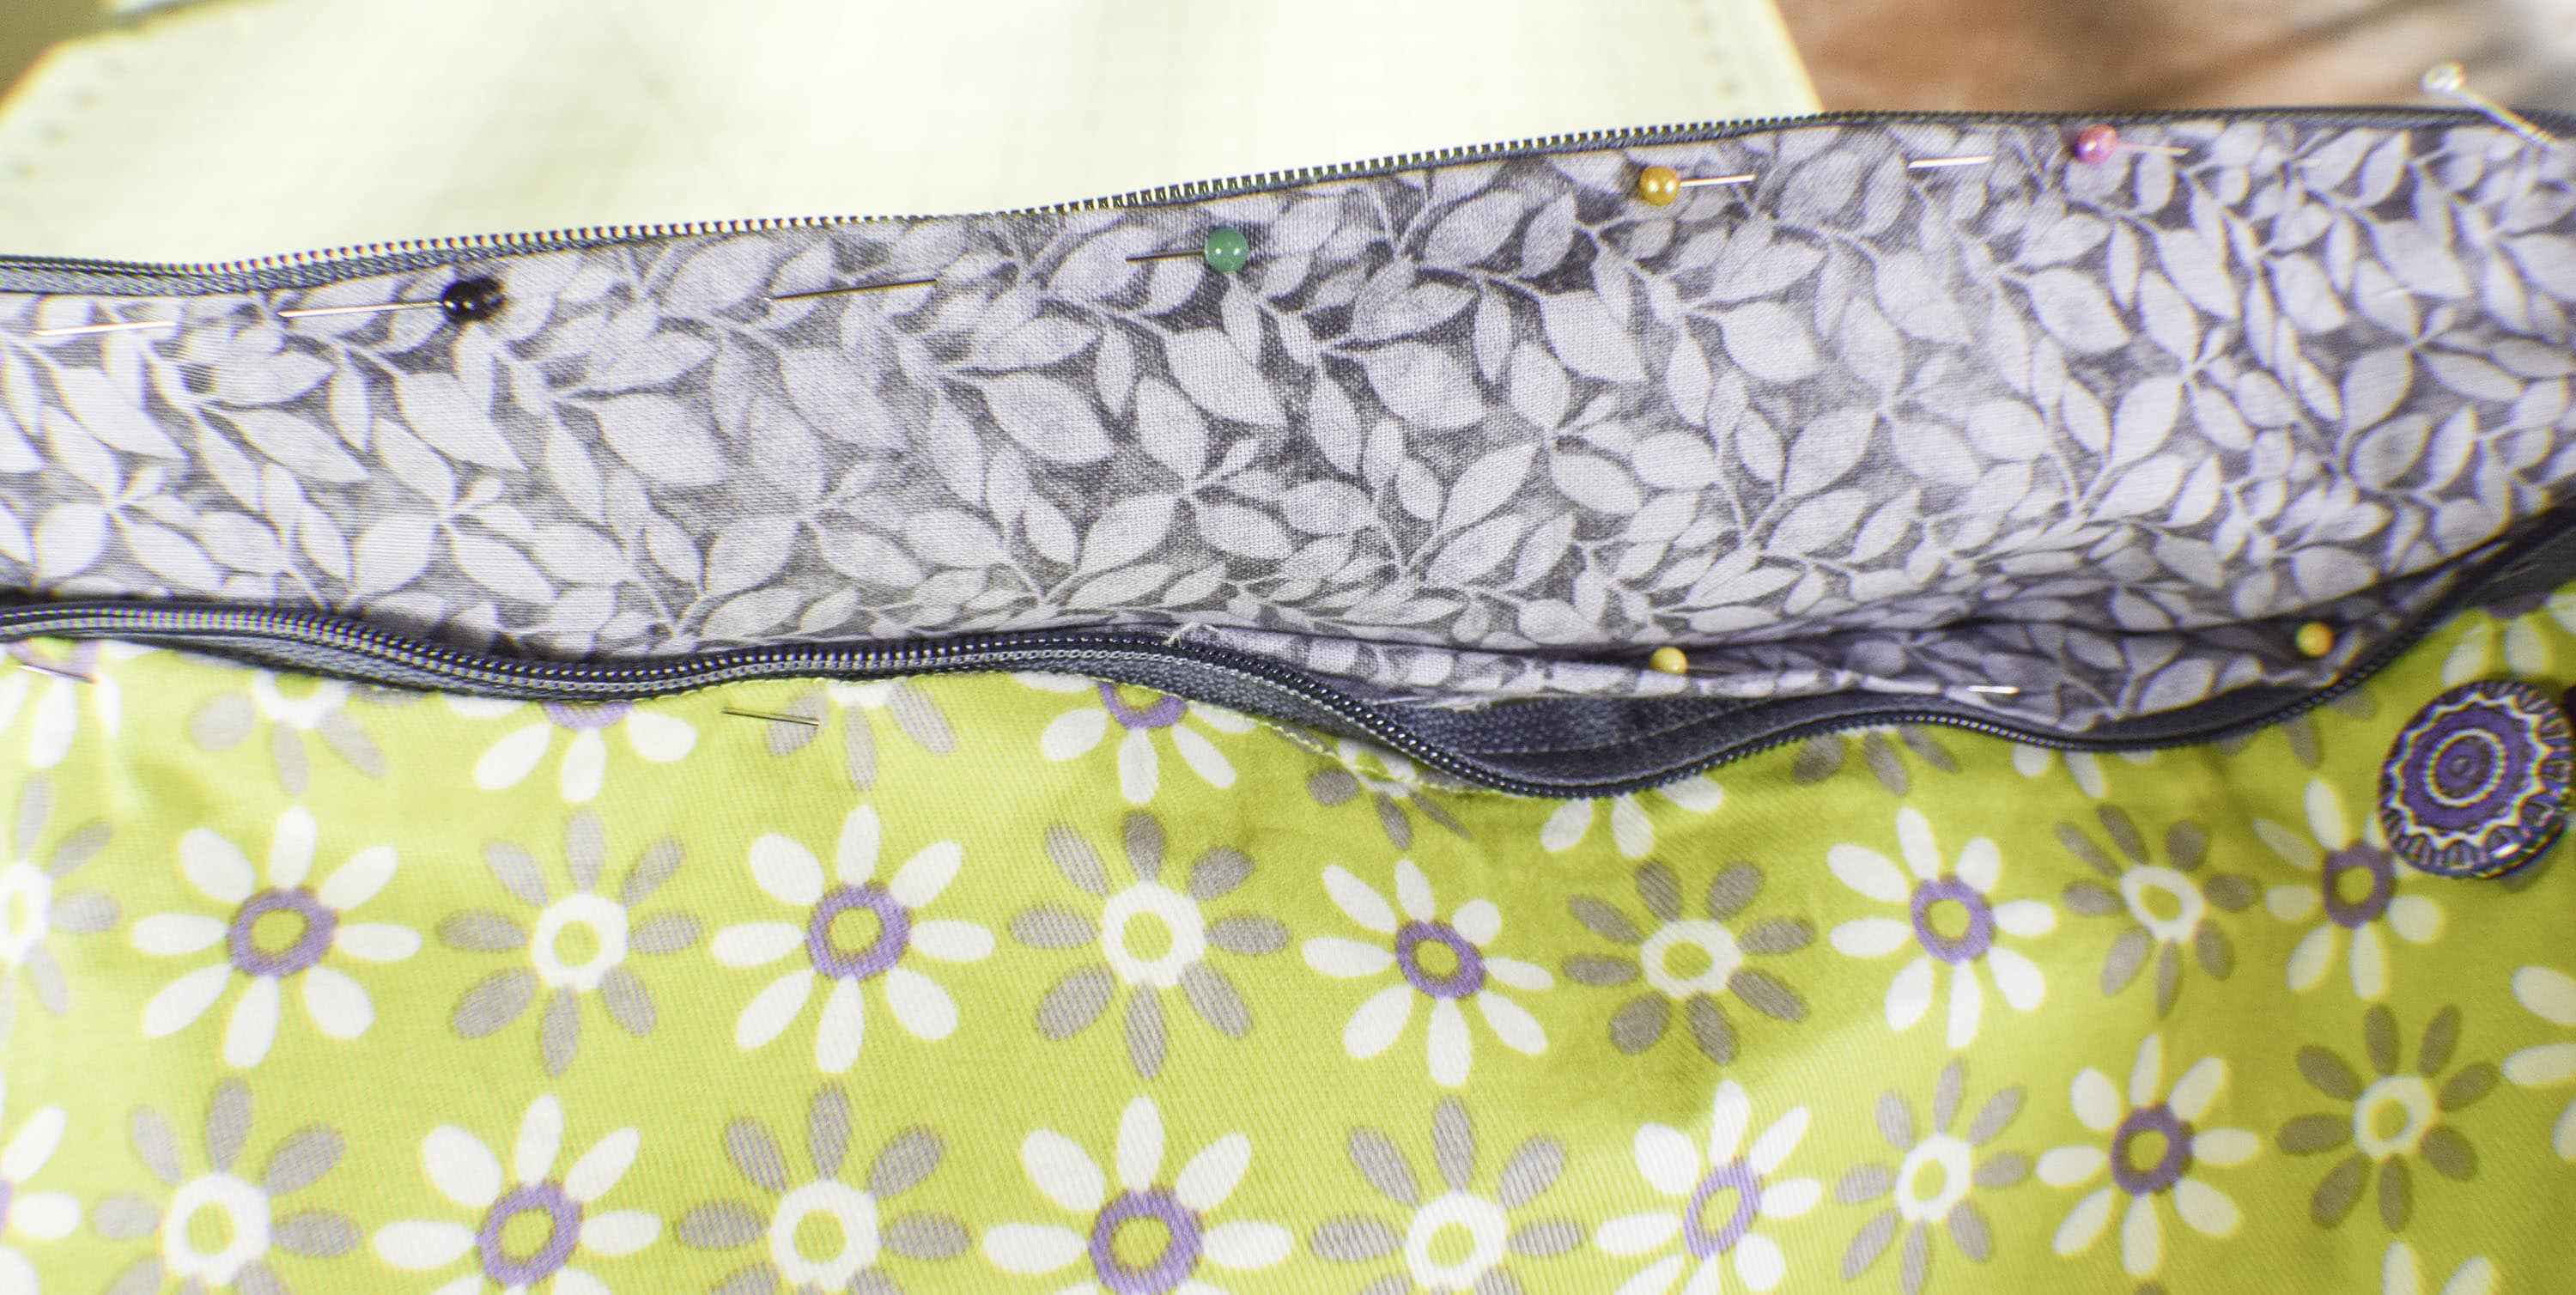
Place the lining in the bag wrong sides together and pin the long pressed edge to the zipper. Sew the lining to the zipper following the original stitch line and making sure that the top thread matches the exterior and the bobbin thread matches the lining.
Step 16: How to Make a Custom Gym Bag
Tack the lining ends to the outer bag ends for nice clean fit. You have now completed the lined bag.
Step 17: How to Make a Custom Gym Bag
Make the straps in the same way that you made the ring tabs. You will have two straps.
Step 18: How to Make a Custom Gym Bag
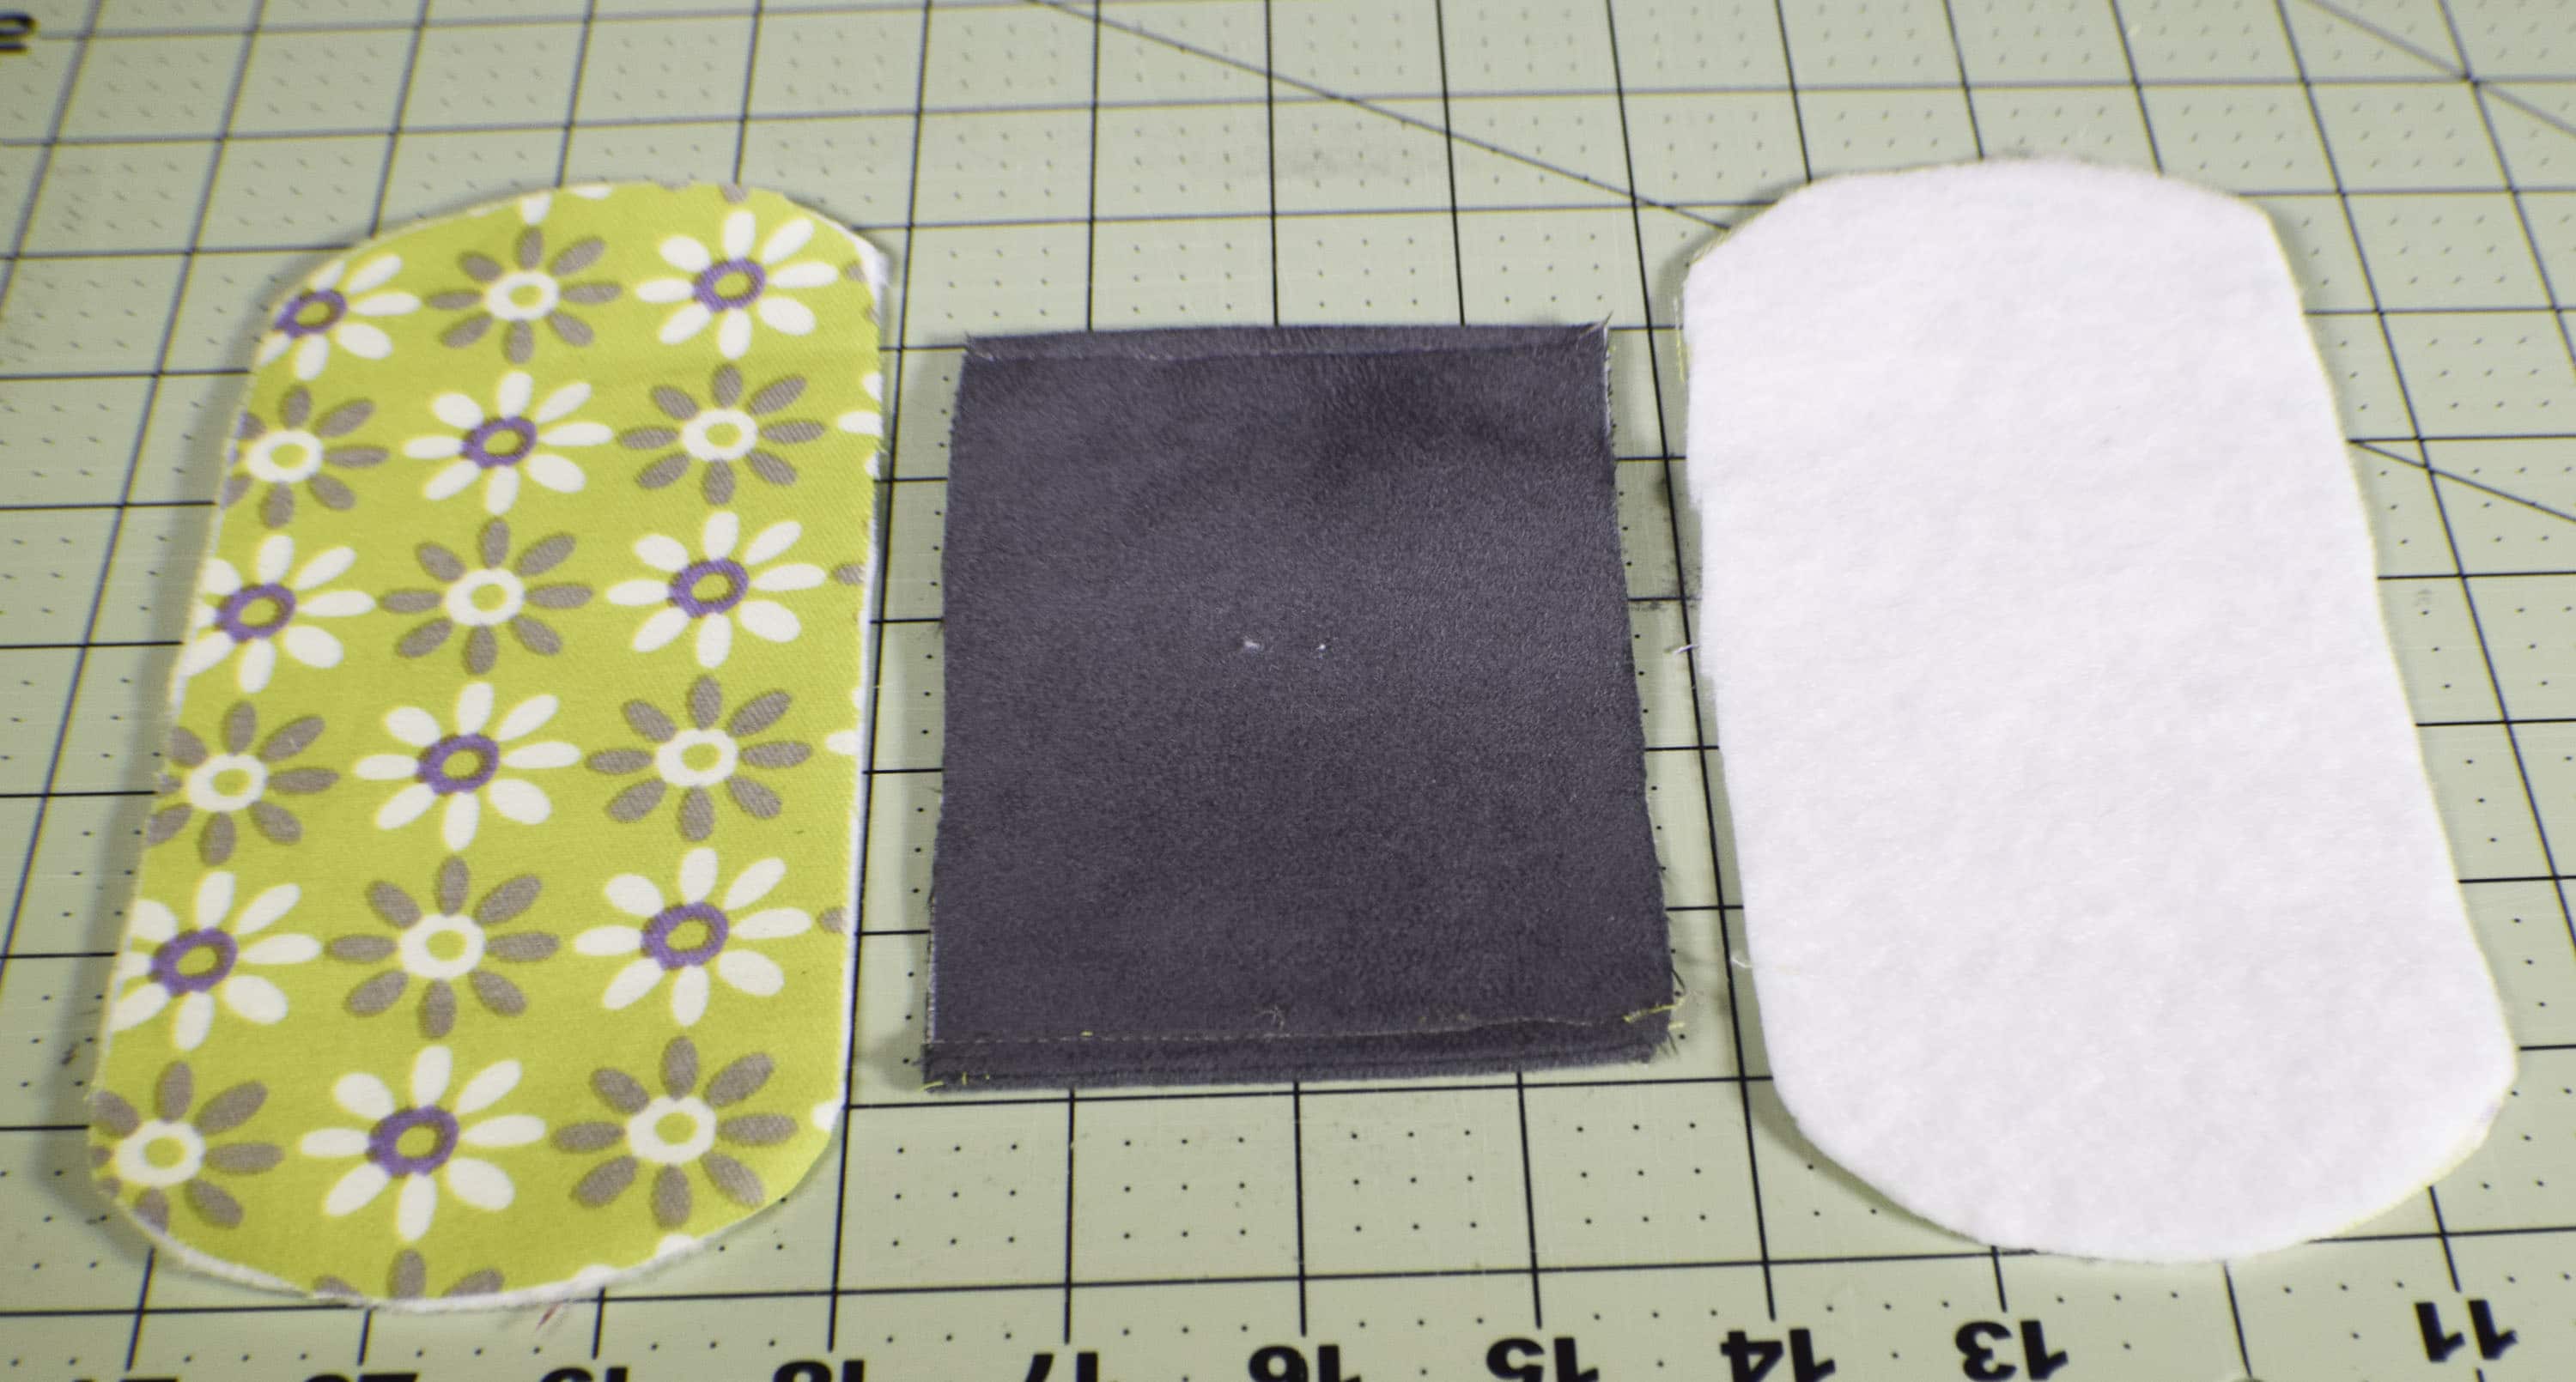
Make the Strap Handle. Print out the pattern. Fuse the fleece to the wrong side of the faux suede. Place the main fabric and the faux suede right sides together and sew all the way around leaving an opening for turning. Turn the piece right sides out through the opening. Top stitch around the entire piece enclosing the opening as you go.

Step 19: How to Make a Custom Gym Bag
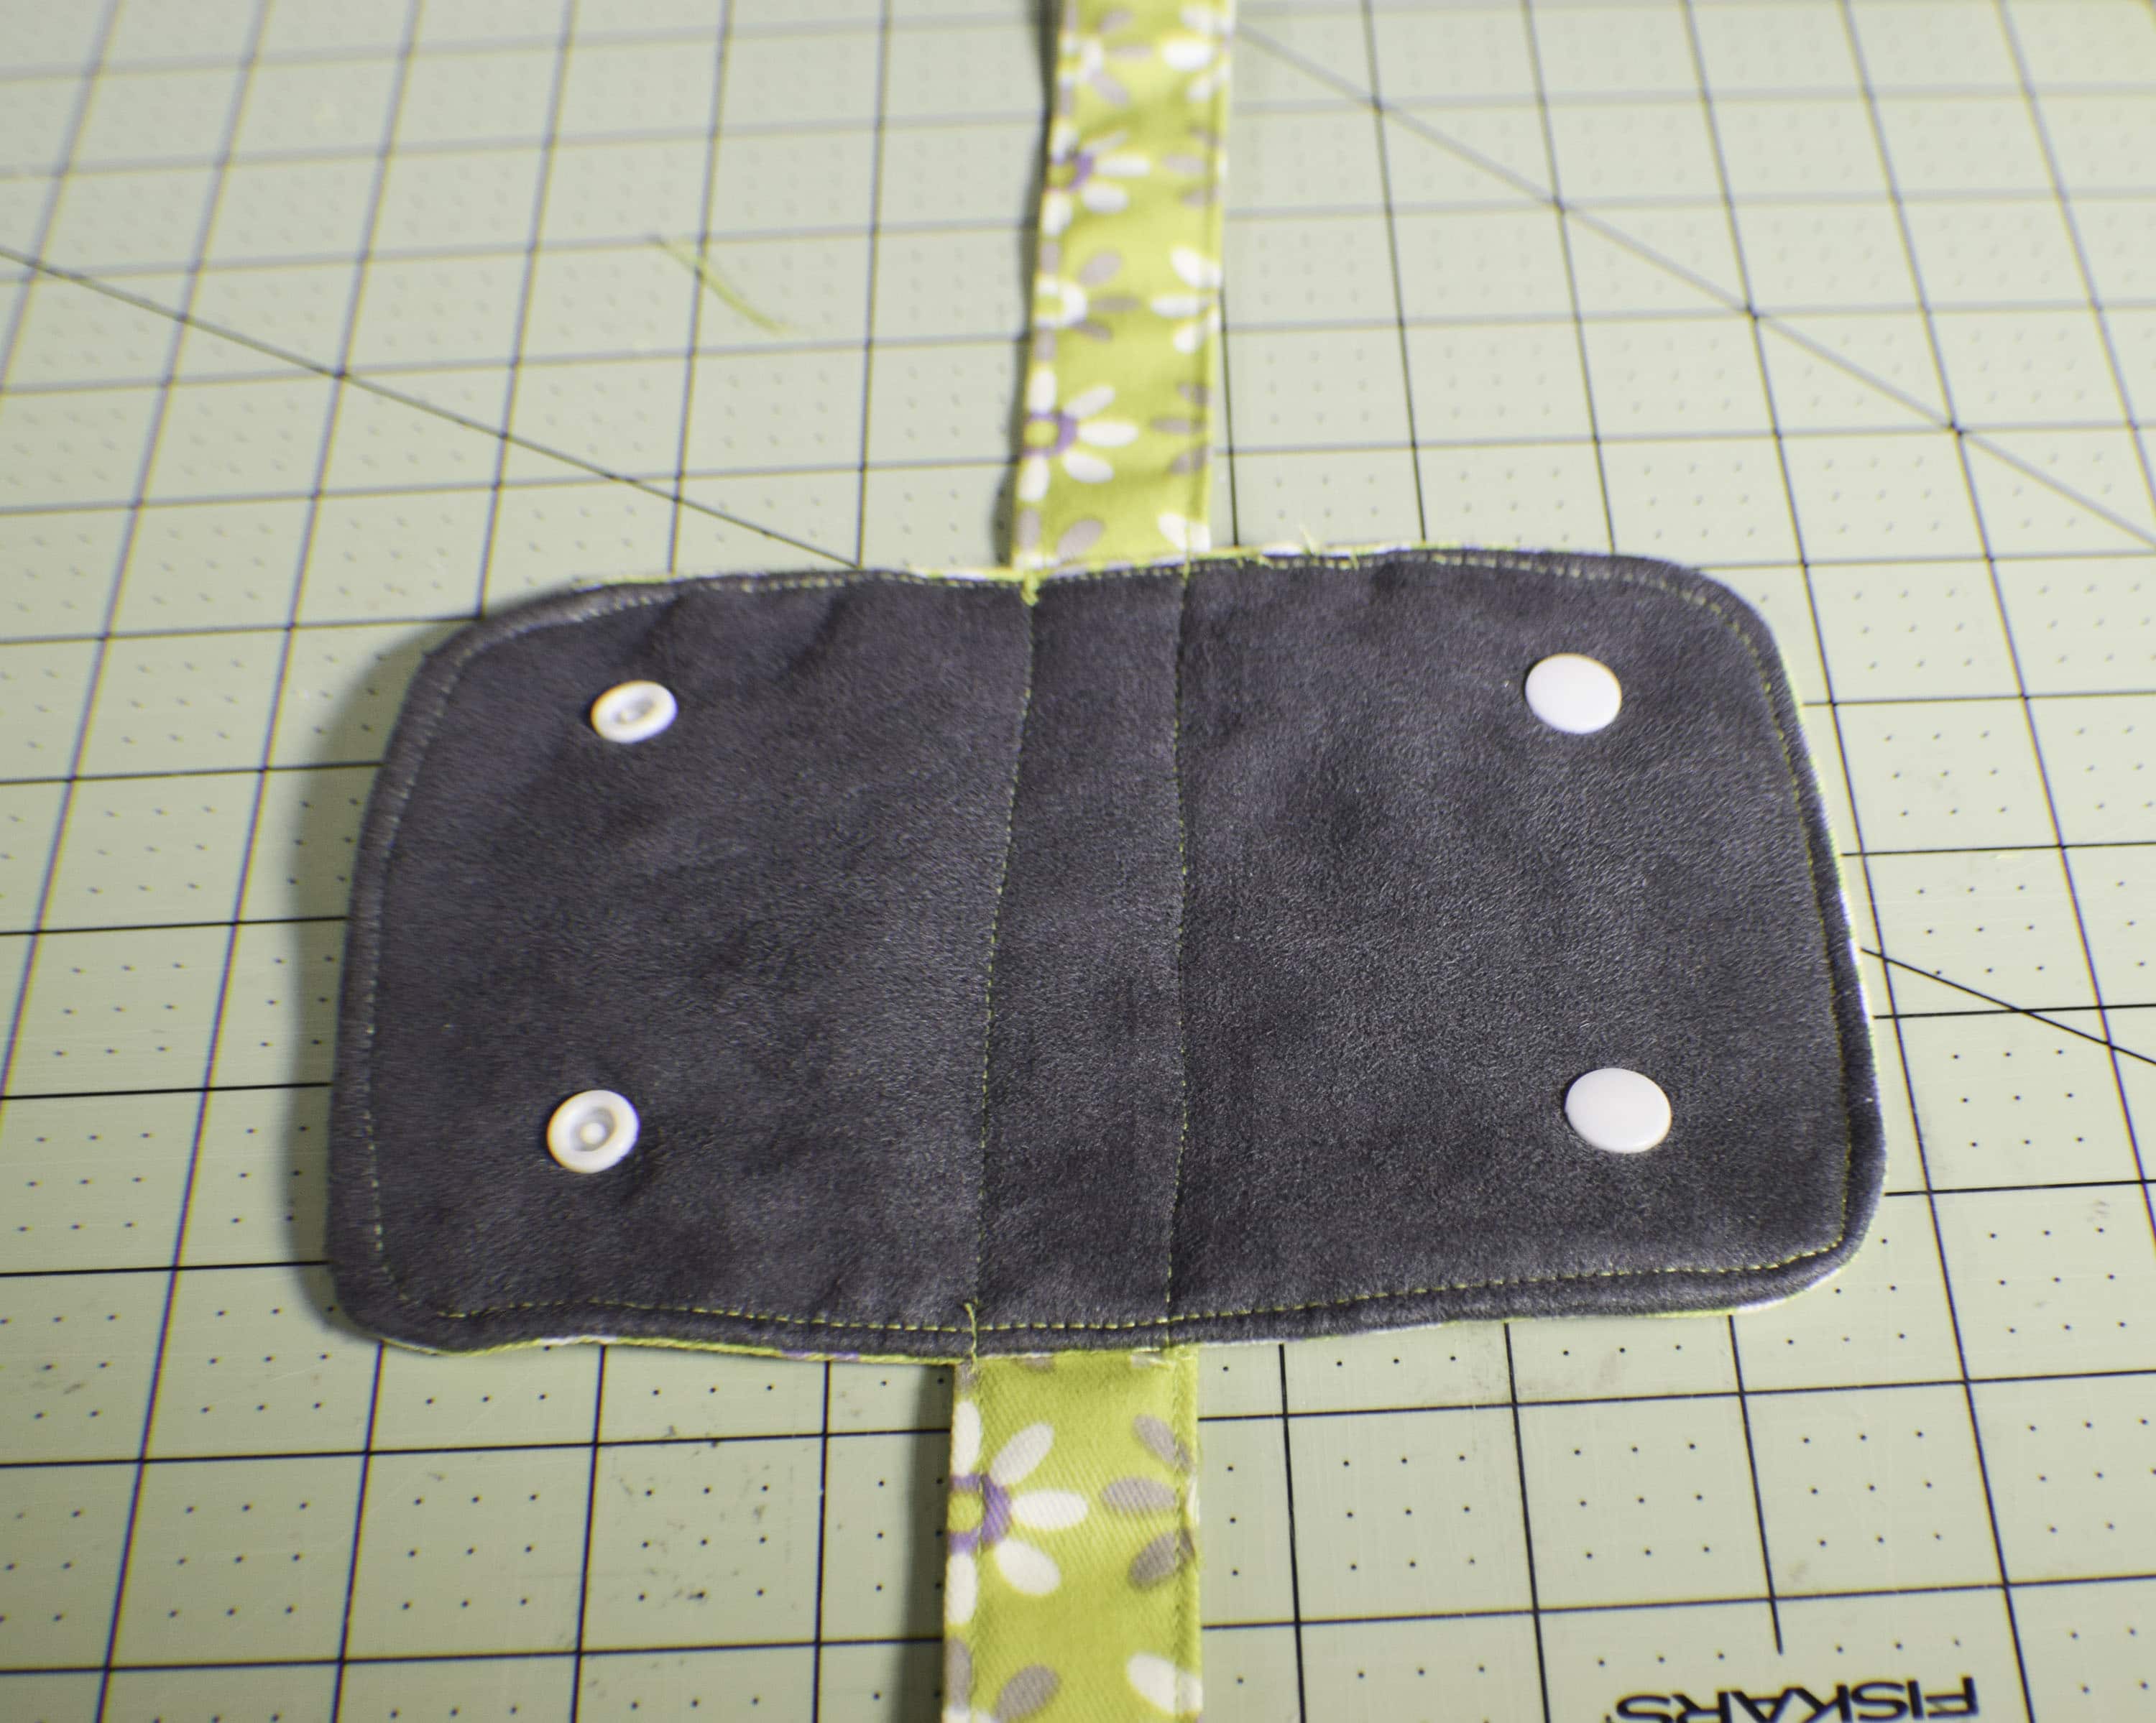
Add the Kam snaps. Measure down 1″ from the short edge and 1″ in from the side and place one of the Kam snaps. Repeat for the other side. Insert the corresponding Kam snap Pieces to the other end of the strap handle so that the handle overlaps. This will enclose the handle straps together for better carrying.
Step 20: How to Make a Custom Gym Bag
Sew the strap handle to one of the handles. Take one of the handles and center it in the middle of the long side of the strap handle and in between the Kam snaps. Sew along the top stitching of the handle to secure the strap handle to the handle.
Step 21: How to Make a Custom Gym Bag
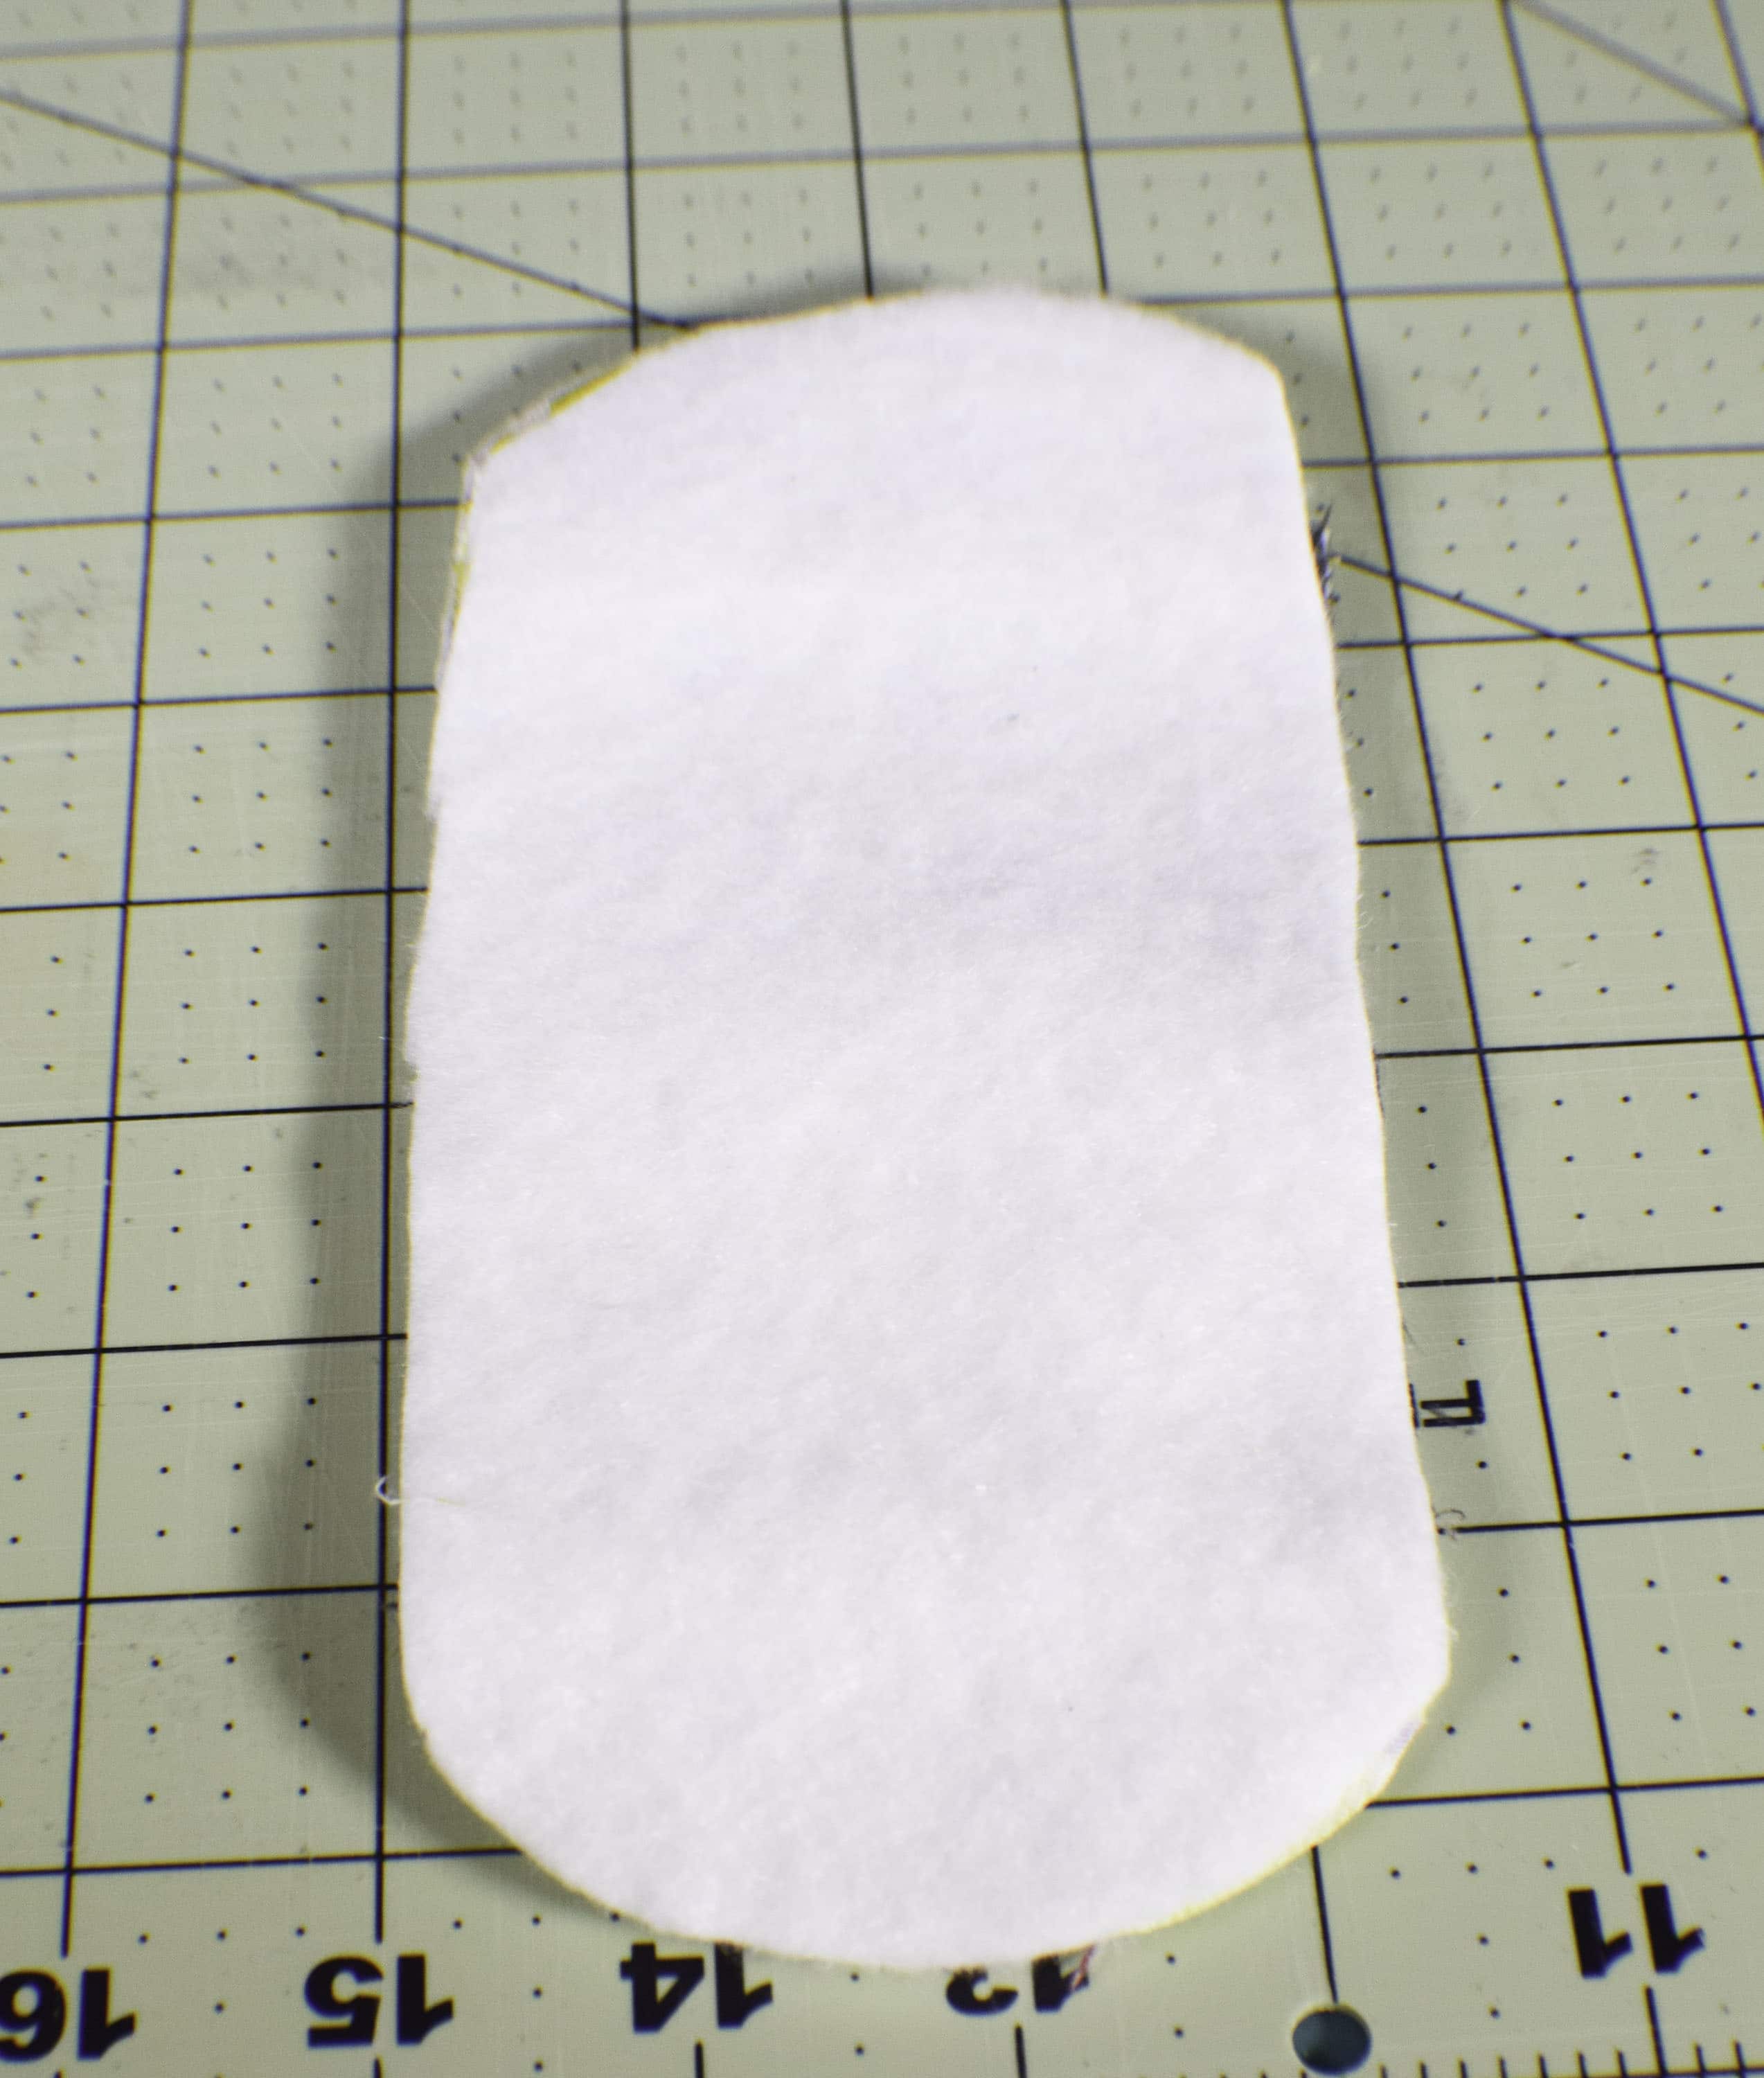
Create the Strap Shoulder Pad. Print out the pattern pieces. Place the two top pieces right sides together. Sew the short ends together using a 1/4″ seam allowance. Trim the seam allowance and turn right side out and press. Top stitch along the short ends. Take the bottom piece and fuse both pieces with fusible fleece.
Step 22: How to Make a Custom Gym Bag
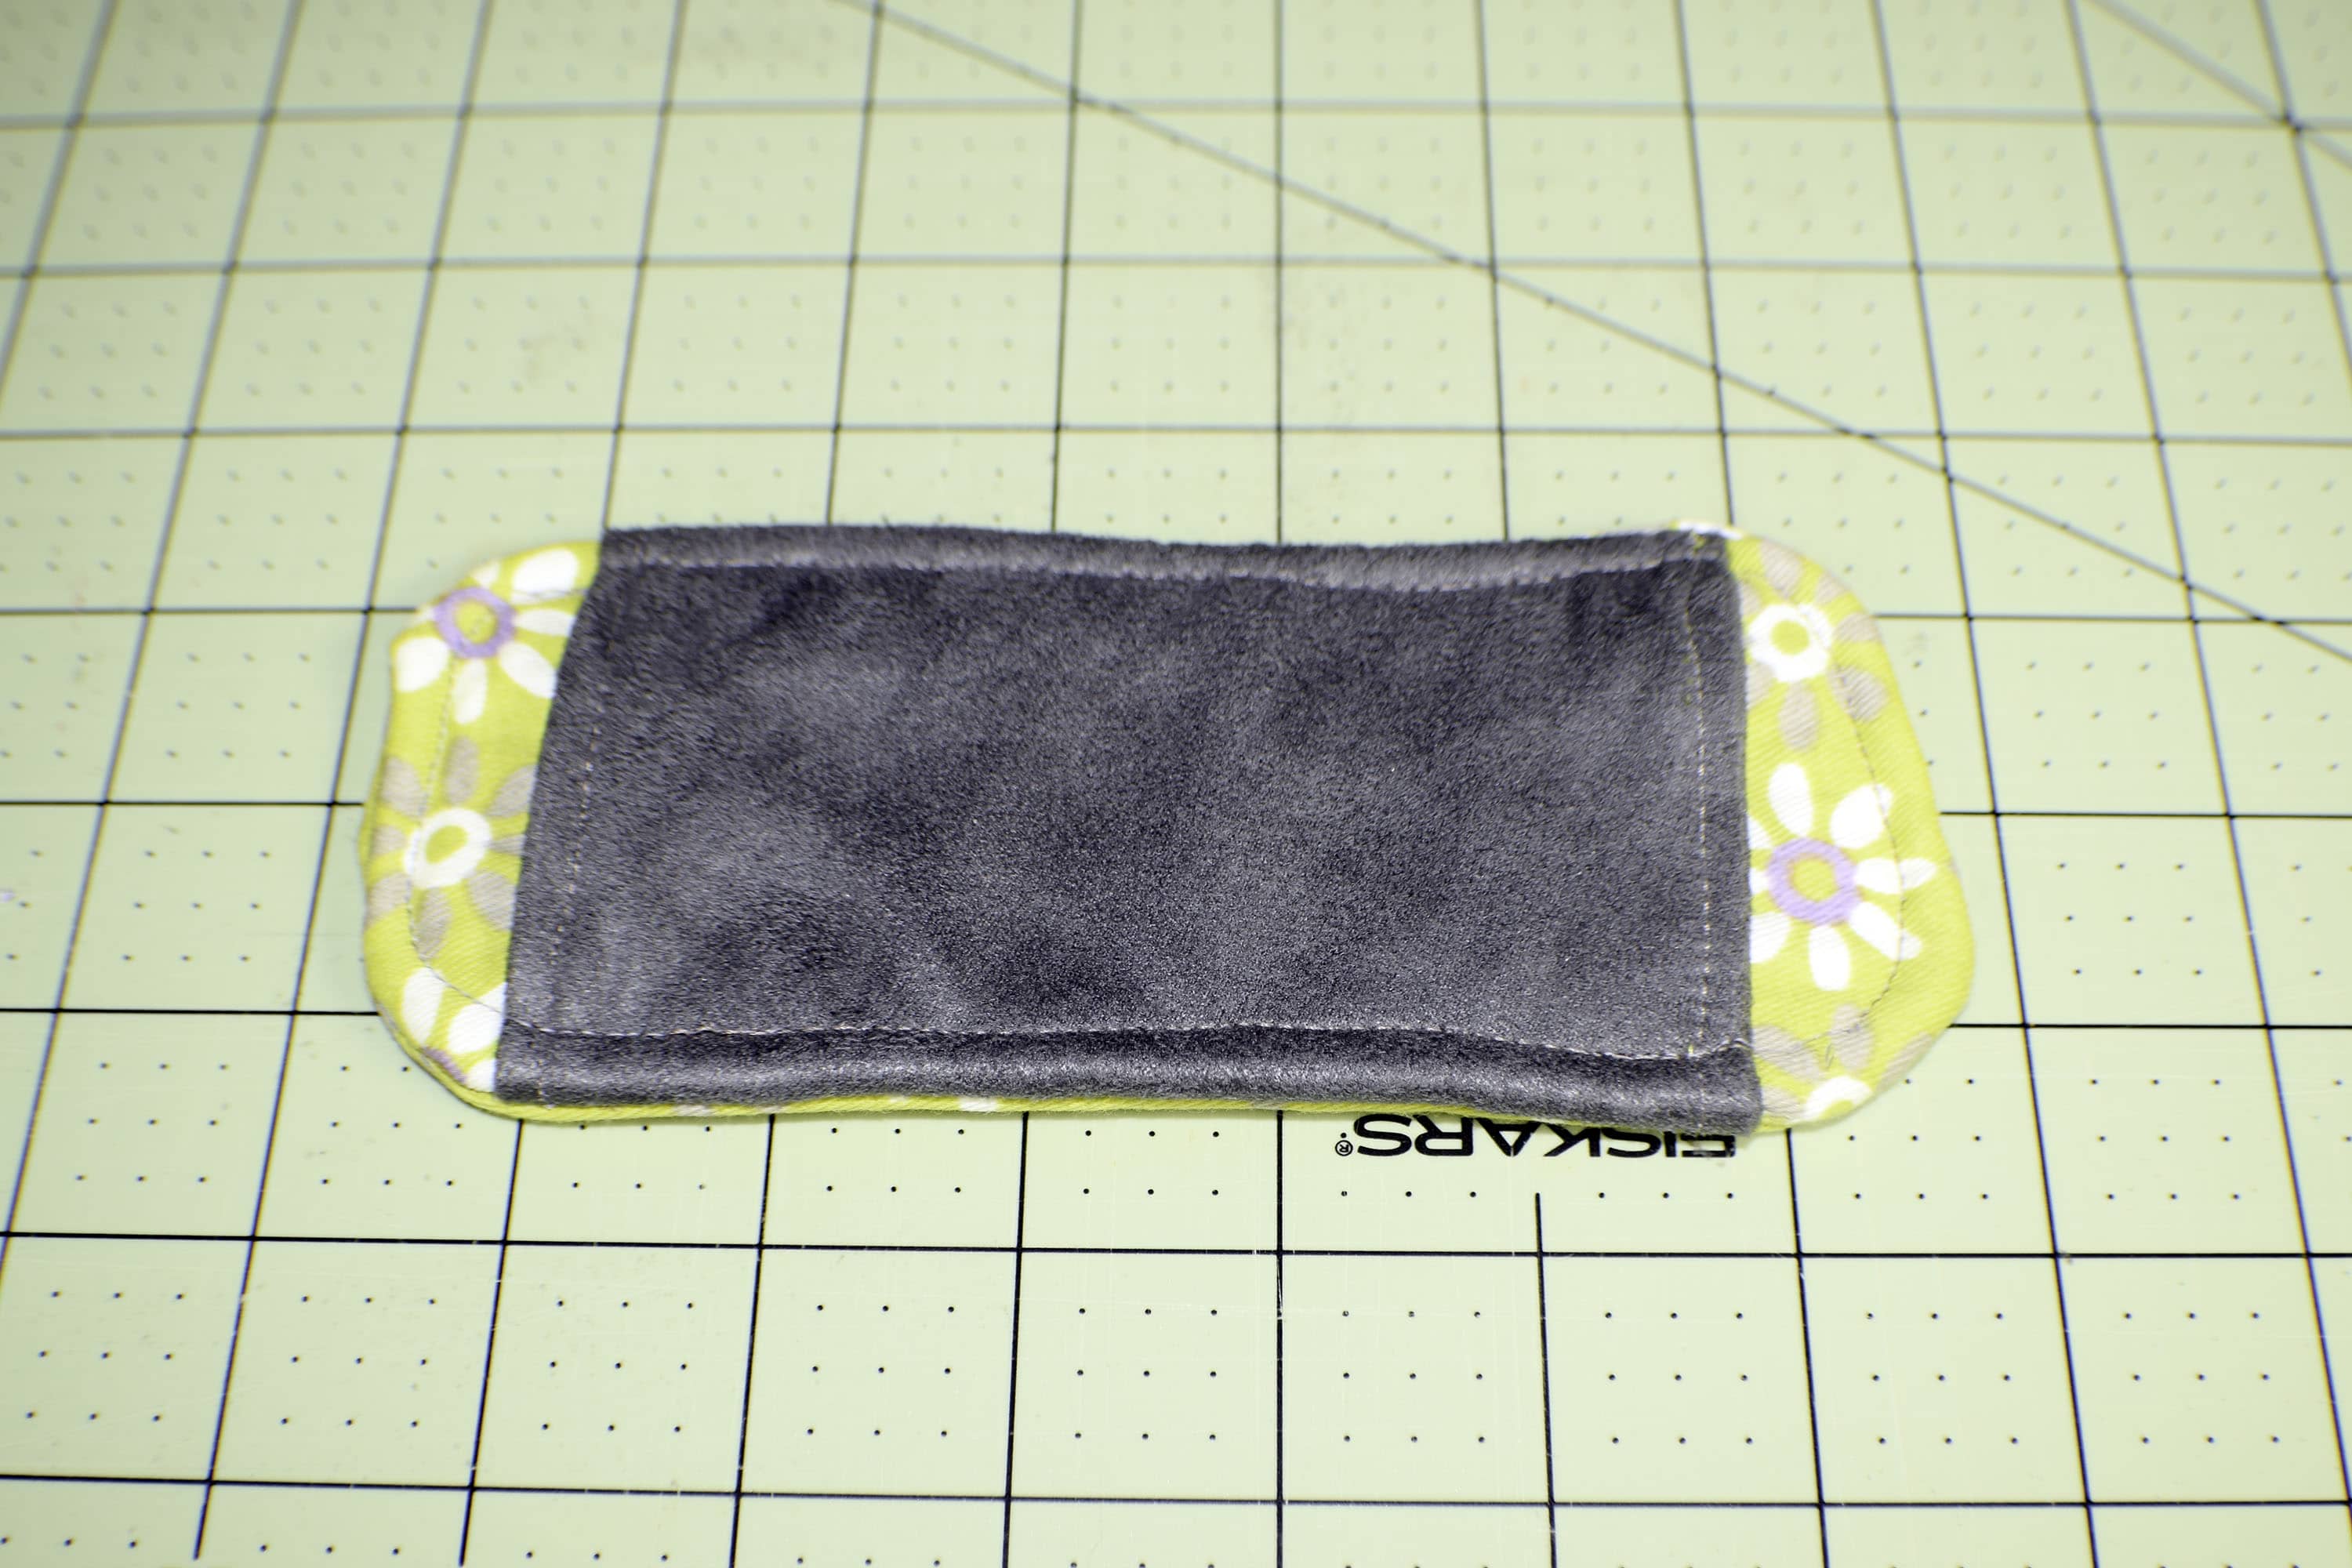
Lay one of the bottom pieces right side up. Place the top piece on top of the bottom piece in the center. Place the second bottom piece on top of the two other pieces right sides together. Sew around the perimeter through all layers leaving an opening for turning. Turn the piece right sides out and press. Top stitch all the way around the piece. You have now completed the shoulder pad.
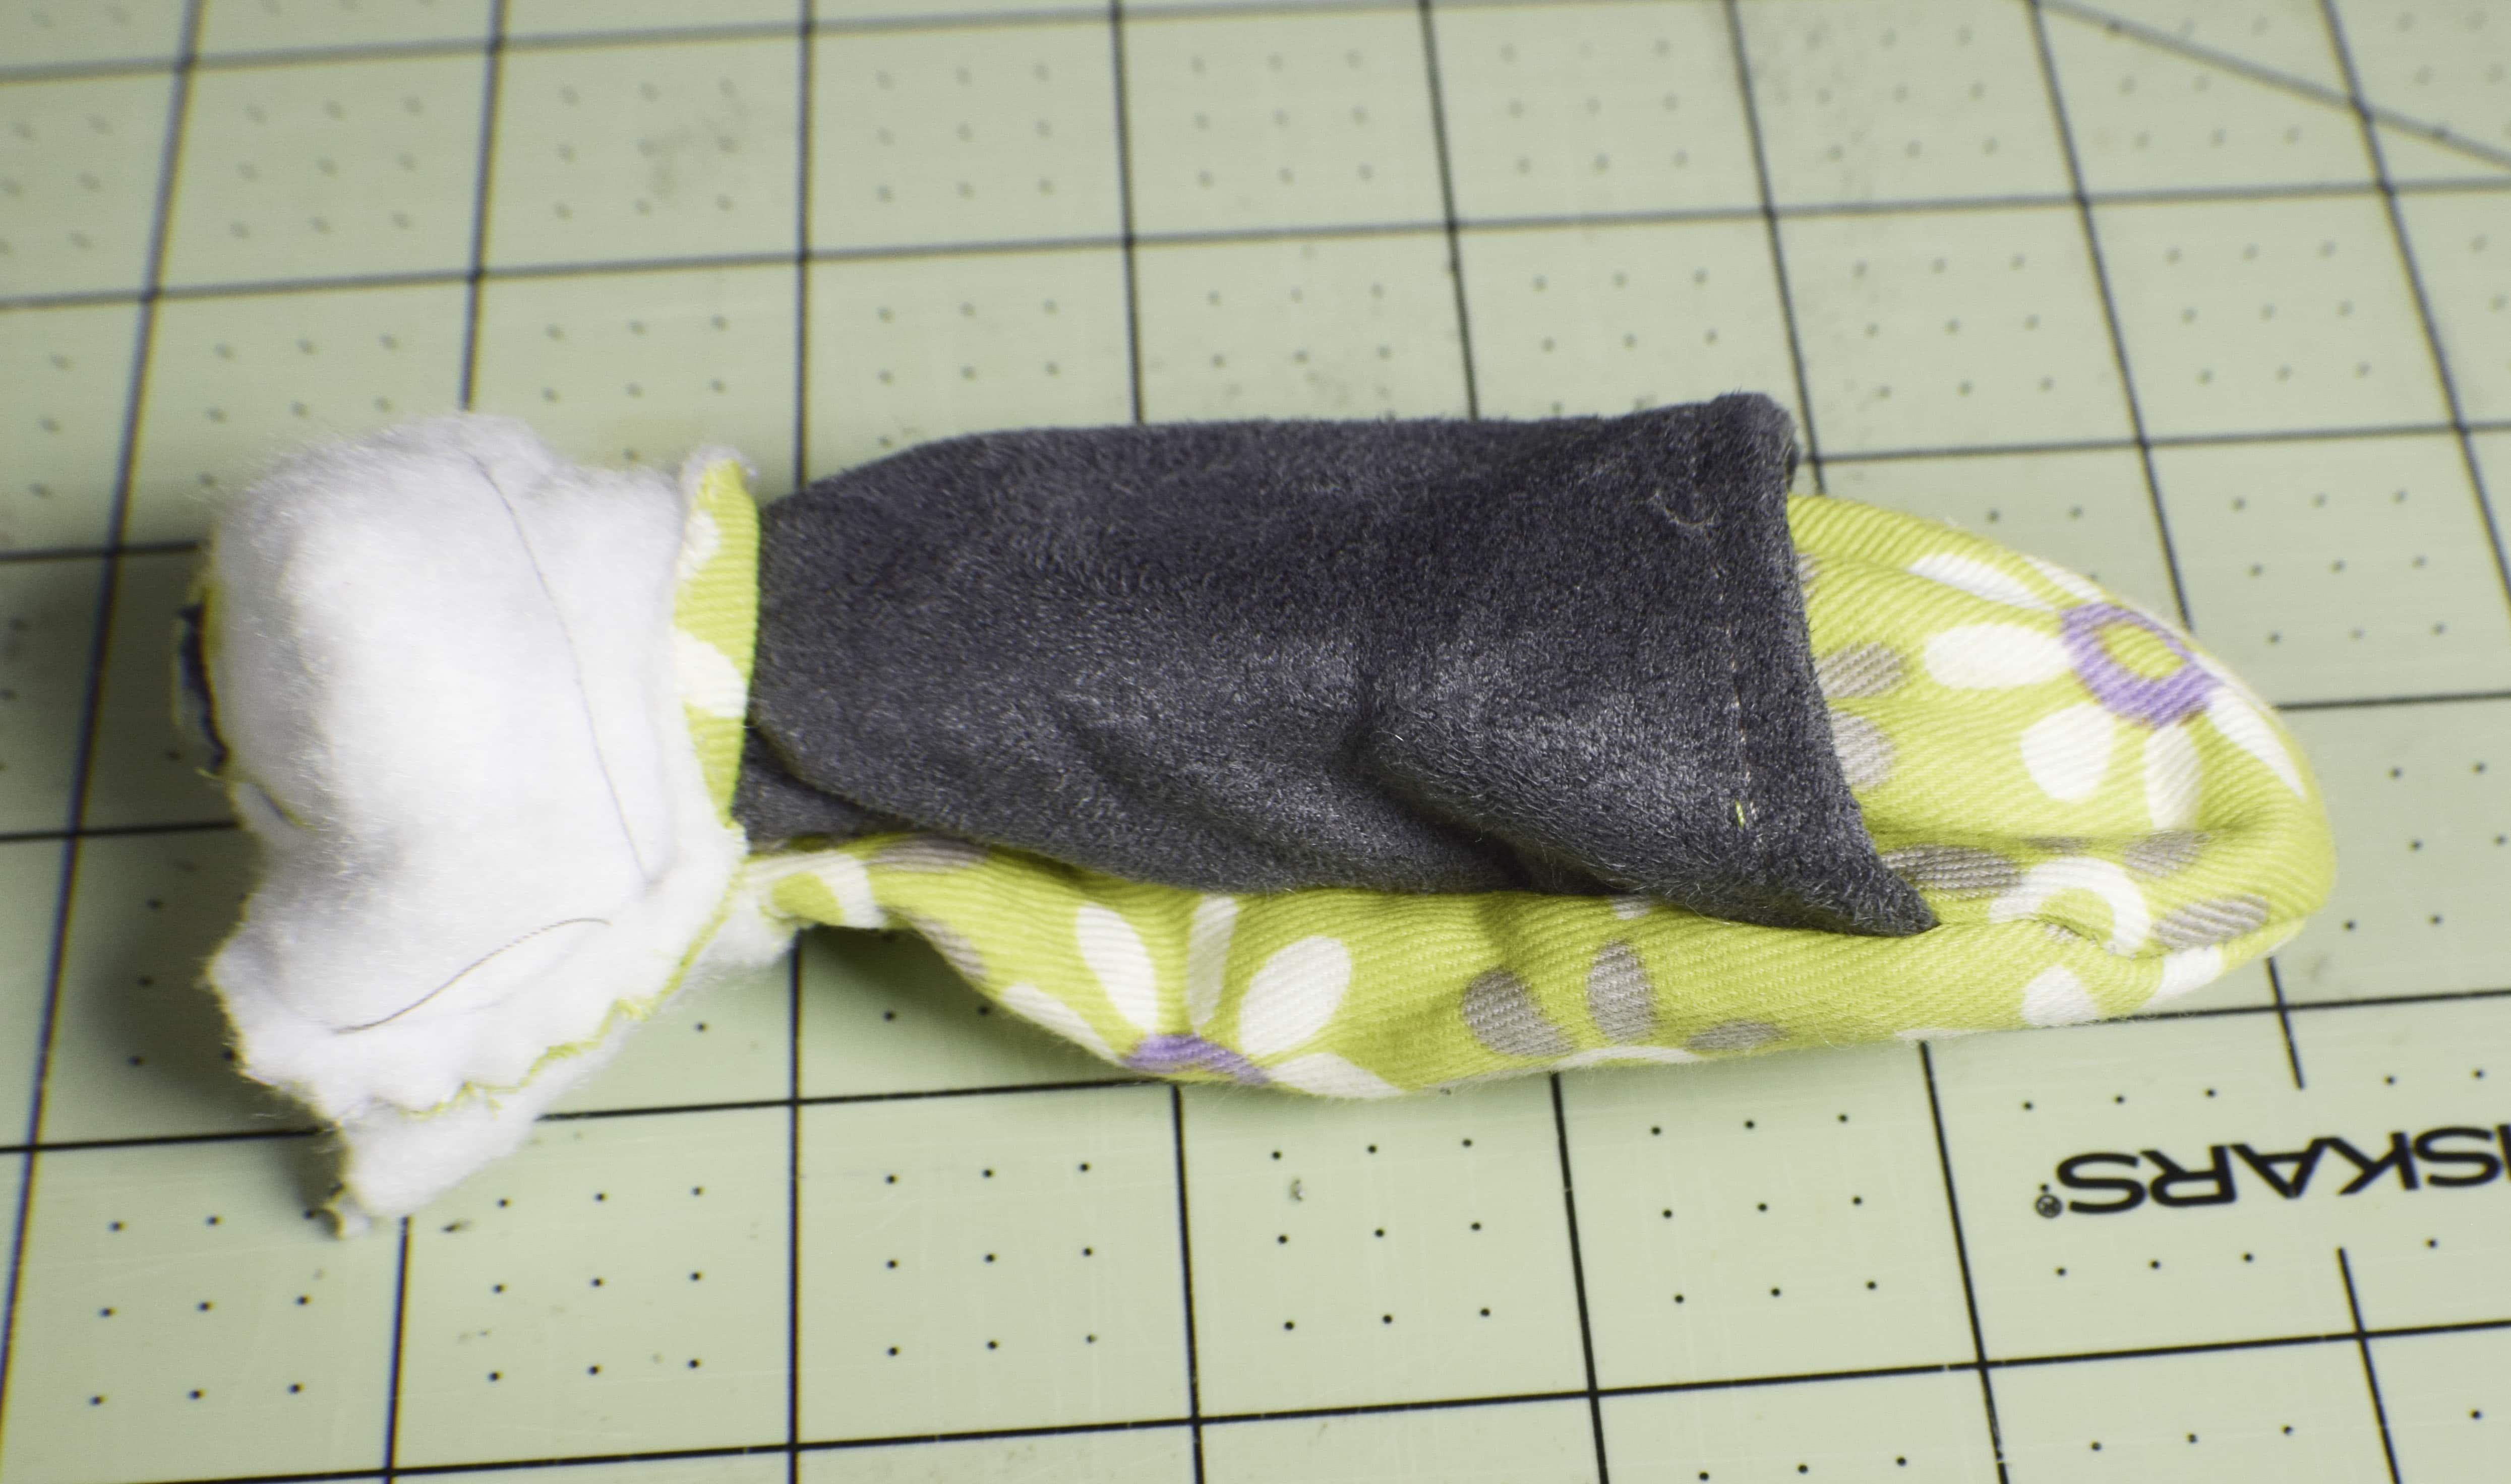
Step 23: How to Make a Custom Gym Bag
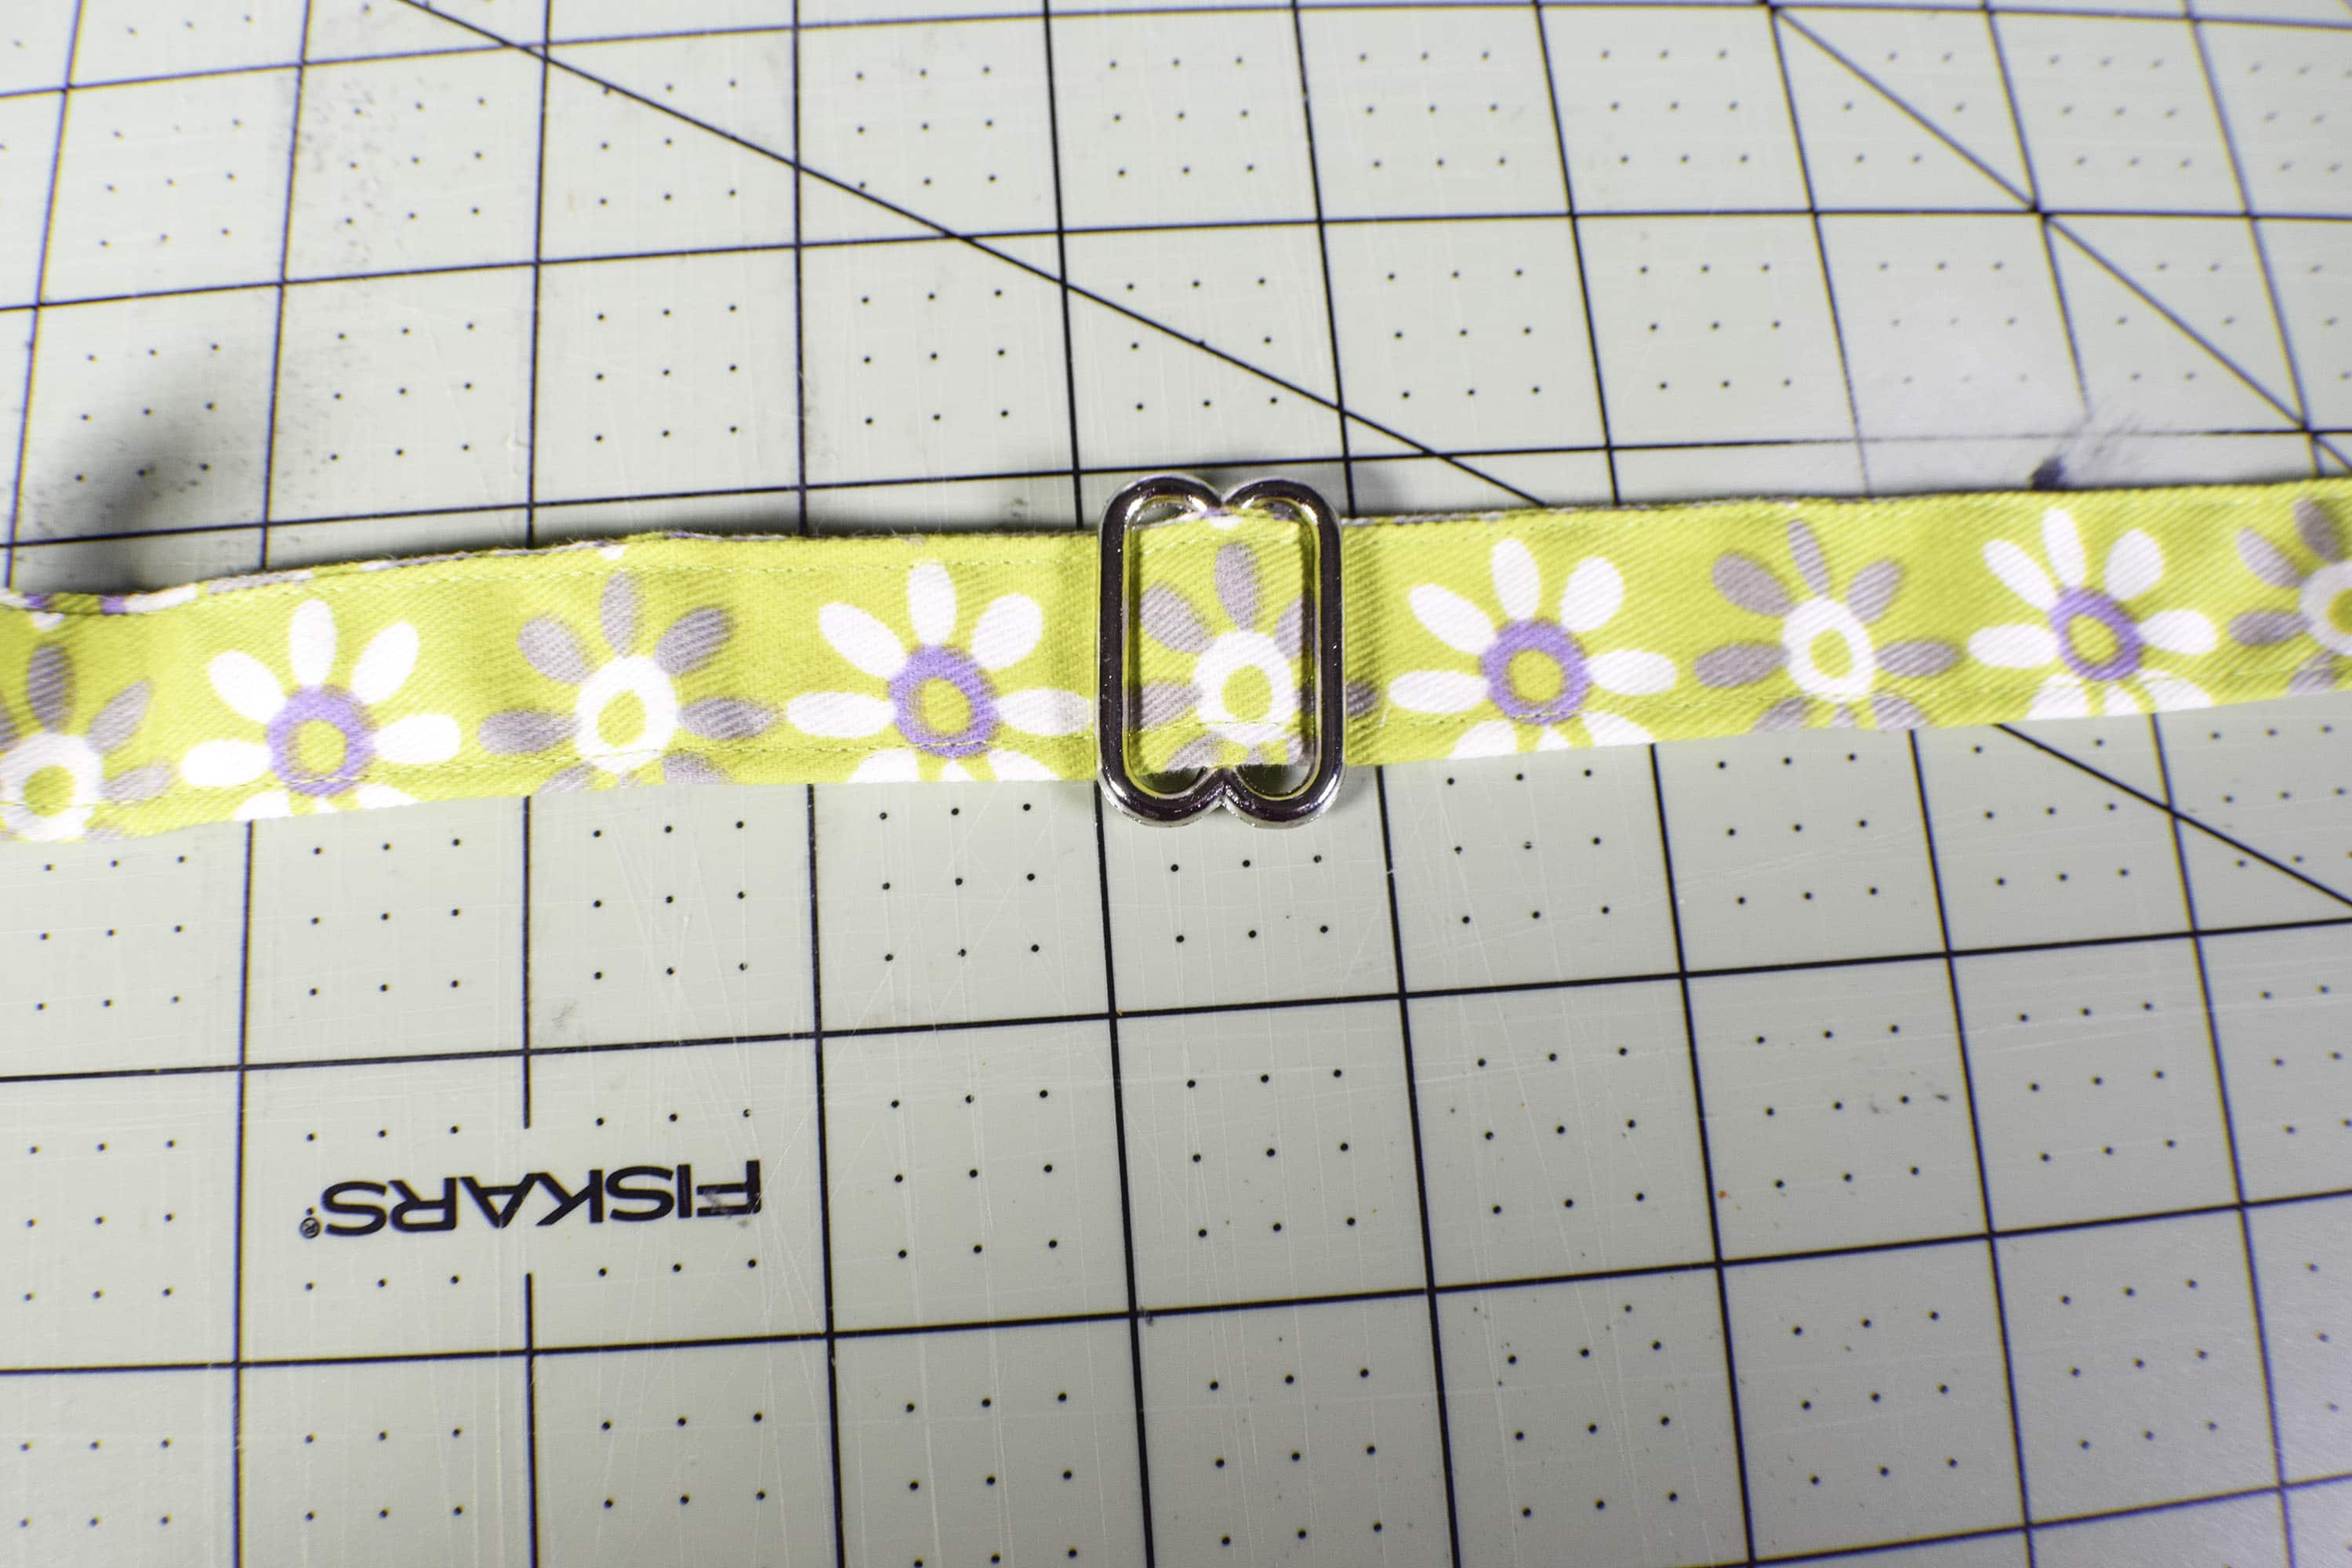
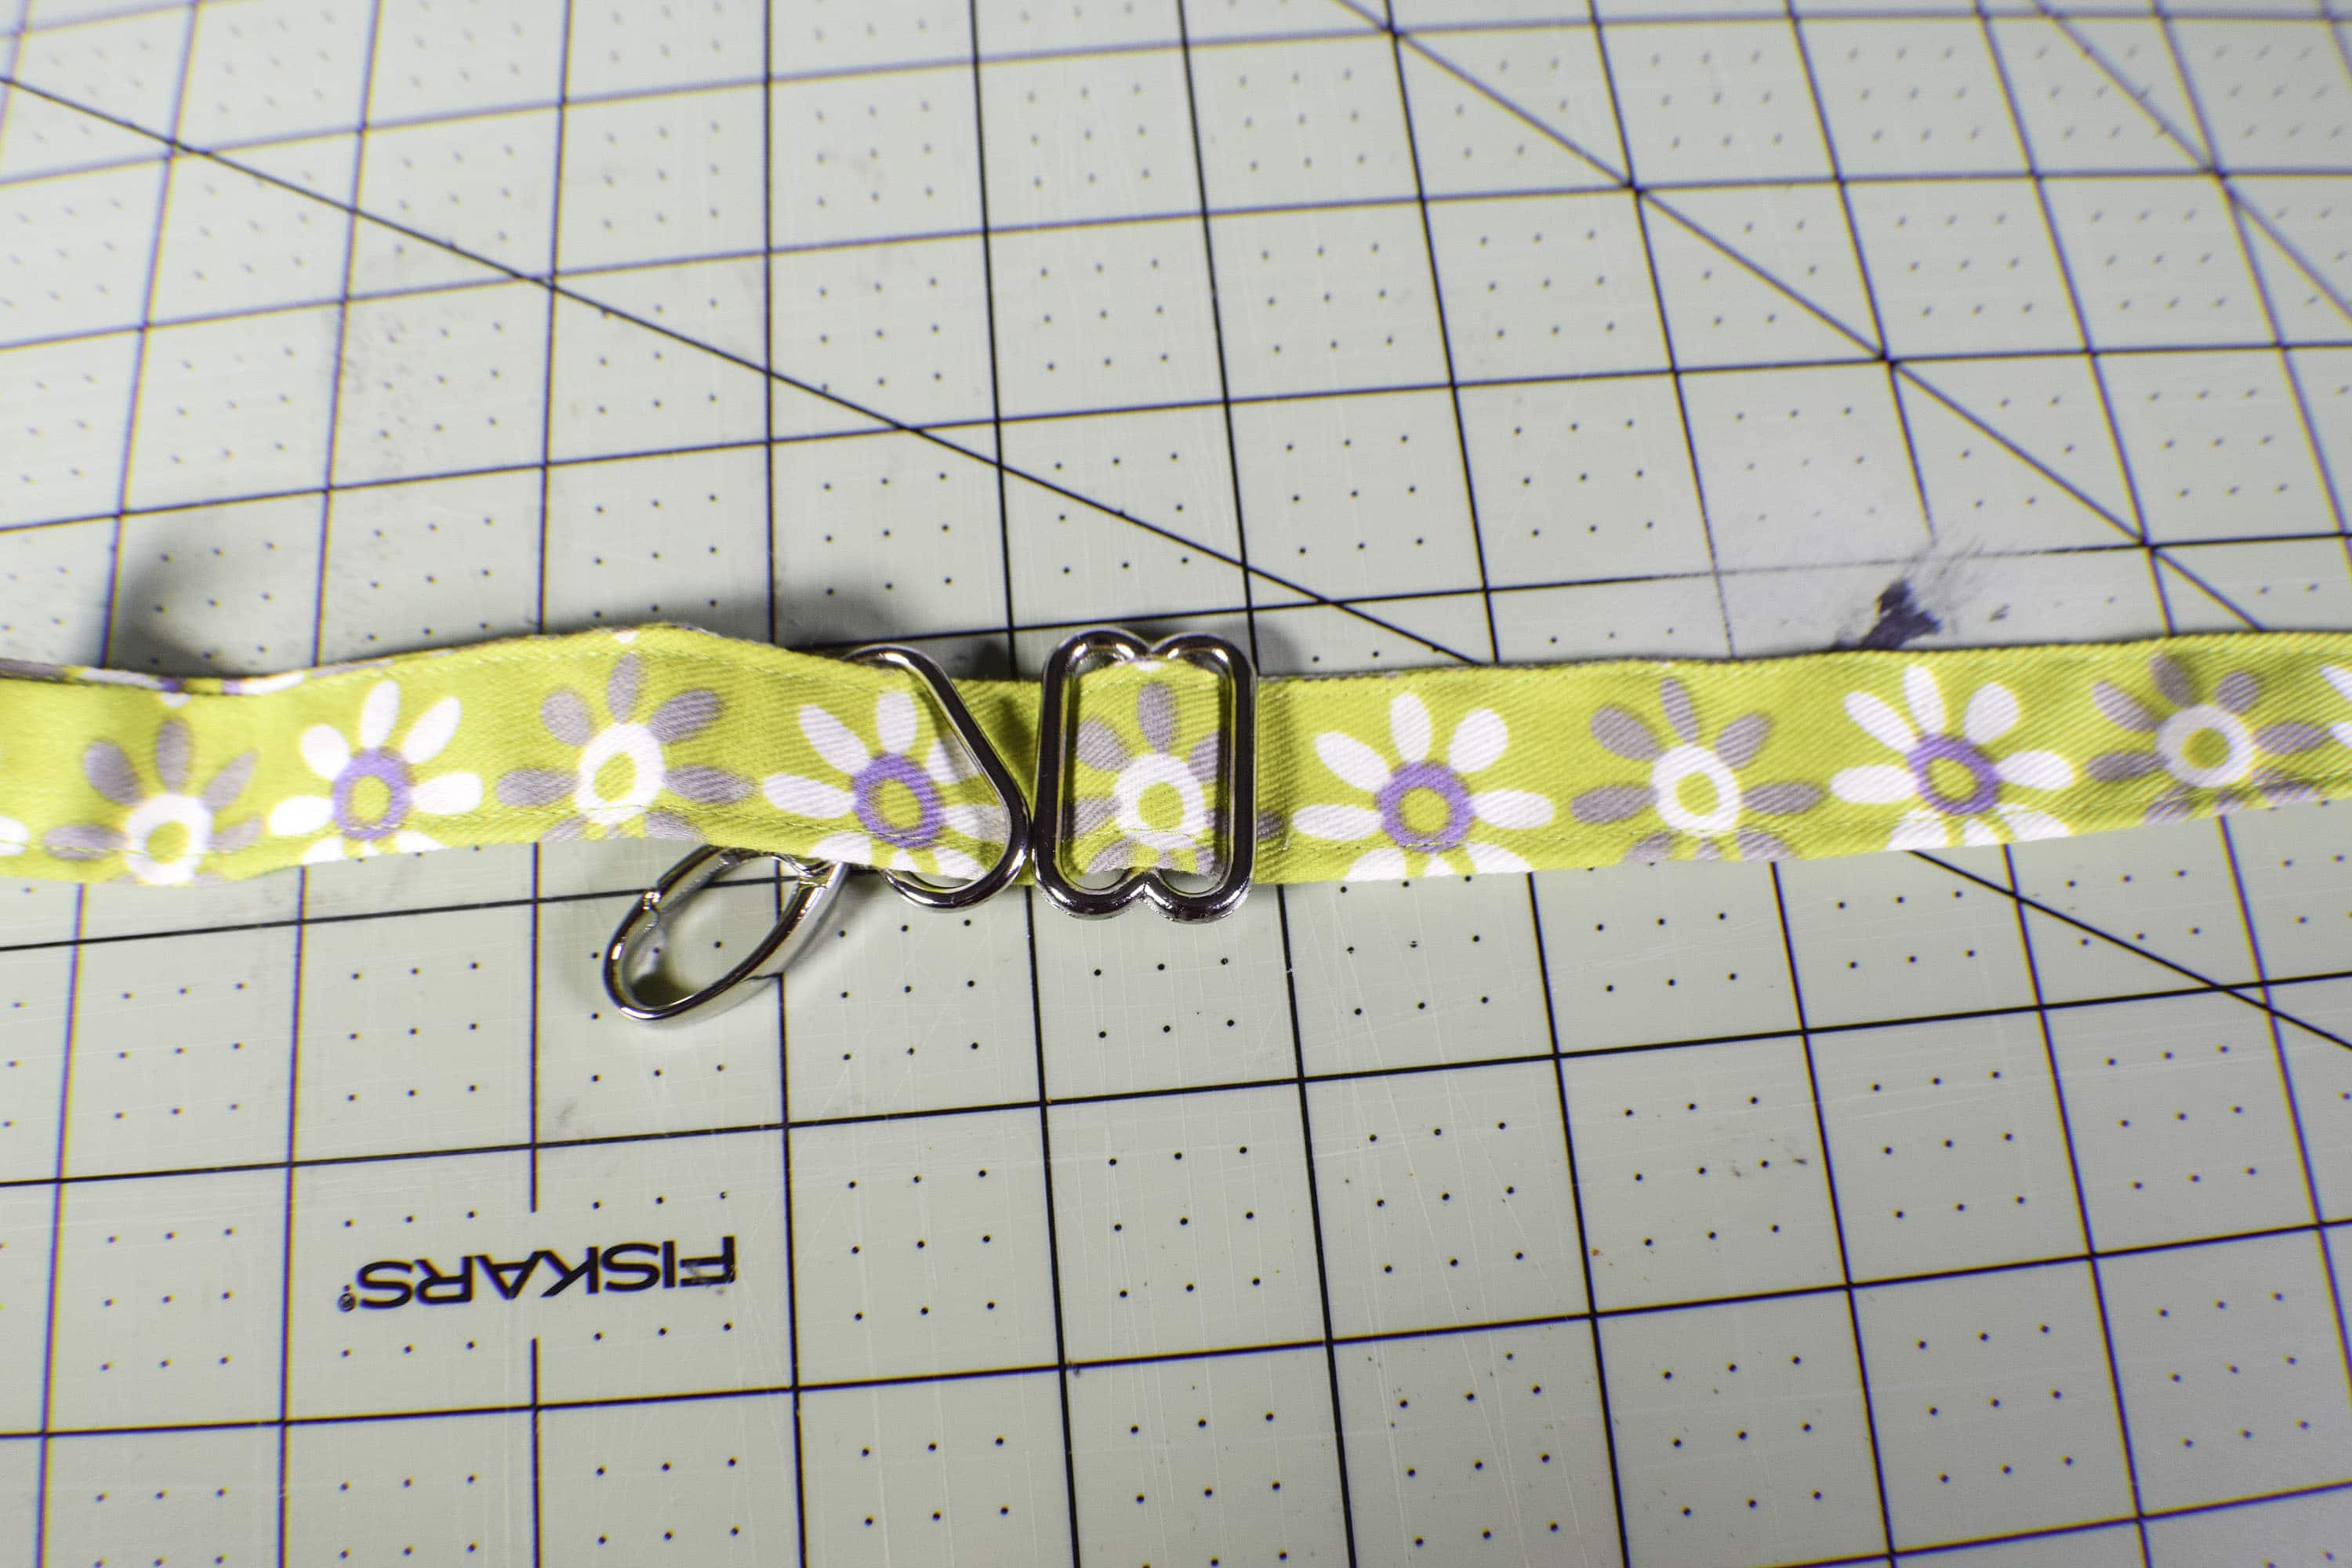
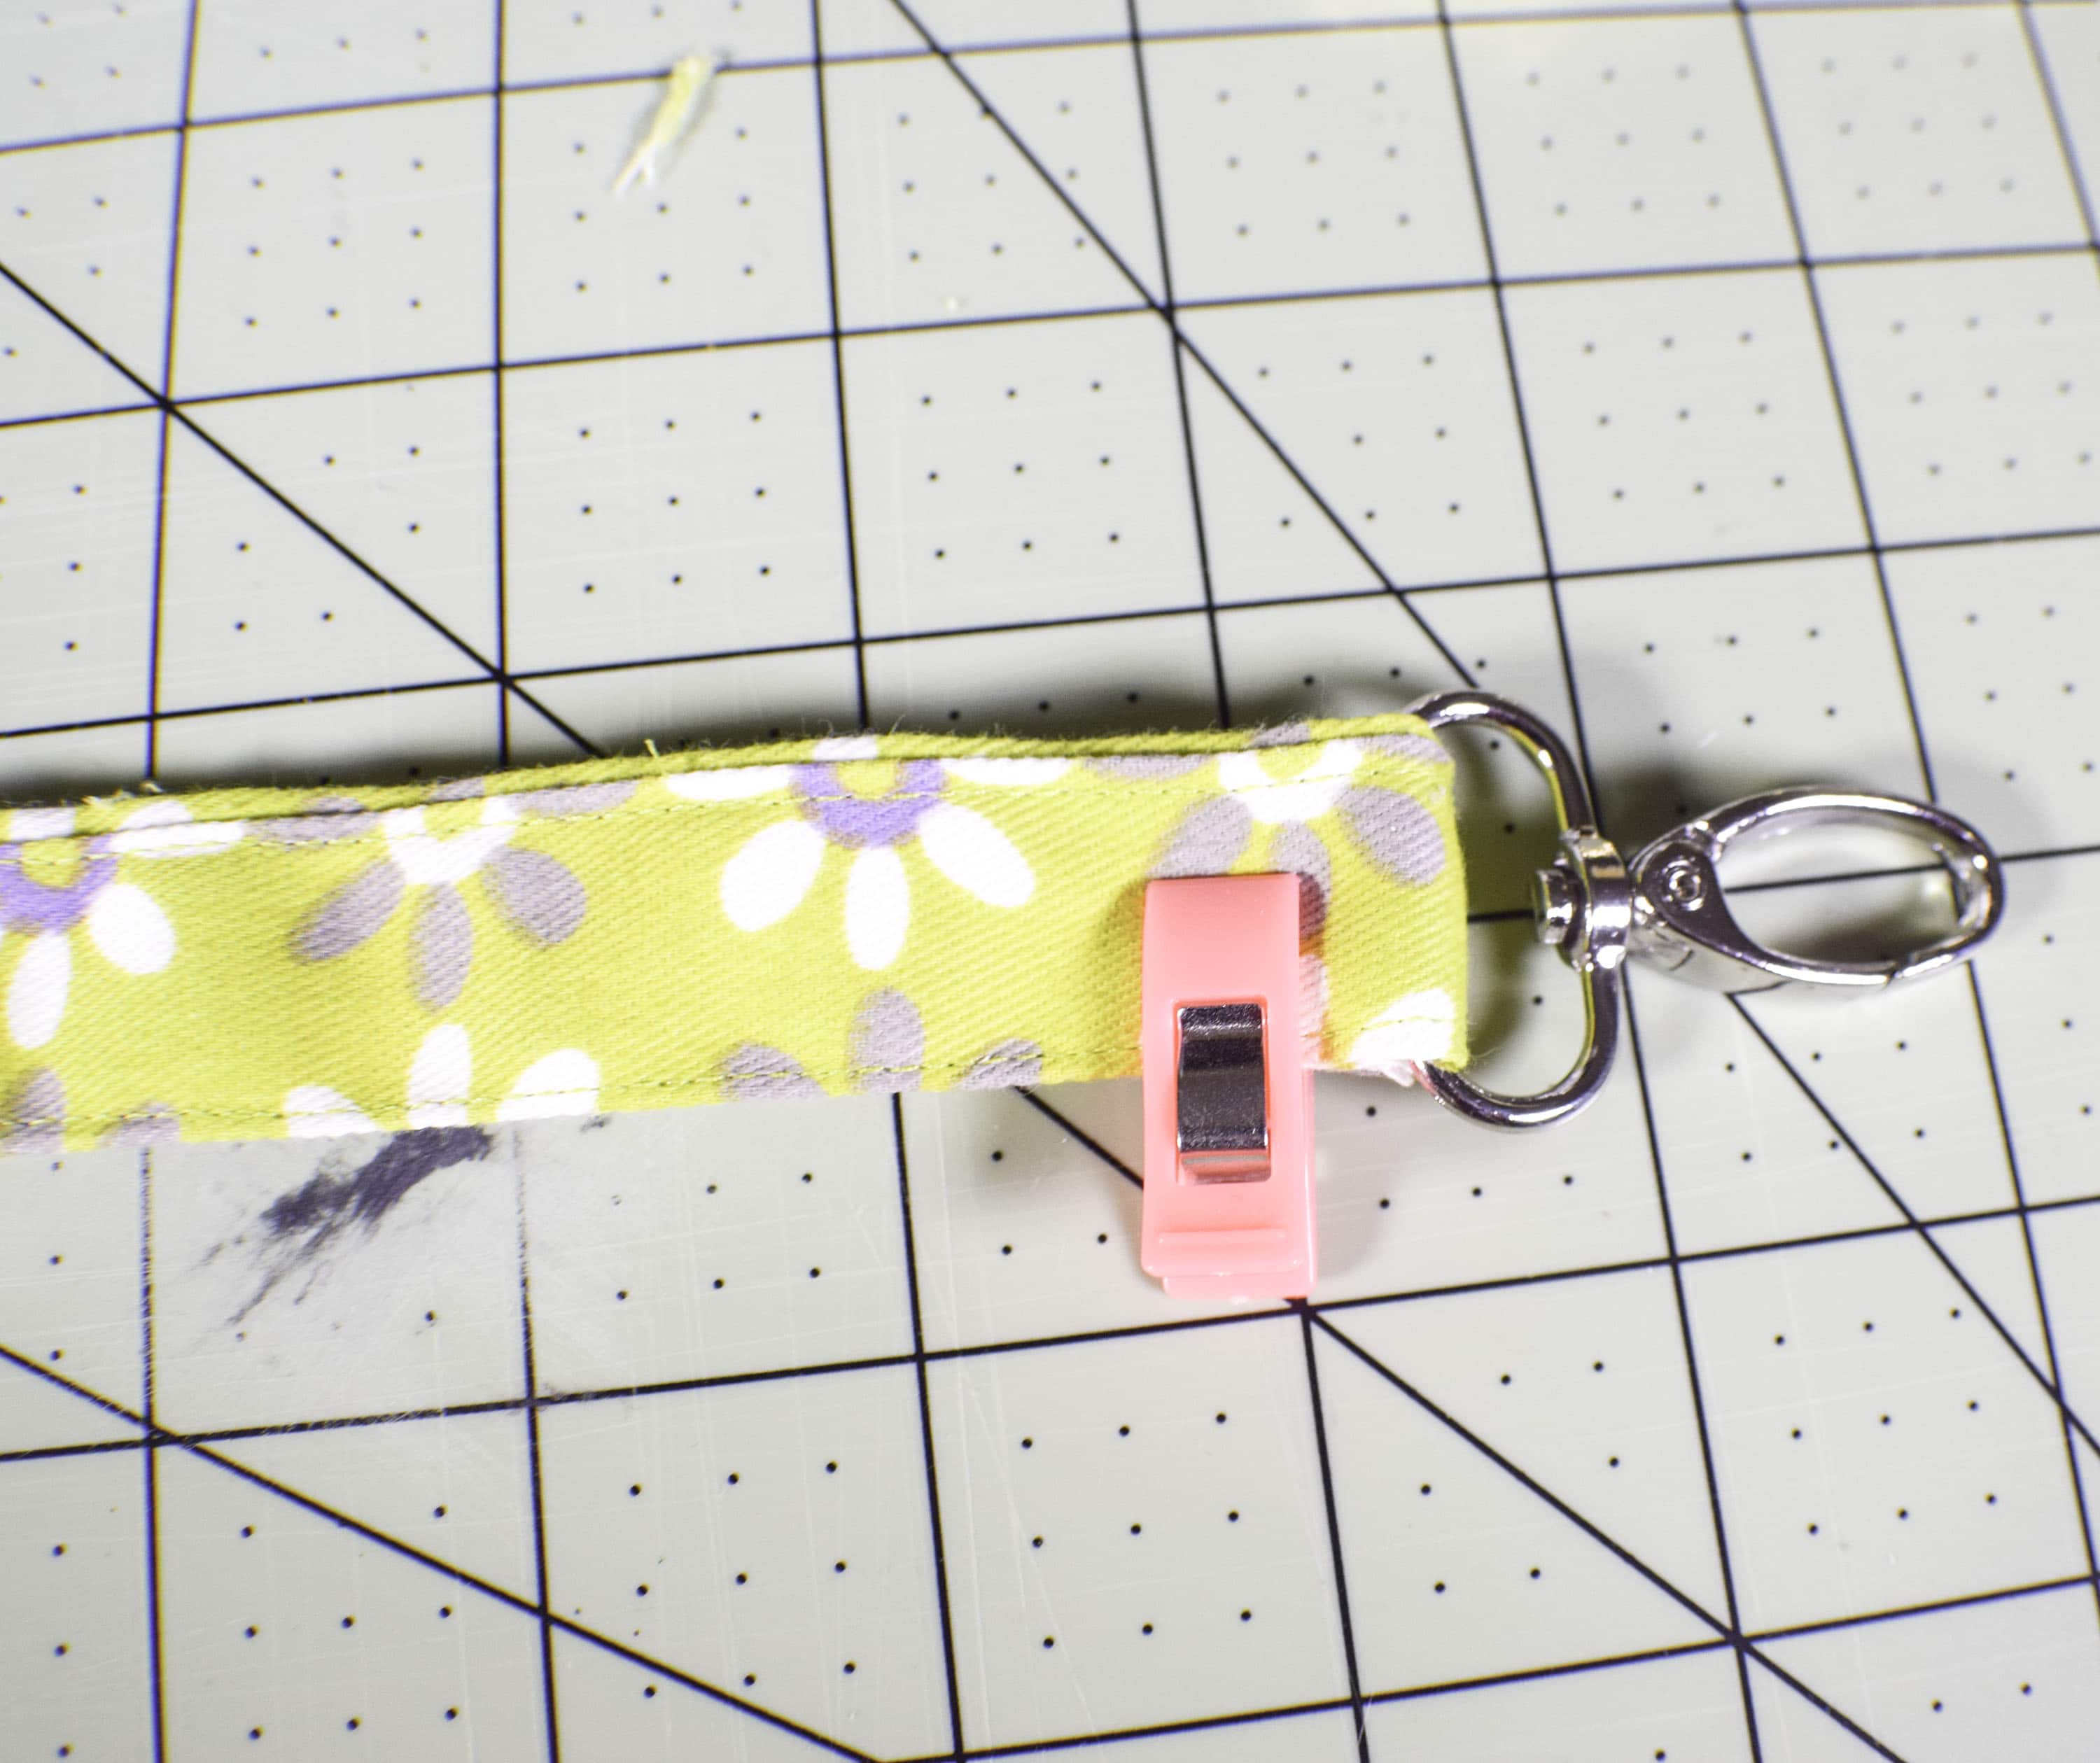
Create the shoulder strap in the same way that you created the other straps. Add the triglide and the swivel clips. To add the triglide simply thread the strap through the triglide as shown. Then add one of the swivel clips. Take the end of the strap and thread it back through the center of the triglide and fold it back toward the swivel clip. Sew the end as shown. You will find that the strap is now adjustable. Thread the strap through the shoulder pad and add a swivel clip to the other end of the strap. Fold under the raw edges and sew.
Step 24 : How to Make a Custom Gym Bag
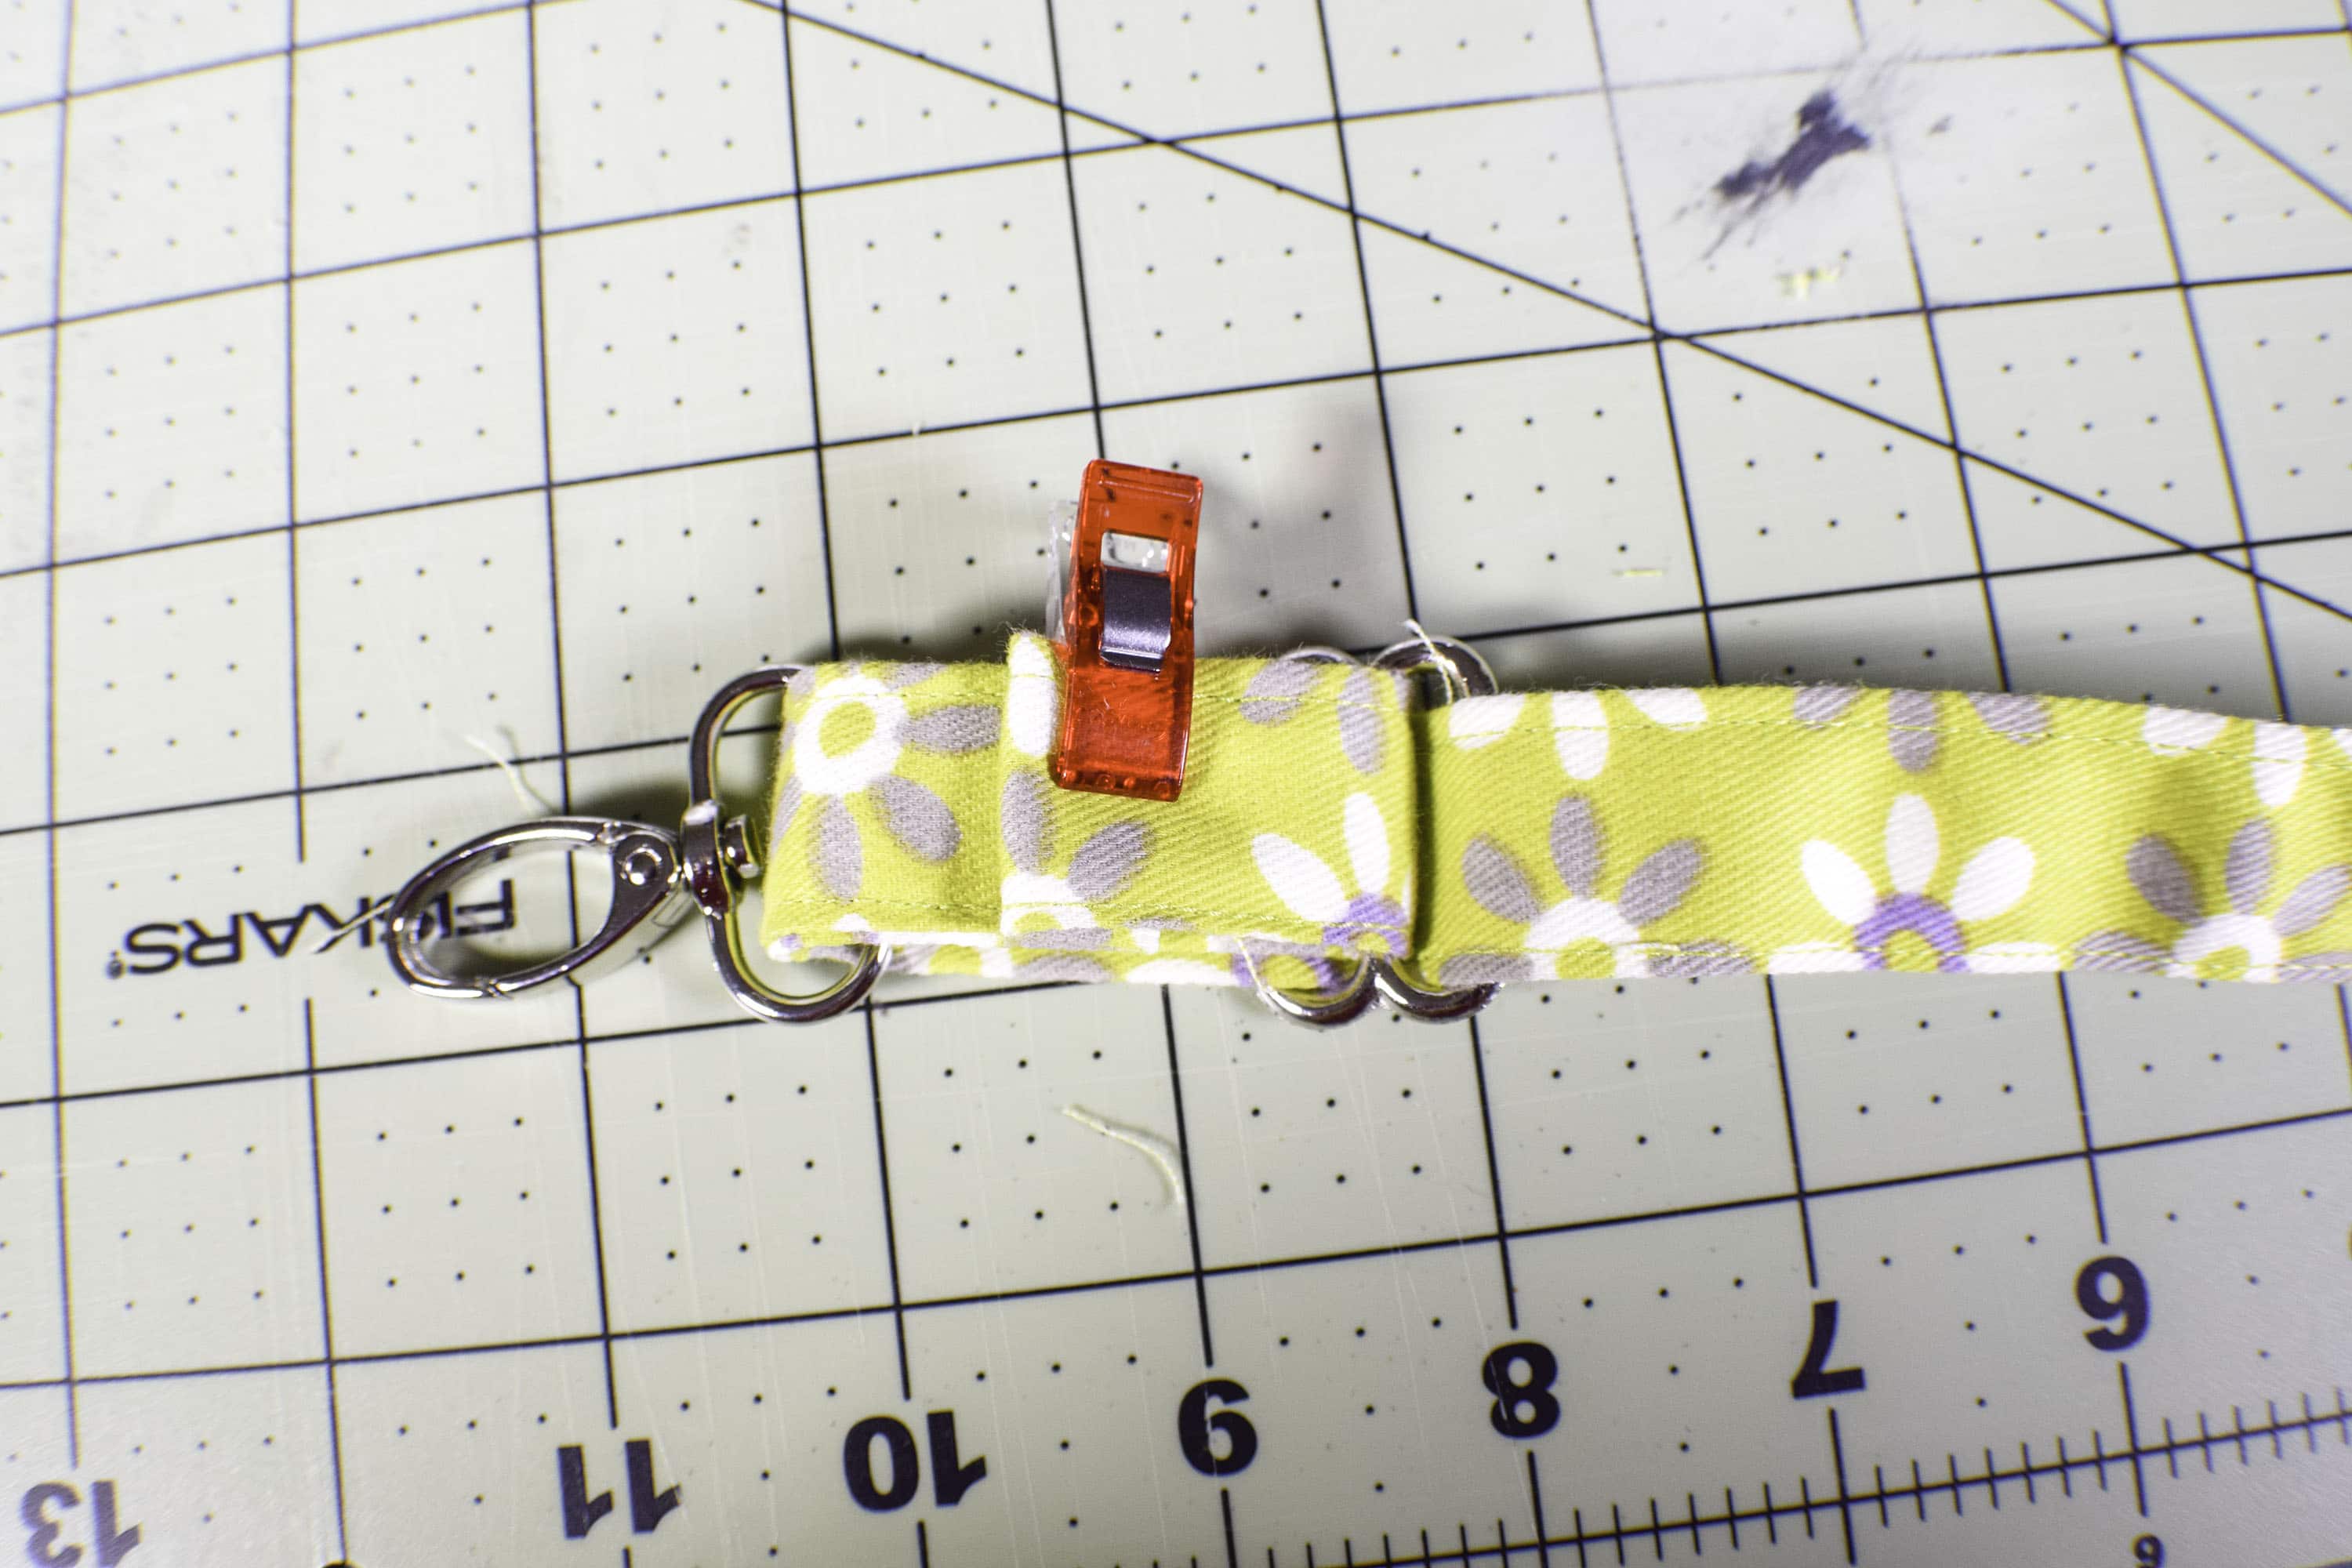
Add the handles to the ring tabs. Fold the handles around the rectangles and and turn under the raw edges and sew. Clip on the shoulder strap to the strap tab rectangles and you have completed your custom gym bag.
If you enjoyed this project and would like more sewing and crafting projects sign up for our news letter and receive your free eBook of 15 handbag patterns and tutorials.