How to Make Silk Scarf Scrunchies
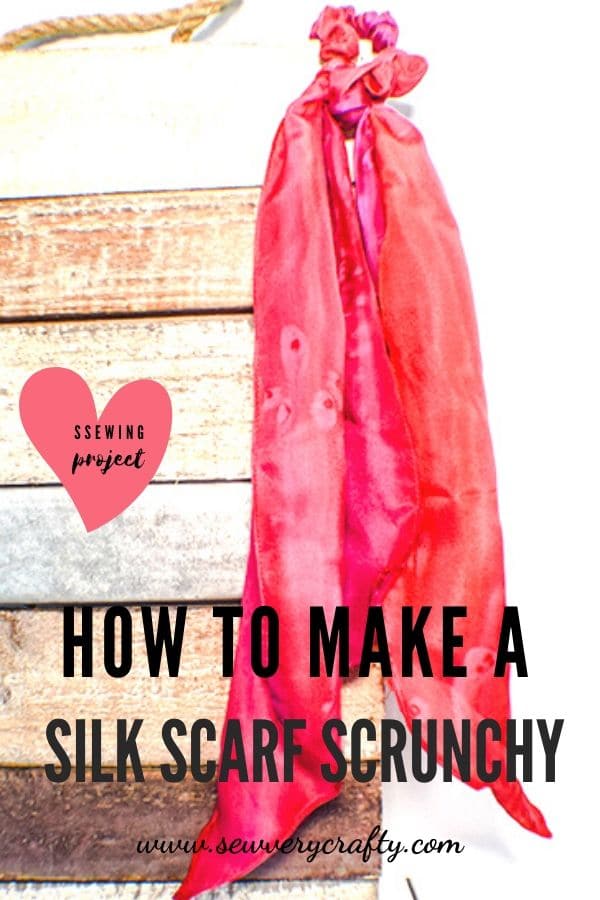
Scarf scrunchies are a terrific accessory to make for this upcoming summer. I decided to go the extra mile and make mine out of hand dyed silk. I know it is unusual for me to splurge on something as extravagant as silk bit I really thought it would be alright since it was such a small amount. My silk scarf scrunchies are made from one of a kind hand dyed silk. The colors are so vibrant. I knew I wanted to do the scarf scrunchy project. With this in mind, I thought that silk would be perfect. It was also a perfect opportunity to provide some tips for sewing with silk.
The small amount of hand dyed silk that I used for this project came from a shop on Etsy. Fortunately it was local to me and I received it in no time. I was stunned at how beautiful it was when I got it and knew I made the right choice. You can make this project out of a synthetic fabric if you want to save on the cost or even cotton if you like. The techniques will be the same. This might just be that project that you decide to splurge on yourself. I have done a complete tutorial on tips for sewing with silk that you can find here.
What you will Need: How to make silk scarf scrunchies
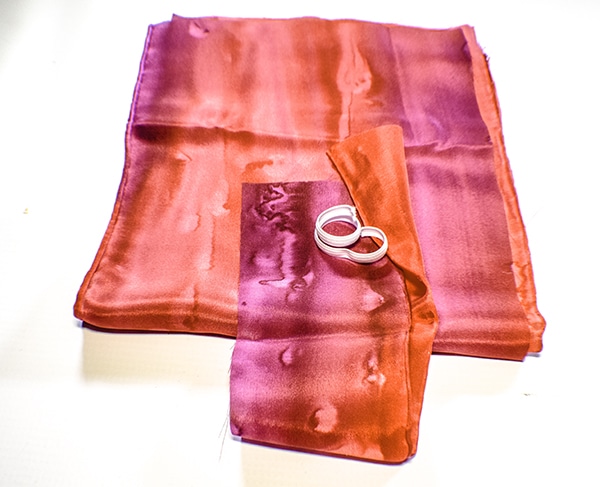
- 6″ x 28″ piece of silk
- 3″ x 14″ piece of silk
- 6 1/2″ piece of elastic
- rolled hem foot
- Teflon Foot (optional)
- Coordinating cotton or polyester thread
Step 1: Create the scrunchies
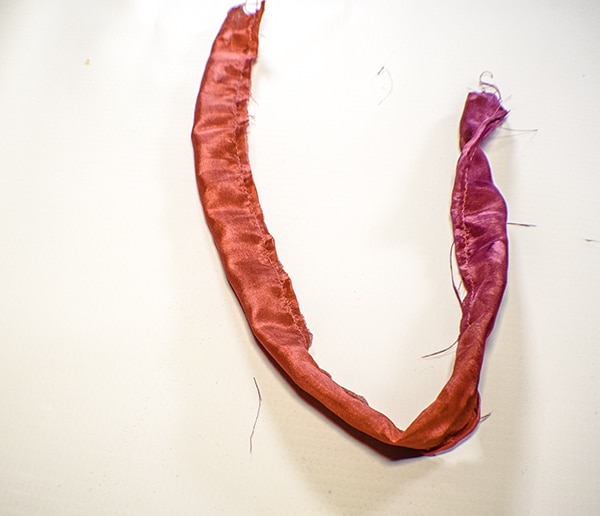
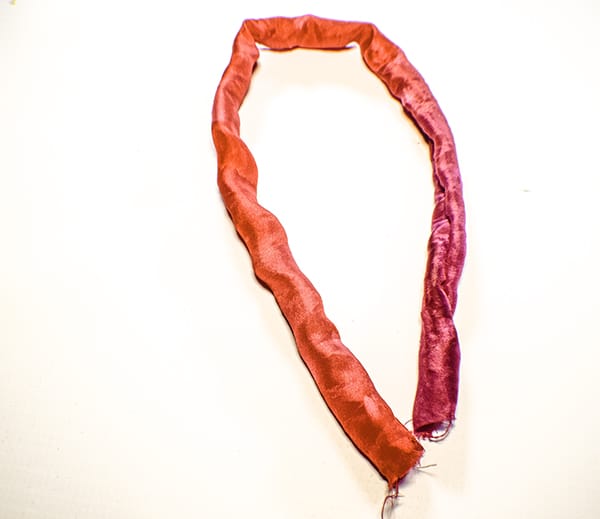
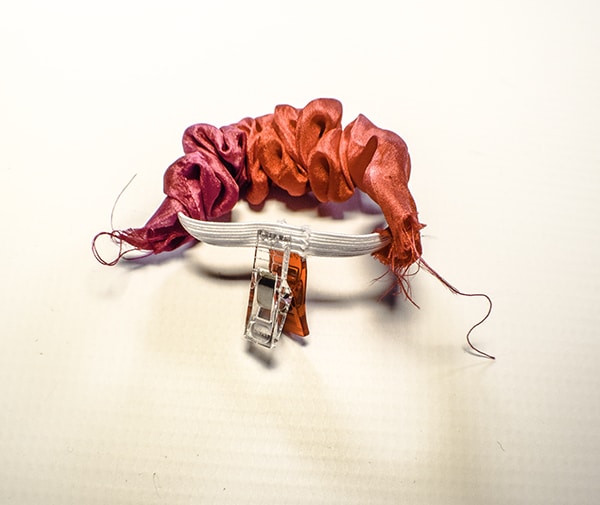
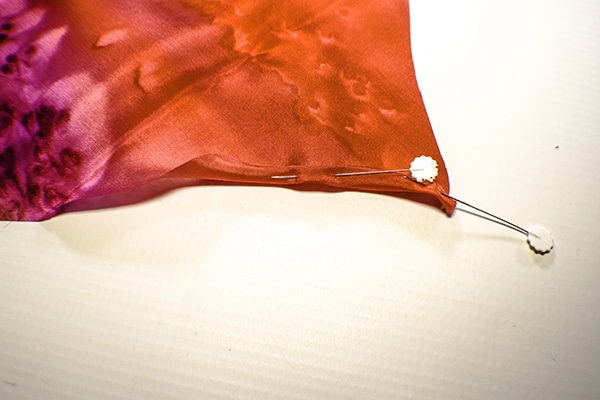
Fold the 3″ x 14″ piece of silk in half lengthwise. Sew the rectangle up one long side right sides together using a 1/4″ seam allowance. Use a Teflon foot if you have one. It is a little easier to sew if you have a Teflon foot but it is not required. Turn the rectangle right sides out and lightly press so that the seam is in the back of the rectangle. You will use a press cloth to iron your silk. Do not iron directly on the silk.
Take the 6 1/2″ piece of elastic and insert a safety-pin at one end. Feed the elastic through the rectangle so that both edges meet. Sew the elastic ends together using zig zag stitch. Turn under one of the short raw edges of the scrunchy and place the other raw edge underneath it so that it is inside the scrunchy. Sew the turned under edge through all layers including the elastic. You have now created the scrunchy.
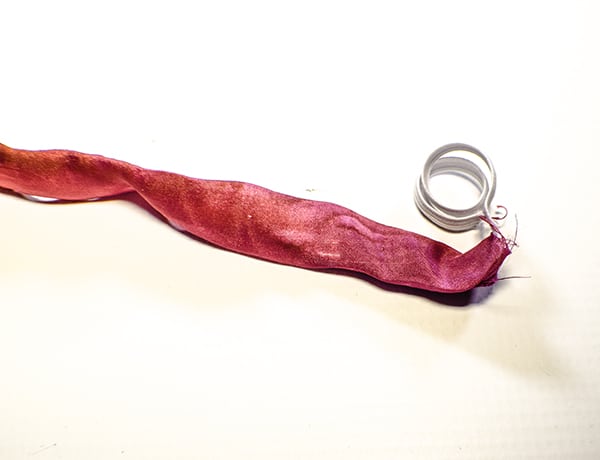
Step 2: Cut the scarf
Cut the ends of the 6″ x 28″ piece of silk so they meet in a point.
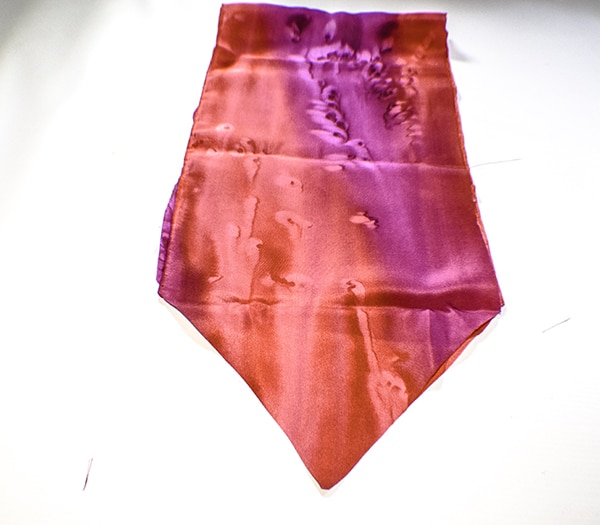
Step 3: Hem the raw edges
Hem the raw edges using a very narrow hem. The best way to do this is to use a rolled hem foot. I have done a complete tutorial on how to use a rolled hem foot that you can find here. The best way to start is to start at one of the points and turn under the hem by 1/8″ and then another 1/8″ for about 3″. Begin stitching the hem for about 4-5 stitches. Once you have completed the 4-5 stitches insert the hem through the curl of the rolled hem foot. Begin stitching and allowing the foot to turn under the hem as you go. Do not force it. this is a little fidgity with silk or other slippery fabric but stay with it and task ti slow and you will be fine. Sew off the next point. Do not try to turn the piece. Start the hem again along the long edge. Again stitch off the edge and start again on the next edge. Continue all the way around the scarf until it is hemmed.


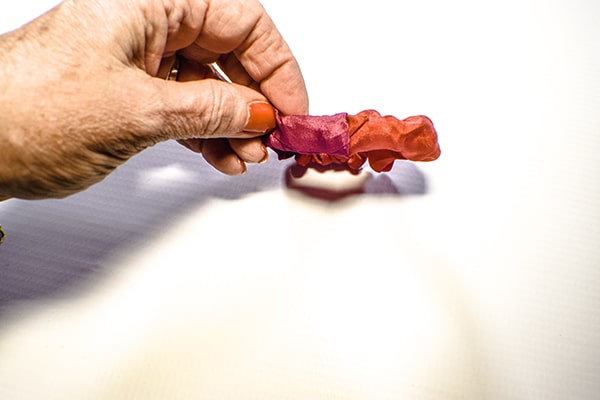
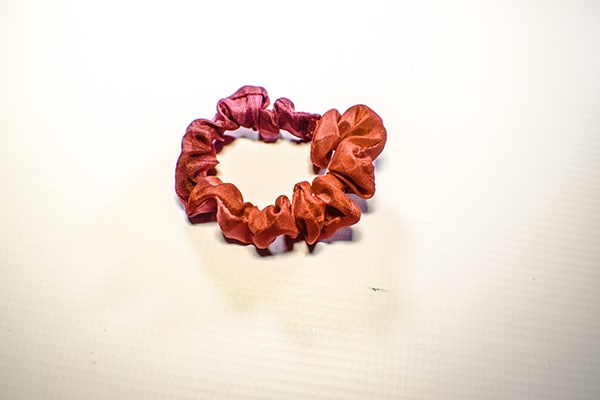
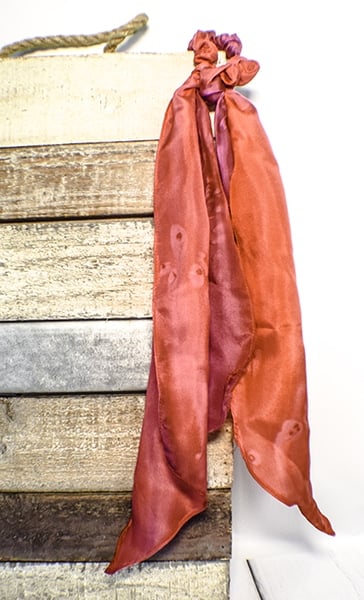
Step 4: Add the scarf to the Scrunchy
Simply tie the scarf around the scrunchy and you have finished your silk scarf scrunchy.
I hope you enjoyed this project. If you would like more sewing and crafting projects sign up for our newsletter and receive access to our free Printables library.
If you would like video tutorials of some of Sew Very Crafty's most popular posts subscribe to our free YouTube channel Here.