
How to Make a Chicken Basket
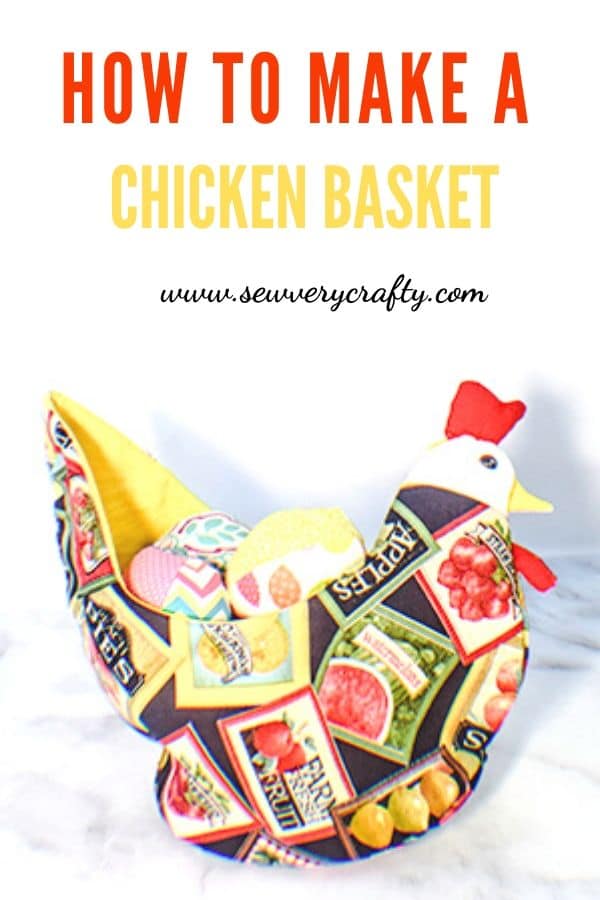
I really wanted to create this adorable chicken basket. I found many examples of this pattern online but couldn't actually find the pattern so I created one. This chicken basket is just too cute and the perfect accompaniment to any country kitchen. It is a simple sewing project that anyone with basic sewing skills can make. There are a few steps in this one but each step is simple to do so don't be intimidated by this project. There is both machine and hand sewing in this project so you will have to get out your needle and thread. This is a good time to brush up on your ladder stitching skills. I will include a video on how to do ladder stitch if you are not familiar with that stitch.
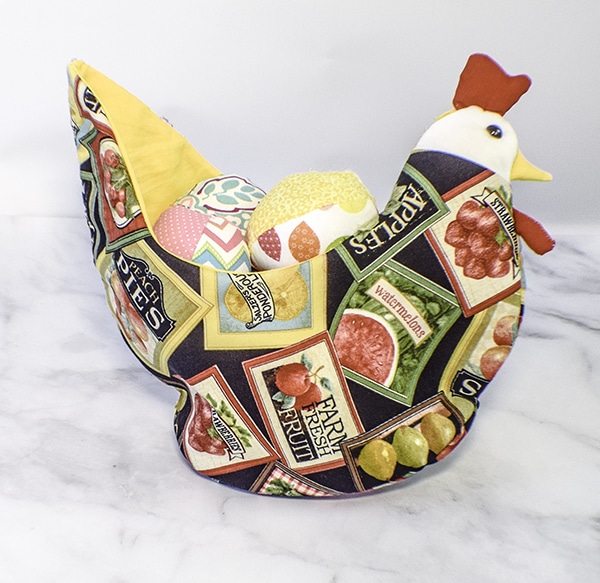
I used quilting cotton and fusible fleece to create my chicken basket. This project does not require a lot of fabric so I used remnants that I purchased at JOANN Fabric & Craft Stores![]() as well as the fusible fleece. Of course you can head over to Hobby Lobby or Fabric.com to get exactly what you need for your chicken basket. This post contains affiliate links that if you click on them and make a purchase I will receive a s small commission at no extra cost to you. If you would like to make the fabric eggs in the basket checkout my fabric Easter egg post here.
as well as the fusible fleece. Of course you can head over to Hobby Lobby or Fabric.com to get exactly what you need for your chicken basket. This post contains affiliate links that if you click on them and make a purchase I will receive a s small commission at no extra cost to you. If you would like to make the fabric eggs in the basket checkout my fabric Easter egg post here.
What you will Need: How to Make a Chicken Basket
- Pattern you can get by clicking this link
- 1/4 yd outer and lining fabric
- 1/4 yd fusible fleece
- 1/8 yd of white for the head
- scraps of red for the comb and wattle
- Scrap of yellow for the beak
- 2 black safety eyes
- scraps of fiberfill
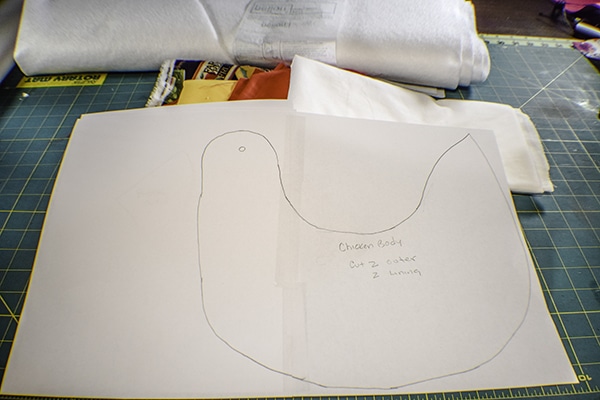
Step 1: Print the Pattern
There are four pieces to the main part of the chicken. There is the head piece, two pieces for the body and the bottom. Tape the two body pieces together by abutting the edges. In addition there are pieces for the beak, the comb, the wattle and the cushion for the head. To cut the head, measure down from the top of the head 6″ and make a dot. Draw a diagonal line through the dot from the front of the neck to the back of the neck so that the line is sloping upward toward the back. Then cut the neck off at that point. This will create the head pattern.
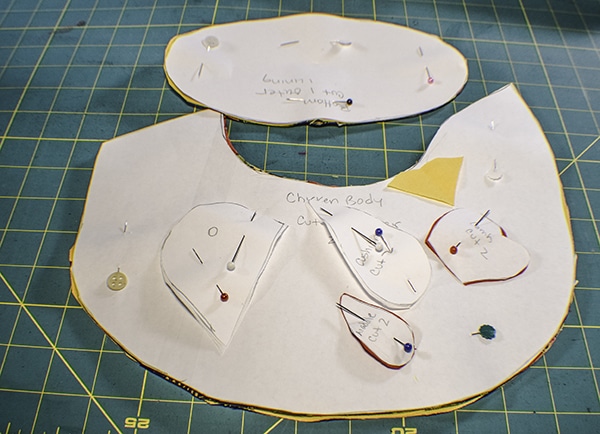
Step 2: Cut the fabrics
Cut two each from the outer and lining of the body. Cut two white pieces for the outer head and two lining pieces for the lining head. You should cut one bottom piece from each of the lining, outer and fleece pieces. From the comb and waddle cut two pieces each. Cut two pieces of white for the head cushion. Cut one piece for the beak.
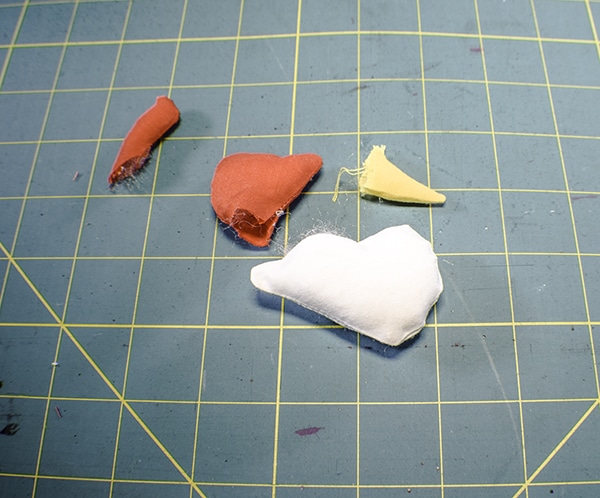
Step 3: Create the Beak, Comb, Waddle and cushion
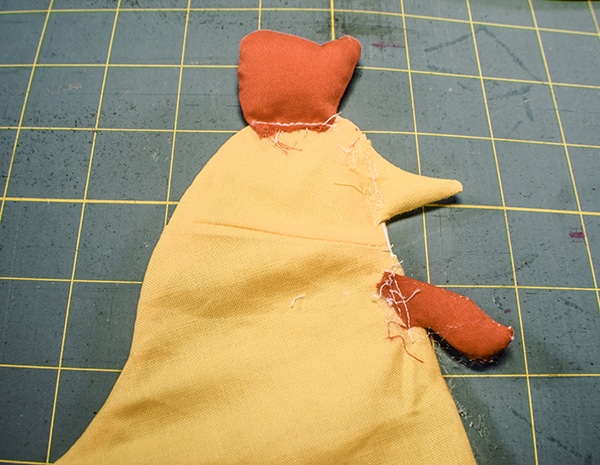
Place each corresponding piece right sides together and stitch all the way around leaving the bottoms open. Stuff with a small amount of fiberfill and stitch the bottom closed so that there is a excess fabric that you can attach to the body of the chicken as shown. For the beak simply fold it in half and stitch along the side and turn right sides out.
Step 4: Add the head to the body
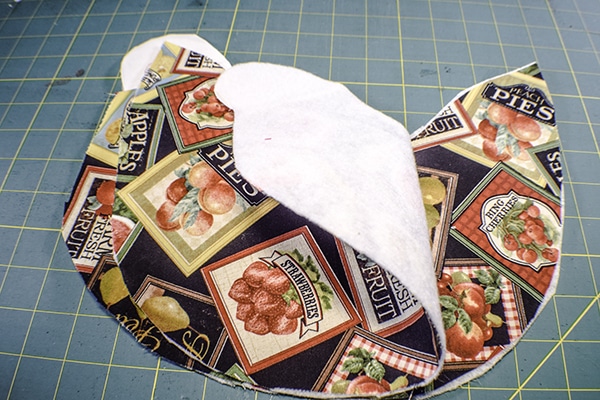
Take the white head piece and place it right sides together with the body piece and stitch using a 1/4″ seam allowance. Do this for both body pieces. Repeat for the lining pieces as well. Once you have added the head to the body cut two pieces of fleece in the shape of the head and body making sure that you will be able to fuse the fleece appropriately on both pieces.

Step 5: Fuse the fleece
Fuse the fleece to the body and the bottom of the chicken basket pieces following the manufacturers instructions.
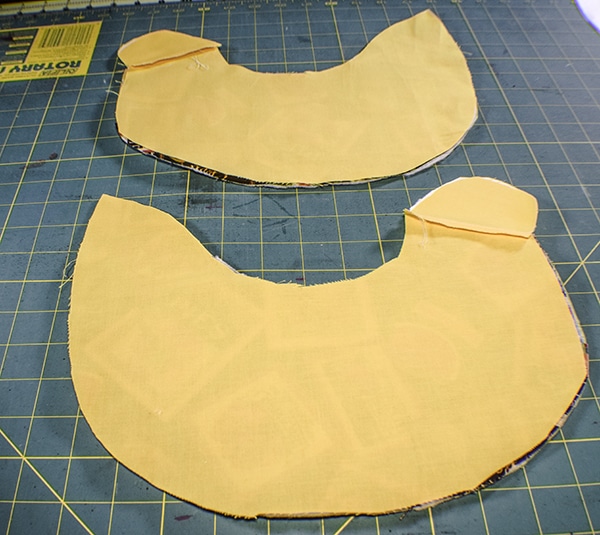
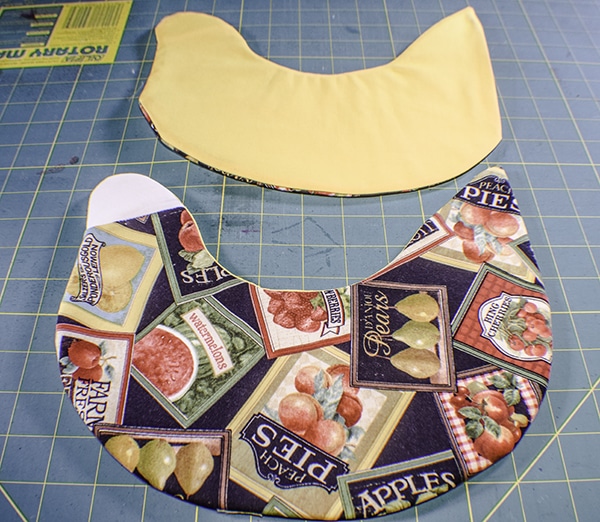
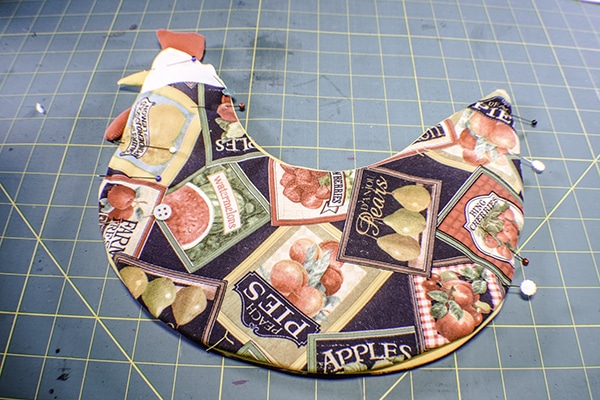
Step 6: Stitch the lining to the outer pieces
With right sides together stitch each body piece and the bottom to its corresponding lining piece leaving a small opening for turning. Clip any curves so that the pieces lay flat after turning. Turn the pieces right sides out and press. Stitch the openings closed using ladder stitch. If you are unfamiliar with ladder stitch check out this video.
Step 7: Add the Beak, comb and waddle
Place the beak, comb and waddle to their corresponding places on one of the body pieces on the lining side using the flat part of the fabric that you left when you created them. Stitch.
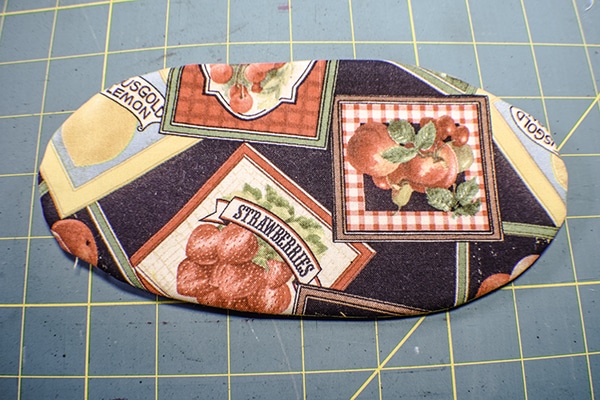
Step 8: Put the pieces together
Stitch the front and back of the body pieces together using ladder stitch. Add the cushion you created to the head. Stitch the back of the head closed using ladder stitch. Sew the bottom to the body also using ladder stitch.

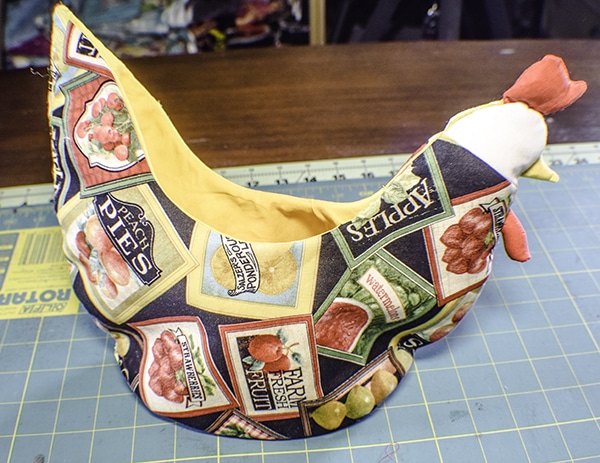
Step 9: Add the Safety Eyes
Add the eyes and you have completed your adorable chicken basket.
I hope you enjoyed this project. If you would like more sewing and crafting projects sign up for our newsletter and receive access to our free printables library.
If you would like video tutorials of some of Sew Very Crafty's most popular posts subscribe to our free YouTube channel here.


I know you posted the chicken basket a while ago, but I’m just making it now. Willyou tell me please what the “cushion is for? I’m trying to figure out what color to make it and the placement of it.
If I remember correctly, it goes inside the head to separate out the two sides so it can be any color but white is best. Otherwise your head will be flat. I hope the is right. It has been some time since I made this.
The pattern you gave us to print out has the head attached to the body. Not sure where to cut the head off to make it separate.
I am sorry I should have written that down. I will add that. Measure down from the top of the head 6″ and make a dot. Draw a diagonal line through the dot from the front of the neck to the back of the neck so that the line is sloping upward toward the back. Then cut the neck off at that point.
This makes a very cute chicken, I made it for myself and then my sister asked for one, but there is a LOT of hand sewing.
I think your measurement for where to cut the head off may be wrong, 6 inches takes you about 2/3 of the way down the front but 6 cm seemed correct.
I kind of created this as I was going along so it may be that the measurement was wrong. The hand sewing seemed easier for me given the pattern. Thanks for trying it out though.