How to Make a Simple Glasses Case
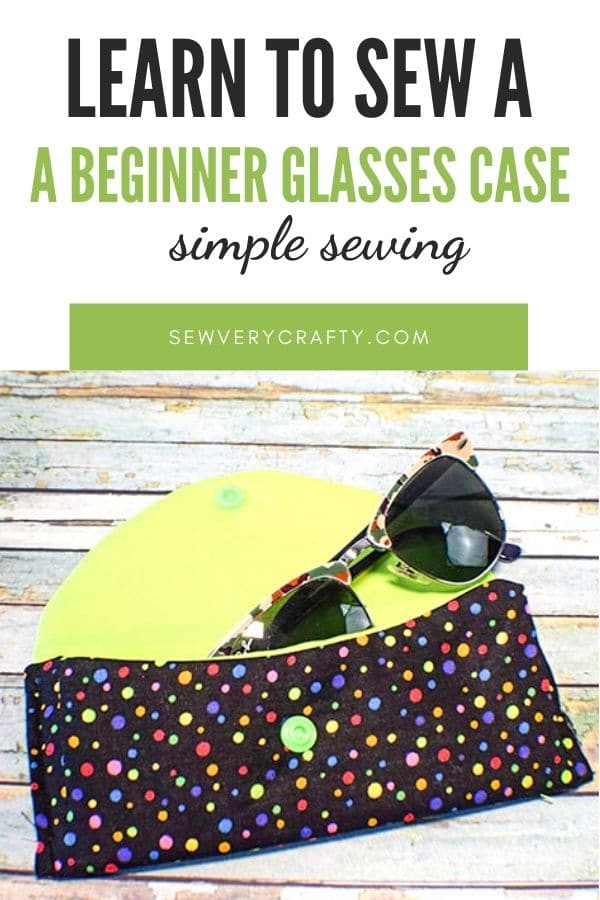
I know you get a glasses case when you get glasses or sun glasses but they have no character. With this glasses case you get to pick your won fabric to make this one truly your own. I love to make common things so that they have my own personality. This is a great example of one of those things and it is super simple to make. There is a pattern that comes with this tutorial that makes this project simple and easy for the beginner sewist. The pattern, of course is free as is the tutorial.
I used fabrics that I purchased form JOANN Fabric & Craft Stores![]() but you could head to Hobby Lobby, fabric.com or onlinefabricstore.net to get exactly what you need for this project. This post contains affiliate links that if you click on them and make a purchase I will receive a small commission at no extra cost to you. As an Amazon Associate I earn from qualifying purchases.
but you could head to Hobby Lobby, fabric.com or onlinefabricstore.net to get exactly what you need for this project. This post contains affiliate links that if you click on them and make a purchase I will receive a small commission at no extra cost to you. As an Amazon Associate I earn from qualifying purchases.
What you will need: How to Make a simple glasses case
- Pattern you can get by clicking on this link
- 1/4 yd outer and lining fabric
- 1/4 yd fusible fleece like Pellon TP971F
- 1 kam snap
- Standard sewing supplies
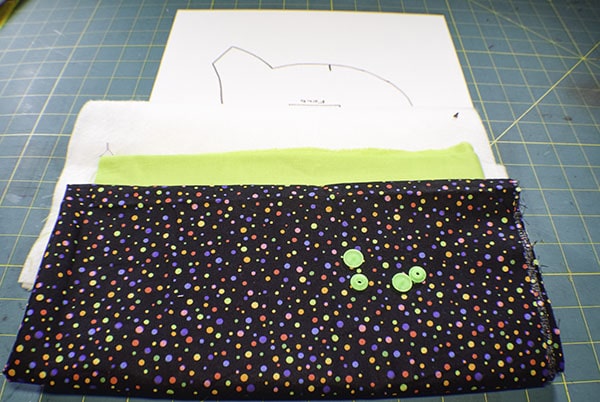
Step 1: cut your fabrics
Using the pattern piece cut your fleece piece on the fold. Use the fleece piece as a pattern and cut a piece of outer fabric and lining fabric adding a 3/8″ seam allowance.

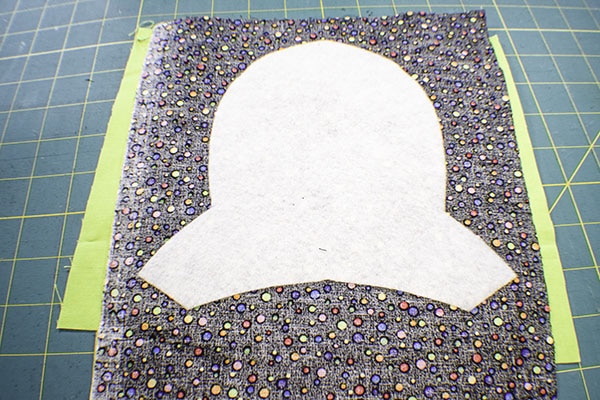
Step 2: Fuse the fleece
Fuse the fleece piece to the wrong side of the outer fabric using a hot iron and following the manufacturer's instructions.
Step 3: Stitch the outer piece to the lining
Place the outer piece and the lining piece right sides together. Using the pattern piece mark the outer piece at the mark on the pattern on each side. Clip the top from mark to mark and clip the bottom using wonder clips or pins. Stitch long the top and the bottom where you clipped using a 3/8″ seam allowance.

Step 4: Turn right sides out
Turn right sides out and press. Fold under the raw edges to equal the seam allowance and press.
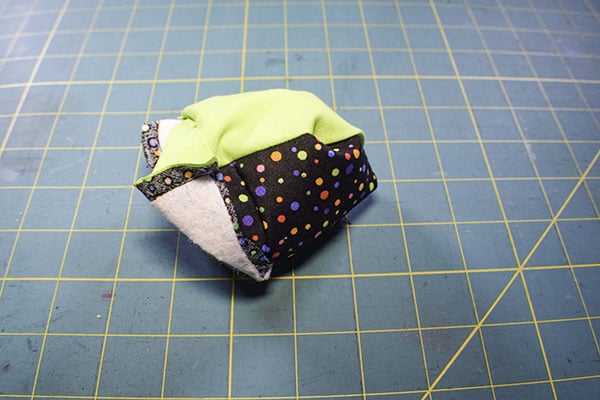
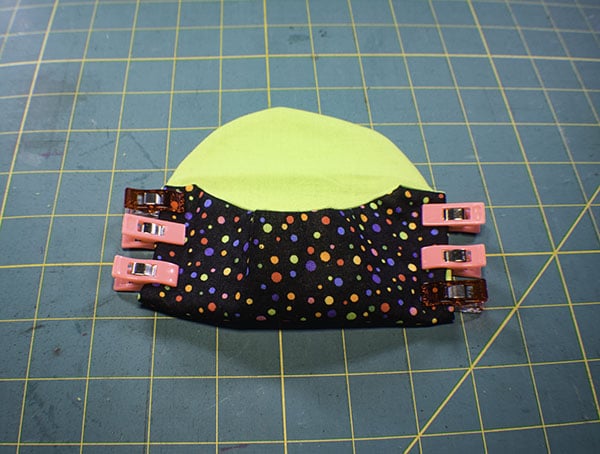
Step 5: Fold up the bottom
Fold the bottom up matching the sides as shown and clip. Repeat for the other side. Stitch from the bottom around to the other side using a 1/4″ seam allowance. This will close up the open seam. Press the entire piece so that the front is folded accordion like.
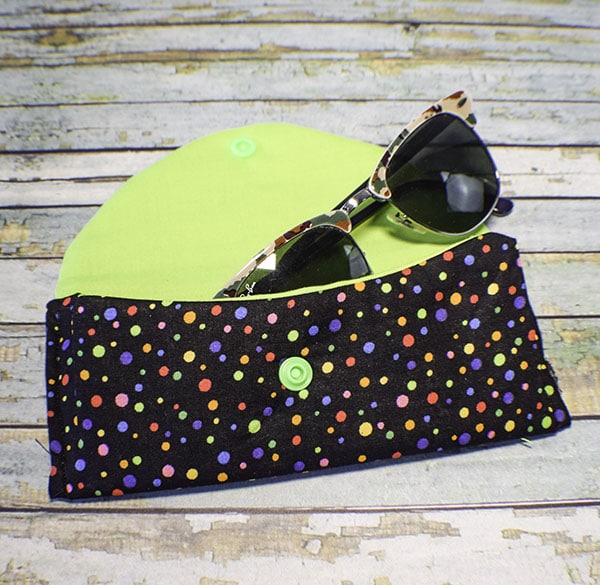
Step 6: add the kam snap
Measure 1″ up from the curve and place one side of the Kam Snap. Measure down 2″ from the top of the bottom part of the case and place the other half of the Kam snap. If you do not know how to install Kam Snaps take a look at this video. Once you have completed installation of the Kam Snap you have completed the glasses case. Add your glasses or sunglasses and you are ready to go.

I hope you enjoyed this project. If you would like more sewing and crafting projects sign up for our newsletter and receive access to our free printable library.
If you would like video tutorials of some of Sew Very Crafty's most popular posts subscribe to our free Youtube channel Here.