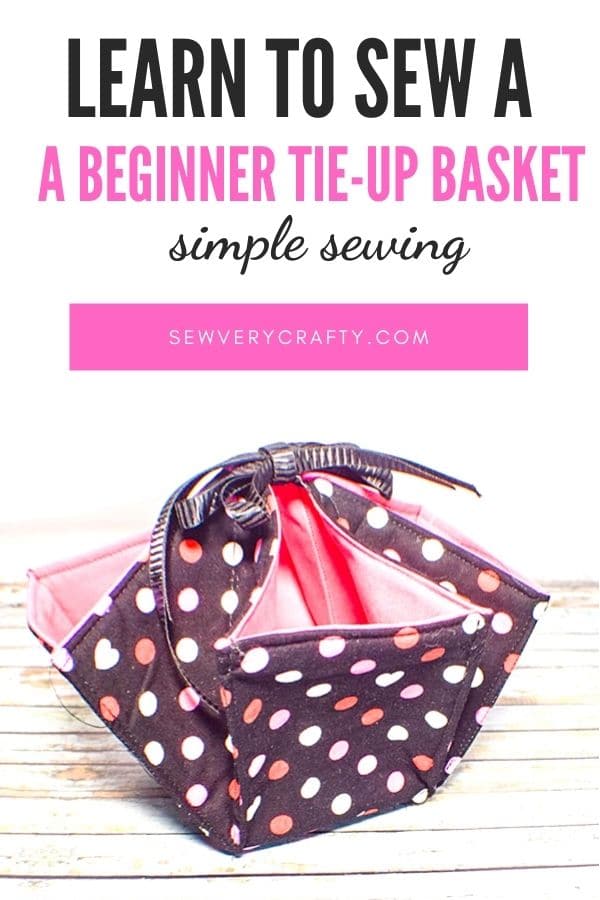
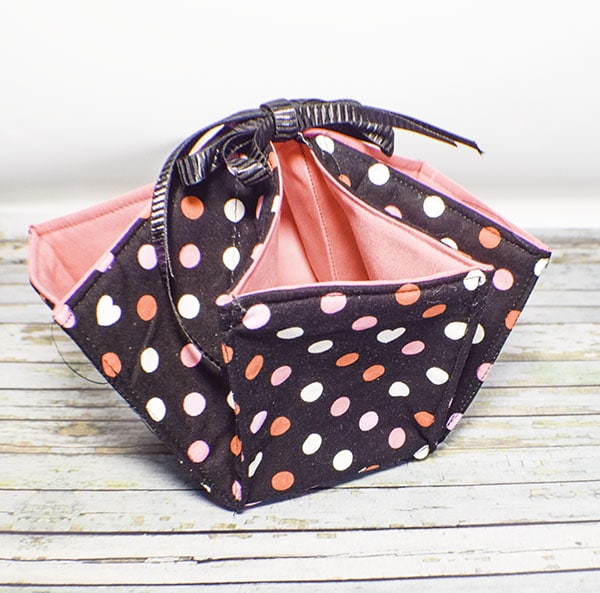
How to Make a Tie-Up Fabric Basket
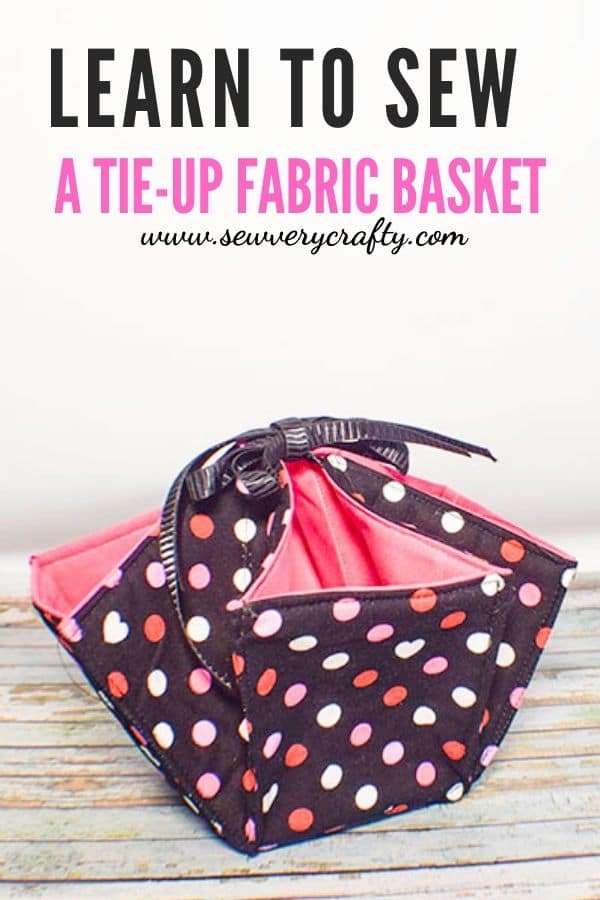
I came across this cute little tie-up fabric basket on YouTube and just had to share it with you. This basket is just too cute not to share. You can store all kinds of fun things in these fabric baskets. These baskets are a simple sewing project that anyone with beginner sewing skills can make by just following the step-by-step tutorial. If you can stitch a straight line you can sew these baskets. This is a fun and functional beginner sewing project so give this one a try.
I used fabrics that I purchased at Hobby Lobby for this project but you could head to JOANN Fabric & Craft Stores![]() , Fabric.com or onlinefabricstore.net to get exactly what you want for your tie-up fabric basket project. This project contains affiliate links that if you click on them and make a purchase I will receive a small commission at no extra cost to you.
, Fabric.com or onlinefabricstore.net to get exactly what you want for your tie-up fabric basket project. This project contains affiliate links that if you click on them and make a purchase I will receive a small commission at no extra cost to you.
What you will need: How to Make a Tie-up fabric basket
- 1/4 yd outer and lining fabric
- 44″ of twill tape or 3/8″ ribbon
- Fusible Fleece like Pellon TP971F
Step 1: Cut Your Fabrics
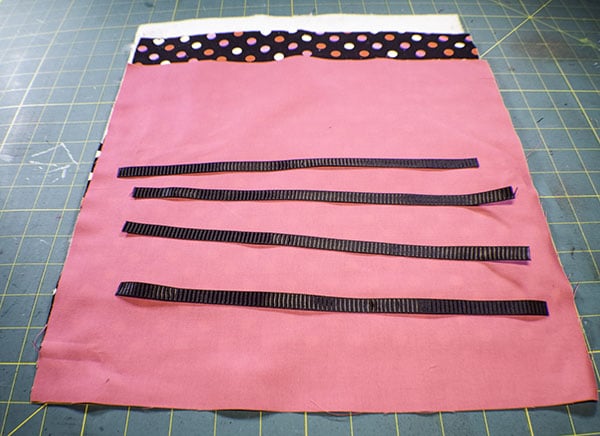
Cut one outer, one lining and one fleece piece that measure 13″ x 13″. Cut 4 pieces off twill tape or ribbon that each measure 11″ long.
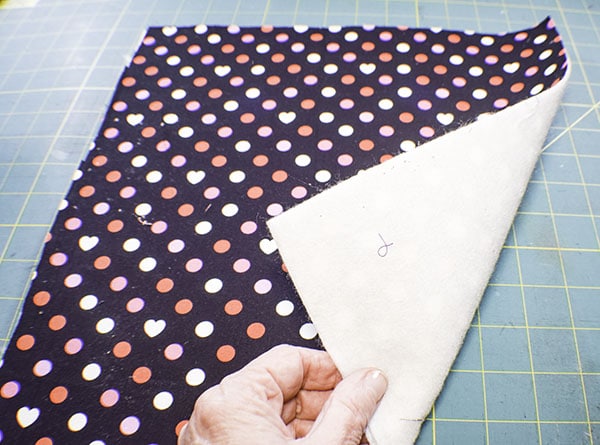
Step 2: Fuse your Fleece
Fuse the fleece to the wrong side of your outer fabric using a hot iron and following the manufacturers instructions.
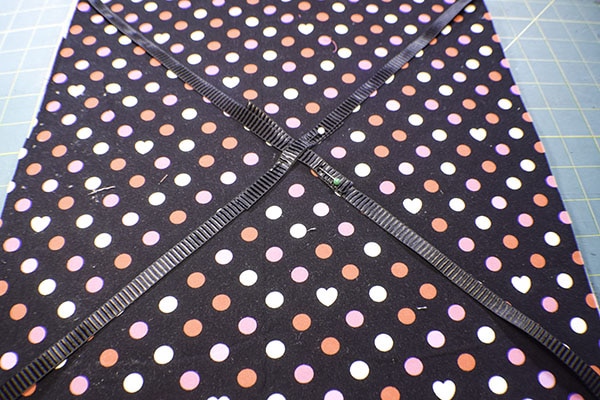
Step 3: Add the Twill Tape/Ribbon
Place the tape or ribbon on each corner and stitch to hold in place. Pin the pieces in the center to keep them out of the way for the next step.
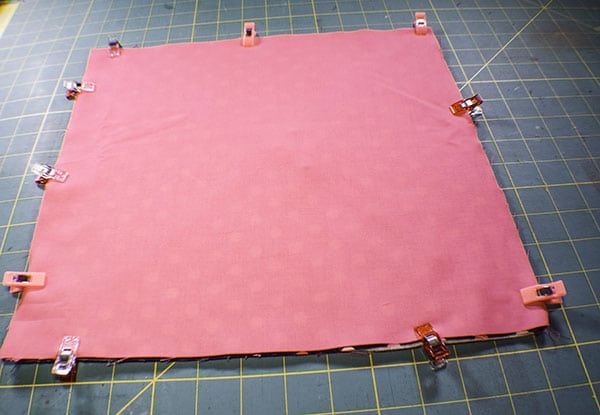
Step 4: add the lining
Place the lining right sides together with the outer fabric and stitch all the way around using a 1/4″ seam allowance and leaving an opening on one side for turning.
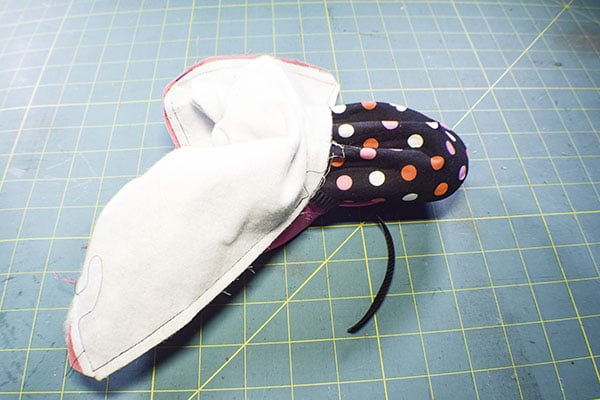
Step 5: Turn the square
Reach inside the opening and remove the pins. Clip the corners to the stitching without cutting the stitching for crisp corners. Turn the fabrics right side out and press.
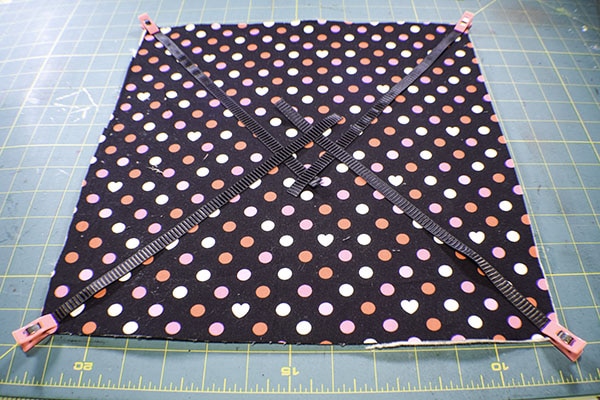
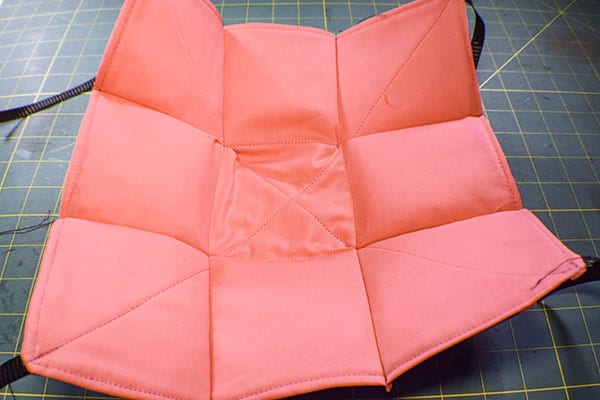
Step 6: Top stitch
Top stitch all the way around the edge of the square making sure that you close the opening. Divide each side by thirds and draw lines in a hashtag manner. Draw lines from corner to corner. Stitch along all of the lines.

Step 7: fold the edges and stitch
fold each of the horizontal and vertical lines on each end and clip. Stitch along one side of each of the folds from the bottom to the top. Tie the tapes together and your basket is complete.
I hope you enjoyed this project. If you would like more sewing and crafting projects sign up for our newsletter and receive free access to our printable library.
If you would like video tutorials of some of our most popular posts subscribe to our free YouTube Channel here.