
Sun Dress, Hat, and Tote
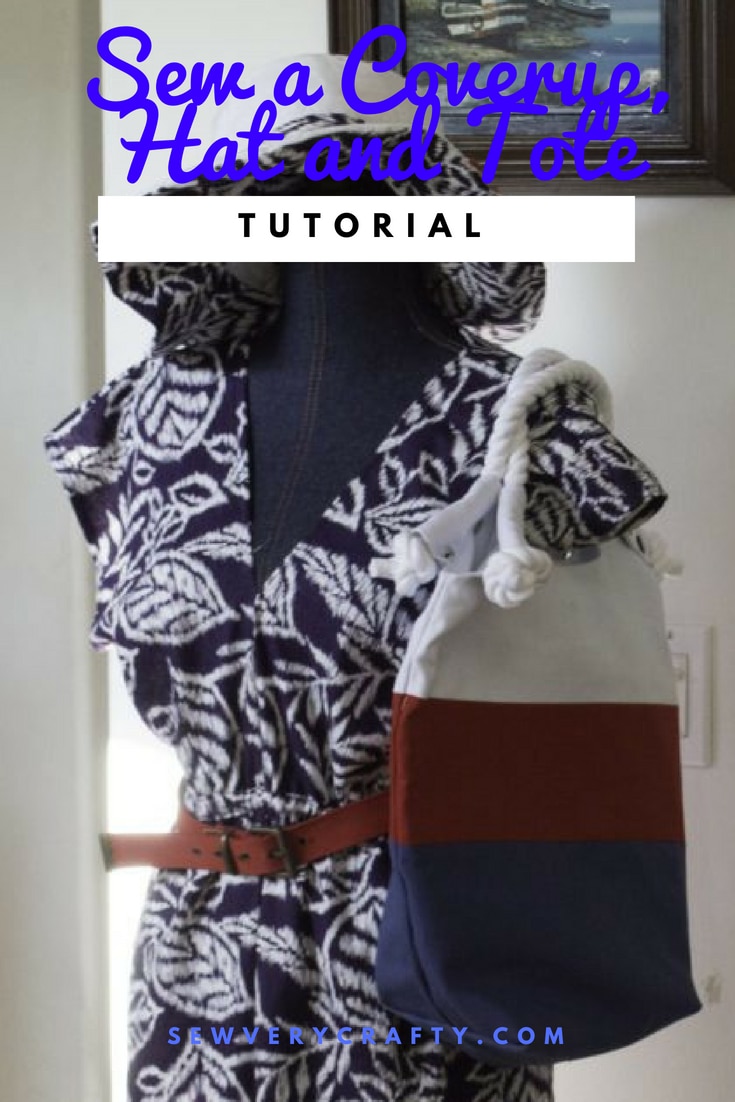
It is summer time and I have put together a terrific sun dress, hat, and tote to make and use all summer long. Each of these ideas are simple to make and can be made in a matter of hours. You will be fun and fashionable wherever you go in this great fun in the sun trio. I used a breezy linen for the dress but you could use cotton if you like. The bag is made of canvas with a quilting cotton lining. For a wide variety of breezy summer fabrics and canvass for these great projects head over to Fabric.com or Hobby Lobby by clicking the links.
Sun Dress:

What you Need: Sun Dress
- 1 1/2 yds of fabric
- 1/4 yd of 1/2″ elastic
- Thread
- Standard sewing supplies

Step 1: Sun Dress
There is no pattern needed for this project and I used 1/2″ seam allowance throughout. Simply cut four rectangles of fabric. The size of the rectangles depends on your size. I made a small size recommended by Faith over at Design Fixation but made some changes to suit my fabric. This dress can be made any size easily by simply increasing the size of the rectangles. In this case I used one rectangle that was 26″ wide by 36″ long and two rectangles that were 9″ x 36″ and one that was 2″ x 44″. I used linen for this project. Ordinarily I would not use such a fidgety fabric but it was one I had on hand that had a nice print for a summer dress. You could use anything you like but something that doesn't ravel like a jersey would make this project fast and easy.
Step 2: Sun Dress
With right sides together sew the 9″ x 36″ pieces to the sides of the larger 26″ x 36″ piece attaching them only at the top. This creates the shoulders of the dress. Once the shoulders have been sewn, measure down 10″ from the top on both sides and place a pin or clip. Sew from this mark to the bottom on both sides. This creates the sides of the dress.

Step 3: Sun Dress
Once you have sewn the sides, take the 2″ by 44″ piece and press down the sides lengthwise making it 1″ wide. Measure down to your natural waist line and pin the piece to the dress using this measurement. This acts as the casing for the elastic you need for this project. Sew the casing in place using a 1/8″ seam allowance. Measure your waist and cut the elastic to the same size. Insert the elastic into the casing using either a safety pin or a bodkin (one of my favorite tools).

Step 4: Sun Dress
Now that the elastic is in place, Measure down 11″ from the top and mark. With right sides together sew the front seams starting at the mark you just made. If you are using a jersey or some other non-fraying fabric simply turn the dress inside out and you would be finished. However, if you use cotton or linen as I did some modifications need to be made.
Step 5: Sun Dress
To finish the dress, I hemmed the arm holes, the front V-neck facing and around the back of the neck as well as the bottom. The linen fabric I used is extremely prone to fraying so it was absolutely necessary to hem. In addition, I used my pinking shears on all of the seams to help prevent them from fraying as well. These extra steps took a little more time but the dress came out beautifully. It was super simple to make and took no time at all. Thanks again to Faith at Design Fixation for this terrific idea.

The dress is finished.
Sun Hat:


What you Need:
- Pattern that you can get by clicking on this link ( This is not the pattern in the photo. That pattern is no longer available).
- 1/2 yd of exterior fabric
- 1/2 yd of lining fabric
- 1/2 yd Pellon 808 Interfacing
- 1/2 yd Pellon SF101 Interfacing
- Pin Back
- Pin accessory
- Standard sewing supplies
Step 1: Sun Hat
Cut out the pattern pieces. Fuse the outer fabric with the Pellon 808 interfacing. Fuse the lining pieces with the fusible Pellon SF101. In this version of the hat I chose to place the brim piece on the fold and cut one end to avoid having two seams in the brim. It worked out much better but when I sewed the two ends together I used a full 1″ seam allowance and trimmed it down to 1/2″. *****ERRATA***** the pattern for this hat is no longer available but check out this Similar Pattern.

Step 2: Sun Hat
Cut a piece of the coordinating fabric on the bias to act as the hat band. It is important that this piece be bias cut so that it will lay flat going around the hat band. Once the strip is cut. Turn the top under about 1/2″ and sew it to the hat band. Sew the two ends of the hat band together using 1/2″ seem allowance. In this version of the hat, I chose to make it reversible so I made two bias strips in opposite colors for the other side of the hat.

Step 3: Sun Hat
Attach the hat band to the top circle pattern piece making sure there are no gaps. Take your time here because you are going in a circle and it is easy to get puckers along the way. Stop and smooth the fabric as you go and it will be perfect every time.

Step 4: Sun Hat
Once the hat band is attached it is now time to attach the brim to the hat band. First, sew the brim seam together together using 1″ seam allowance and trimming it to 1/2″. Place the hat band and top piece right sides together with the brim upside down and sew them together making sure there are no gaps. Go slowly here because you are sewing in a circle and it is easy to get tangled up. Once the exterior of the hat is complete set it aside and make the other side of the hat in exactly the same way.

Step 5: Sun Hat
Attach the two hat pieces right sides together and sew them at the brim leaving an opening for turning. Once you have finished turning the hat push one side of the hat into the other and press the brim completely. You can top stitch around the brim if you like. Hand sew the opening and you are finished with your sun hat. You can wear either side of the hat depending on your mood and get two for the price of one.
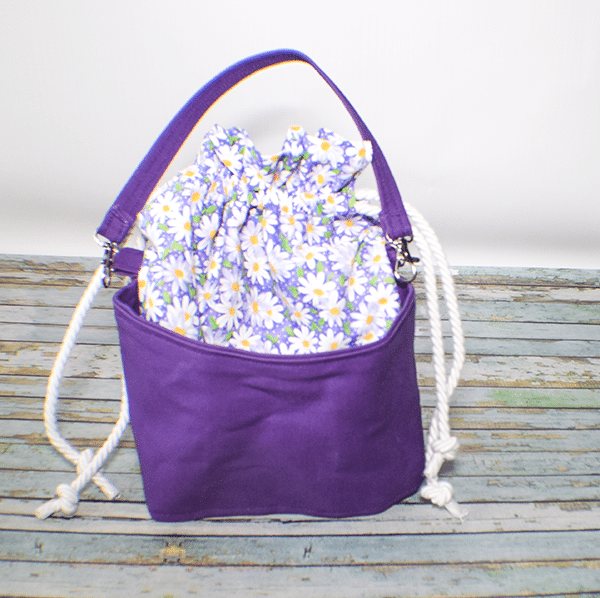
Tote:

I got the inspiration for this bag and the pattern for the top of the bag from Sew News magazine. I changed the design of the rest of the bag but used the same colors to keep with the nautical theme. I liked the rope handles and I hope you will too.
What you Need: Tote
- Pattern
- 1/4 yd Red Canvas
- 1/4 yd White Canvas
- 1/2 yd Blue Canvass
- 1/2 yd Lining fabric
- 2 yds of 1/2″ Rope
- Magnetic Snap (optional)
- Zipper (optional)
- 8 heavy duty Snaps
- Standard Sewing Supplies
Step 1: Tote
Print out the pattern piece and cut four of them from the white canvas on the fold. Next cut 2 rectangles from the red canvas that measure 5″ x 15 1/2″. Then cut 2 rectangles that measure 9 1/2″ x 15 1/2″ from the blue canvass. Finally cut a 2 rectangles that measure 14″ x 15 1/2″ from the lining fabric. I chose a nautical anchors print for my lining but you chose whatever you like.
Step 2: Tote
Sew the White pattern piece to the red pattern piece then the red piece to the blue piece. Sew this twice so you have a front and a back.

Step 3: Tote
Next sew another white pattern piece to one lining piece right sides together and repeat for the other side. Make sure that you thoroughly press the seams open. If you want to add pockets to your tote, now is the time to do it. You can easily add a zipper picket or slip pockets to the lining. I chose to add a zipper pocket to this bag because I think that most bags need a zipper pocket. You can follow my tutorial on adding a zippered pocket by clicking on the link if that is what you would like to do for this bag.

Step 4: Tote
Now it is time to sew the front of the outer bag to the back of the outer bag and the front of the lining to the back of the lining only at the side seams using a 1/4″ seam allowance and the bottom. When sewing the bottom of the lining, leave am opening for turning the bag. Once both the outer bag and the lining are complete. Box the bottoms using my boxing technique.
Step 5: Tote
Add the magnetic snap to the top white portion of the lining of the bag 1 1/2″ below the center. I used a white snap to match but you can use any color you like. Adding the magnetic snap is super easy. Simply take the back of one side of the snap and use it as a template. Center the snap and mark the two slips with a pen. Do the same on the other side. Use a seam ripper or small scissors to cut the slits. Push the prongs of the snap through the slits and place the backing through the prongs. Push the prongs inward toward each other and you are now finished.


Step 6: Tote
Place the Outer bag inside the lining so the two are right sides together. Sew the top white parts together. Once you have finished make sure to clip the curves. Once you have finished sewing, turn the bag through the opening you left in the lining and push the lining into the outer bag, Press thoroughly.

Step 7: Tote
Now its time to add the snaps to the white tabs at the top of the bag. Measure 1/2″ from the bottom of the tab and 3/4″ from each edge and add a snap top. I used black snaps to offset the white canvas but you can choose any color. Place the other side of the snap 2″ lower down. Do this for all 8 snaps.

Step 8: Tote
Cut the 2 yds of rope in half and place it flat through the snap enclosures before you have snapped them closed. Snap the snaps. Tie the rope in a knot at the ends to secure them then put fabric glue or white tape at the ends to prevent fraying. Now your boat tote is finished to take to the beach, the pool or the boat. Bon Voyage.

If you would like more handbag patterns and tutorials sign up for my mailing list and receive your free ebook of 15 handbag patterns and tutorials.


Help. THe sun hat pattern pieces are no longer there.
Think to the hat is no longer available. I have included another link.