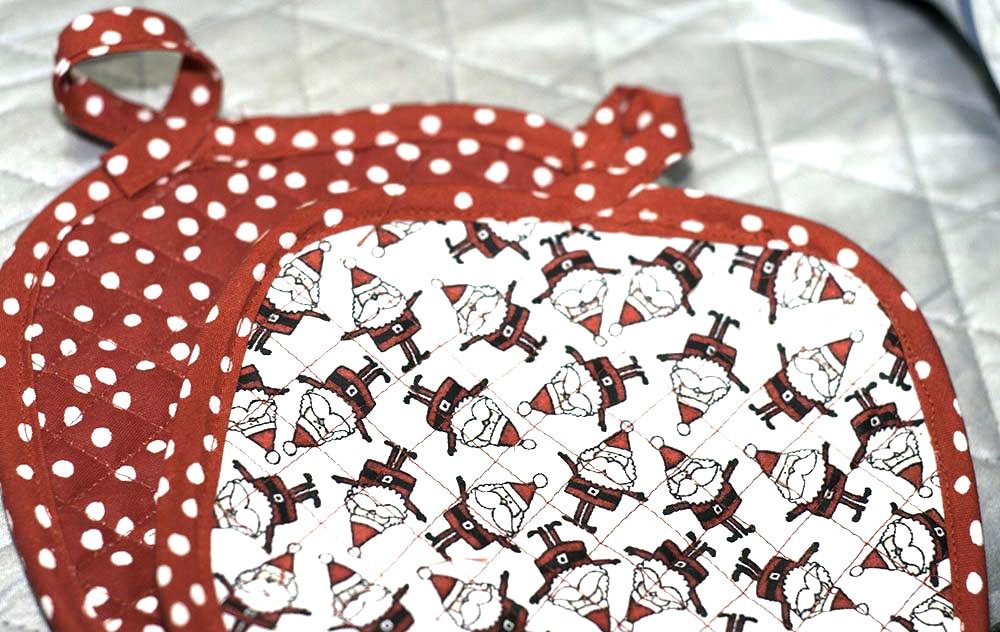
Ever wonder how to make your own oven mitts and potholders. I love making my own oven mitts and potholders because I can use exactly the fabric that I want and am not limited to what I find in the shops. For this project I used some charming Santa Claus fabric and red and white dot fabric for the perfect Christmas accessories for my kitchen. I must admit that these DIY oven mitts and potholders came out really cute. I just love them.
As usual I had these remnants in my massive stash of remnants (I am trying to use them up but I keep buying more). If you don't have fabrics in your stash I recommend that you head over to Hobby Lobby or Fabric.com to find the perfect fabric for your project. I used basic novelty cotton and quilting cotton for my project.
This tutorial walks you step by step on how to sew your own oven mitts and potholders simply and easily using insul bright. The insul bright. is what prevents the pots from getting hot so it is a necessity for this project. This post contains affiliate links that if you click on them and make a purchase I may receive a small commission at no extra cost to you.
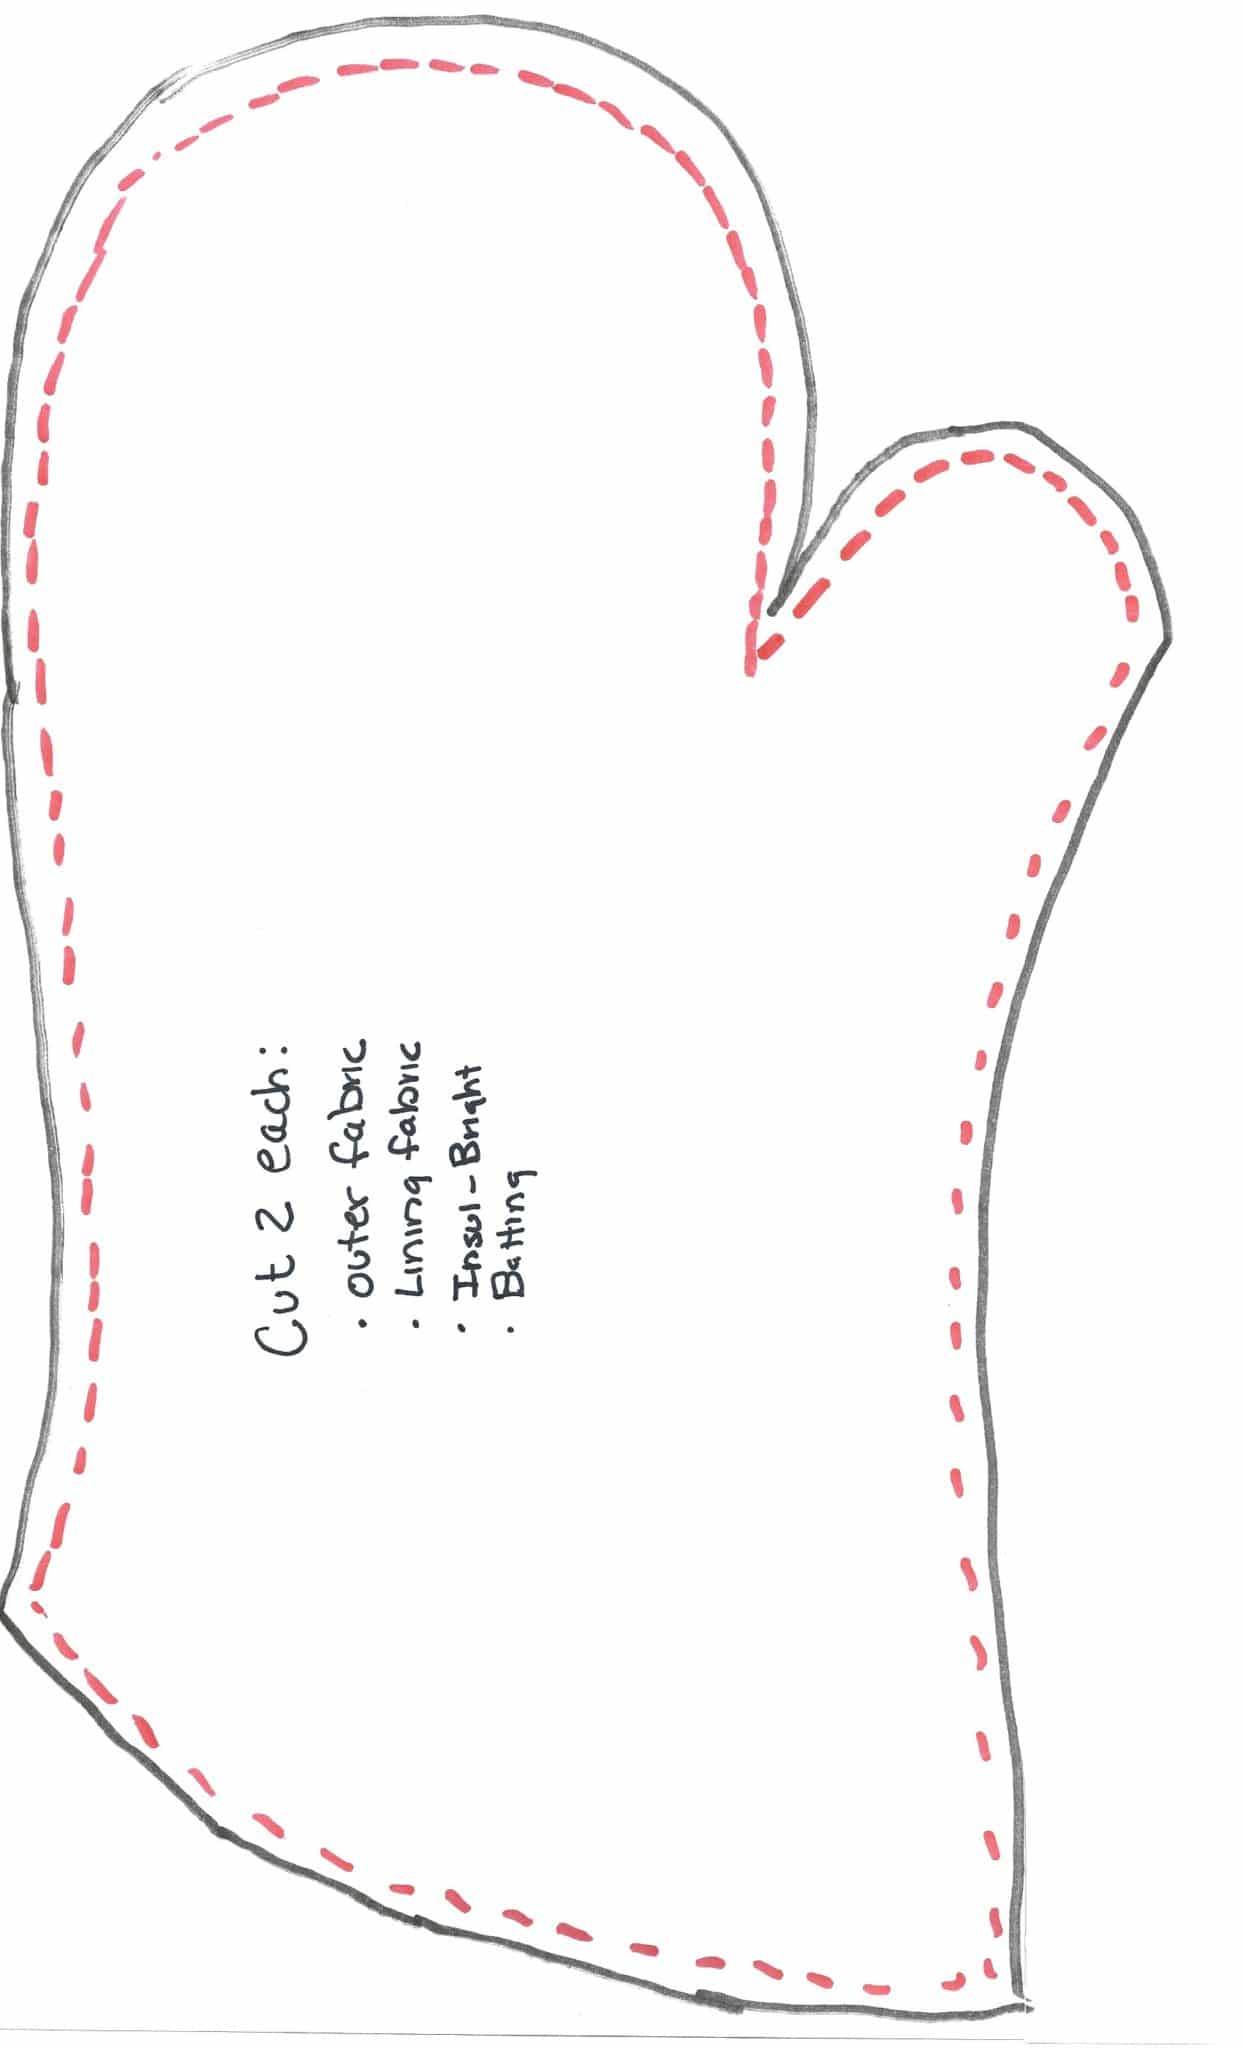
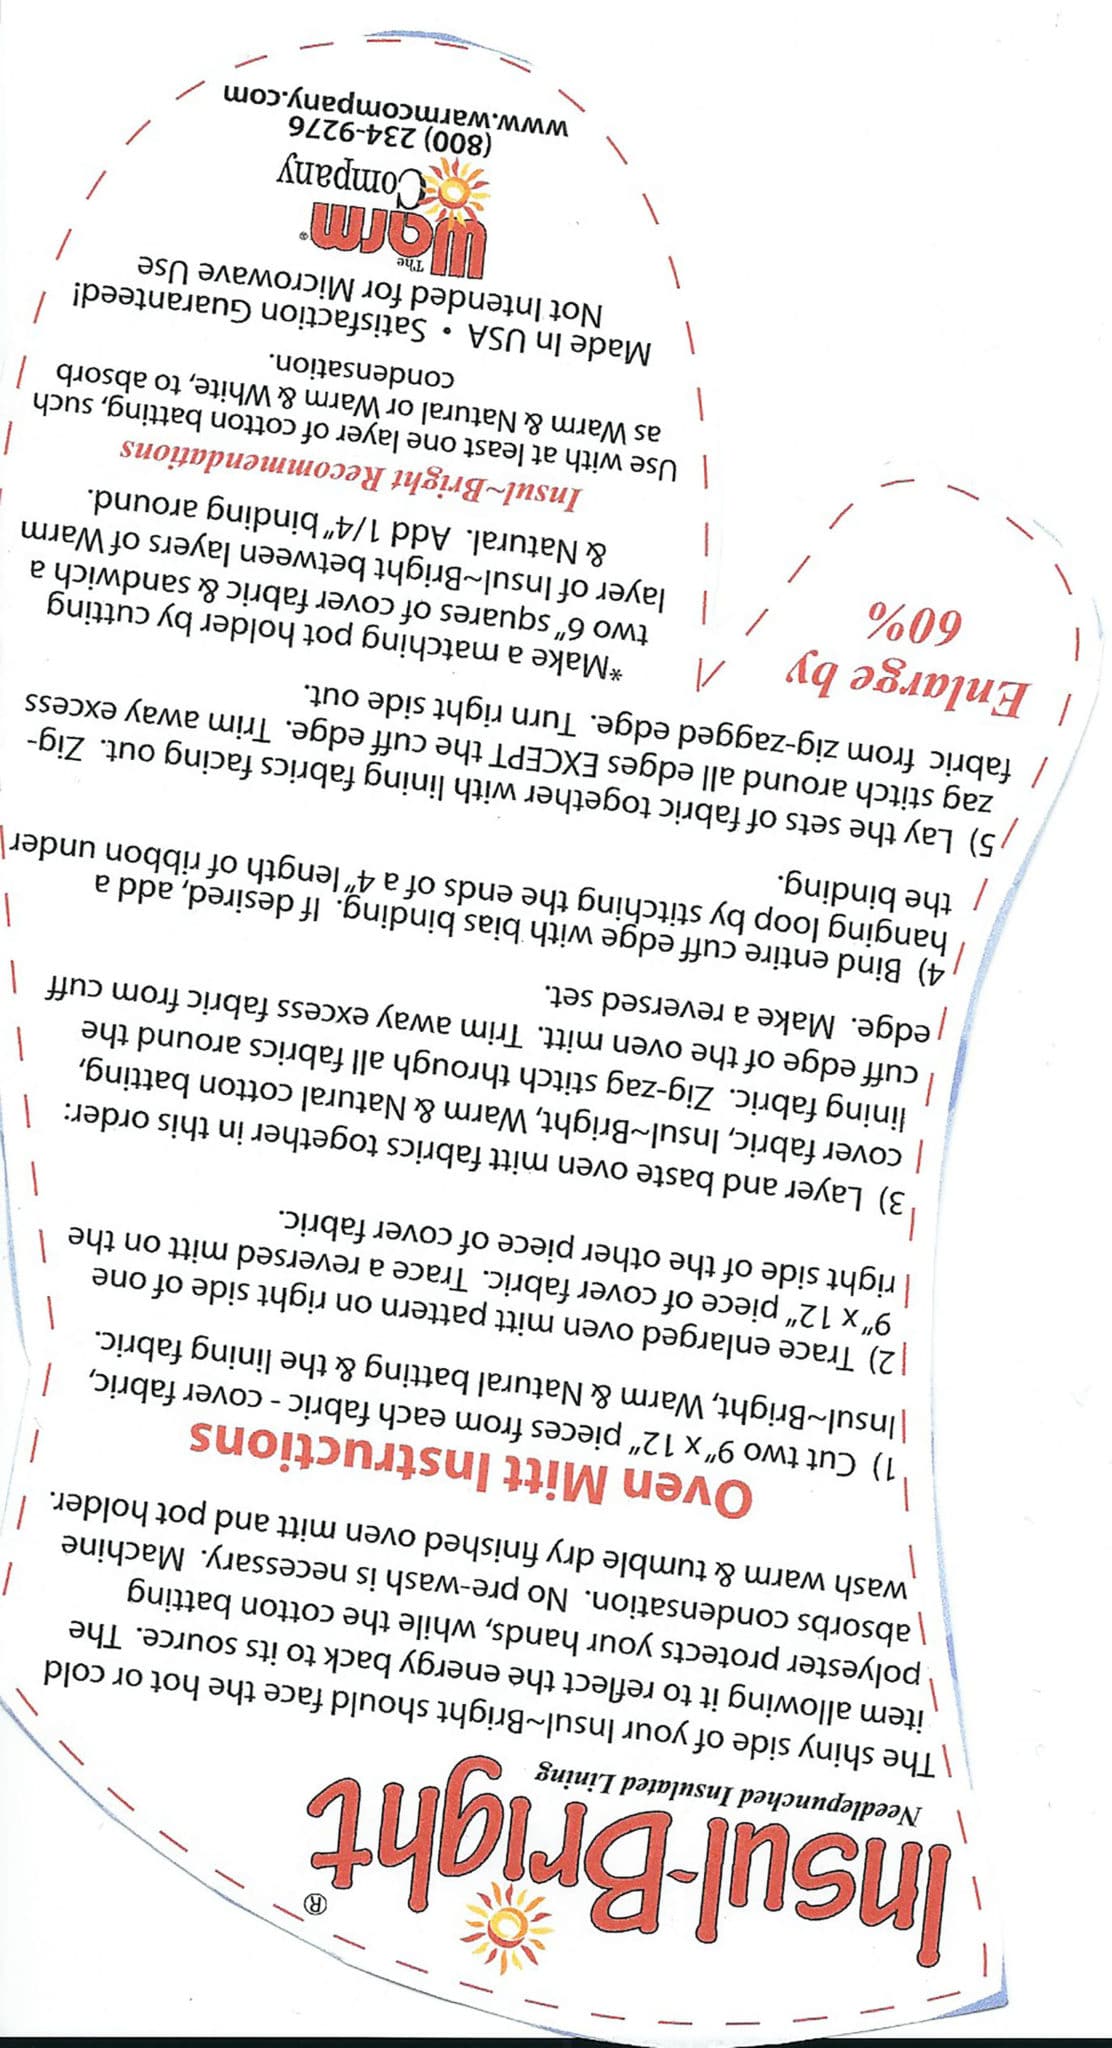
Pick the size mitt you want to make and download the pattern. Note that the large mitt pattern requires 11″ x 14″ paper and the small pattern was taken from the Warm Company's website and requires that it be enlarged by 60%.
Oven Mitt Step 2: Cut out your Fabrics
Oven Mitt Pieces
Once you have chosen your pattern, cut two each of the main fabric, lining fabric, batting and insul-bright. Layer the lining fabric, batting, insul-bright and then the main fabric in two separate piles.
2 Oven Mitt Stacks clipped together
These two piles will make one mitt. Note: using the insul-bright or a similar product is important because it is the product that insulates your hands from the heat. According to the Warm Company's website “the polyester fibers resist conduction while the reflective metalized polyester film reflects radiant energy, hot or cold, back to its source.”
Oven Mitt Step 3: Quilt your Oven Mitt
Quilted Oven Mitts
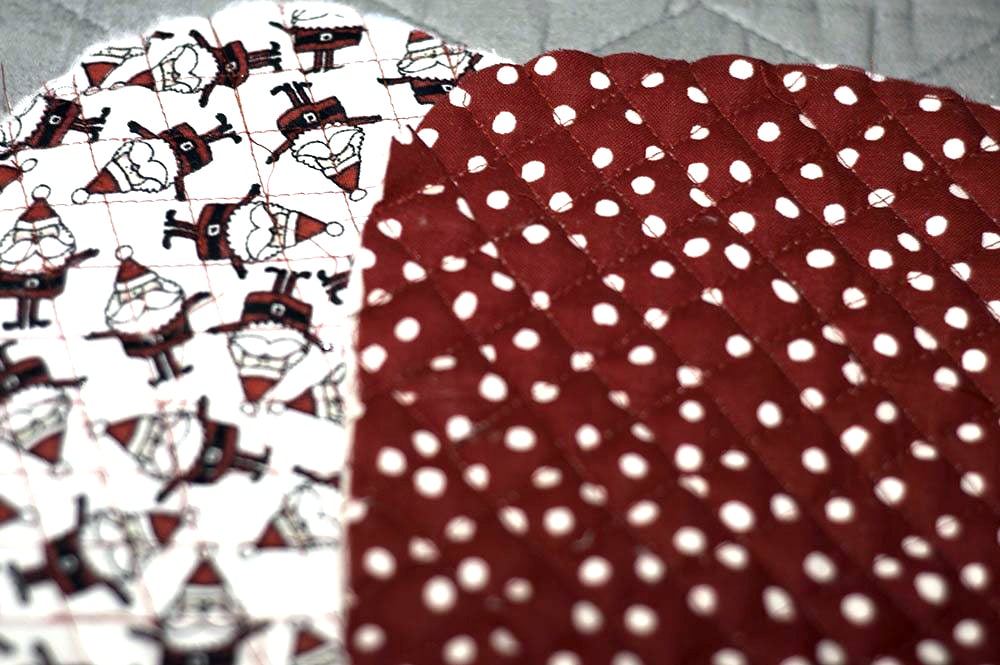
I chose to quilt my oven mitt but it is not necessary for this pattern to work. If you choose to quilt the mitt, simply sew evenly spaced lines diagonally across the mitt so that a diamond pattern forms or you can free arm sew in a random pattern so that all of the layers are bound together. You can use matching or contrasting thread. I chose contrasting thread for my project.
Oven Mitt Step 4: Add the Bias Binding
Once the quilting of the mitt is done or you have chosen not to quilt the mitt take your bias binding either store-bought or you can make your own using my how to make bias binding tutorial and sew it to the bottom of each of the mitt halves. I also used the binding fabric to make a small loop to hang the mitt by cutting a 2 x 2 1/2″ long rectangle. Fold the rectangle in half then open it up. Folded both sides to the middle and then fold the sides together at the original middle fold. Once that was finished I sewed a line up both sides to make a strong hanger for the mitt. Set the hanger piece aside.
To sew the bias binding, I attached the raw edges of one side of the binding to the raw edge of the mitt and sewed a 1/4 inch seam. I then folded the binding over and top stitched it through all layers so that the binding underneath was caught and there was a nice edge of contrasting binding to the bottom of each of the mitt halves. You could also follow my how to sew bias binding tutorial.
Raw Edge of Bias Binding and Raw Edges of Mitt
Folded Bias Binding
Completed Bias Binding
Oven Mitt Step 5: Join the Two Mitts
Once the binding has been attached I placed the two halves of the mitt together with right sides together. Add the hanger piece so that the loop is facing inside the mitt and the raw edges are sticking out slightly through the raw edges of the mitt. Sew a 1/4″ seam around the whole mitt leaving the bottom where you attached the bias binding open. I sewed a few times over the handle loop to make it secure. I used the overlock stitch on my sewing machine to secure the raw edges. You could also use a serger or leave them raw.
Oven Mitt Right Sides Together
Oven Mitt Step 6: Turn Right Side Out
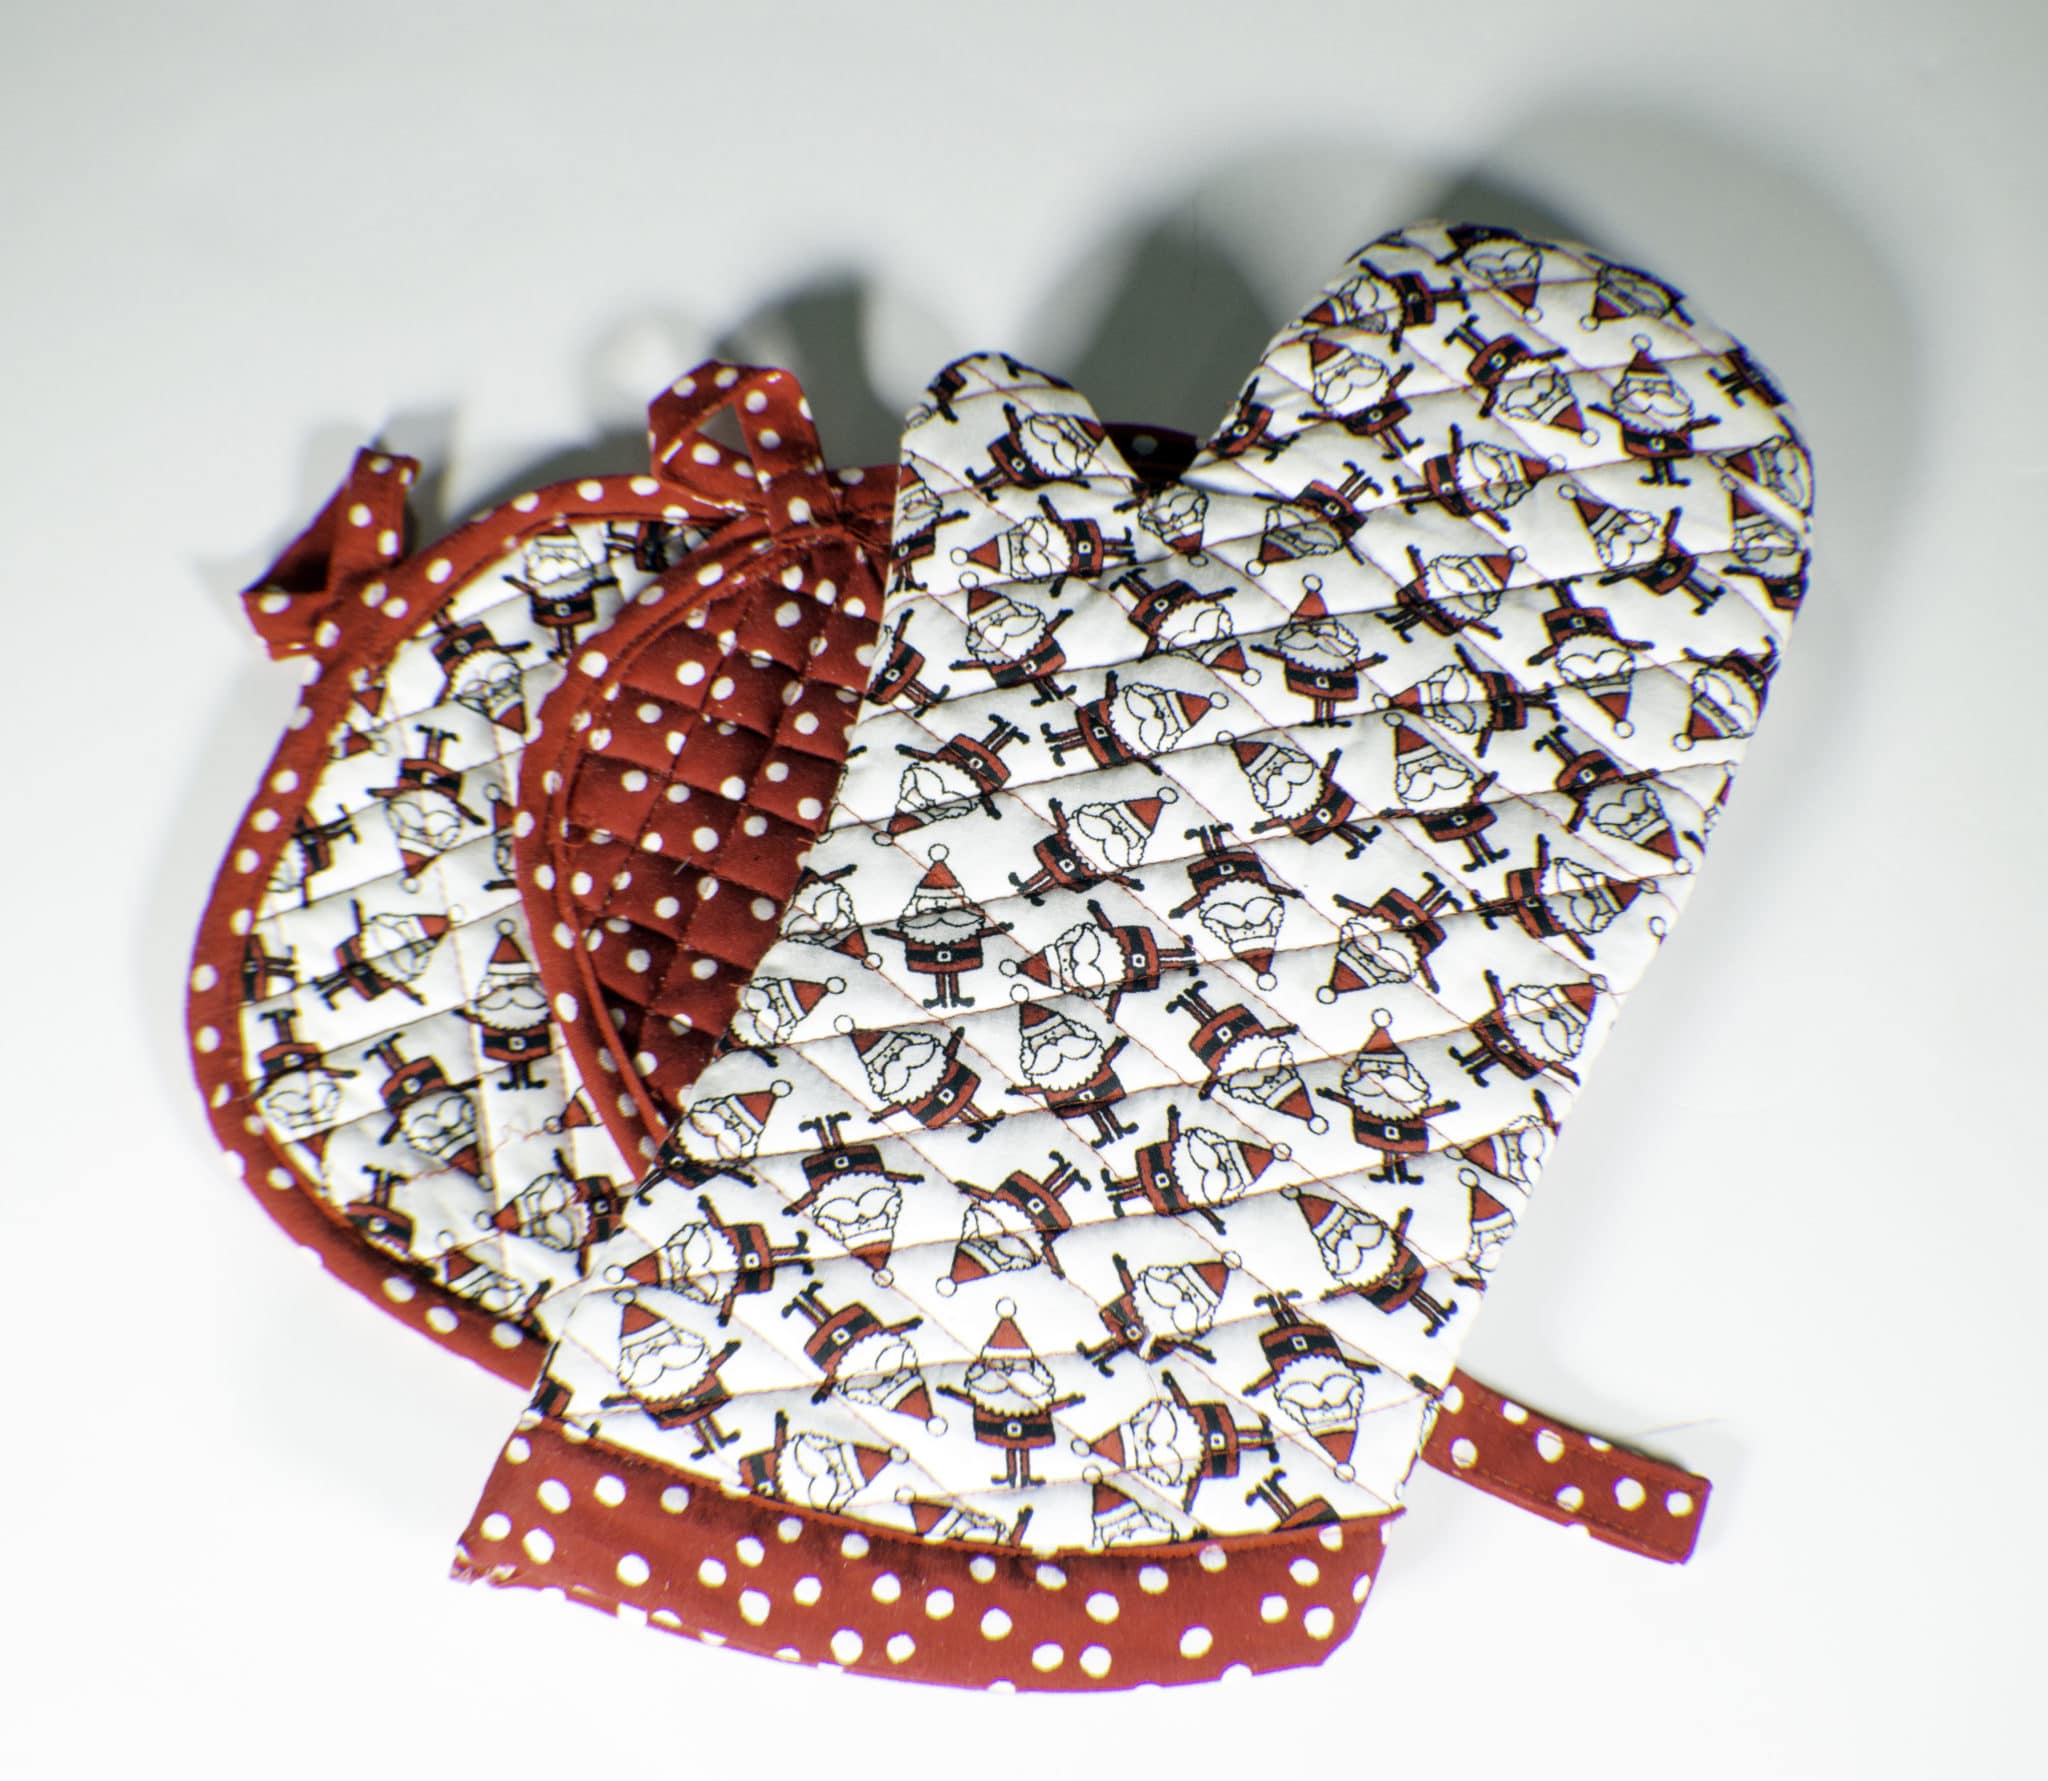
Once the mitt is sewn I turned it right side out and the mitt was finished. You can repeat the process for a second mitt but be sure to turn the pattern up side down so that it fits the other hand. You have now created a cheery Santa Claus Christmas Oven Mitt that is perfect for the holiday season for your home or as a fun yet functional gift for family and friends.
Potholder: Oven Mitts and Potholders Tutorial
Pot Holder Step 1: Download the Potholder Pattern
Download the Pot Holder Pattern. Cut two of each of the main fabric, lining fabric, insul-bright and batting. Layer the lining fabric, batting, insul-bright and then the main fabric in two separate piles. These two piles will make two potholders. Once again, I chose to quilt my potholders by sewing diagonal lines making a diamond pattern. You do not need to quilt your pot holders if you do not want to do so.
Potholder Step 2: Quilt and Bind
Once the quilting of the potholder is done or you have chosen not to quilt the potholder take your bias binding either store-bought or you can make your own using my how to make bias binding tutorial and sew it around the potholder. Start on one side in the middle unfolding the binding so that the raw edges and right sides are together. Once you have sewn around the potholder make a loop with the binding, Twist the loop to the back side of the potholder as you are folding the binding over. The loop will serve as a hanger for the potholder. Once the binding is folded over to cover the raw edges of the potholder, sew around the perimeter binding to complete the finished look. Remember to sew the loop as well.
Follow the same steps again to create the second potholder and you now have two potholders to keep for yourself or to give as gifts.
Double Oven Mitt:
Step 1: Download the Double Oven Mitt Pattern
Download the Potholder Pattern. Cut 1 rectangle of any length you would like from the main fabric, lining fabric, insul-bright, and batting. I made my rectangle 24″ long. The width of the rectangle is 7 1/4″ which is also the width of the basic potholder.
Double Oven Mitt Step 2: Cut out the Fabrics
Take the potholder pattern and cut out two potholders from the main fabric, lining fabric, insul-bright, and batting. Use the potholder pattern to round off the ends of your rectangle so that they match up with your potholders.
Double Oven Mitt Step 3: Quilt
I chose to quilt my double oven mitt but it is not necessary for this pattern to work. If you choose to quilt the mitt, simply sew evenly spaced lines diagonally across the rectangle and the two potholders so that a diamond pattern forms or you can free arm sew in a random pattern so that all of the layers are bound together. You can use matching or contrasting thread. I chose contrasting thread for my project.
Double Oven Mitt Step 4: Bind
Once the four pieces are quilted or you choose not to quilt them, take your store-bought bias binding or make your own using myHow to make bias binding tutorial and attach the raw edge of one side of the binding to the edges of the bottom arc of both potholder pieces. Then fold the binding over and top stitch through all layers catching the bottom of the binding to create a clean binding edge. You can also follow my How to Sew Bias Binding Tutorial
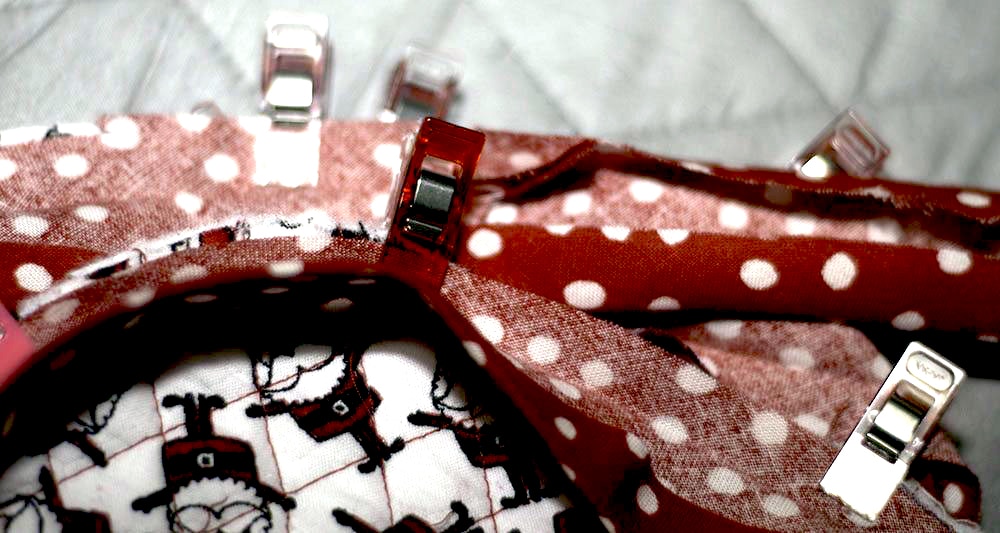
Then place the potholders at each end of the long rectangle. You can pin them together or use clips like I did to hold the three pieces together. Once the pieces are together, take the rest of your binding and sew it all the way around the outside of your rectangle in the same manner you attached it to the small potholders. Like the basic potholders place loops using the binding at each end of the double oven mitt to use as hangers.
Double Oven Mitt Step 4: Finish
After the binding is sewn you have finished your double oven mitt and once again can keep it for yourself or give it as a gift. Combine all three for a terrific handmade house-warming or holiday gift.
If you would like more sewing and crafting projects sign up for my free newsletter and get your free list of sewing room must haves.
We use cookies on our website to give you the most relevant experience by remembering your preferences and repeat visits. By clicking “Accept”, you consent to the use of ALL the cookies.
This website uses cookies to improve your experience while you navigate through the website. Out of these, the cookies that are categorized as necessary are stored on your browser as they are essential for the working of basic functionalities of the website. We also use third-party cookies that help us analyze and understand how you use this website. These cookies will be stored in your browser only with your consent. You also have the option to opt-out of these cookies. But opting out of some of these cookies may affect your browsing experience.
Necessary cookies are absolutely essential for the website to function properly. These cookies ensure basic functionalities and security features of the website, anonymously.
Cookie
Duration
Description
cookielawinfo-checkbox-analytics
11 months
This cookie is set by GDPR Cookie Consent plugin. The cookie is used to store the user consent for the cookies in the category "Analytics".
cookielawinfo-checkbox-functional
11 months
The cookie is set by GDPR cookie consent to record the user consent for the cookies in the category "Functional".
cookielawinfo-checkbox-necessary
11 months
This cookie is set by GDPR Cookie Consent plugin. The cookies is used to store the user consent for the cookies in the category "Necessary".
cookielawinfo-checkbox-others
11 months
This cookie is set by GDPR Cookie Consent plugin. The cookie is used to store the user consent for the cookies in the category "Other.
cookielawinfo-checkbox-performance
11 months
This cookie is set by GDPR Cookie Consent plugin. The cookie is used to store the user consent for the cookies in the category "Performance".
viewed_cookie_policy
11 months
The cookie is set by the GDPR Cookie Consent plugin and is used to store whether or not user has consented to the use of cookies. It does not store any personal data.
Functional cookies help to perform certain functionalities like sharing the content of the website on social media platforms, collect feedbacks, and other third-party features.
Performance cookies are used to understand and analyze the key performance indexes of the website which helps in delivering a better user experience for the visitors.
Analytical cookies are used to understand how visitors interact with the website. These cookies help provide information on metrics the number of visitors, bounce rate, traffic source, etc.
Advertisement cookies are used to provide visitors with relevant ads and marketing campaigns. These cookies track visitors across websites and collect information to provide customized ads.


