
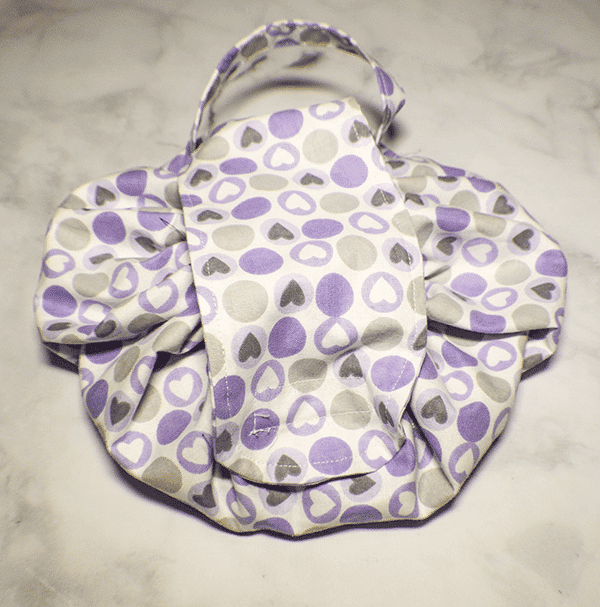
I am always looking for fun and functional ways to store things. I came across this super simple project at Sewing Times on Youtube. This drawstring makeup pouch can be used to store a variety of things from makeup to medication to thread or just about anything small. This is a beginner sewing project that anyone with basic sewing skills can make. It is a fairly large pouch that opens wide when the drawstring is opened out. Ii just love this simple sewing project. It is perfect for everything that I need to store. So lets get started.
I used some fun fabric that I purchased at JOANN Fabric & Craft Stores![]() but you can head to fabric.com or onlinefabricstore.net to get exactly what you need for your drawstring makeup pouch. This post contains affiliate links that if you click on them and make a purchase I may receive a small commission at no extra cost to you.
but you can head to fabric.com or onlinefabricstore.net to get exactly what you need for your drawstring makeup pouch. This post contains affiliate links that if you click on them and make a purchase I may receive a small commission at no extra cost to you.
What you will Need: How to Make a Drawstring Makeup Pouch
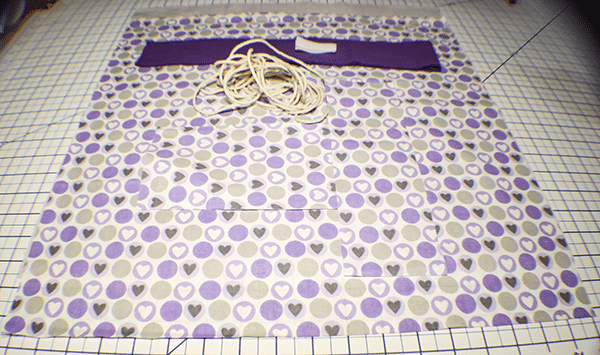
- 18 1/2″ piece of outer fabric
- 18 1/2″ piece of lining gabric
- 2 pieces of outer fabric that measure 4 3/8″ x 10″
- 1 outer piece that measures 3 1/4″ x 10″
- 2 accent pieces that measure 30″ x 2 3/8″
- 1 piece of velcro that measure 1″ x 2″
- 130″ of 3mm cotton cording
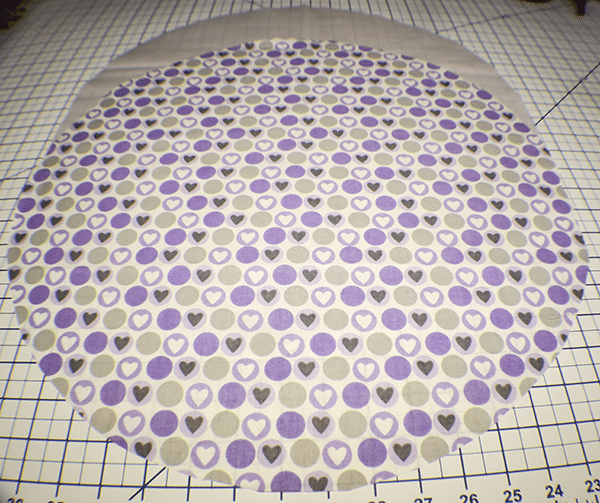
Step 1: Cut the outer Fabric
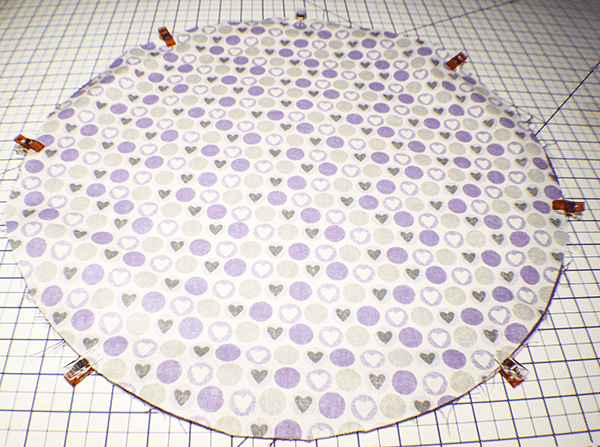
Find the center of the two squares of fabric and make a mark. Measure 9 1/4″ from the center in a circle and make marks. Join the marks to make an 18 1/2″ diameter circle. Cut the circle from both outer and lining pieces.
Step 2: Prepare the Accent Fabric
Fold under the short ends of the accent pieces by 1/2″ twice and stitch across the ends. Then fold the accent piece in half lengthwise and press.
Step 3: Add the Accent Fabric
Fold the lining in half to find the center and mark each side. Do the dame for the accent fabric. Match the center of the accent fabric to the center of the lining fabric matching the raw edges and pin. Repeat for the other side. You should have two accent pieces that surround the lining piece with a slight gap between the two. Stitch the accent piece using a 3/8″ seam allowance.
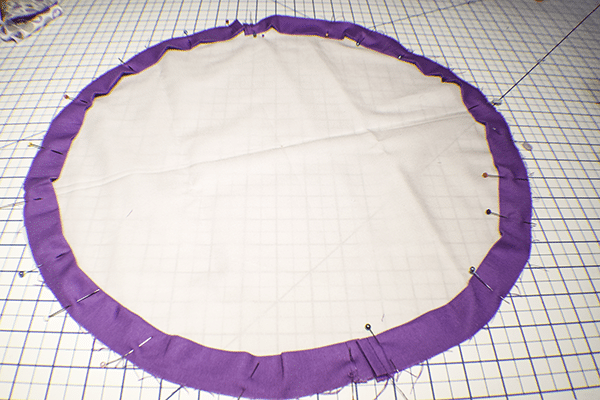
Step 4: Add the Outer Circle
Place the outer circle right sides together with the lining circle so that the accent fabric is in between. Stitch the outer circle to the lining circle and accent fabric using a 3/8″ seam allowance. Leave an opening on one side for turning. Turn right sides out and press. Top stitch all around the outer circle to enclose the opening you left.
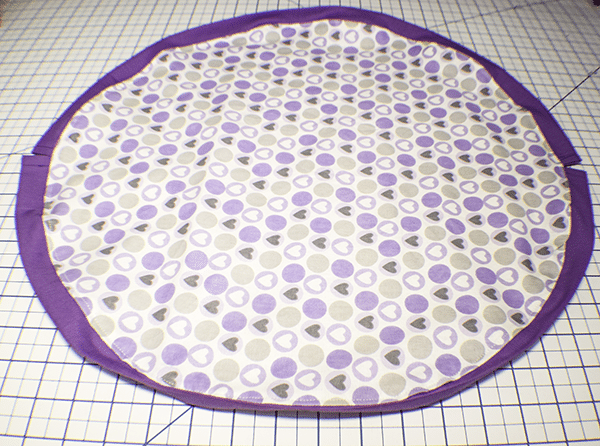
Step 5: Insert the Cording
Cut the cording in half. Using a safety pin or a bodkin insert the cording through one side of the accent fabric all the way around. Insert the other piece of cording in the other direction so that you have two pieces of cording ends on both sides. Tie the ends in a knot.
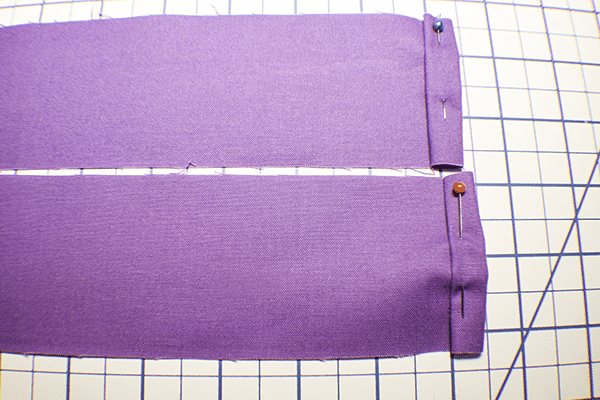
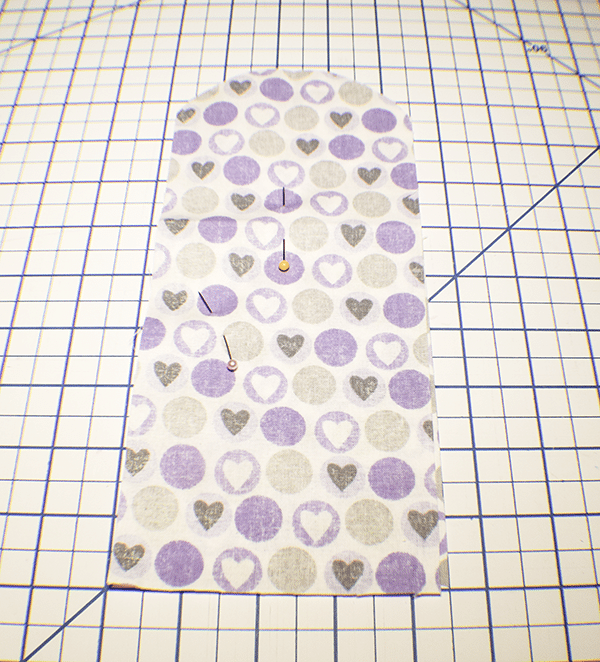
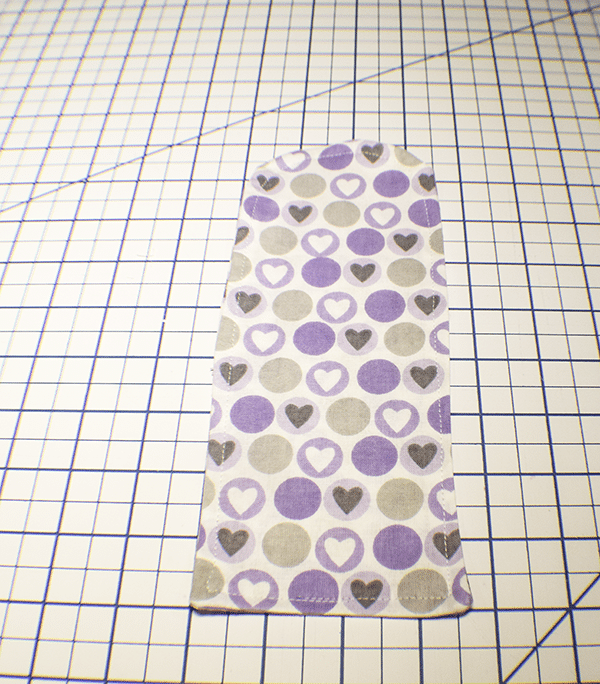
Step 6: Create the Cover Flap
Take the two matching outer pieces and place them right sides together and pin in the center. Fold one end lengthwise and round the corner to make a curved end. Stitch all the way around using a 3/8″ seam allowance but leaving an opening on one side for turning. Turn right sides out. Topstitch all the way around.
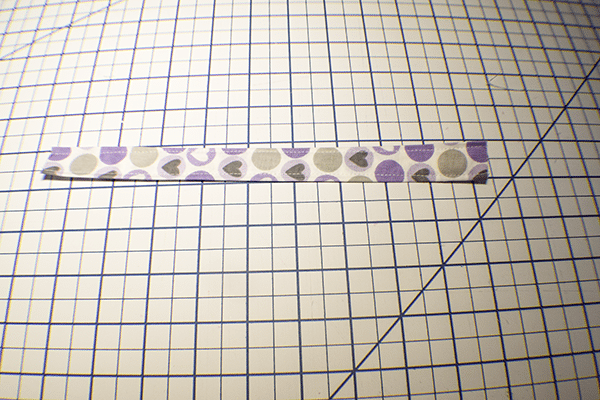
Step 7: Create the Handle
Take the remaining outer piece and fold the long edges to the center and press. Fold in half to enclose the raw edges and press again. Topstitch on both sides.
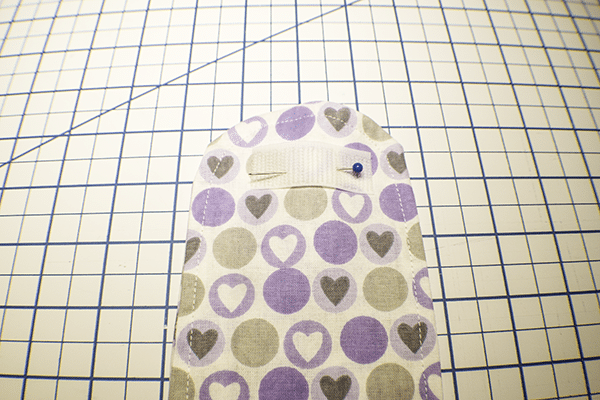
Step 8: Add the Velcro
Add one side of the Velcro to the top end of the rounded side of the cover flap. Add the other half of the Velcro vertically in the center opposite the drawstrings about 1 1/2″ from the edge of the accent fabric on the outer fabric side. Stitch the Velcro in place.

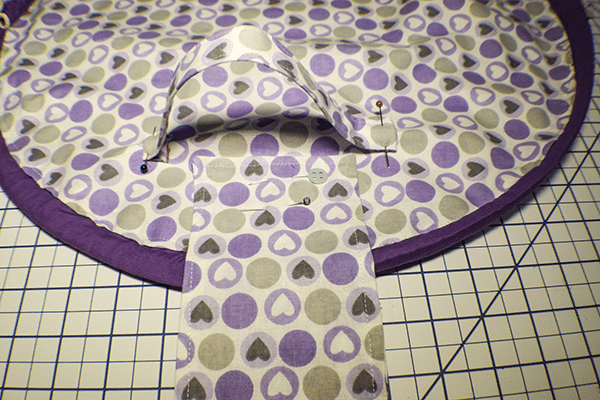
Step 9: Add the Handle
Place the cover flap onto the outer pouch opposite the Velcro piece. Measure down 3″ from the accent fabric and pin. Fold under the handle on each end by 1/2″. Place the handle ends on either side of the flap about 2″ from each side. Stitch along the ends of the handle. Stitch two lines on the end of the cover flap. Turn the pouch over and pull the drawstring closed. Close the flap and you are finished.

I hope you enjoyed this makeup pouch project. If you would like more sewing and crafting projects subscribe to our newsletter and receive your free eBook of 15 handbag patterns and tutorials taken from the blog.
If you would like video tutorials of some of Sew Very Crafty's most popular posts subscribe to our free YouTube channel here.


I love reading through your tutorial and seeing your creative process. This looks fun to make. I was thinking someone can also enlarge it and use it for a yarn project carry-all, or even make it really big with a light decorator or denim and it can be a legos/blocks carry-all for kids. So….many….possibilities! Thanks for sharing this great project.
You are welcome. Yes it can be used for all of those things. It is really functional.