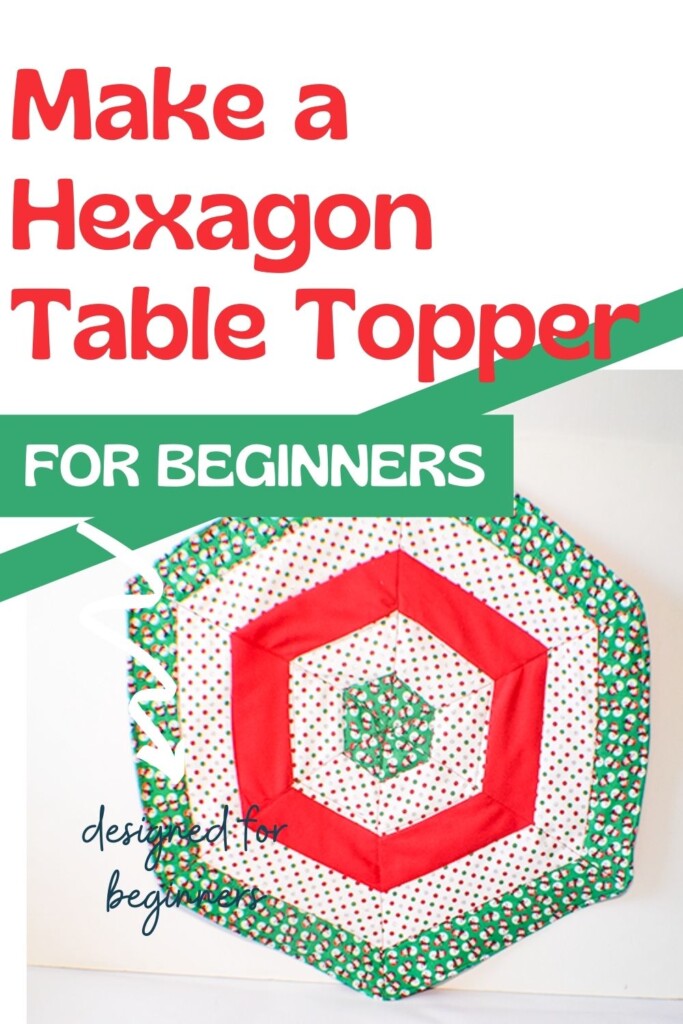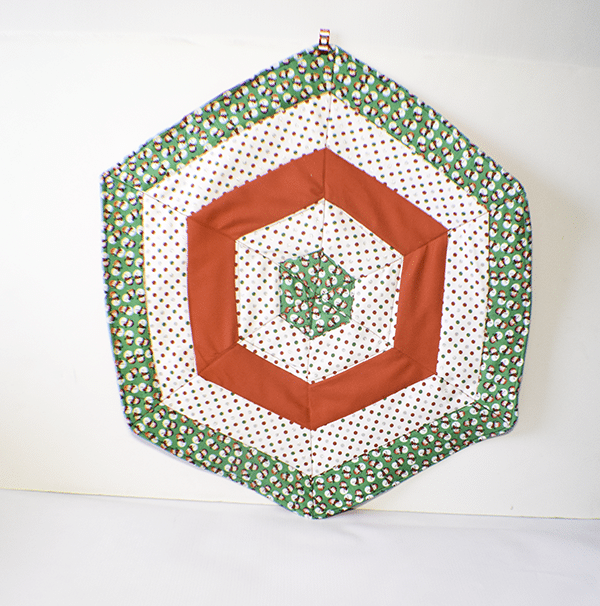
As those of you who follow Sew Very Crafty know I am not much of a quilter. But, I decided to create this simple hexagonal table topper for my round Christmas table. It is a simple quilting project for the beginner quilter like me. There is no binding, thank goodness for that. I have decided to make this table topper without a binding and use my other sewing skills instead. I was surprised how it came out and decided to share it with you so that you could create a quilted hexagonal table topper of your won even if you are not a quilter like me.
The Christmas fabrics I used came from my stash to make this hexagonal table topper. I purchased these at JOANN Fabric & Craft Stores![]() but you could head to fabric.com or onlinefabricstore.net to get what you need for your Christmas table topper. This would also be amazing as a Halloween table topper using Halloween fabrics as well. This post contains affiliate links that if you click on them and make a purchase I may receive a small commission at no extra coast to you. As an Amazon Associate I earn from qualifying purchases.
but you could head to fabric.com or onlinefabricstore.net to get what you need for your Christmas table topper. This would also be amazing as a Halloween table topper using Halloween fabrics as well. This post contains affiliate links that if you click on them and make a purchase I may receive a small commission at no extra coast to you. As an Amazon Associate I earn from qualifying purchases.
If you would like a video tutorial of this project head over to YouTube and check out my video. While you are there subscribe to my free YouTube channel.

What you will Need: How to Make a Simple Hexagon Table Topper
- 1/4 yd each of three different patterns of Christmas or Halloween fabric
- 1 yd of outer fabric
- 1 yd of quilt batting
- Large quilting ruler
- Cutting Mat
- Rotary Cutter
- Standard sewing supplies
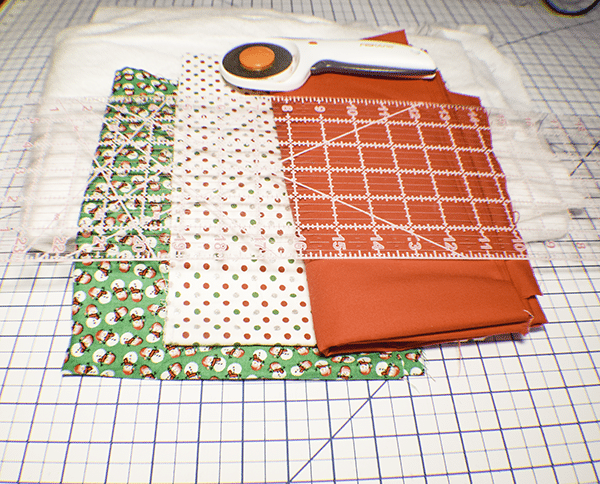
Step 1: Cut your Fabrics
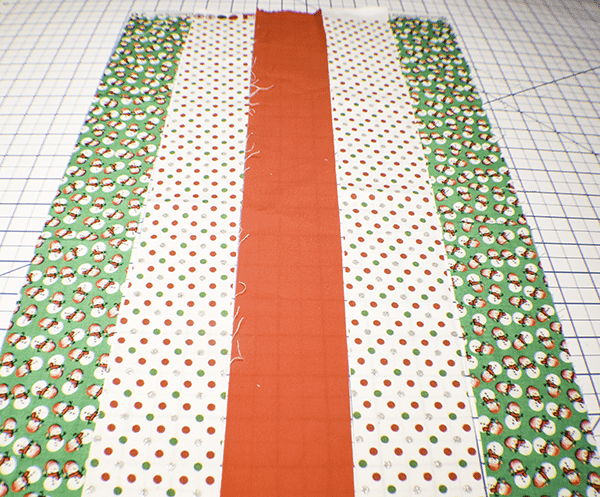
Cut 2 1/2″ x WOF five times. WOF means width of fabric or from selvedge to selvedge. You can use five different fabrics for this or three to make a less busy design. I cut two of two of the fabrics and one of the final fabric to create my design. It is completely up to you. Your final design will be determined by how many different fabrics you choose.
Step 2: Stitch your Fabrics
First, line up your fabrics on your work space. To get the pattern I wanted I placed my five pieces of fabric so that the same piece was on the outside and the same pieces were on the inside and the remaining piece was in the center. Then I was sure to have the pattern that I wanted for my table topper. From there, I Placed the first inner piece right side together with the outer piece and stitched using a 1/4″ seam allowance. I then placed the center piece to the inner piece right sides and stitched using a 1/4″ seam allowance. I continued until all of the pieces were stitched in the order that I had placed them.
Step 3: Press the Seams
Press the seams open using a hot iron.

Step 4: Cut your Stitched Fabrics
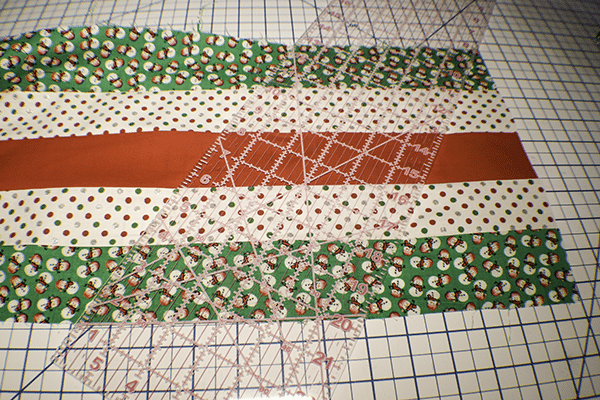
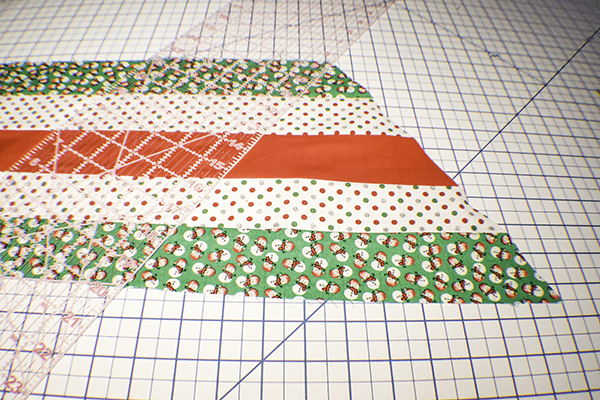
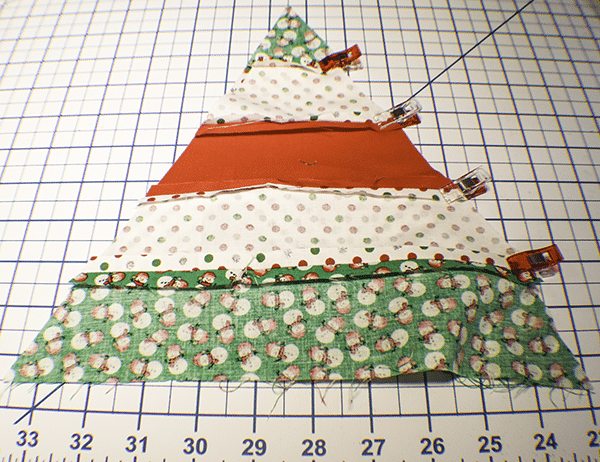
This is the most complicated part of this whole project. First Cut off the selvedge edges. Next, locate the 60 degree line on your quilting ruler. Line up the 60 degree line with the bottom of your long strip of fabrics and the point of the ruler at the top corner. Using your rotary cutter cut along the edge closest to the end of the fabric and discard that fabric piece. Move the ruler so that the other 60 degree mark is on the bottom of the fabric and you are creating a triangle. Cut along the ruler and set aside your first triangle. Continue to move the ruler so that you are creating triangles at the 60 degree mark. Every other triangle will be upside down. This is correct. You should have 6 triangles when you are finished.
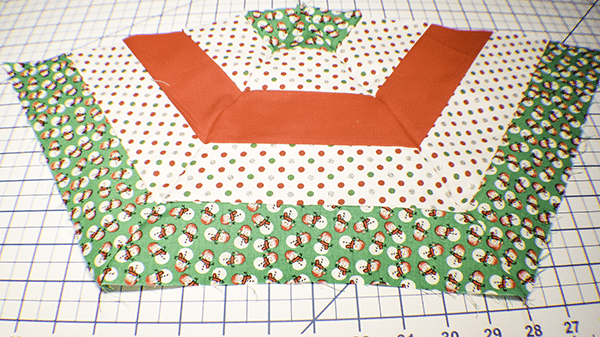
Step 5: Stitch your Triangles
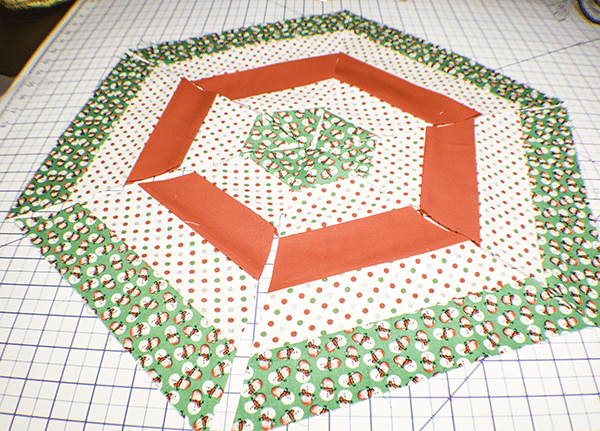
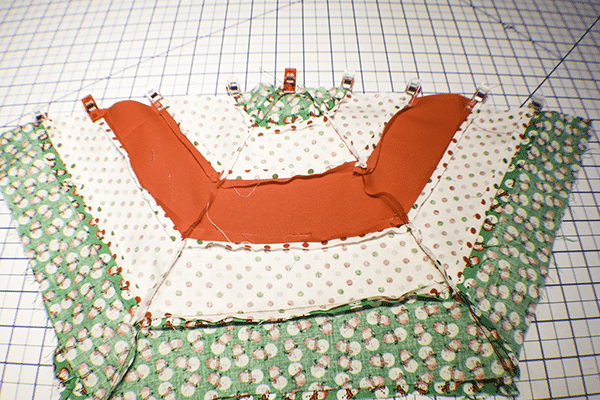
Match the triangles so that they create the hexagonal shape and the patterns line up. Place the first set of triangles right sides together and stitch using a 1/4″ seam allowance. Add the third triangle and again stitch using a 1/4″ seam allowance. Repeat for the other three pieces. You should have two halves of the hexagon. Press the seams open. Stitch the two sides together using a 1/4″ seam allowance and press the seam open. You have completed the top of your hexagon table topper.
Step 6: Cut your Batting and Outer Fabric
Using your hexagon table topper as a template cut a piece of batting and a piece outer backing fabric.
Step 7: Stitch the Hexagon Table Topper
Place the table topper, right sides together with the backing fabric. Layer the batting on top of the backing fabric. Stitch all the way around the table topper leaving an opening for turning on one side. Turn right sides out through the opening. The batting should be in the center of the table topper and the backing fabric. Press.
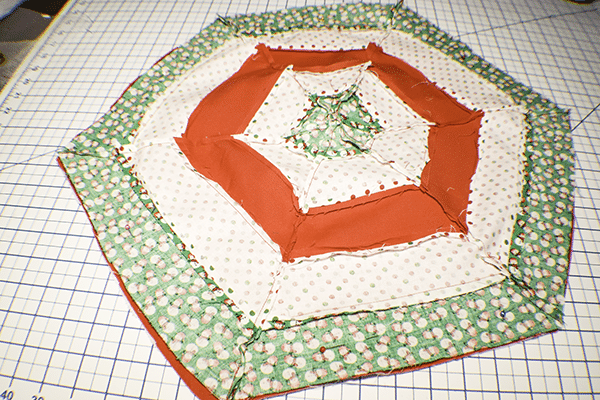
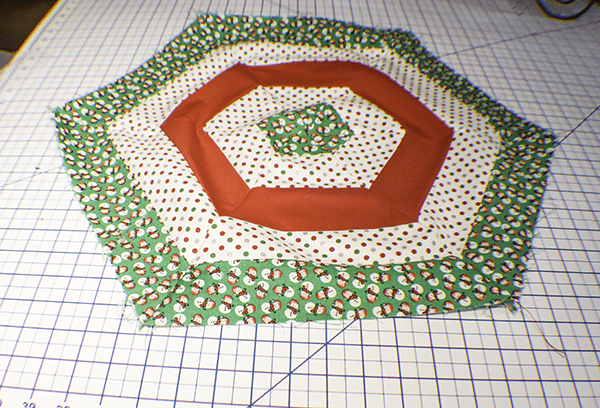
Step 8: Quilt the Hexagon Table Topper
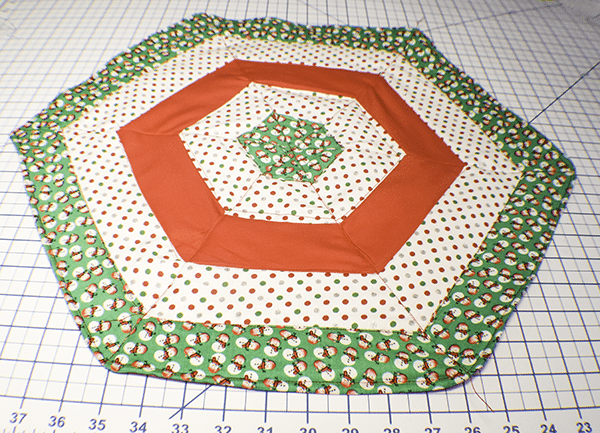
To quilt this table topper start by topstitching all the way around the edge using a 1/4″ seam allowance. Stitch around each of the inner hexagons. Once you have stitched around each of the hexagons stitch in the seam of the criss cross seams of the table topper by stitching in the ditch or stitching in the seam line and you have finished your simple hexagonal table topper.
I hope you enjoyed this Hexagon Table Topper project. If you would like more sewing and crafting projects sign up for our newsletter and receive access to our free printables library
If you would like video tutorials of some of Sew Very Crafty's most popular posts subscribe to our free YouTube channel here.