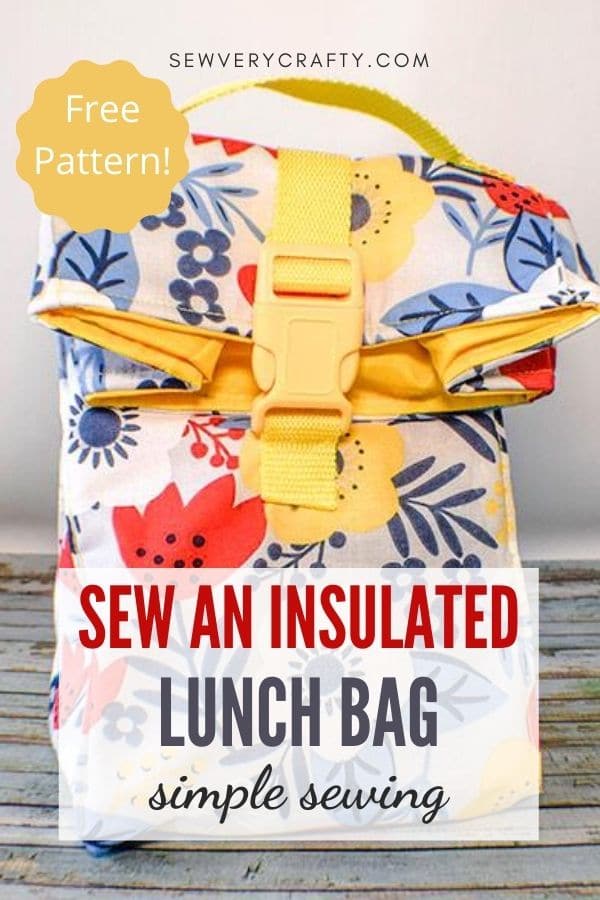
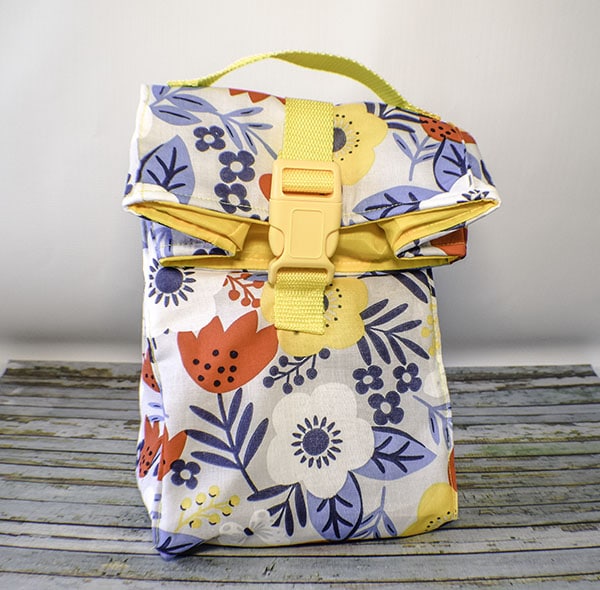
Sew a Reusable Insulated Lunch Bag
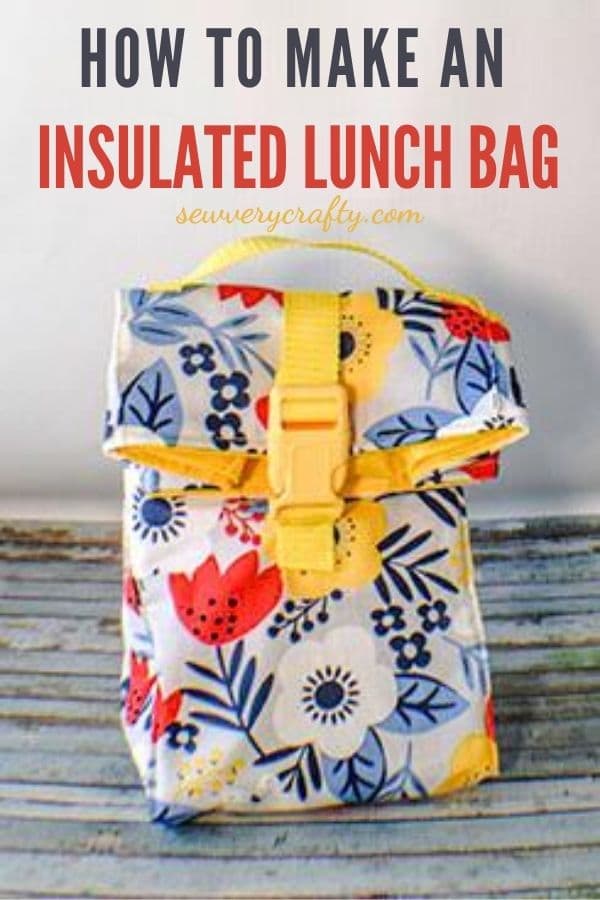
I take my lunch to work everyday and decided to sew a own reusable insulated lunch bag to carry it in. This simple sewing project can be made in no time using basic sewing skills. It is a a terrific bag making project for beginner bag makers. Not only is this bag insulated it is water resistant as well. Even though there are some specialty fabrics used in this project it is still a simple one to make.
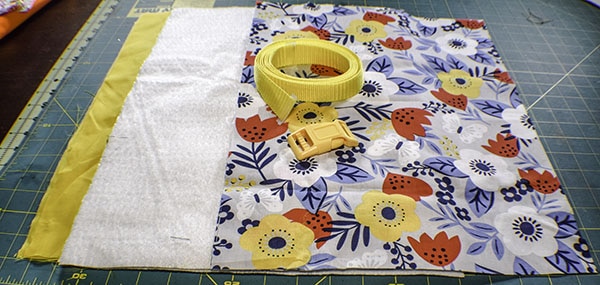
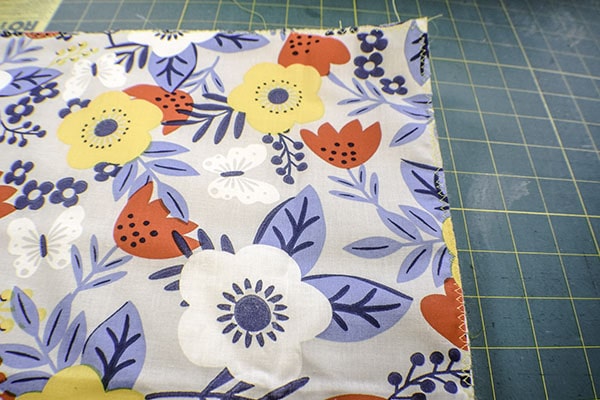
For my insulated lunch bag I used quilting cotton for the exterior and ripstop nylon for the lining to make it water resistant. I also used Insul-Bright. Insul-Bright is what makes this bag insulated. It also acts as an interfacing. I purchased the all three fabrics at JOANN Fabric & Craft Stores![]() but you could head to Hobby Lobby, Fabric.com or onlinefabricstore.net for your fabrics. This post contains affiliate links that if you click on them and make a purchase I may receive a small commission at no extra cost to you. As an Amazon affiliate I earn from qualifying purchases.
but you could head to Hobby Lobby, Fabric.com or onlinefabricstore.net for your fabrics. This post contains affiliate links that if you click on them and make a purchase I may receive a small commission at no extra cost to you. As an Amazon affiliate I earn from qualifying purchases.
What you will Need: Sew a Reusable Insulated Lunch Bag
- 1/2 yd outer fabric and Ripstop nylon or other lining fabric
- 1/2 yd Insul-Bright
- 22″ long 1″ strapping
- 1″ parachute buckle
- Standard sewing supplies
Step 1: Cut your Fabrics
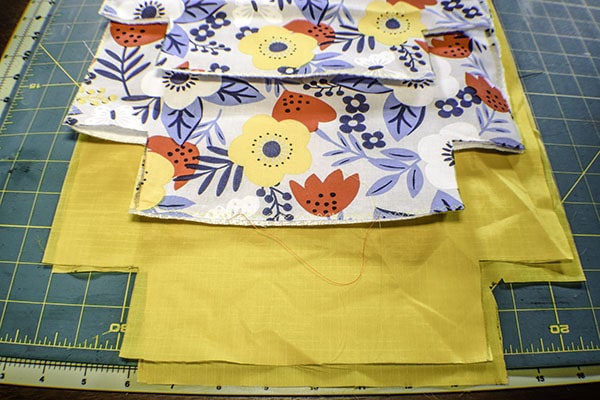
From the outer, lining and Insul-Bright cut two rectangles each that measure 13″ x 17 3/8″.
Step 2: Stitch the Insul-bright
Using zig-zag stitch attach the insul-bright to the outer fabric pieces wrong sides together.
Step 3: Cut the corners
From each of the fabrics cut out the bottom corners in squares that measure 2 3/8″ x 2 3/8″.
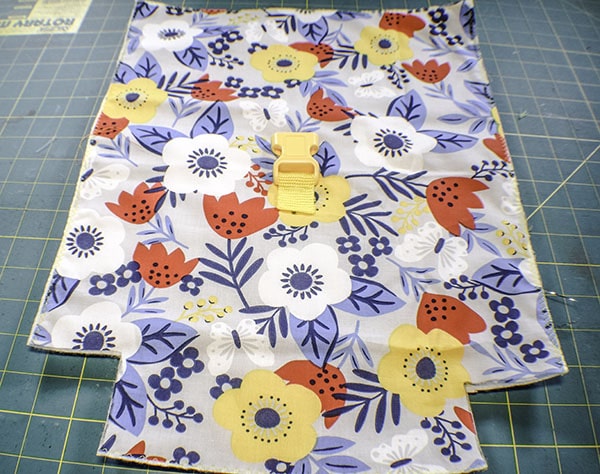
Step 4: Add the Parachute Clip to your lunch bag
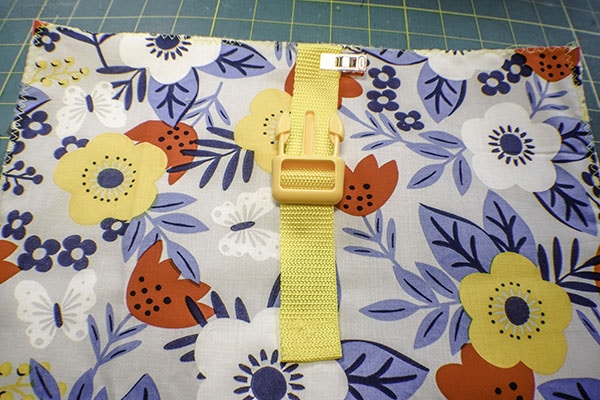
Fold one of the outer pieces in half lengthwise to determine the center. Measure down 10″ from the top and mark using a Frixion heat erasable pen that you can get here or some other erasable pen. Cut a 2 3/4″ piece of strapping and put it through the female half of the parachute clip. Fold one raw edge under and place ion the 10″ mark and pin so that the buckle is facing up. Stitch a box with an X in the center around the bottom of the strapping to secure the clip.
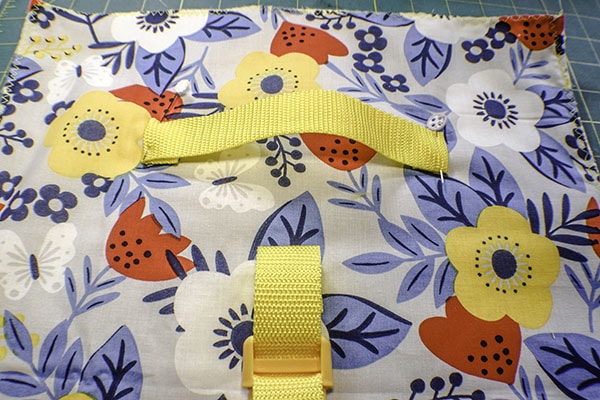
On the other main fabric piece again find the center. Measure down 7 1/8″ and mark. Take a 10″ piece of strapping and fold under one raw edge and place it on the mark. Stitch a box as before. Add the other half of clip to the loose end. Fold under the raw edge and stitch making sure that the clip is able to slide.
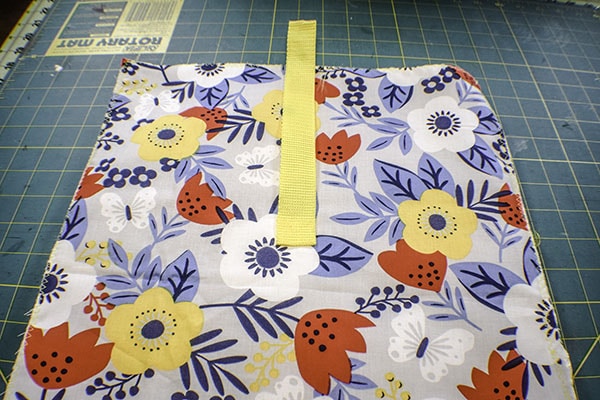
Step 5: Add the Handle to your lunch bag
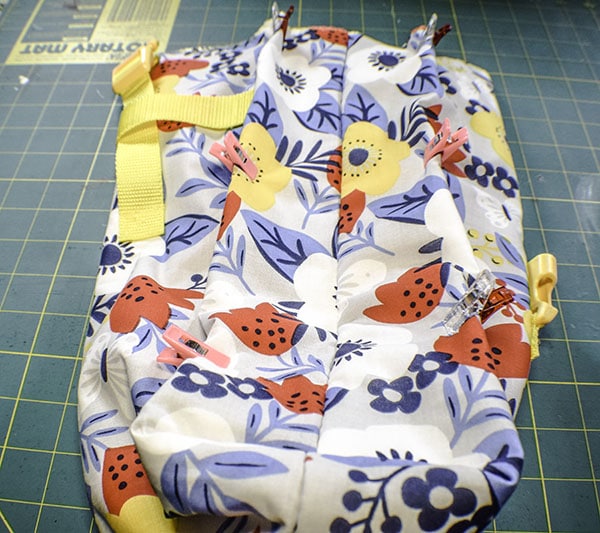
On the main outer piece with the male side of the parachute clip measure down 4 3/8″ from the top on each side 3 1/2″ from the sides. Take 8″ piece of strapping and fold under the raw edges. Place the raw edges on the marks and stitch a box on each side to secure.
Step 6: create the outer lunch bag
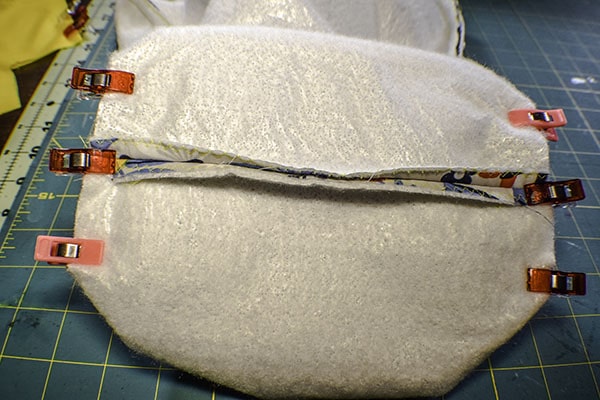
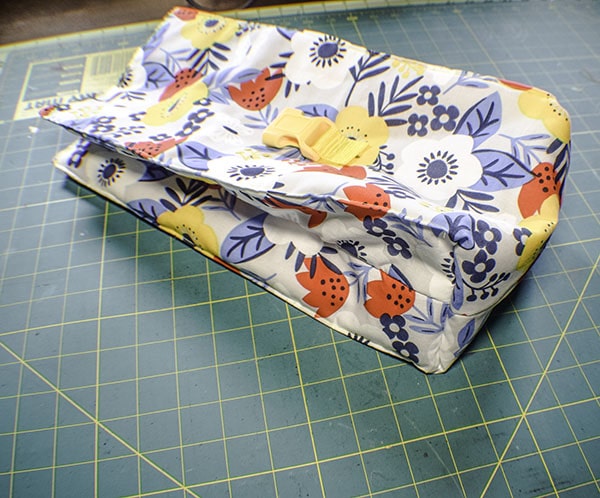
Place the two outer pieces right sides together. Stitch along the long sides and the bottom using a 3/8″ seam allowance. Box the corners by pinching the bottom seam to the corresponding side seam. Stitch using a 3/8″ seam allowance. Turn right sides out. Place the bag on one side. Measure 2 3/8″ from either side of the seam and mark. Fold along the marks and clip. Repeat for the other side. Top stitch along all folds.
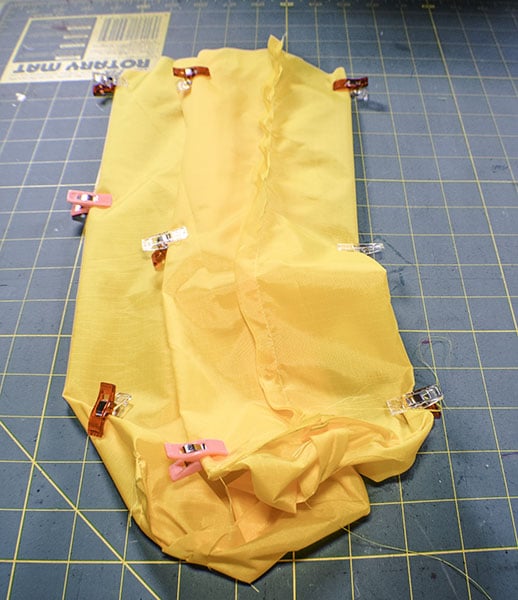
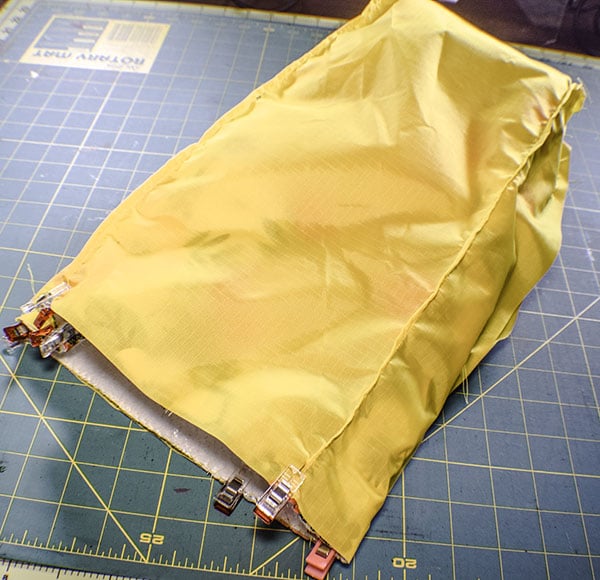
Step 7: create the lining
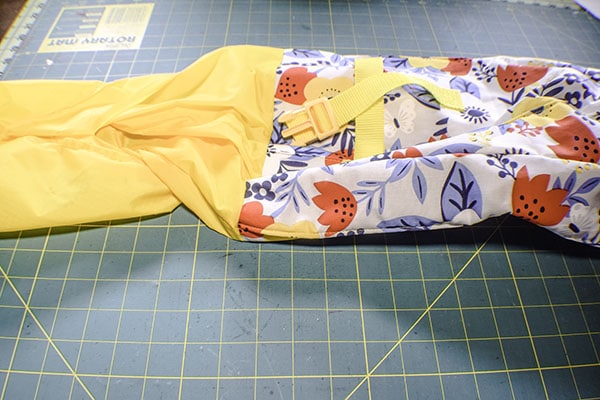
Create the lining the same way you created the outer bag but without the strapping and clip. Leave an opening along one side of the lining for turning the bag.
Step 8: Finish the lunch bag
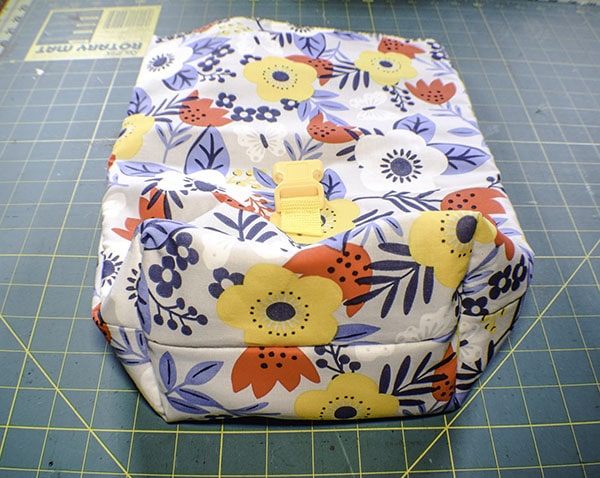
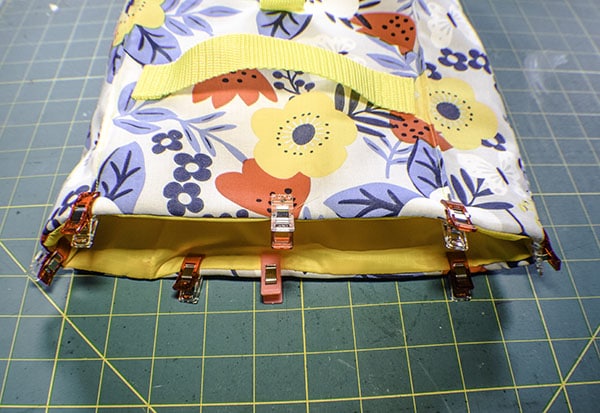
Place the outer bag inside the lining bag so that they are right sides together matching up the seams. Stitch all around the top of the bag using a 3/8″ seam allowance. Turn the bag right sides out through the opening in the side. Stitch the opening closed using your machine or ladder stitch. Place the lining in the bag. Top stitch all around the top to secure the lining. Fold over the top and clip the clip and you have finished your reusable insulated lunch bag.
I hope you enjoyed this project. If you would like more sewing and crafting projects sign up for our newsletter and receive your free eBook of 15 handbag patterns and tutorials taken from the blog.
If you would like video tutorials of some of Sew Very Crafty's most popular posts subscribe to our free YouTube Channel Here.