
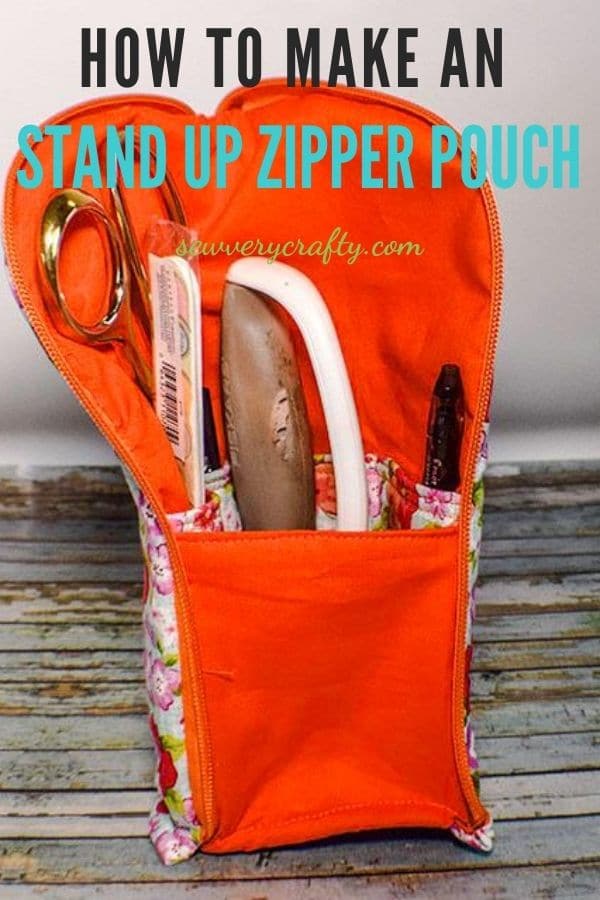
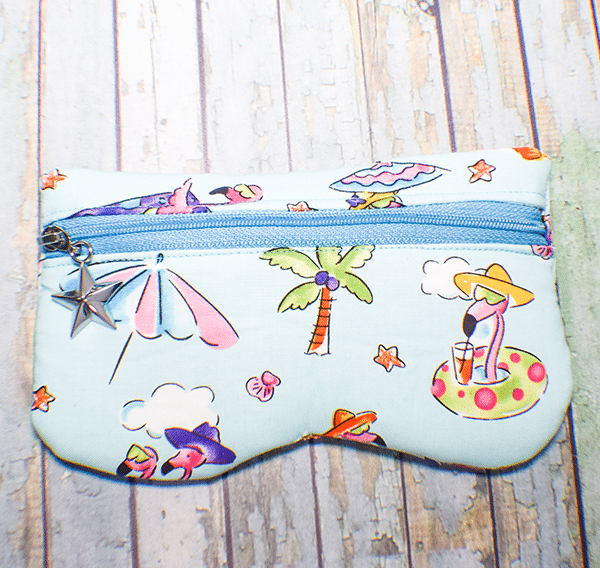
How to Make a Stand Up Zipper Pouch
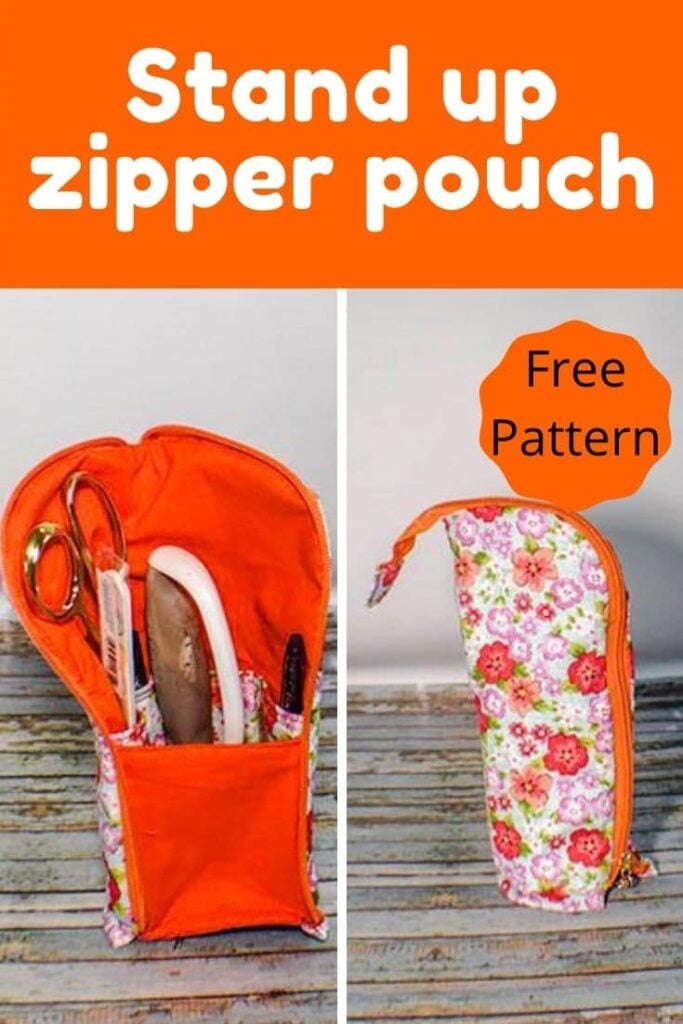
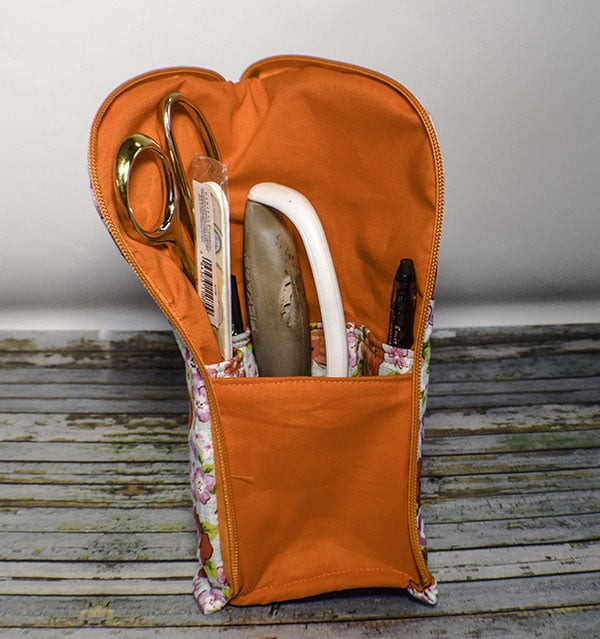
Zipper pouches are fun to make and make fantastic storage containers. This one is particularly fun. You can store pens and pencils, toiletries like a toothbrush and toothpaste or sewing supplies, just about anything. This project requires some sewing skills to complete. I would not think that a beginner could tackle this project. If you are relatively confident in your skills you should give this project a try.
This project does not require a lot of fabric so it is perfect for remnants if you have them on hand. If not head to JOANN Fabric & Craft Stores![]() to purchase some or to purchase the perfect fabric for you. You could also try out Hobby Lobby, Fabric.com or onlinefabricstore.net to find the perfect fabric for your project. Standard cotton fabric is perfect for this sewing project. This post contains affiliate links that if you click on them I will receive a small commission at no extra cost to you.
to purchase some or to purchase the perfect fabric for you. You could also try out Hobby Lobby, Fabric.com or onlinefabricstore.net to find the perfect fabric for your project. Standard cotton fabric is perfect for this sewing project. This post contains affiliate links that if you click on them I will receive a small commission at no extra cost to you.
What you will need: How to Make a Stand Up Zipper Pouch
- Pattern you can get by clicking on this link
- 9 5/8″ x 10″ piece of outer fabric and lining fabric
- 2 — 4 1/8″ x 8 1/2″ piece of contrasting fabric or outer fabric for the bottom
- 9 5/8″ x 8 3/4″ piece of outer fabric for pocket
- 15 3/4″ zipper from a continuous zipper or shortened from a 16″ zipper
- 3 1/8″ x 2″ outer piece for zipper tab
- 11 3/4″ x 2″ strip of solid colored or outer fabric for binding
- 9 5/8″ x 10″ Piece of fusible fleece for the main body piece
- 9 5/8″ x 8 3/4″ Piece of Fusible fleece for the pocket
- 4 1/8″ x 8 1/2″ Piece of fusible fleece for the bottom
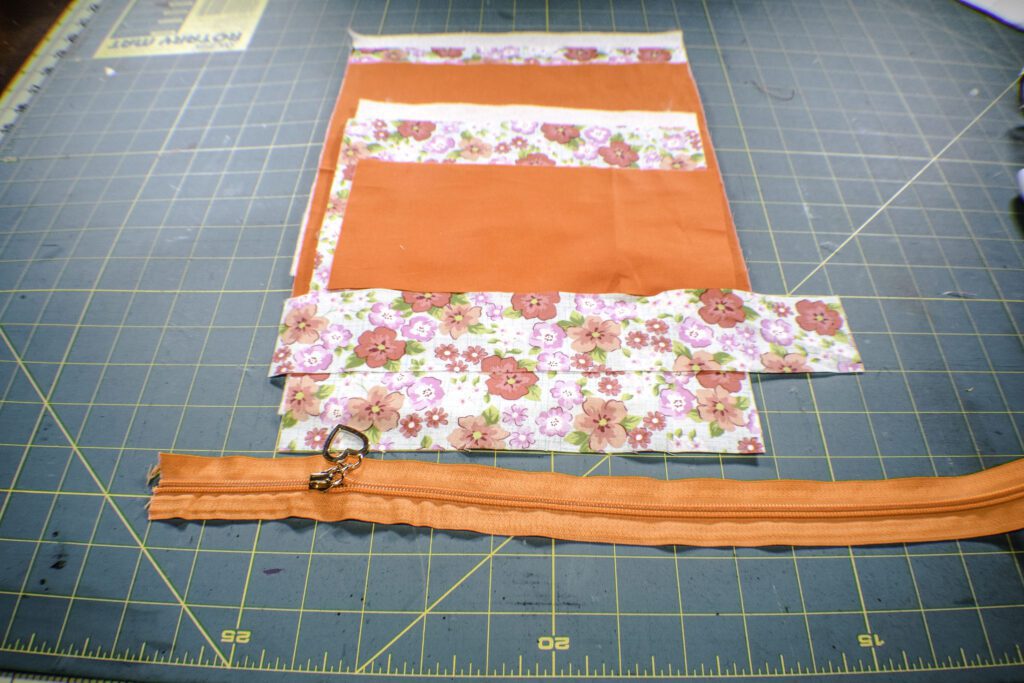
Step 1: Cut Your Fabrics
Cut all of your fabrics and fleece as designated above.
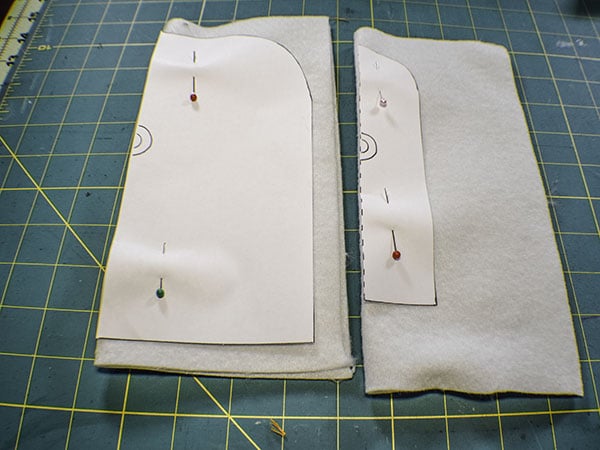
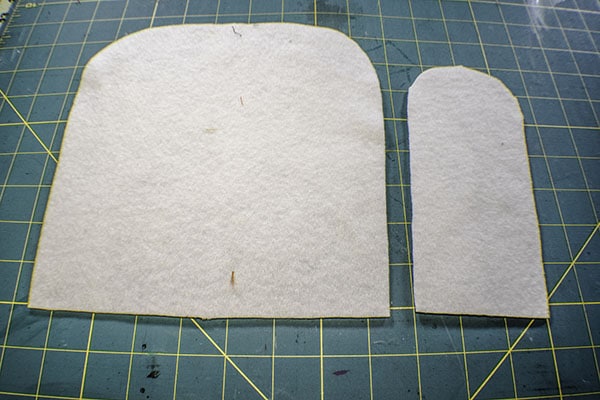
Step 2: Cut the fleece
Using the pattern pieces cut one each of the fleece on the fold of the main fleece piece and the bottom fleece piece.
Step 3: Fuse the fleece
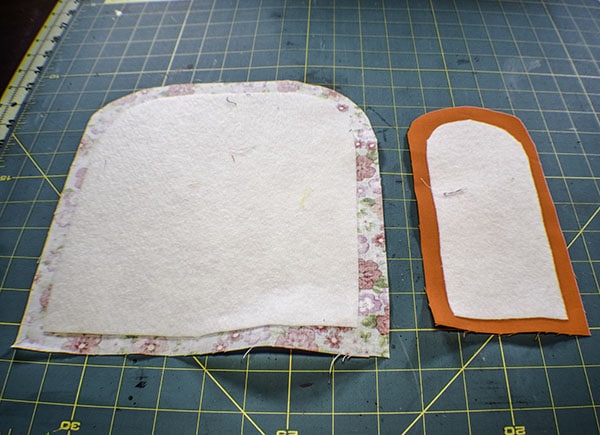
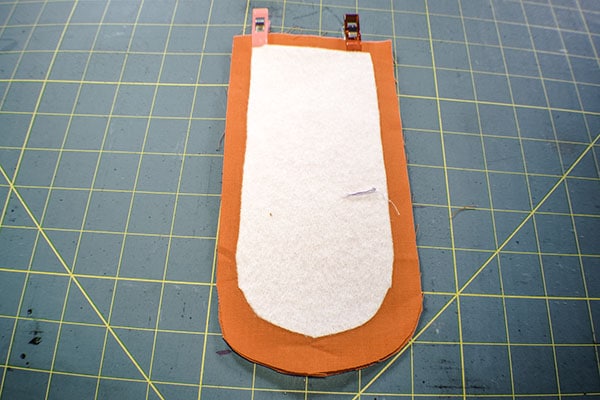
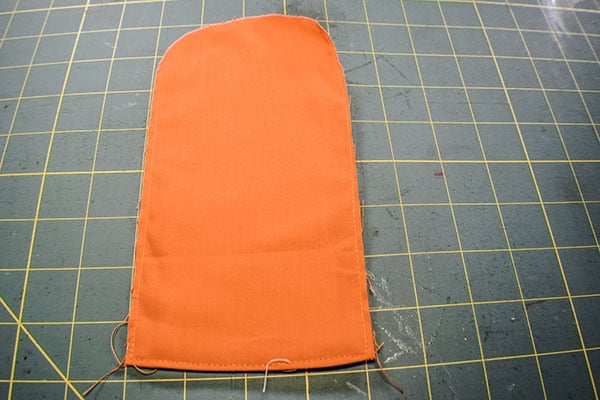
Place the larger fleece piece onto the outer fabric piece that measures 9 5/8″ x 10″ in the center and fuse. Place the large outer piece on top of the corresponding lining piece and clip. Trim the rounded edge keeping the 3/8″ seam allowance. Fuse the small fleece piece to one of the bottom pieces. Trim the curves keeping the seam allowance. Fuse the pocket fleece piece to the pocket piece.
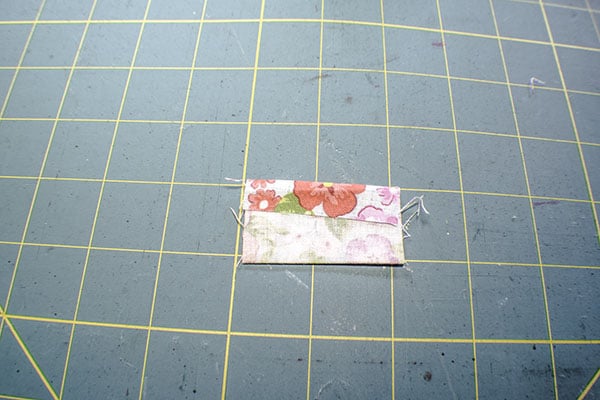
Step 4: create the Pocket
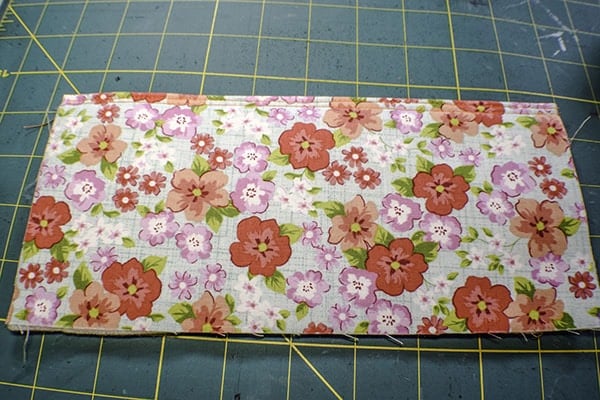
Fold the pocket piece that measures 9 5/8″ x 8 3/4″ in half lengthwise and press. Stitch two lines of top stitching along the fold.
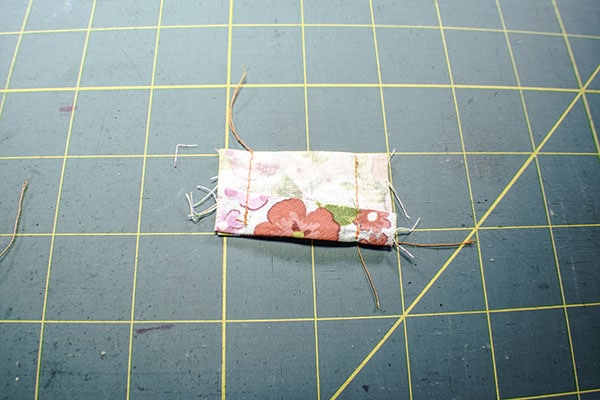
Step 5: Add the Pocket
Add the pocket to the bottom of the large lining piece. Divide the pocket into thirds by stitching two lines equal distance apart. Zig zag stitch along the sides and bottom of the pocket piece.
Step 6: Stitch the bottom
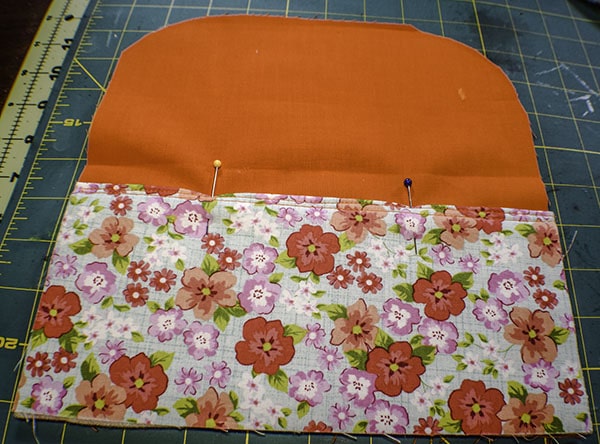
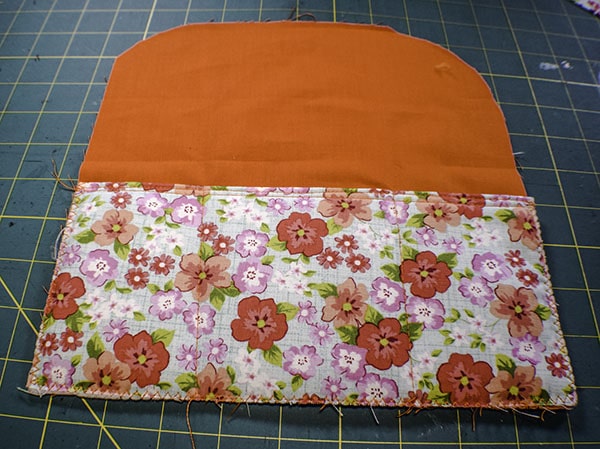
Take the two bottom pieces and place them right sides together. Stitch them together at the bottom using a 3/8″ seam allowance. Turn right sides out. Top stitch along the raw edges and the bottom. Measure 3 3/4″ from the bottom and mark with a heat erasable pen like Frixion. Take the large lining piece with the pocket and measure up 4 1/8″ from the bottom and mark. Place the bottom of the bottom piece at that mark. Stitch using a 1/4″ seam allowance stopping where you made the mark on the bottom.

Step 6: Add the zipper
Take the main outer piece, find the center and mark. Measure 3/8″ on each side of the center mark and mark again. Measure up 3/4″ from the bottom and make a mark. From that mark measure 4″ up and make another mark. Do this for both sides. Repeat the whole process for the lining piece with the bottom attached.
Take the zipper and measure from the wrong side end 3/4″ and mark and 4″ from that mark and mark again. Pull the zipper apart and match the marks on the zipper to the marks on the right side outer piece and pin. Continue pinning the zipper on each side until you reach the top. Once you have reached the first mark on each side of the center point stop pinning and place the excess zipper onto the outer piece as shown. Fold up the bottom of the zippers as shown. Using a zipper foot stitch the zipper to the outer fabric using a 1/4″ seam allowance starting at the bottom. When you reach the top stitch straight across and continue down the other side of the zipper. You want the top pf the zipper to be loose.

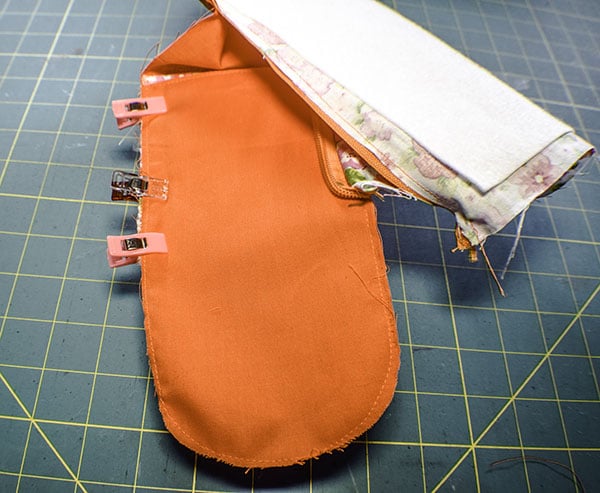
Step 7: Add the Lining
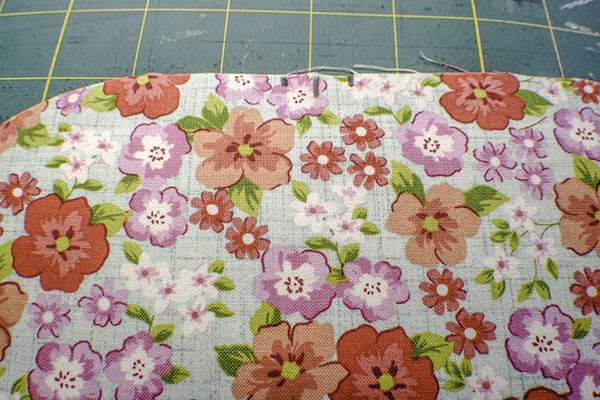
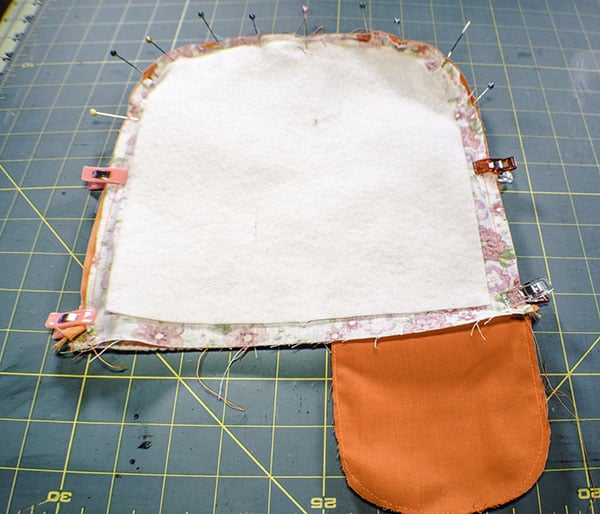
Place the lining right sides together with the main outer piece matching the marks. Stitch the two pieces together starting on the top left side of the main outer side of the two pieces where the pins start in the photo all the way to the bottom mark on the right side.
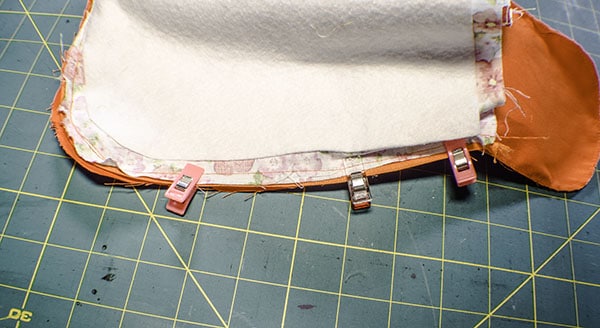
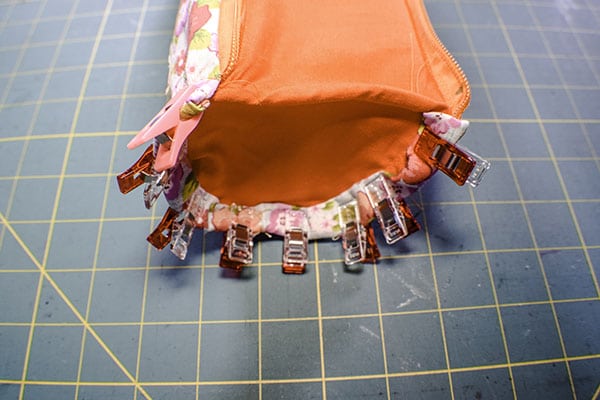
Step 8: Add the bottom
Leaving the piece wrong sides out place the side of the bottom on the side of the pocket piece matching the marks. Place the zipper on top of the side of the bottom and the pocket piece as shown and clip. Stitch from the bottom mark to the rest of the stitching. Turn right sides out. Fold the bottom under and clip all the way around. Stitch using a 3/8″ seam allowance. This is a little fidgity so take care with this step.

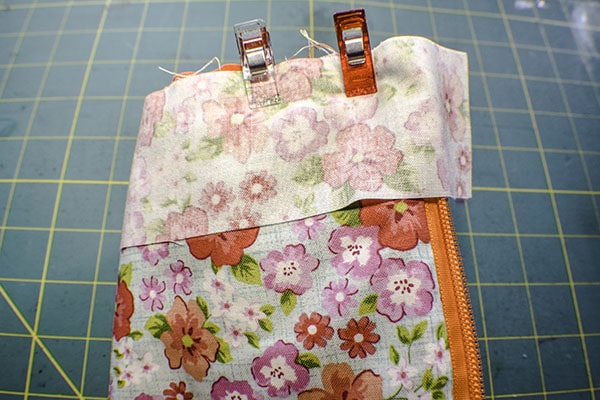
Step 9: Stitch the binding
Take the binding piece and place it right sides together with the main outer piece and stitch from edge to edge leaving excess binding on each end. Fold under the excess binding and fold under the rest of the biding to enclose the raw edges and clip. Hand stitch the binding to the bottom using ladder stitch.
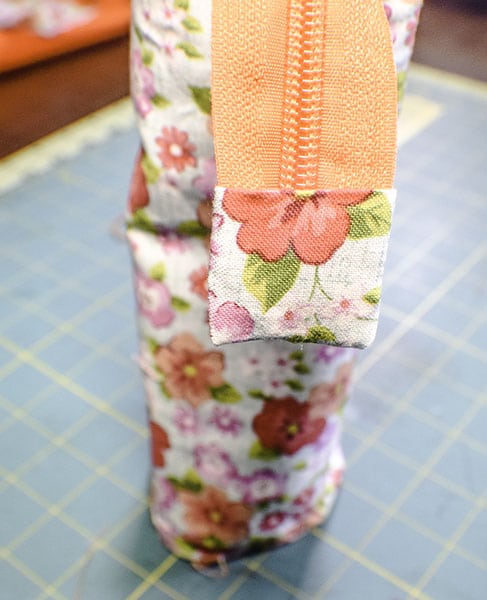
Step 10: Add the zipper tab
Add the zipper pull to the zipper. Fold the tab piece in half right sides together. Fold the edges down and press. Stitch along the short sides. Turn right sides out . Slip the pouch you just created over the end of the zipper and stitch all the way around. You have now competed your stand up zipper pouch.
I hope you enjoyed this project. If you would like more sewing and crafting projects sign up for our newsletter and receive access to our free printables library.
If you would like video tutorials of some of Sew Very Crafty's most popular projects subscribe to our free You Tube Channel Here.
If you would like a video of this project check out the one from sewing times.


Amazing bags. Thank you sharing this.
You’re welcome
Looks really good. I’m thinking about doing it to hold an electric toothbrush, but having printed off your kind, free pattern I think the finished height may be too small. Do you have the finished dimensions? Many thanks
It is 9″ tall and 4 1/4″ wide. My Sonicare fits perfectly inside if that helps.
Since there is no download for the tutorial, it would be really great if you put a link to the website on the pattern piece. That way I can save the pattern & still be able to accesss the tutorial.
Great idea. Sorry I did not think of that.
Tutorials are great but I’d like to have a printable directions as well as the printed pattern. Thanks.
There is an icon at the bottom of every post to print out the instructions. Just click on that and you should get the instructions with photos printed out.
This is the most confusing tutorial ever you put so many steps in one paragraph and not having the pieces number makes my head spin they all sound the same. This is a simple concept made unnecessarily complex.
I am so sorry you feel that way. I will look at the tutorial again and see what can be changed.