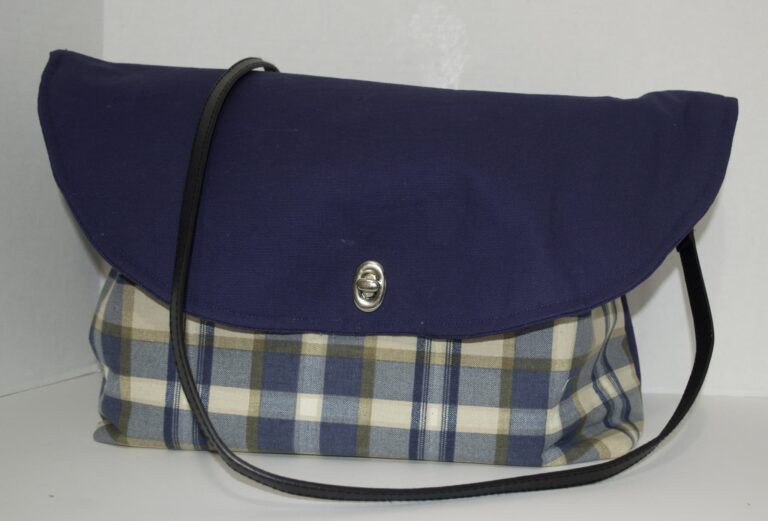
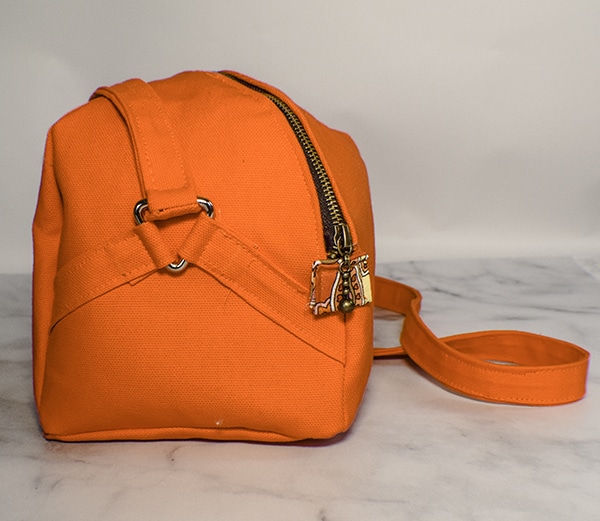
How to Make a Boxy Cross Body Bag
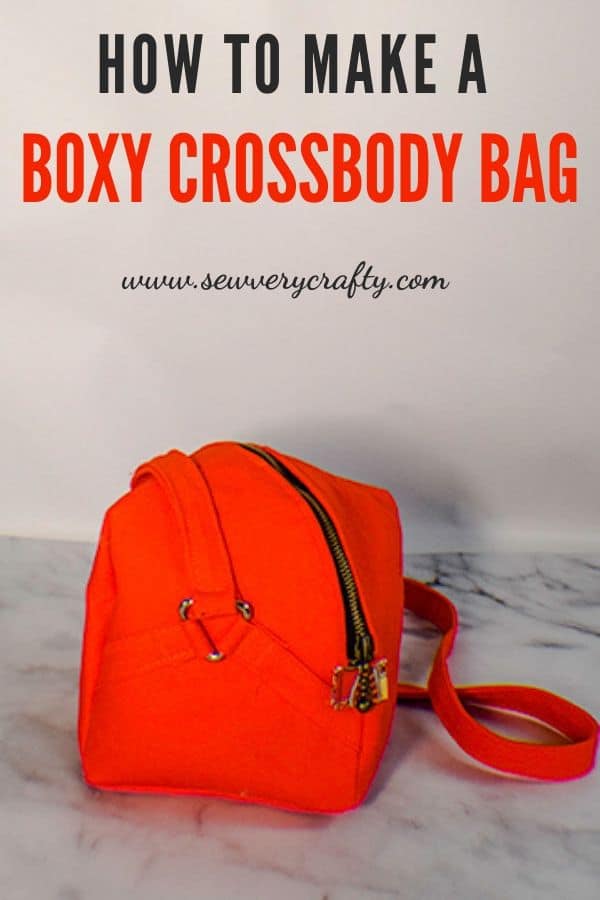
I came across this project on YouTube from Sewing Times and and had to share it with you. It is a small Boxy Cross Body bag. This is an intermediate sewing project that is a little more difficult than some of the other projects here at Sew Very Crafty but it is worth giving a try. It is a very cute little bag that is unique and one of a kind. I would encourage you to give this bag a try if you want to up your sewing skills. This boxy bag is a basic bag making project but it does require a few tips and tricks. This bag has a drop in lining that requires a bit of hand sewing but overall it is a doable project with a fabulous result.
I used canvas for the outside of my bag as recommended by the video and quilting cotton for the lining. I had my canvas on hand which I purchased from JOANN Fabric & Craft Stores![]() but you could head to Hobby Lobby or Fabric.com for exactly what you will need for your project. The pattern also required some metal triangle rings that I purchased from Amazon. This post contains affiliate links that if you click on them and make a purchase I may receive a small commission at no extra cost to you. As an Amazon Associate I earn from qualifying purchases.
but you could head to Hobby Lobby or Fabric.com for exactly what you will need for your project. The pattern also required some metal triangle rings that I purchased from Amazon. This post contains affiliate links that if you click on them and make a purchase I may receive a small commission at no extra cost to you. As an Amazon Associate I earn from qualifying purchases.
What you will Need: How to Make a Boxy Cross Body Bag
- Pattern that you can get here
- 1/2 yd Canvas
- 1/4 yd quilting cotton for lining
- 1/4 yd Fusible fleece
- 14 5/8″ or longer Zipper
- 1″ Metal Triangles

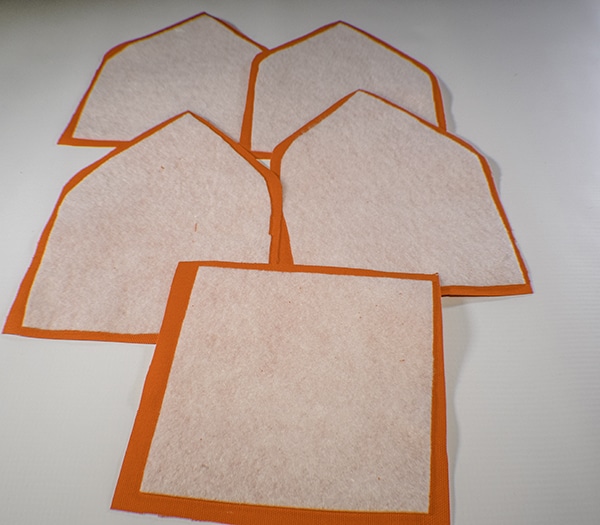
Step 1: Cut your Fabrics
Using the pattern piece cut four canvas and four lining pieces and four fusible fleece pieces. Cut two 1 1/2″ x 43 1/2″ pieces of canvas for the strap. Cut four 5 1/8″ x 1 1/2″ pieces of canvas for part two of the strap. You will need two squares that measure 6 1/4″ x 6 1/4″ each of canvas and lining for the bottom of the bag and lining. Cut two pieces of lining fabric that measure 3 1/8″ x 2″ for the zipper ends. Take the fusible fleece pieces and trim off the 3/8″ seam allowance to prevent bulk.

Step 2: Fuse the fleece
Fuse the fleece to the canvas pieces so that it is centered following the manufacturers instructions.
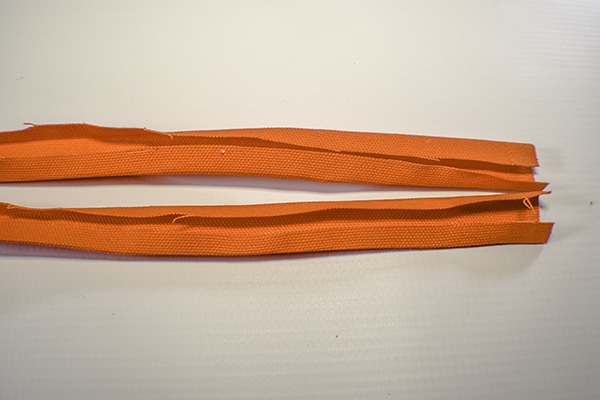
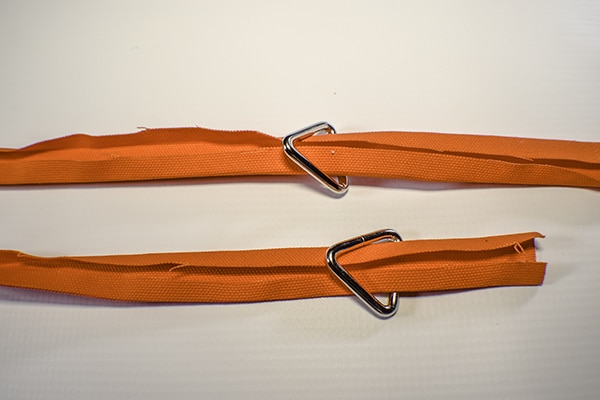
Step 3: create the strap
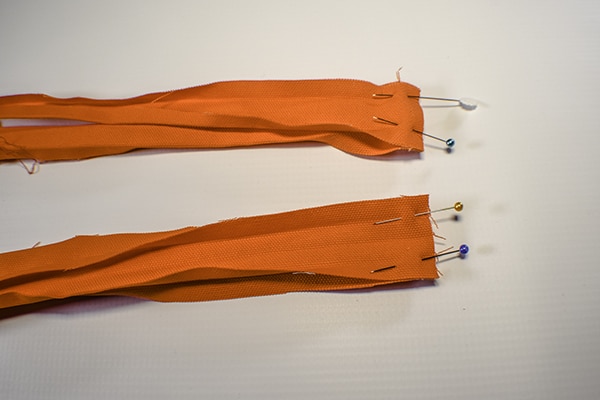
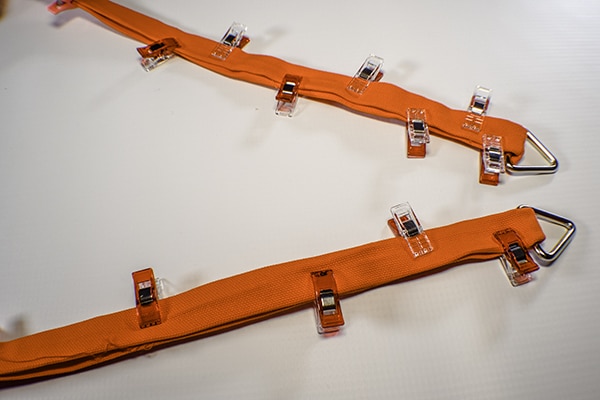
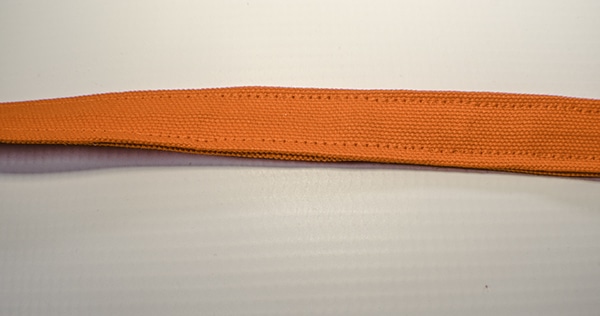
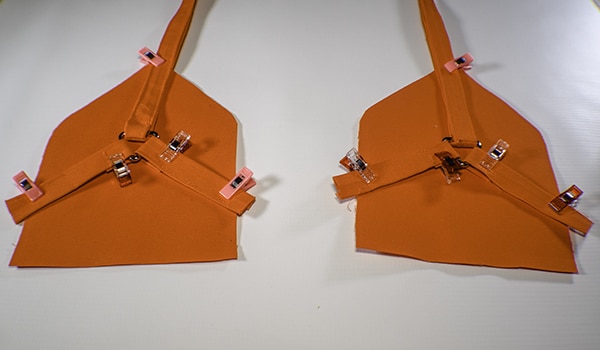
Fold the long raw edges to the center and press. Press the strap in half to conceal the raw edges. Open up the strap and add a triangle piece to each of the strap pieces. Attach the two straps together by placing the raw edges right sides together at each end. Stitch each end using a 3/8″ seam allowance. Press the seams open. You should have a large circle of fabric with tow triangle piece. Lay the strap pieces wrong sides together with a triangle at each end and clip. Edge stitch along both sides and the ends to secure.
Step 4: create the part 2 of the strap
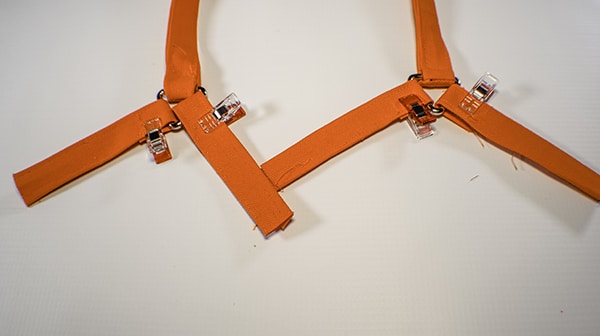
Fold the raw edges of the 5 1/8″ x 1 1/2″ pieces to the center and press. Stitch down each side about 2″. Place the sewn ends into the triangle pieces and fold under the raw edges and clip. Take two of the outer body canvas pieces and measure up 2″ from the bottom and pin. Place the short strap pieces in the center of the pins and clip. Remove the pins. Stitch along both sides of the strap pieces and the triangle end to secure.
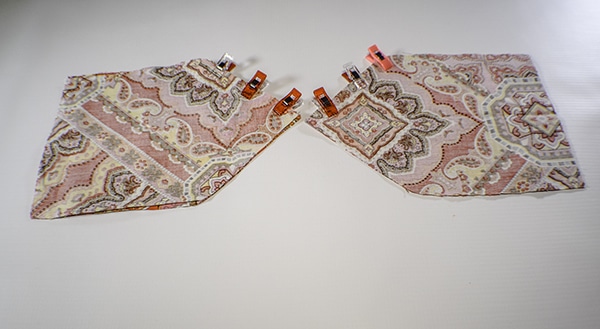
Step 5: create the Lining
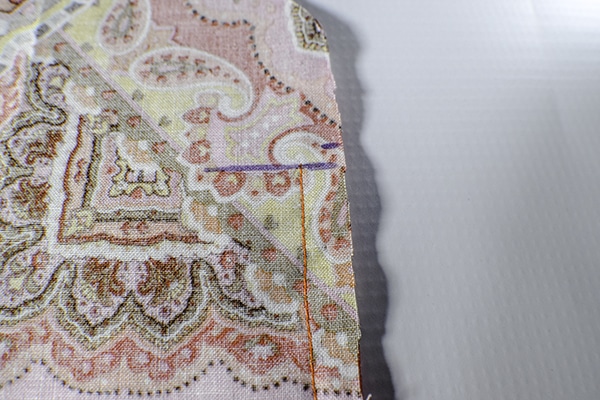
Place two of the lining pieces right sides together and stitch along one top edge as sewn. Repeat for the other two. Press the seams open. Place the two pieces right sides together and pin. Measure up the outer side 3 3/4″ and mark. Stitch using a 3/8″ seam allowance from the bottom to the mark on both outer sides. Here is where it gets a little tricky.
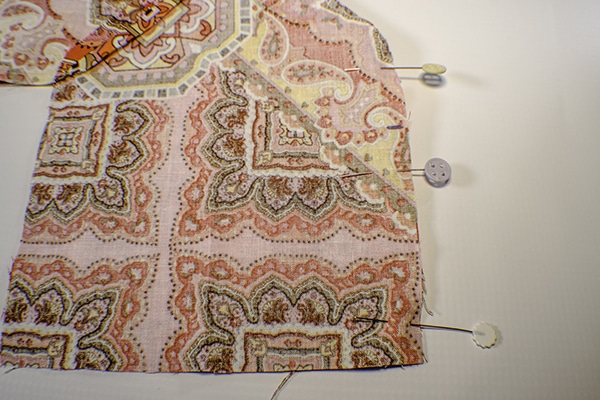
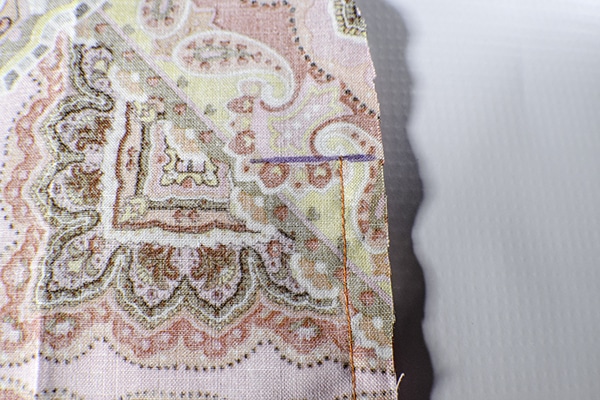
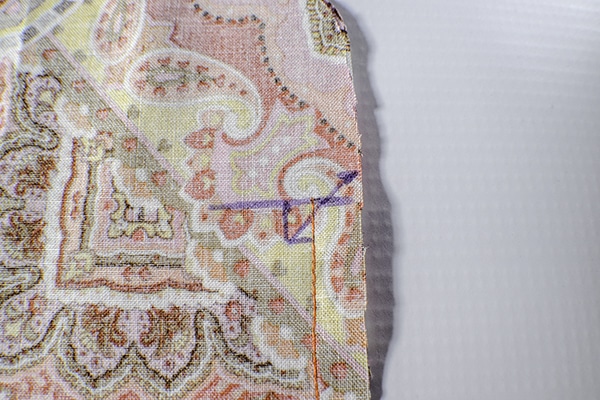
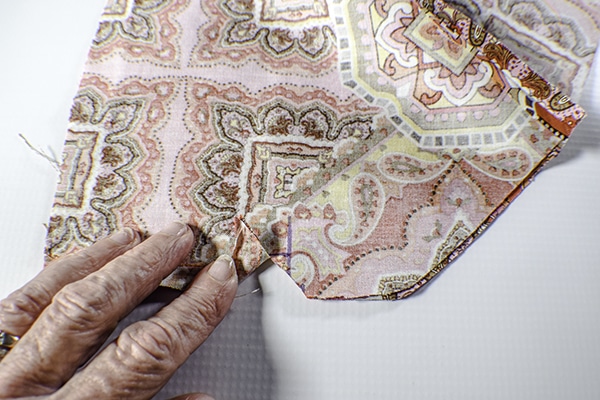
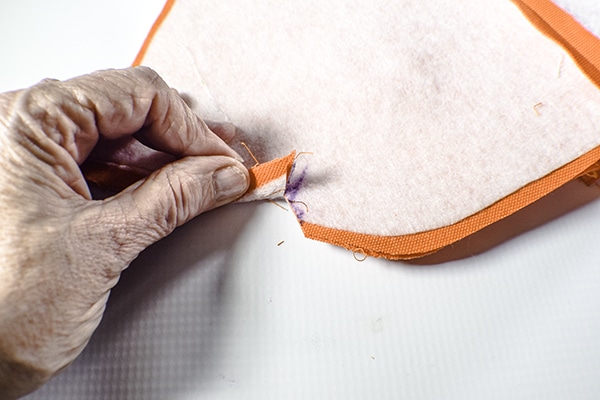
Draw a straight line perpendicular to the seam you just stitched. Measure up .2″ and make a mark. Measure down from the original mark another .2 and make a mark. Now measure over from the seam .2″ and draw a box. Now draw a straight line from the corner of the box to the top .2″ mark and draw a line. Using scissors clip that line.Fold back the excess fabric and press. This will be the location of the zipper when you drop in the lining. Repeat for the other side.
Step 6: stitch the sides and bottom
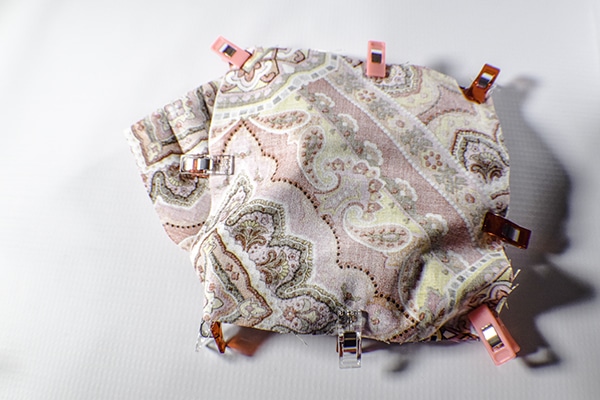
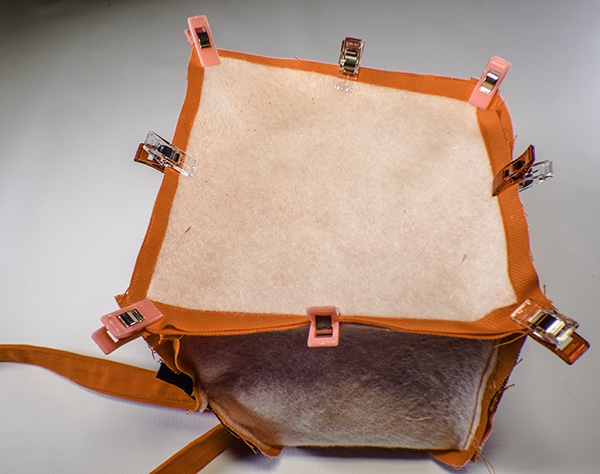
Stitch the sides of the lining Leaving a 3/8″ seam allowance at the bottom. Take the bottom square and mark the 3/8″ seam allowance around the edges. Pin the llining to the lining bottom. Stitch around the bottom using a 3/8″ seam allowance.
Step 7: Stitch the bag pieces
The bag pieces are created the same as the lining pieces. 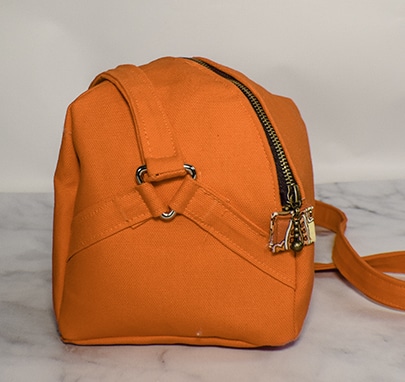 Take one bag piece with the strap and one with out and place them right sides together. Stitch along one top side. Place the two pieces right sides together with the strap in the center. Measure up from the bottom outer edges 3 3/4″ and mark. Stitch down the side from the mark to the bottom leaving a 3/8″ seam allowance at the bottom. Clip off the excess strap pieces that are sticking out through the sides.
Draw a straight line perpendicular to the seam you just stitched. Measure up 1/4″” and make a mark. Measure 1/4″ toward the center of the lining along the line you first drew and make a mark. Draw down from that mark another 1/4″ and make a mark. Draw a box to the seam. Now draw a straight line from the corner of the box to the top 1/4″ mark and draw a line. Using scissors clip that line. Repeat for the other side. Press back the seams.
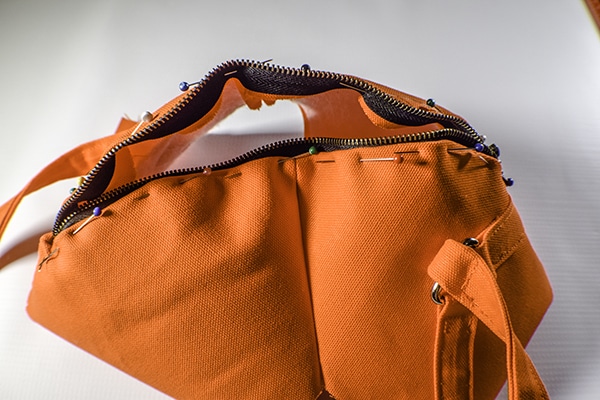
Step 8: Add the zipper
Pin the zipper to the folded seam allowance and stitch all the way around the zipper using a zipper foot. Take the zipper ends and fold the lengthwise so the raw edges meet in the center and press. Fold the raw short edges into the center and press again. Fold in half so that you have a small square of fabric. Stitch around the squares. Stitch the squares to each end of the zipper for decoration.
Step 9: Stitch the Sides and Bottom
Open the zipper at least half way. Stitch the sides of the lining Leaving a 3/8″ seam allowance at the bottom. Take the bottom square and mark the 3/8″ seam allowance around the edges. Pin the bag to the bag bottom making sure that the straps are inside the bag. Stitch around the bottom using a 3/8″ seam allowance. Turn the bag right sides out through the open zipper.
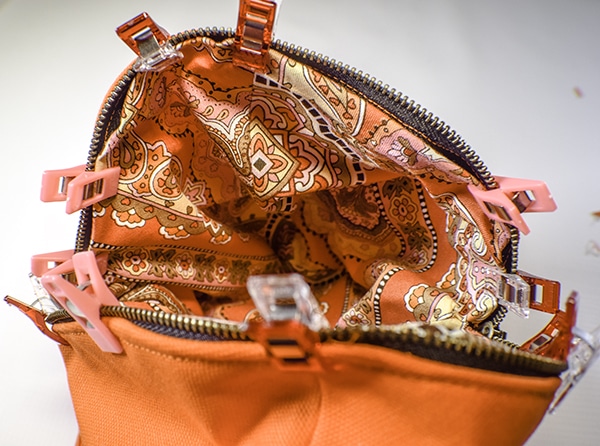
Step 10: Drop in the lining
Drop the lining into the bag so that the right sides are facing. Pin the lining to the zipper making sure to cover the stitching. Hand stitch the lining to the zipper. If you are unfamiliar with ladder stitch check out this video. You have now finished your boxy cross body bag.
If you would like to watch the YouTube video of this project. Check it out here:

I hope you enjoyed this project. If you would like more sewing and crafting projects sign up for our newsletter and receive your free eBook of 15 handbag patterns and tutorials.
I you would like video tutorials of some of SEW very crafty's most popular projects subscribe to our free You Tube Channel here.