
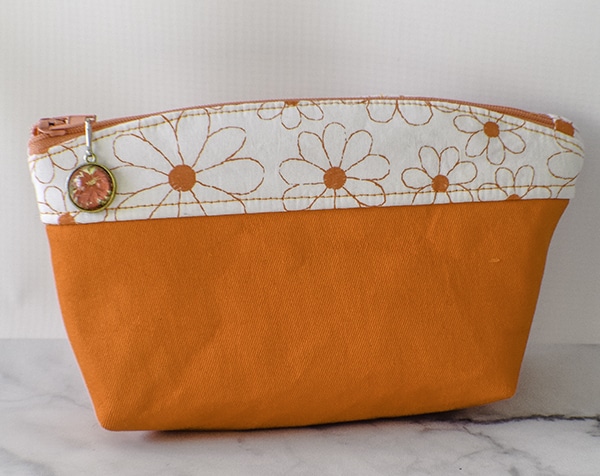
How to Make a Curve Top Makeup Bag
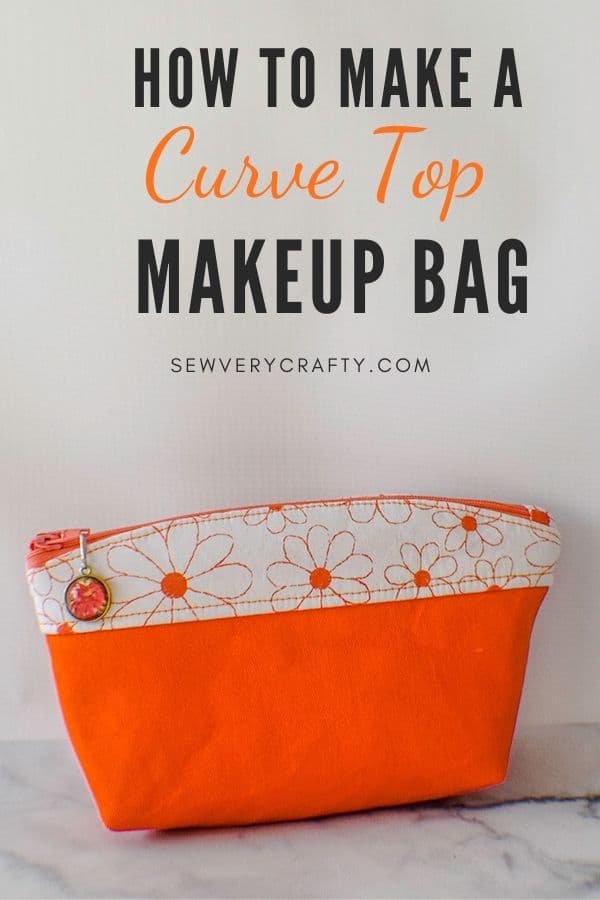
I was in desperate need of a new makeup bag. I travel a lot for my job so the one I have gets treated pretty roughly. This makeup bag has a nice curved top to fit everything I need. The pattern for this project is simple to construct like most things on Sew Very Crafty but the results are just adorable. This is a terrific little project that can be made using basic sewing skills. Just follow the step-by-step instructions and you will be able to create your own curve top makeup bag.
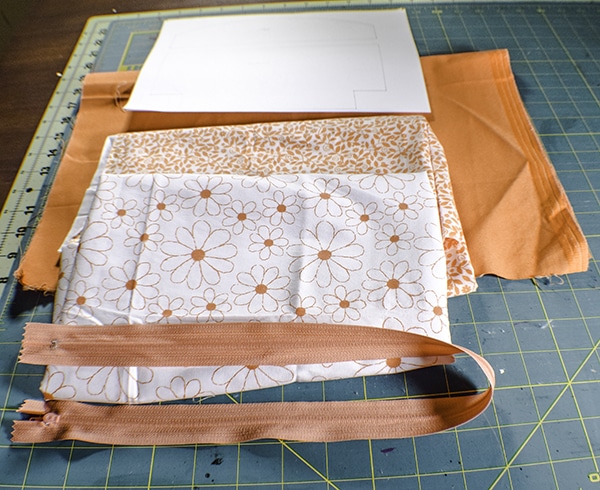
I used quilting cotton for this project. I love quilting cotton because it comes in so many colors and patterns. The fabrics I used for my makeup bag came from JOANN Fabric & Craft Stores![]() but you could head to Hobby Lobby or Fabric.com to get the perfect fabrics for your project. I used three different fabrics for my bag but you could use two or even one if you like. This post contains affiliate links that if you click on them and make a purchase I may receive a small commission at no additional cost to you. As an Amazon Associate I receive from qualifying purchases.
but you could head to Hobby Lobby or Fabric.com to get the perfect fabrics for your project. I used three different fabrics for my bag but you could use two or even one if you like. This post contains affiliate links that if you click on them and make a purchase I may receive a small commission at no additional cost to you. As an Amazon Associate I receive from qualifying purchases.
If you would like a video tutorial of this project head over to YouTube and check out my video. While you are there subscribe to my free YouTube channel.

What you will Need: How to Make a Curve Top Makeup Bag
- Pattern you can get here
- Fat quarter or remnant of each of three fabrics
- 1/4 yd Pellon 808 interfacing
- 1/4 yd fusible fleece
- 9″ zipper
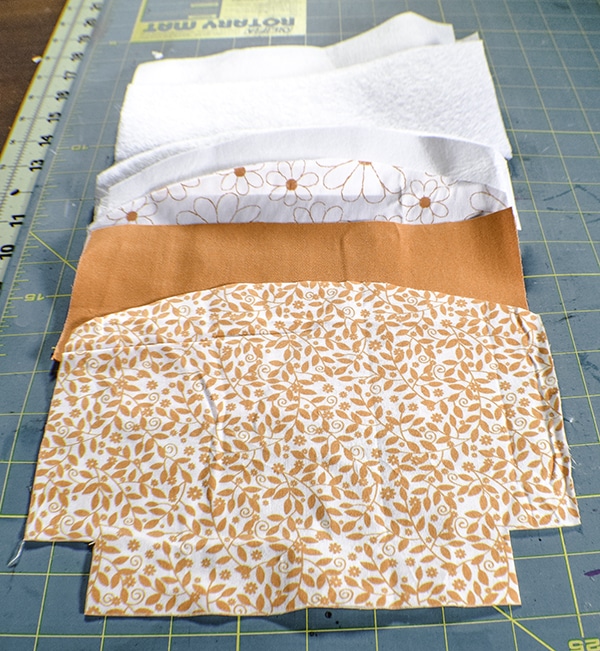
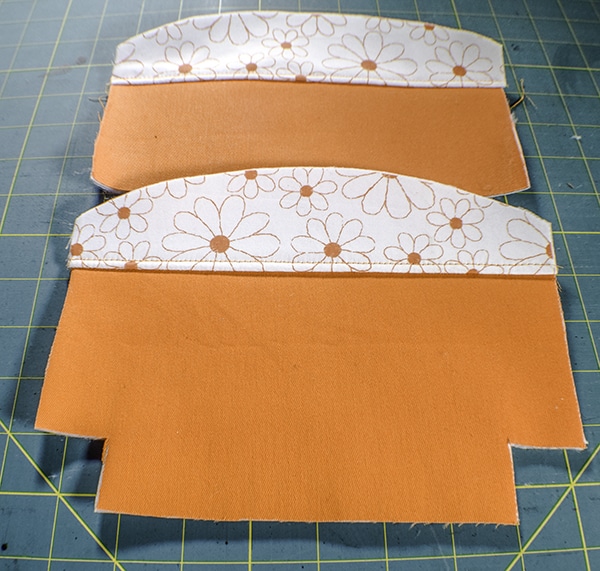
Step 1: Cut out your fabrics
Cut two tops of the fabrics, two bottoms of fabrics and two linings of fabrics and corresponding interfacings. Two zipper tabs that measure 1″ x 4″ from the top fabric.
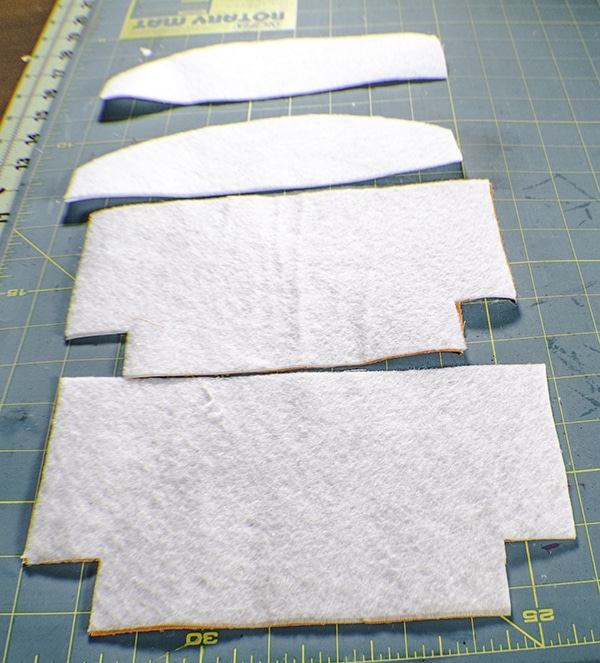
Step 2: Fuse the interfacing
Fuse the Pellon 808 to the outer pieces of fabric. Fuse the fleece on top of the Pellon 808. Follow the manufacturers instructions for each of the interfacings.
Step 3: Sew the top to the bottom
Stitch the top piece to the bottom piece using a 3/8″ seam allowance. Press. Top stitch just above the upper seam.
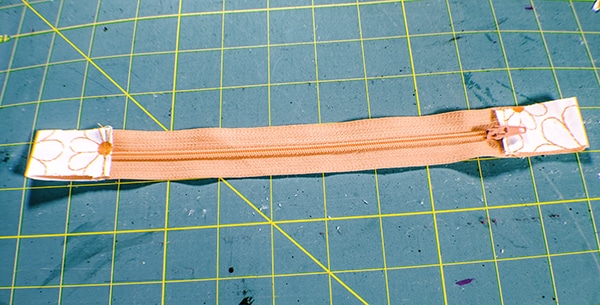
Step 4: Add the zipper tabs
Fold under each end of the zipper tabs by 1/4″ and press. Attach the zipper tab to the end of the zipper and wrap it around the end and stitch close to the folded edge. Measure 7 3/4” from the stitched edge of the zipper tab and mark using a frixion heat erasable pen. Wrap the other zipper tab around the other end of the zipper so the folded ends line up with the mark. Trim your zipper as needed to accomplish this. Stitch close the folded edge.
Step 4: Add the zipper
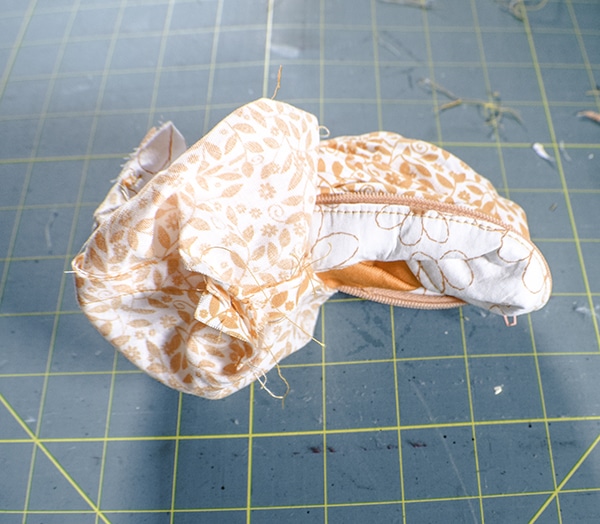
Lay the outer piece face up on your work surface. Place the zipper face down on the outer piece. Lay the lining piece on top of the zipper making a zipper sandwich. Stitch the zipper through all layers. Repeat for the other side of the zipper. Top stitch both sides of the zipper. Open the zipper half way.
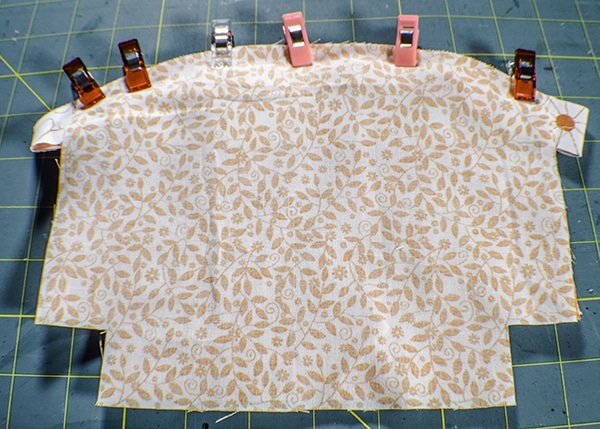
Step 5: Stitch the bag
Match the outer pieces right sides together and the lining pieces right sides together. Stitch along the sides and bottom leaving and opening in the bottom of the lining for turning.
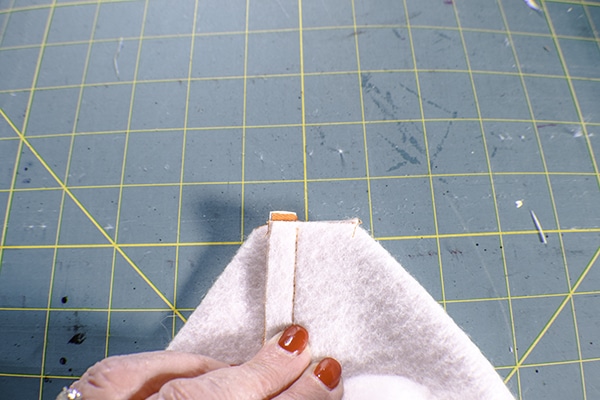
Step 6: Box the corners
Pinch the open corners together so that the raw edges meet and the seams line up. Stitch across the raw edge on the outer bag and the lining bag. Turn the bag right sides out through the opening in the lining and the zipper. Stitch the opening closed in the lining using ladder stitch. Stuff the lining in to the outer bag. You have now completed your curve top makeup bag.
I hope you enjoyed this project. If you would like more sewing and crafting projects sign up for our newsletter and receive your free eBook of 15 handbag patterns and tutorials.
If you would like another makeup bag tutorial check out my pleated makeup bag or my open wide bag.


This is a really cute bag. I would like more info about how you worked with the sides of the bag where the zipper tabs are. I folded the zip tab ends rt sides together and stitched across them in the side seams but end result is thick bumpy and the lining doesn’t lie smoothly at the seam either. Even though I trimmed the excess zip tab away.
I am unsure of how that happened. I am looking at mine and I would recommend that you make the zipper tabs longer than the zipper so that there is no zipper caught in the side seems. I noticed that in my finished product which is not what I was going for. The best way to do this is to make the zipper slightly shorter on each end and extend the zipper tab so that only the zipper tab ends up in the seam instead of the zipper. Otherwise, would it be possible for you to send me some pictures? You can send them to me at diana@sewverycrafty.com. I hope this helps. Diana.
Hi, I love the fabric you used in this cute project. I have been looking for this style of bag to make for my daughters, so thank you very much. Can’t wait to try it!
Thank you. Good luck with the project.