
Easy DIY Insulated Casserole Carrier
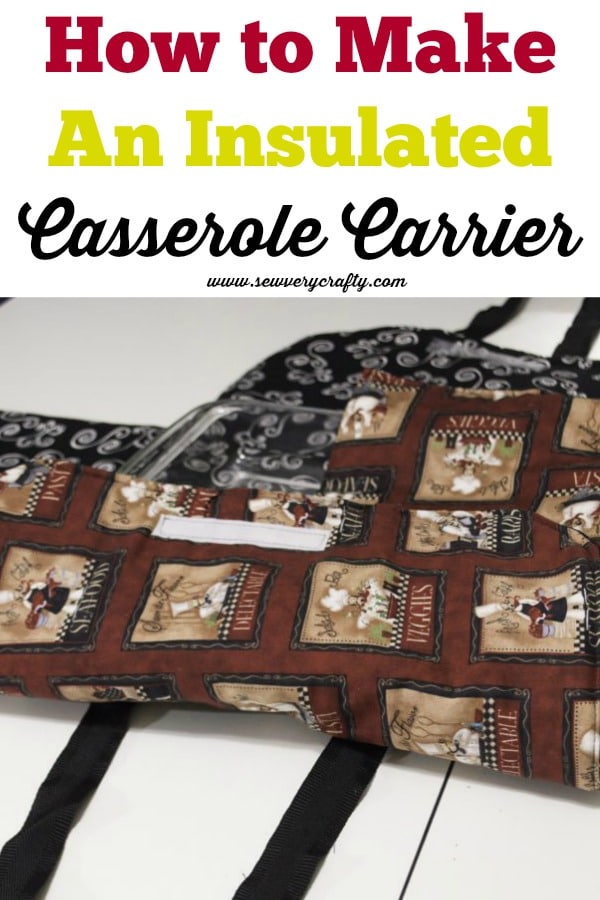

This is a super easy DIY insulated casserole carrier that I modified from several that I found around the web. I used remnants, left over Insul-Bright and strapping to complete this project. It only took a few hours to complete and is perfect for my next potluck. If you don't have a stash like I do and are looking for the perfect fabric for this project I recommend Fabric.com and Hobby Lobby for a wide variety of fabrics to choose from. This post contains affiliate links that if you click on them and make a purchase I might receive a small commission at no extra cost to you.
What You Will Need: Easy DIY Insulated Casserole Carrier
- 1 yd Outer Fabric
- 1 yd Lining Fabric
- 1 yd Insul-Bright Insulated Lining -45″ x 1 yard

- 2.5 yds 1 Inch Black Polypro Webbing
- 6″ Velcro Strip

Step 1: Cut your Fabrics
Cut your fabrics and your Insul-Bright. Cut one exterior, one interior and one Insul-Bright piece 30″ x 17″. Cut one exterior, one interior, and one Insul-Bright piece 40″ x 12.”

Step 2: Layer the Fabrics and Insulbright
Separate the fabric and Insul-Bright by size. Lay the fabrics of the same size right sides together then add the Insul-Bright. There should be two rectangles with three layers each. On the wider of the two rectangles round the edges using a small plate as a template. Using a 5/8″ seam allowance stitch around each of the rectangles leaving a 3″ opening at the bottom for turning. Be sure to clip the corners on the rectangle that has not been rounded for a nice crisp corner.
Step 3: Turn the Rectangles Right Sides Out
Turn the rectangles so they are right sides out. Push out the corners using a turning tool and top stitch around both rectangles making sure to close the openings you used for turning as you go. Sew the strapping short edges together using a zig-zag stitch so that it is one continuous loop.

Step 4: Easy DIY Insulated Casserole Carrier
Lay the strapping parallel with the wider rectangle with the rounded corners making sure that it is centered. Place your 9″ x 13″ dish perpendicular and on the center of the fabric and pin the straps at the side of the dish. Set the dish aside and sew the straps to the fabric on both sides between the pins. Leave the ends loose.

Step 5: Easy DIY Insulated Casserole Carrier
Lay the rounded wider rectangle right side down and place the other rectangle centered and perpendicular on top. Sew along all 4 edges to connect the pieces together.

Step 6: Easy DIY Insulated Casserole Carrier
Add the velcro closures to the ends of the wider rectangle. One rectangle piece will be on the lining side and the other on the outer side so that they overlap and close securely. You can also add Velcro to the other rectangle if you like but it is not really necessary.

Step 7: Easy DIY Insulated Casserole Carrier
Place your casserole inside the carrier and cover it up and you are finished.

If you want more sewing and crafting projects sign up for our newsletter and receive your free list of sewing room must haves.
My thanks to Danielle at Making it Danielle for the measurements for this project.


What if u don’t have a dish to measure by
You can use a tape measure. I placed my straps 4 1/2″ inside the long edges and sewed them 10″ from the short curved edges on each end if that makes sense. Let me know if you have any additional questions.
I like the way you did the strap.
Thank you!