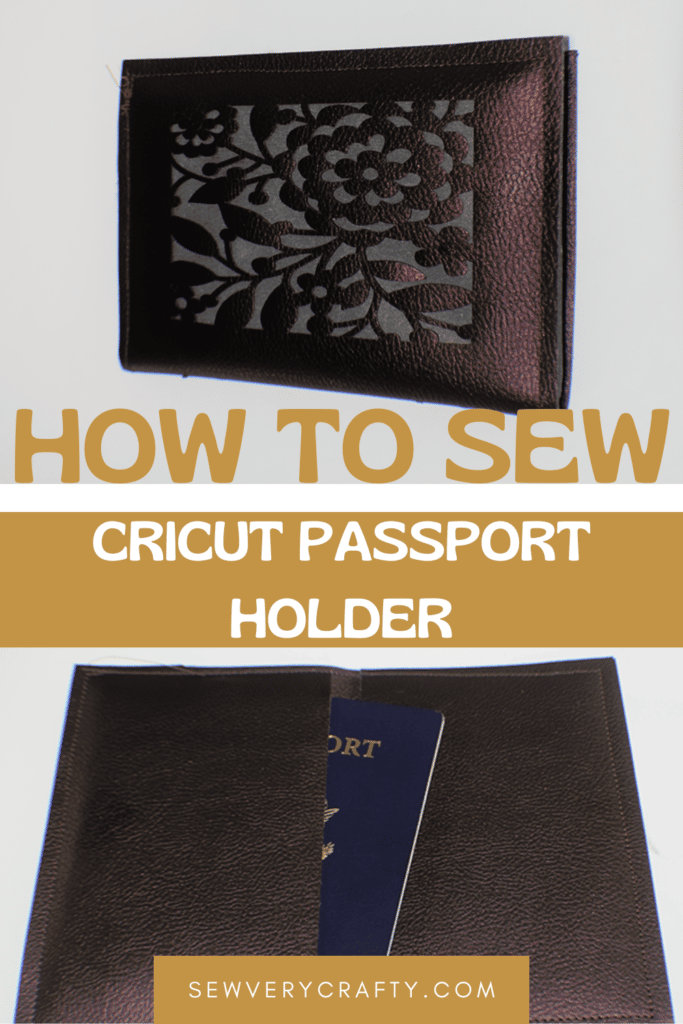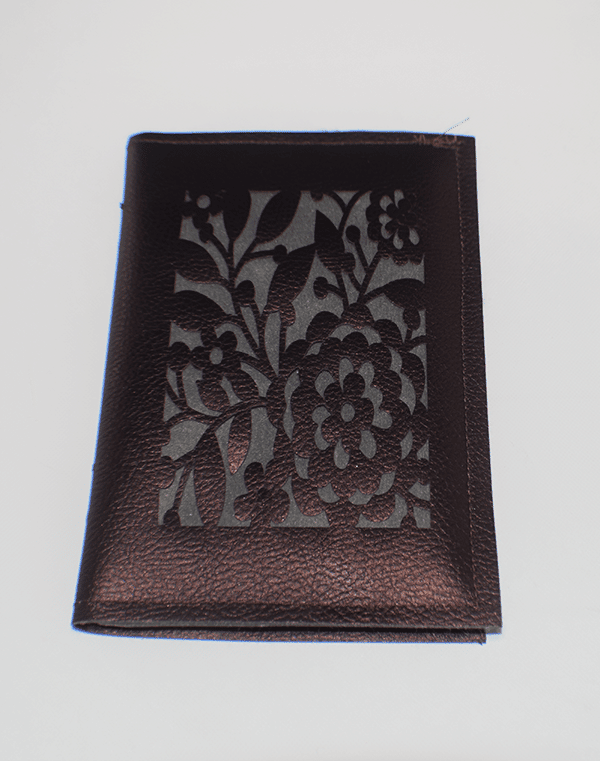
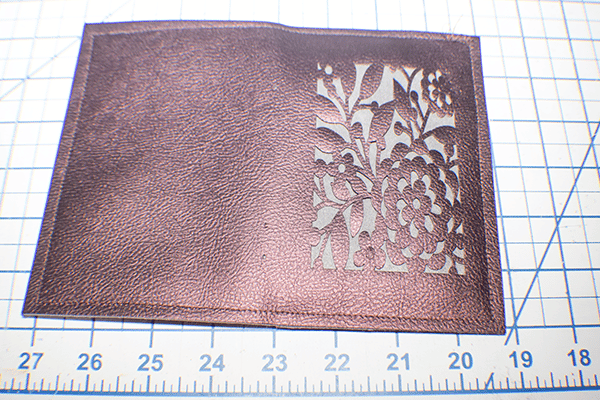
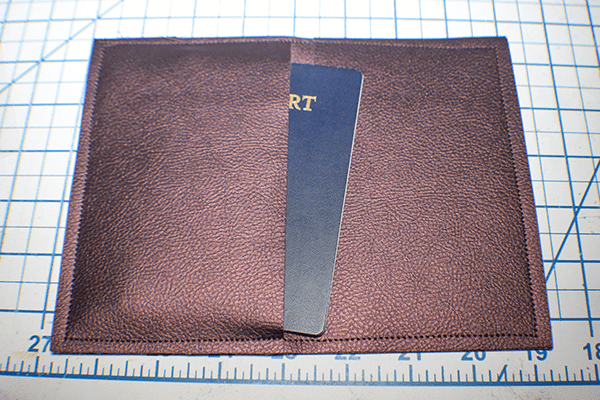
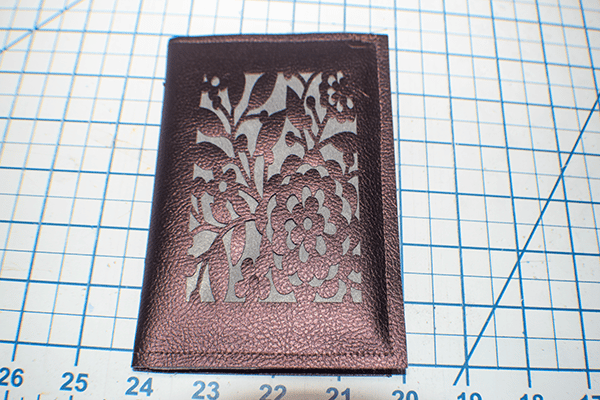
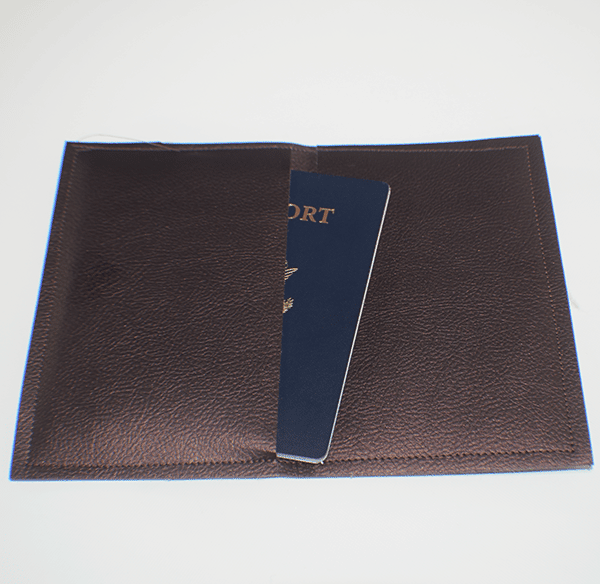
I travel internationally about once a year and thought I would make a faux leather passport holder using Cricut. I chose an access pattern that I enlarged to the dimensions of 8″ x 6″. Then, I created two rectangles using 4″ x 6″ measurements for the inside pockets. I chose two inside pockets because I carry two passports. This was a super simple sewing and Cricut project. If you would like more Cricut projects check out my Cricut project page.
I used pebbled faux leather that I purchased at JOANN Fabric & Craft Stores![]() . You could head to Cricut.com or to Amazon to purchase leather or faux leather. This post contains affiliate links that if you click o n them and make a purchase I may receive a small commission at no extra cost to you. As an amazon Associate I earn from qualifying purchases.
. You could head to Cricut.com or to Amazon to purchase leather or faux leather. This post contains affiliate links that if you click o n them and make a purchase I may receive a small commission at no extra cost to you. As an amazon Associate I earn from qualifying purchases.
What you will Need: How to Make a Faux Leather Passport Holder using Cricut
- 12″ x 24″ faux leather
- Cricut
- Double scoring wheel
- Standard Grip Mat
- Premium Fine Point Blade
- Leather sewing machine needle
- Sewing machine
Step 1: Open Cricut Design Space
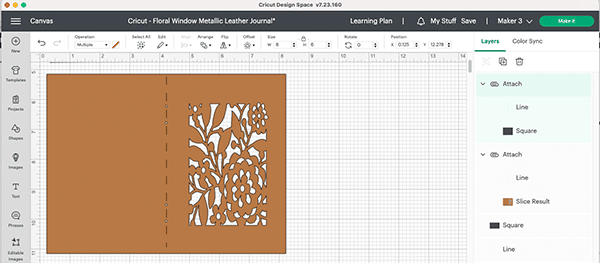
Open Cricut Design Space and choose “Floral Window Metallic Leather Journal” from projects. Remove everything but the outer journal. Place it on the canvas. Unlock the Measurement lock and resize the journal to 8 wide by 6″ high. Place a scoring line in the center by choosing the scoring line from the shapes tab.
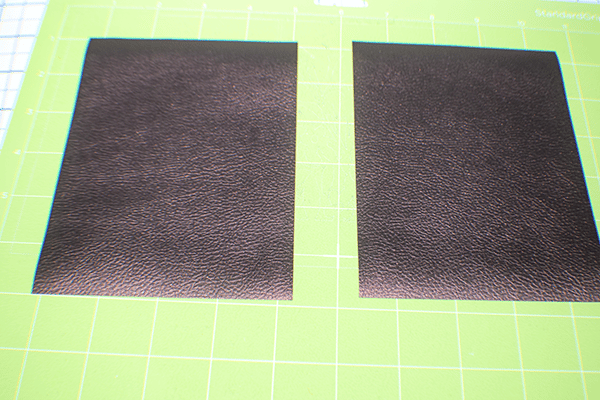
Step 2: Create Two Rectangles
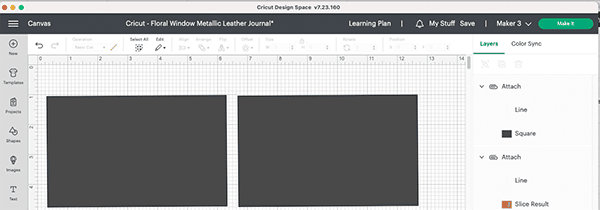
In addition to the journal cover, create two rectangles that measure 3.7″ wide by 6″ high. You can doo this by clicking on the square in the shapes tab and resizing it to the correct dimensions after unlocking the measurement tab.
Step 3: Create the Large Rectangle
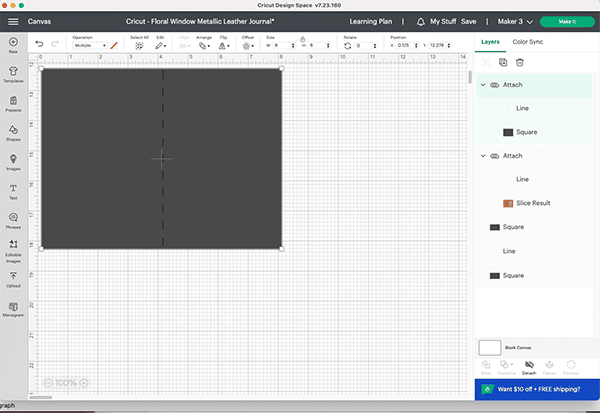
Create a large rectangle that measures 8″ wide x 6″ high.
Step 4: Place the Faux leather on the green mat
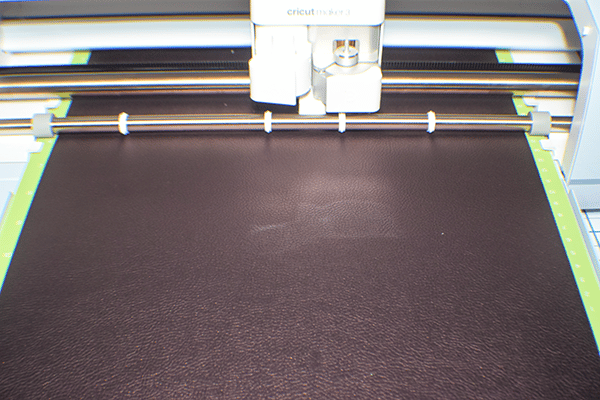
Place the faux leather on the green mat. Tape it to the mat if necessary. Click Make It. Insert the mat with the faux leather into the machine and click go. This will create the outer passport holder.
Step 5: Make the Two Rectangles
Make the two rectangles in the same way.
Step 6: Make the Single Rectangle
Create the single rectangle in the same way.
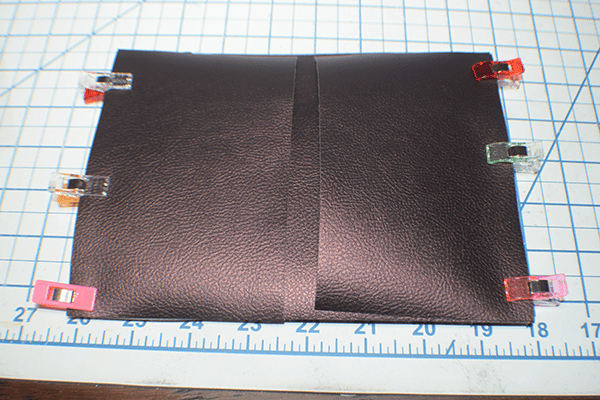
Step 7: Put it all Together
Layer the four pieces of faux leather. Place the outside holder right sides down. Place the large rectangle right sides up on the outer holder. Then, place the the pocket pieces on each side. Clip all the pieces together using wonder clips. Stitch all the way around through all layers. You have now finished your faux leather passport holder using Cricut.
I hope you enjoyed this simple Cricut sewing craft. If you would like more sewing and crafting tutorials subscribe to our newsletter and receive your free eBook of 15 handbag patterns and tutorials then from the blog.
If you would like video tutorials of some of Sew Very Crafty's most popular posts subscribe to our free YouTube channel here.