
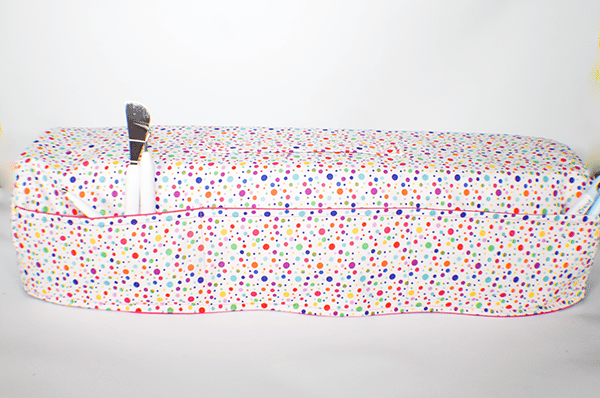
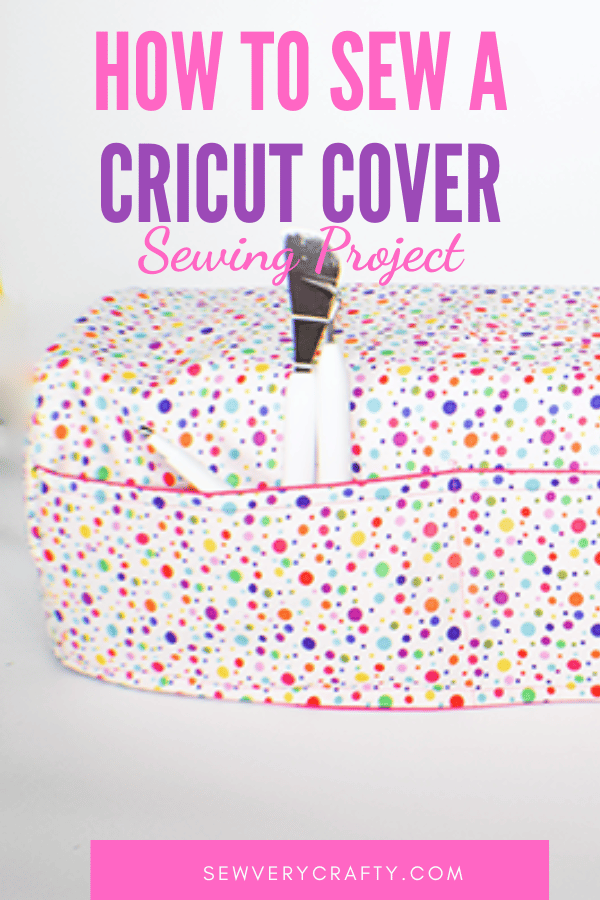
I recently got a Cricut Maker 3 and needed a dust cover for it. There was a pattern on Cricut Design Space for purchase but I decided I wasn't keen on the design so I created my own. It was a simple process to measure it out and create the pattern. But, since this is a Cricut dust cover I thought I would create part of it on my Cricut. With that in mind, there is a pattern attached to this post to allow you to create the ends of the cover by uploading the PNG file. If you would like more Cricut projects check out my leather key fob.
I used quilting cotton for my dust cover that I purchased online from JOANN Fabric & Craft Stores![]() to pick up in store. You could head to Amazon Fabrics or
to pick up in store. You could head to Amazon Fabrics or
If you would like a video tutorial of this project head over to YouTube and check out my video. While you are there subscribe to my free YouTube channel.
What you will Need: How to Make a Cricut Dust Cover
- Pattern you can get by clicking on this link
- 1 yd outer fabric Lining fabric
- 1 yd Pellon SF 101 Interfacing
- Cricut Maker3
- Sewing Machine
- Standard sewing supplies
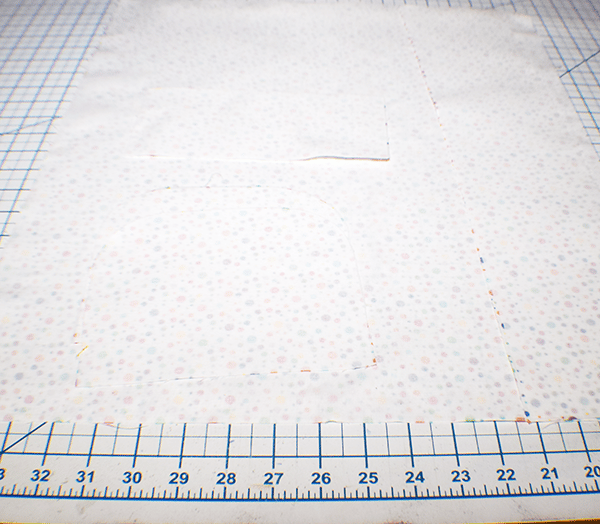
Step 1: Cut your Fabrics
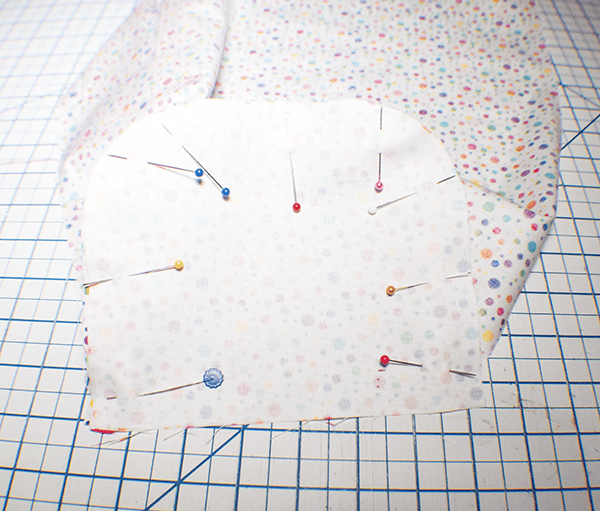
Using your Cricut upload the PNG file or cut it out by hand. This pattern constitutes the ends of the dust cover. Cut two pieces from the outer fabric, lining fabric and interfacing. You will also need an outer, lining and interfacing piece that measures 21 1/2″ x 18″. You will also need an outer, lining and interfacing piece that measures 21 1/2″ x 4 1/2″. Finally, you will need a piece of outer fabric and interfacing that measures 4″ x 8 1/2″ for the handle.
Step 2: Cut out the Pattern
You can cut this pattern out by hand or using your Cricut. If you want to use your Cricut just save the pattern to your computer and upload it to Design Space using the upload button in the left menu. Once you have uploaded the file just add it to the canvas and cut as usual using the pink fabric mat and the teary blade.
Step 3: Fuse the Interfacing
Fuse the interring to all of the outer pieces of fabric following the manufacturer's instructions.
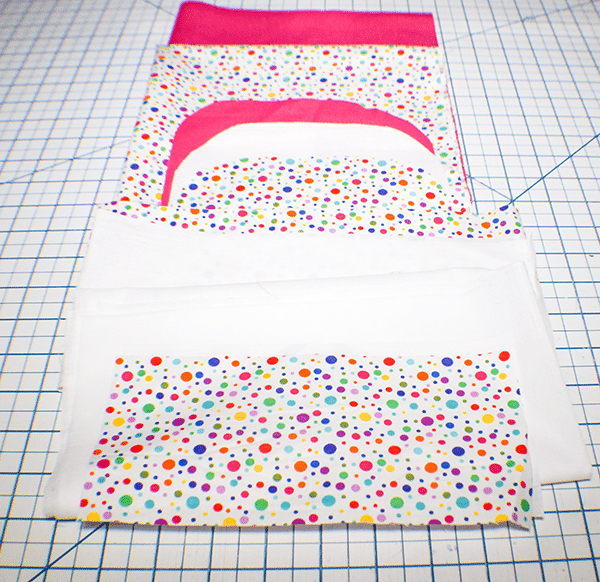
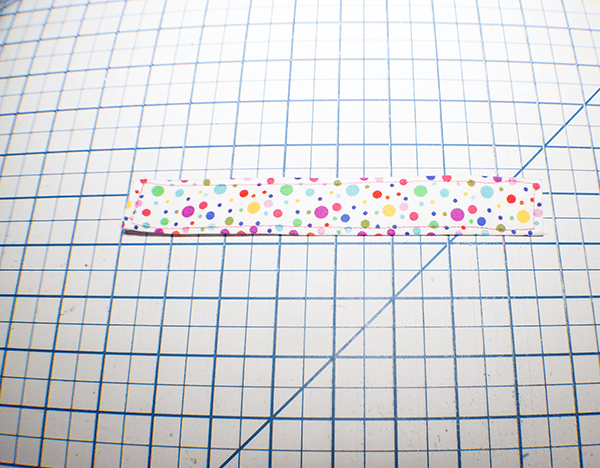
Step 4: Create the Front Pockets
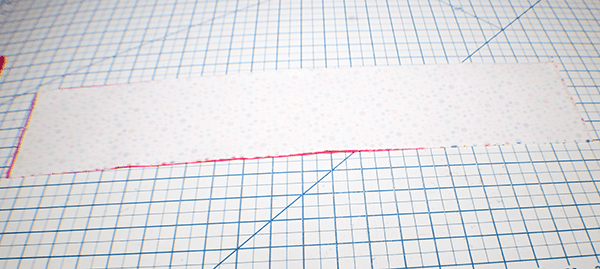
From the 22 1/2″ x 4 1/2″ pieces create the front pockets. To do this, stitch the outer and lining pieces right sides together along the top using a 1/4″ seam allowance. Leave the sides and bottom open. Turn the piece right sides out and press. Topstitch along the seam.
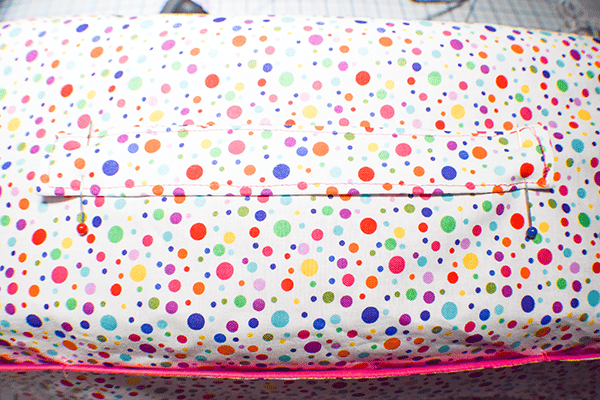
Step 5: Add the Pockets
Place the pocket piece lining side down onto the bottom outer portion of the 18″ x 21 1/2″. Stitch two lines any distance you like to create the pockets.

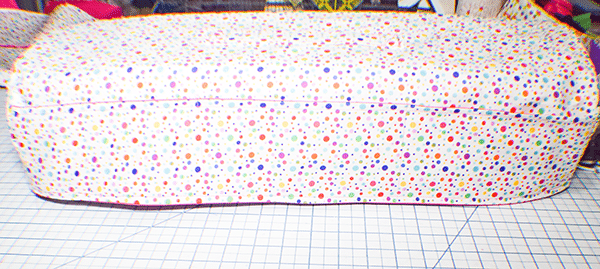
Step 6: Add the Ends of the Dust Cover
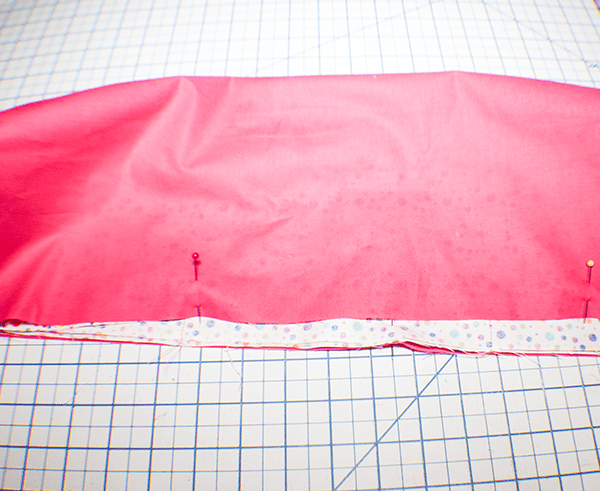
Place the ends right sides together with the short ends of the long piece. Pin and stitch using a 1/4″ seam allowance. Do this for both ends.
Step 7: Create the Lining
Create the lining the same way as the outer piece but without the pockets leaving an opening inn one side for turning.

Step 8: Add the Lining to the Outer Dust Cover
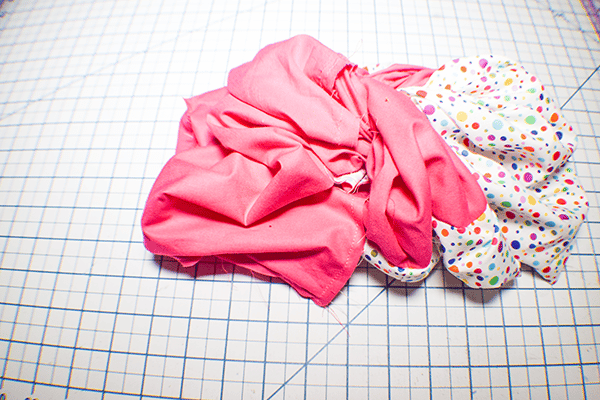
Place the two dust covers that you have created right sides together. Stitch all the way around the bottom using a 1/4″ seam allowance.
Step 9: Turn Right Sides Out
Turn the dust cover right sides out through the opening you left in the lining. Close the opening using ladder stitch. Push the lining into the outer dust cover. Topstitch all the way around the bottom to secure the lining.
Step 10: Create the Handle
Take the handle piece and fold the short ends in about 1/4″. Fold the long edges to the center and press. Fold in half lengthwise and press again. Topstitch all the way around the handle.
Step 11: Add the Handle
Place the handle piece in the center of the top and pin. Stitch the handle to both the outer and lining pieces by stitching a box with an X in the center at the end of each handle. You have now finished your Cricut Maker dust cover.
I hope you enjoyed this dust cover project. If you would like more sewing and crafting projects subscribe to our newsletter and receive access to our free printables library.
If you would like Video tutorials of some of Drew Very Crafty's most popular posts subscribe to our free YouTube channel here.


I think there is a typo in Step 1. Should 2 1/2″ x 4 1/2″ be 22 1/2″ x 4 1/2″?
Actually it should be 21 1/2 4 1/2 sorry about that.