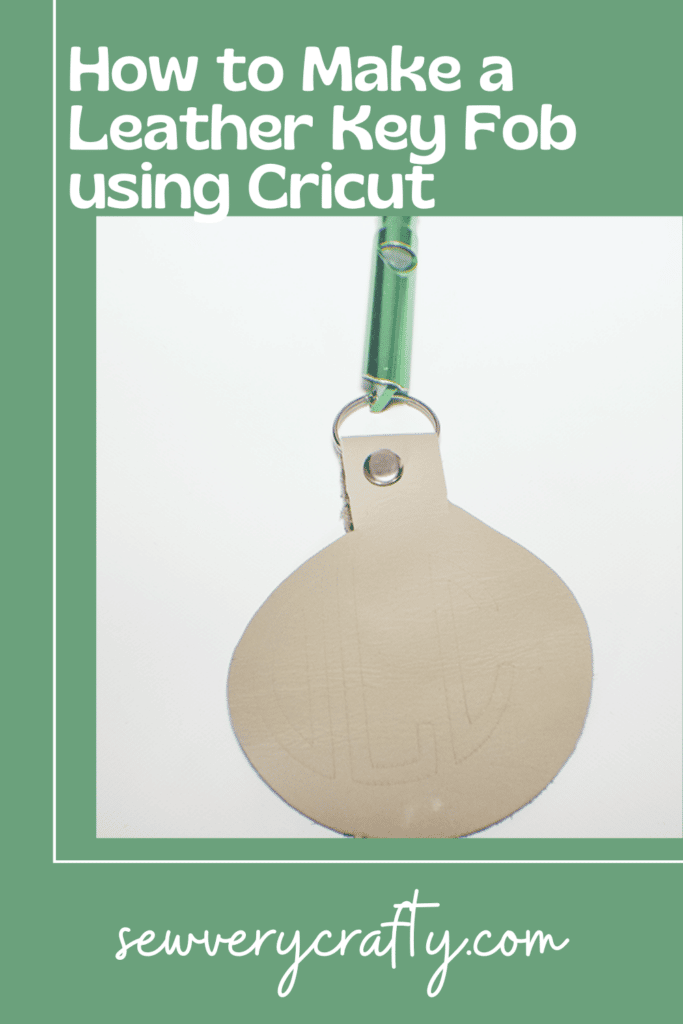
This is my very first Cricut project with my brand new Cricut Maker 3. The Cricut Maker 3 allows me to work with leather so I chose to make my Key Fob using Cricut with leather as my first project. May be not the best idea but it came out great. I was actually surprised at how easy it was given that I have no experience with Cricut. I purchased these scraps of leather at Michaels so they were in my stash and worked perfect for this project. If you would like to see my embroidered key fob you can check that out here.
The Cricut comes with a lot of attachments. For this project I used the purple strong grip mat, deep cut blade and the embossing blade along with the Cricut design space. I purchased these items at Joann's and Amazon. This post contains affiliate links that if you click on them and make a purchase I may receive a small commission at no extra cost to you. As an Amazon Associate I earn from qualifying purchases.
What you will need How to Make a leather Key Fob Using Cricut
- Cricut Maker 3
- Purple Mat
- Deep Cut Blade
- Engraving Blade
- Cricut Design Space
- Scrap Piece of Leather
- Rivet or snap
- Key Ring
Step 1: Open Design Space
On your computer open Cricut Design Space. On the left menu bar click on the “shapes tab” and pick the circle. It will appear on the design space. Next click on the rectangle and it will appear on the design space. The below video will walk you step by step.
Step 2: Lineup the rectangle with the circle
First, using the size width and height measurement boxes at the top change the measurement to be .75 wide and 2″ high. Rotate the rectangle 90 degrees using the rotate tool at the e top of design space. highlight the rectangle and move it so that it is lied up at the top of the circle.
Step 3: Weld the Pieces Together
Highlight both pieces and click attach at the lower right hand corner of design space and click weld.
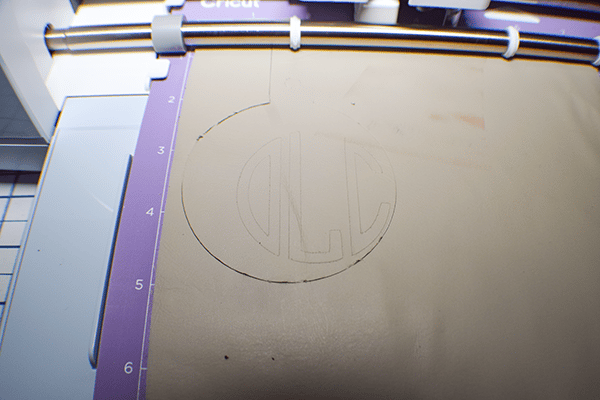
Step 4: Create the Holes
Go Back over to the “Shapes” menu and create two circles. Make them very small. Place one near the bottom of the rectangle and one near the top. Highlight the two circles and weld them together. Highlight both the two circles and the key fob piece go to the bottom of design space and click slice. move the circles out of the way so that the holes appear.
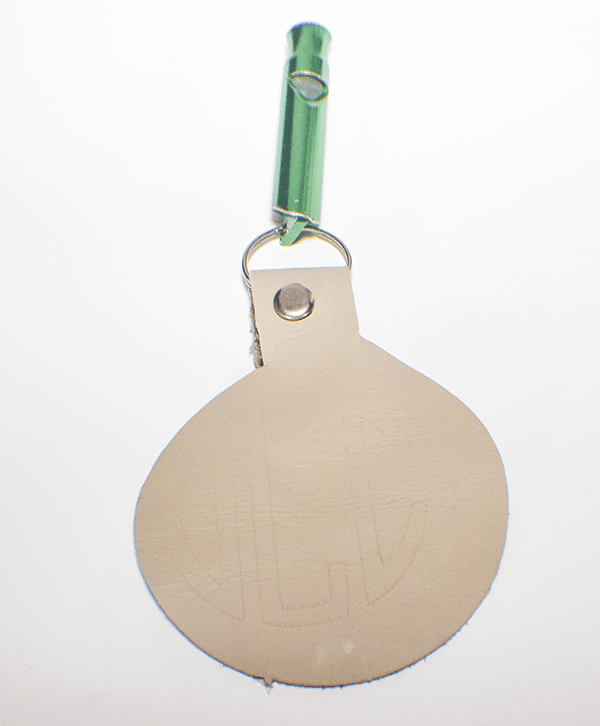
Step 5: Create the Monogram
At the bottom of the left menu there is a menu called monogram. Click on that and choose a monogram with the initials that you want. Place it on design space. Highlight the monogram and go the the top of design space where it says operation and click engrave.
Step 6: Click Make It
Once you have the pieces created in design space click make it on design space. Once you click make it you will be asked how you will be loading your materials. I chose On Mat. Click that selection and click confirm. Place the leather on the purple mat.
Step 7: Click Cut
Once you click cut you will begin a list of materials to choose from. Click Browse all Materials and choose genuine leather. Then choose the feed button on the Cricut and then the cut button. Make sure you have the deep cut blade in the machine.

Step 8: Emboss the Project
Change the blade to the embossing blade. Measure the location for the monogram. Reinsert the mat. Choose the material type and press insert mat and cut. Once you have embossed the project you are finished with the Cricut portion.
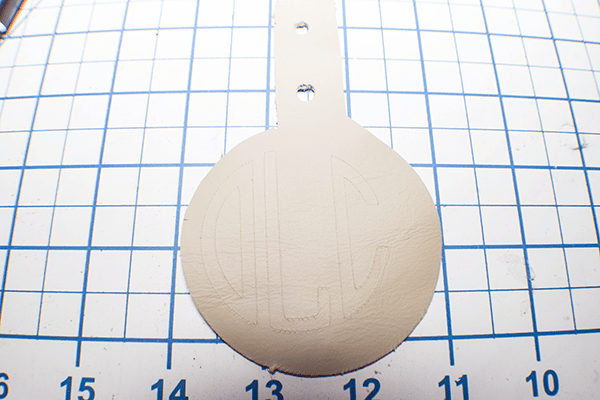
Step 9: Put it Together
Fold the tab down so that the holes lineup. Place the key ring in the center. Insert a jam snap or rivet into the holes and you have finished your key ring.
I hope you enjoyed this simple circuit project. if you would like more sewing and crafting projects subscribe to our newsletter and receive access to our free Printables library.
If you would like video tutorials f some of Sew Very Crafty's most popular posts subscribe to our free YouTube channel here.