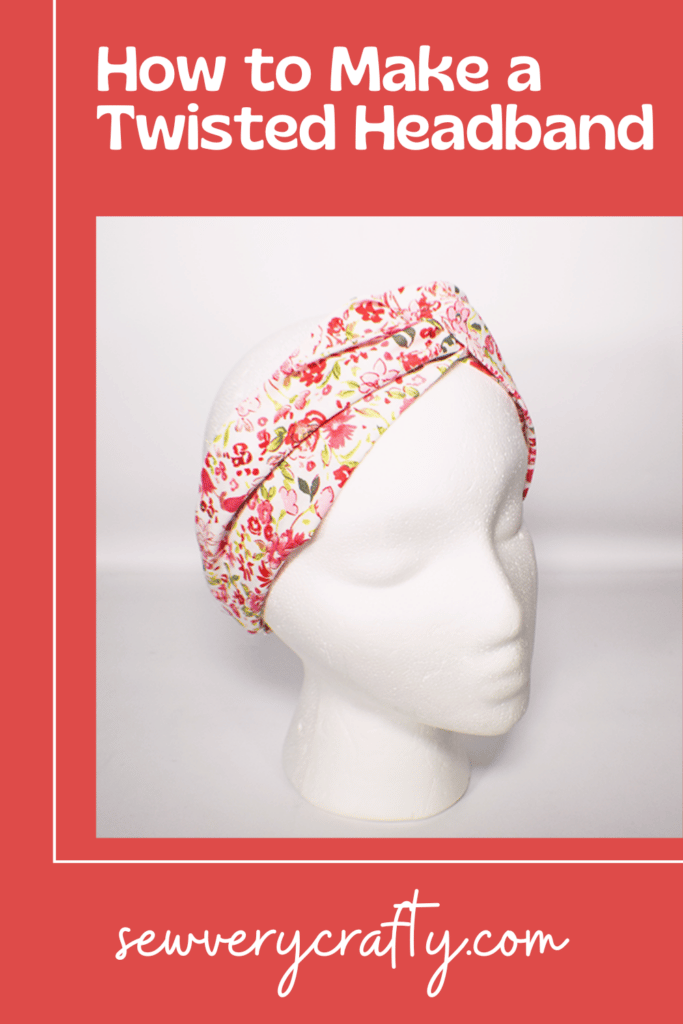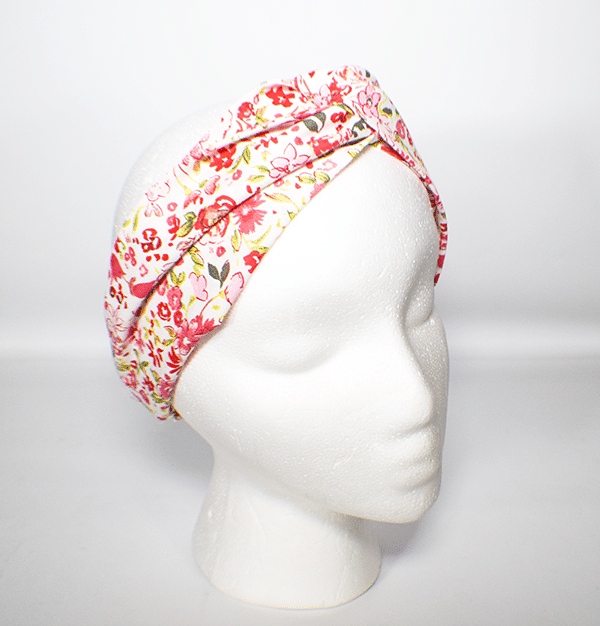
I just love these twisted headbands. Many of the headbands that I have seen require that you use nit fabrics. I decided to use a woven fabric and add the elastic to the bag. This technique gave me a lot of flexibility in terms of the fabric that I chose to use. Plus, cotton fabrics are easier to work with for beginners. If you want just an untwisted headband check out my tutorial here.
I chose some fun cotton fabric that I purchased at JOANN Fabric & Craft Stores![]() . You only need a small amount for this project so a remnant or scrap could work nicely for this headband. Of course you could head to Amazon Fabrics or
. You only need a small amount for this project so a remnant or scrap could work nicely for this headband. Of course you could head to Amazon Fabrics or
What you will Need: How to Make a Twisted Headband
- 1/4 yd of cotton fabric
- 6″ of 1″ elastic
- Standard sewing supplies

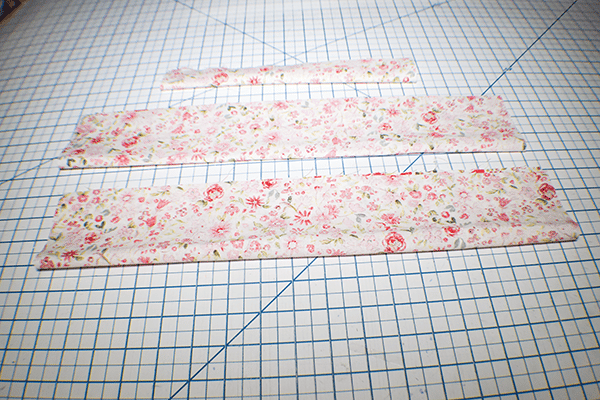
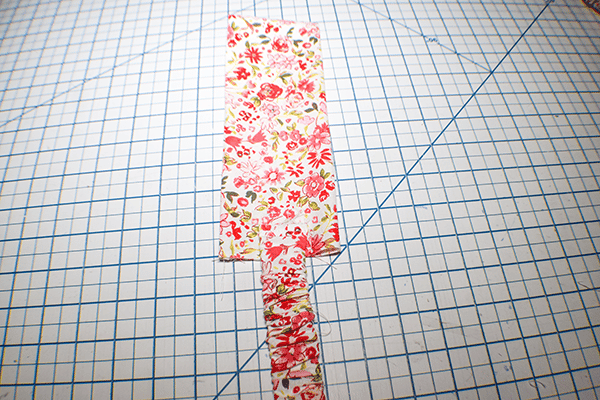
Step 1: Cut your Fabrics
Cut two pieces of fabric that measure 7″ x 18″ and one that measures 3″ x 11″.
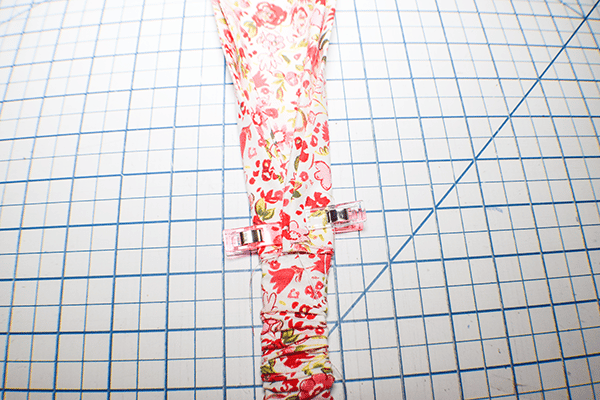
Step 2: Stitch your Fabrics
Fold the fabrics length wise right sides together and stitch along the long sides using a 1/4″ seam allowance. Turn right sides out and press.
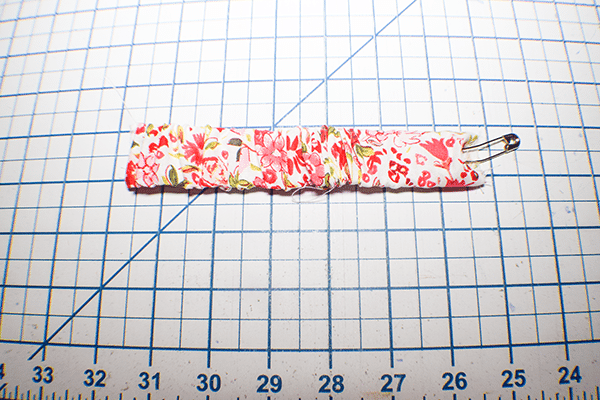
Step 3: Add the Elastic
Take the small tube of fabric you created and insert the 6″ piece of elastic. The elastic is shorter than the fabric so make sure that you secure one end and then feed the rest to the other end. Stitch the short ends to secure the elastic.
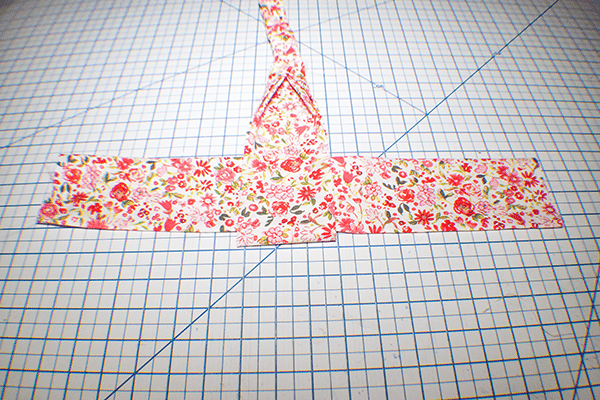
Step 4: Add the Elastic Tube
Take one of the larger tubes of fabric and fold it in half widthwise. Place one end of the elastic tube on top of the short ends and overlap the short ends over the elastic tube. Stitch through all layers using a 1/4″ seam allowance.
Step 5: Add the Other Long Tube
Insert the other long tube through the center of the first tube and fold it in half widthwise. Add the other end of the elastic tube to the end of the second long tube in the same way you did the first and stitch through all layers.
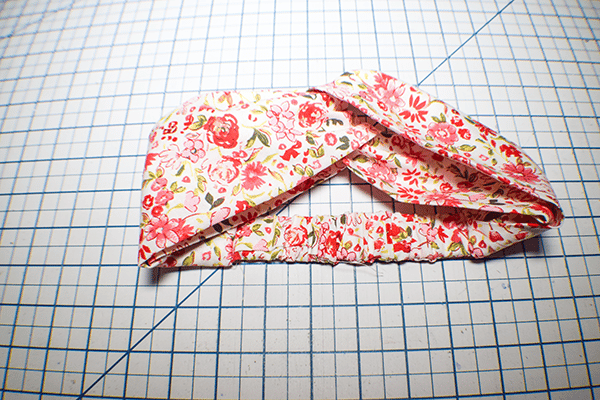
Step 6: Turn Right Sides Out
Turn the elastic to the inside and pull the main fabric to ensure that the elastic is tucked inside. You have now finished your twisted headband.
I hope you enjoyed this twisted headband project. I you would like more sewing and crafting projects subscribe to our newsletter and receive access to our free printables library.
If you would like video tutorials of some of Sew Very Crafty's most popular posts subscribe to our free YouTube channel here.