
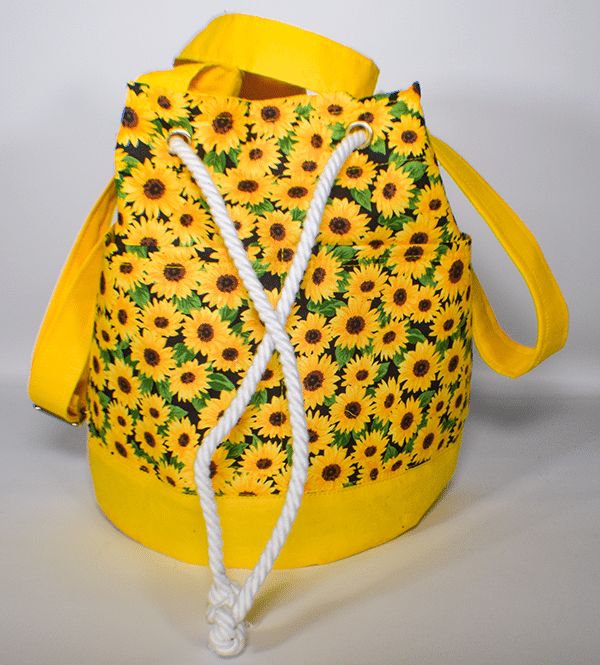
I recently got a grommet setter and I thought what better project to use it on than a traditional DIY bucket bag. This is a simple DIY bucket bag making project especially with the grommet setter. I no longer need a hammer and setter. The one I have is really just a press. Fingers crossed that it actually works. I really like this simple bucket bag. It didn't take long to sew and it came out great. If you would like more handbag making projects head over to my handbag page to find more.
I chose fabrics that I purchased during JOANN Fabric & Craft Stores![]() big quilting cotton sale that has been sitting in my stash. Of course you could head to Amazon Fabrics or
big quilting cotton sale that has been sitting in my stash. Of course you could head to Amazon Fabrics or
What you will Need: How to Sew a DIY Bucket Bag
- Pattern Piece you can get by clicking on this link
- 1/2 yd main outer fabric and accent Fabric
- 1/2 yd lining fabric
- 1/2 yd fusible fleece like Pellon 987F
- 8 3/8″ grommets
- 30″ of 1/4″ cord
- 29″ x 4 of any fabric
- 4 x WOF of any fabric
- 2 1″ D Rings
- 1 triglide
Step 1: Cut your Fabrics
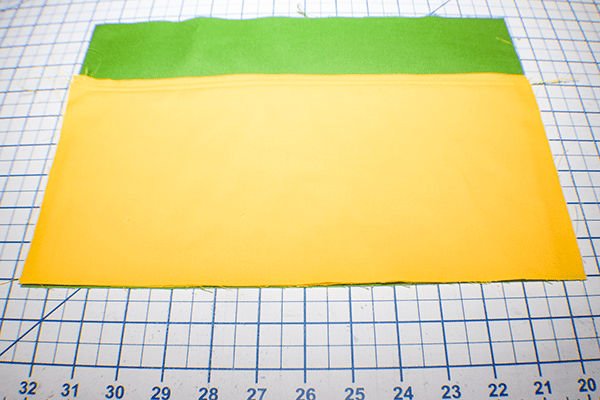
Main outer fabric: 2 pieces that measure 13 1/4″ x 8 3/4″ and 1 piece that measures 13 1/4″ x 10 1/4″.
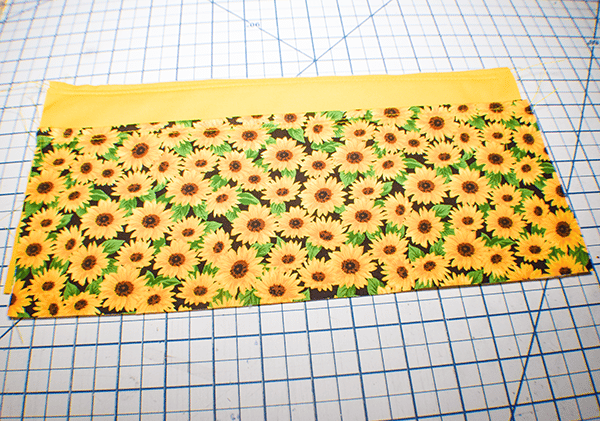
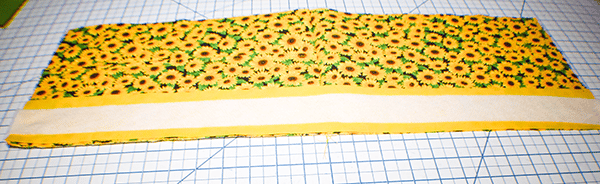
Accent outer fabric 1 piece that measures 25 5/8″ x 2 3/4″ and 1 piece the measures 8 3/4″ x 8 3/4″. 1 piece that measures 25 5/8″ x 2 3/8″ and 1 piece that measures 13 1/4″ x 12 5/8″
Lining Fabric: 2 pieces that measure 13 1/4″ x 9″ and 1 piece that measures 8 3/4″ x 8 3/4″.
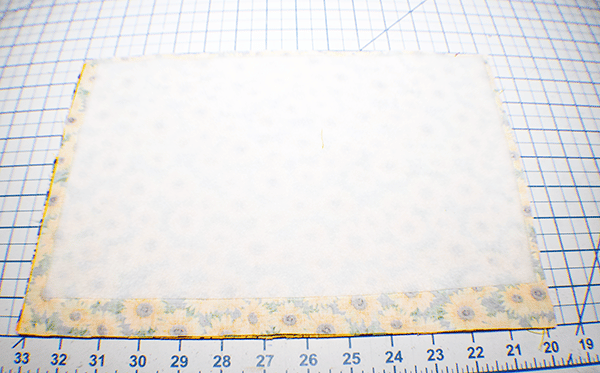
Fusible fleece: 2 from the pattern piece. 2 Pieces that measure 12 1/2″ x 8″. 1 piece that measures 24 7/8 x 2″ and 1 piece that measures 25 7/8″ x 1 5/8″. 1 piece that measures 12 1/2″ x 4 3/4″. Finally, 1 piece that measures 12 1/2″ x 6″.
For he handles cut 2 pieces of any fabric that measure 4″ x 12 1/2″. Cut two D-Ring tabs that measure 4″ x 2″ and a strap that measures 4″ x WOF (width of fabric).
Step 2: Fuse the Fleece
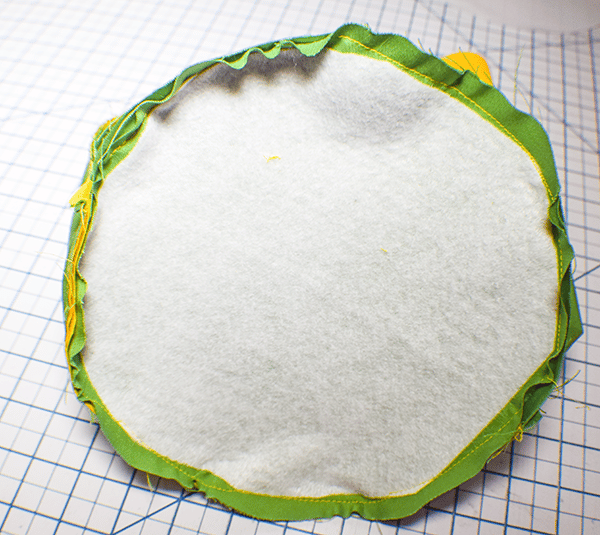
Fuse the fleece to the two main outer pieces that measure 13 1/4″ x 8 1/4″, the accent outer piece that measures 25 5/8″ x 2 3/4″ and the final long outer accent piece. Fuse the 12 1/2″ x 4 3/4″ fleece to 1/2 of the main outer piece that measures 13 1/4″ x 10 1/4″. Take the round fleece and fuse it to the center of the two squares. trim around the circles leaving a 3/8′ seam allowance. Finally, fuse the last piece to half of the accent piece that measures 13 1/4″ x 12 5/8″.

Step 3: Create the Pockets
Take the two pieces that you fused fleece to half and fold it in half with the fleece in the center. Press. Stitch two lines of stitching along the fold.
Step 4: Stitch the Pockets
Place the main outer pockets onto one of the main outer pieces. Stitch along the sides and bottom and down the center dividing the pockets.

Step 5: Stitch the Outer Fabrics
Place the two main outer pieces right sides together and stitch along one side using a 3/8′ seam allowance.
Step 6: Add the Outer Accent Fabric
Place the 2 3/4″ outer accent fabric right sides together with the bottom of the main outer fabric and stitch using a 3/8 seam allowance. Topstitch long the top and bottom of the seam.
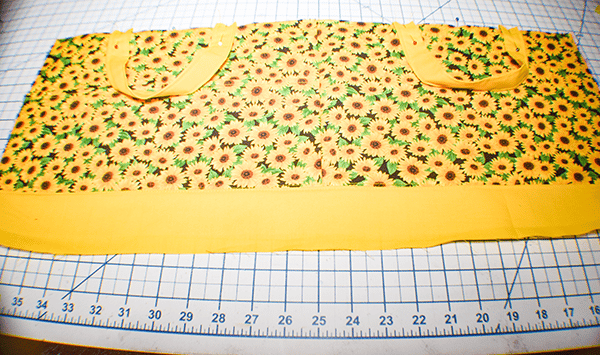
Step 7: Add the Handles
Take two pieces of fabric that measure 12 1/2″ and fold the long edges to the center and press. Fold in half lengthwise and press again. Topstitch along bot sides. Pace the handles right sides together on the main outer bag. To do this, find the center of each half of the bag. Measure 2″ from each center mark on both sides and make marks. Place the handles on each mark and stitch to secure.
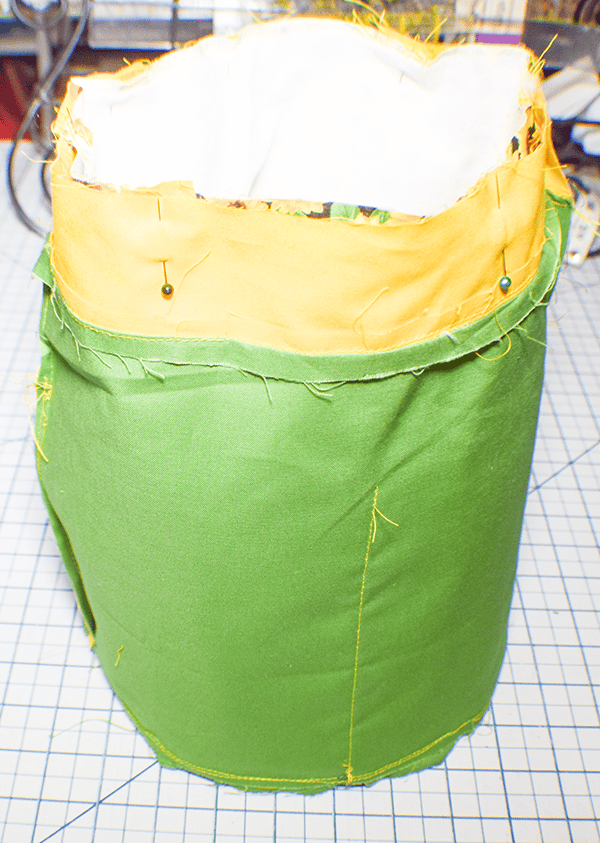
Step 8: Stitch the Bag Together
Place the bag pieces right sides together and stitch using a 3/8″ seam allowance.
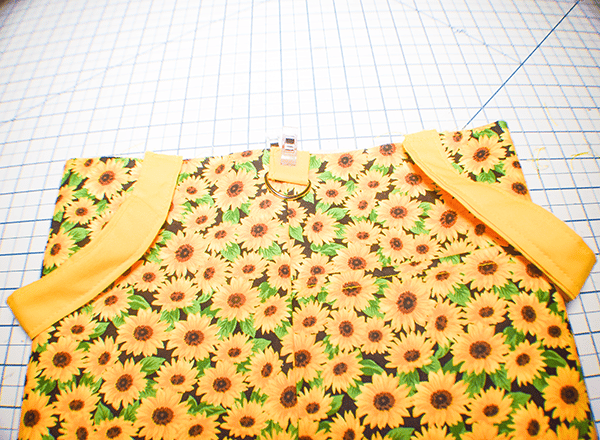
Step 9: Add the D-Rings
Create the D-Ring tabs the same as a the handles. Take the two tab pieces that measure 2″ each. Wrap the tab around the D-Rings and clip. Place the fabric with the D-Rings attached to the seams of the bag and stitch to secure.

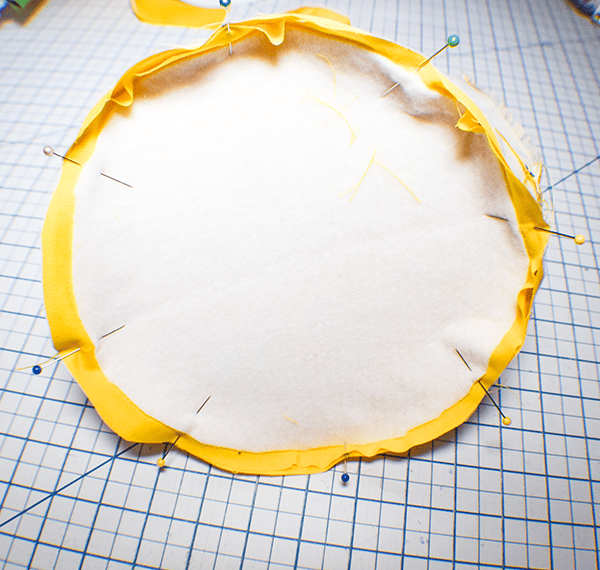
Step 10: Add the Bottom
Fold the accent outer circle in half and mark the centers. Fold in half the other direction and find the other centers. Do the same for the bag. Attach the circle to the bottom right sides together and stitch using a 3/8″ seam allowance.
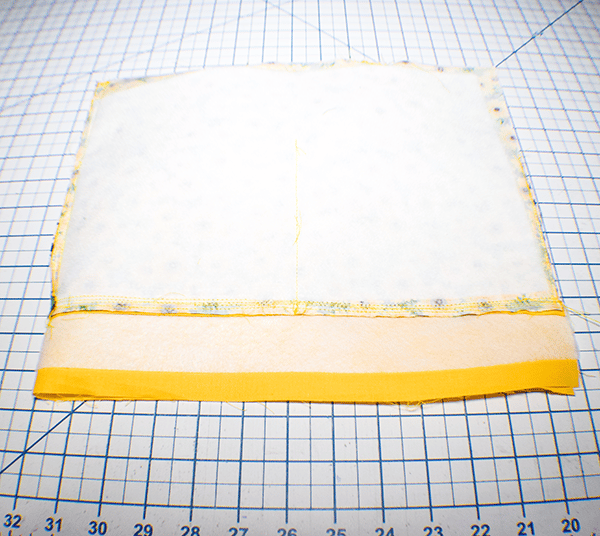
Step 11: Add the Interior Pockets
Place the accent pocket piece onto one of the lining pieces and stitch all the way around and down the middle to divide the pockets.
Step 12: Stitch the Lining
Place the two lining pieces together and stitch along one side using a 3/8″ seam allowance. Place the long accent piece at the to of the lining and stitch it to the lining. Topstitch along the top and bottom of the seam. Place the short ends right sides together and stitch leaving an opening for turning. Add the lining bottom in the same way you added the outer bottom.
Step 13: Stitch the Outer Bag to the Lining Bag
Turn the outer bag right sides out. Place it inside the lining bag so that they are right sides together. match the side seams. Stitch the two bags together around the top using a 3/8″ seam allowance. Turn the bag right sides out through the opening in the lining. Close the opening.
Step 14: Topstitch
Topstitch all the way around the top. Then measure 1 1/2′ down from the top and stitch again.
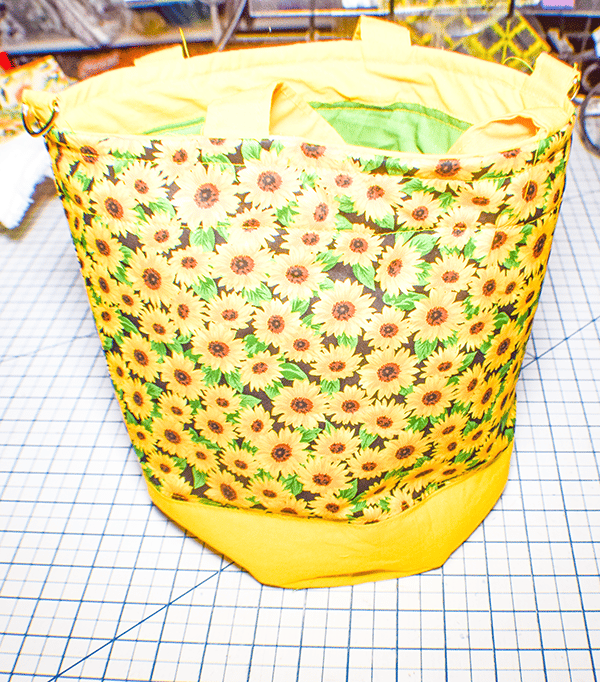
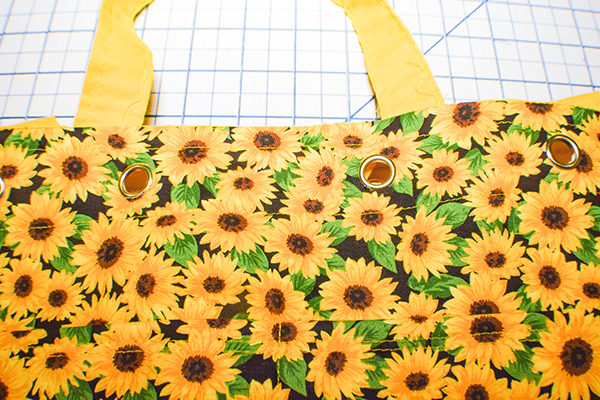
Step 15: Add the Grommets
Add the grommets just inside one of the handles and inside the other handle 3 1/2 apart. Then place the remaining grommets equally apart all the way around the bag in between the topstitching lines. Insert the rope through the grommets.
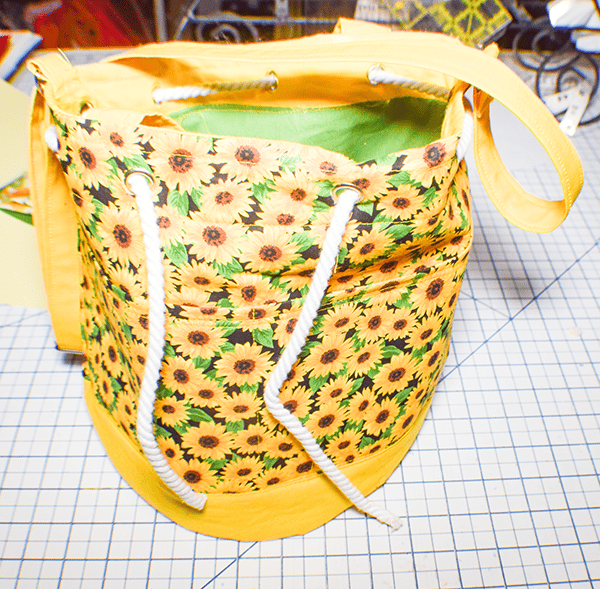
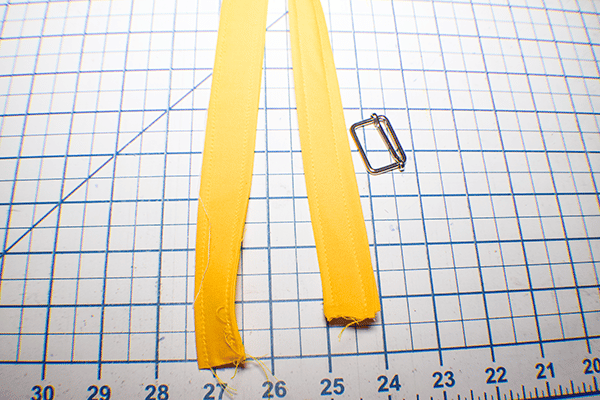
Step 16: Add the Strap
Create the strap the same way as the handles and D-Ring tabs. Insert one end of the strap through the d-Ring and fold under and stitch. Take the other end and insert it through the triglide and through the other d-ring then back through the triglide. Fold the end under and stitch. You have now finished your DIY Bucket bag.

I hope you enjoy this bucket bag project. If you would like more sewing and crafting projects subscribe to our newsletter and receive your free eBook f 15 handbag patterns and tutorials taken from the blog.
If you would like video tutorials of some of Sew Very Crafty's most popular posts subscribe to our free youTube channel here.


Hi Diana, love your sewing blog! Thanks for all the great sewing fun! I’m curious which grommet setter you got? I’ve been shopping for one and can’t decide! Marie
This is the one I use and it works fine for me. https://amzn.to/3RHfHxD