
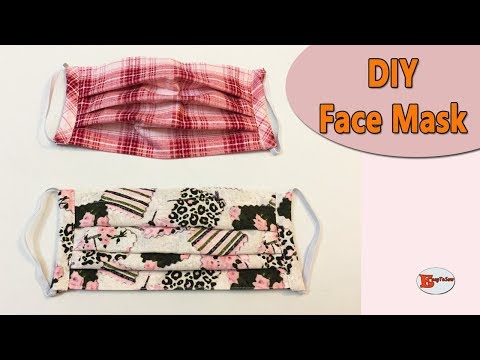
How to Make a Filtered Face Mask

I previously shared a basic fabric face mask with you but came across a pattern for a face mask that has a space for a filter and a nose wire for more security and thought to share that with you as well. This mask was not designed by me but an unknown designer and seems to offer more protection for the user if a filter of some kind can be placed in the pouch. The wire helps to pinch the nose tight. This mask is not quite as simple to make as my previous mask but still only requires the ability to sew a straight line. Just follow the step-by-step tutorial or the attached video to learn how to make this mask and donate, donate, donate!!!
If you want an easier non filtered mask check out my other fabric face mask post. If you would like a simple pouch where you can store your face mask check out my simple face mask pouch project here.
What you will Need: How to Make a Filtered Face Mask
- 15″ x 7 1/2″ piece of fabric
- 7″ of double fold bias binding
- 6 1/2″ piece of twist tie or other wire
- 19 1/2″ Piece of elastic or piece of ribbon or upcycled T-shirt
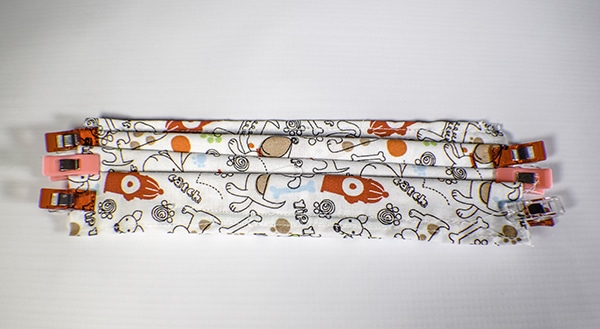
Step 1: Cut out your Fabrics
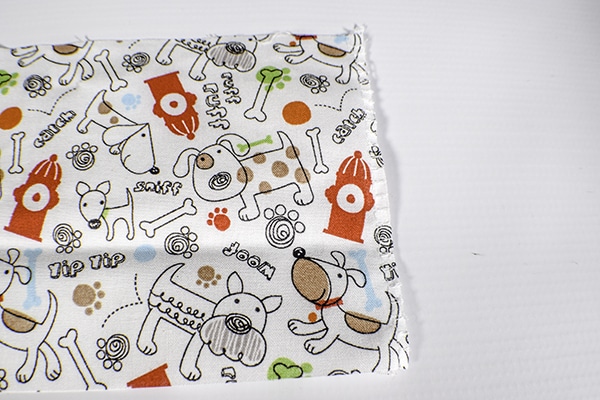
Cut out your fabric to the recommended sizes
Step 2: Finish the short sides
Serge, use overlock or zig zag stitch on your sewing machine or pink the short sides of your fabrics.
Step 3: create the pouch
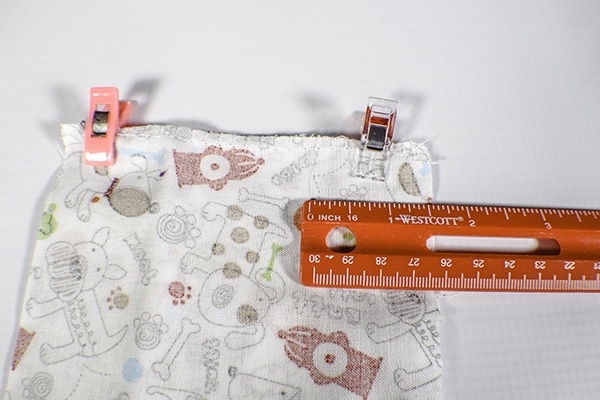
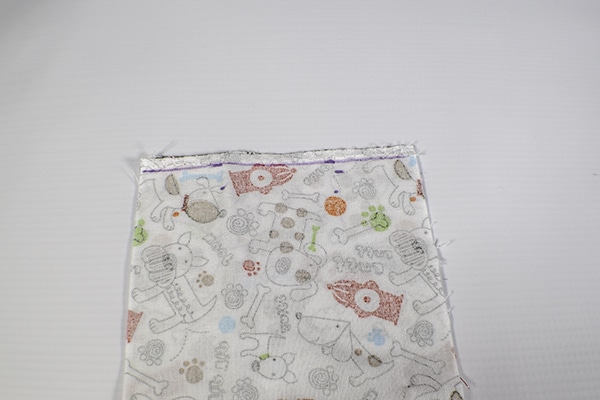
Fold your fabric with short sides right sides together and clip. Measure 1 1/2″ from each edge and make a mark. Sew from each end to the mark using a 3/8″ seam allowance leaving an opening. Press the seam open. Turn right sides out and top stitch along the seam on both sides making sure to push the fabric underneath out of the way. .
Step 4: Measure from the seam line
Measure up 1/2″ from the seam line and mark. Draw a line across the mask parallel with the seam at that 1/2″ mark using a heat erasable pen. Fold the mask on that line and press.
Step 5: stitch all the way around the perimeter
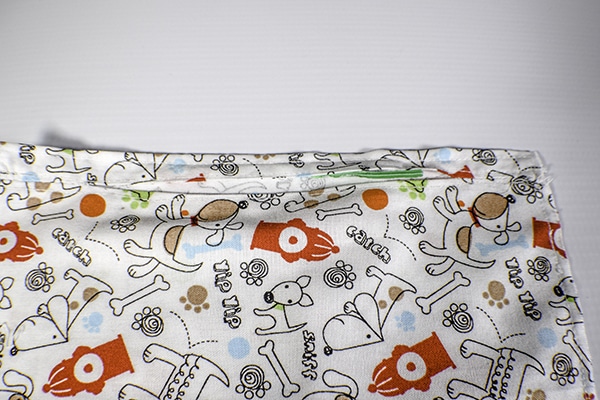
Stitch all the way around the perimeter using a 1/4″ seam allowance.
Step 6: Add the wire
Add the twist tie or thin wire into the opening in the top of the mask. Stitch along the bottom of the opening to close.
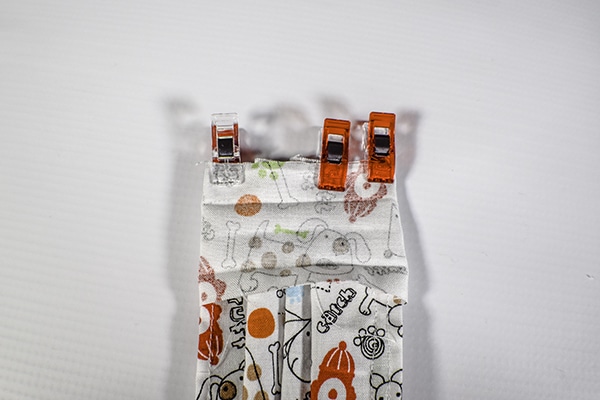
Step 7: add the ACCORDION folds
Turn the mask so the the opening is face down and on the bottom. Make three 1/2″ accordion folds and clip. Press. Stitch along the accordion folds on each side using a 1/4″ seam allowance.
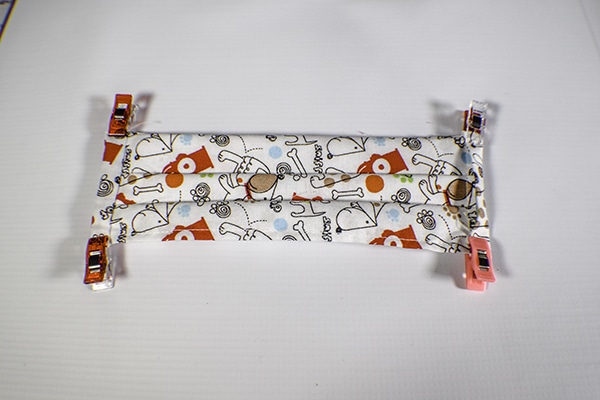
Step 8: Add the Bias Binding to Each end
Add the bias binding to each end. Cut the binding in half. Center the binding on the mask and fold the long ends around the top and bottom. Stitch along the first fold. Trim to 1/8″ seam allowance. Fold down the binding and clip so that it covers the previous stitching. Clip. Stitch along binding to secure. I made my own bias tape for this project but you can use pre made bias tape if you like. If you would like to make your own check out my tutorial.
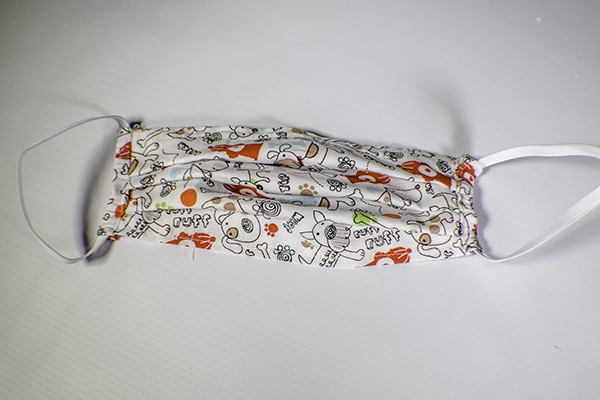
Step 9: Add the Elastic or Ribbon
Cut elastic in half. Using 1/4″ elastic and a safety pin feed the elastic through the binding. Stitch the ends together using zig zag stitch. Feed the stitched ends inside the binding and you have finished the mask. Place some filtering material into the pouch and you have finished your filtered face mask. Check out the video below for video instructions.
****ADDENDUM**** it has become increasingly difficult to get elastic for these masks I recommend that you try to upcycle a T-shirt. Cut the T-Shirt into 1″ wide strips and stretch them until they curl. This may work as a substitute as it will stretch around the ears.
I hope you enjoyed this project. If you would like more sewing and crafting projects sign up for our newsletter and receive access to our free printables library.
IF YOU WOULD LIKE VIDEO TUTORIALS FROM SEW VERY CRAFTY SUBSCRIBE TO MY FREE YOUTUBE CHANNEL HERE.


I Can’t Seem To Find A Pattern In Which To Print So I Can Start Sewing Diane’s Face Mask ?
Please Help !!
Cheryl
No problem. I will email to you. I don’t know why the link is not working.
I can’t find the pattern for the face mask. Like the shape of the mask.
Here it is. Sorry for the inconvenience. https://sewverycrafty.com/wp-content/uploads/2020/03/Face-mask-Pattern.pdf
I thought this was the other face mask. Sorry. There is no pattern for this mask. It is basically a rectangle of fabric. Just follow the instructions to get it to look the way it does. I hop this helps.