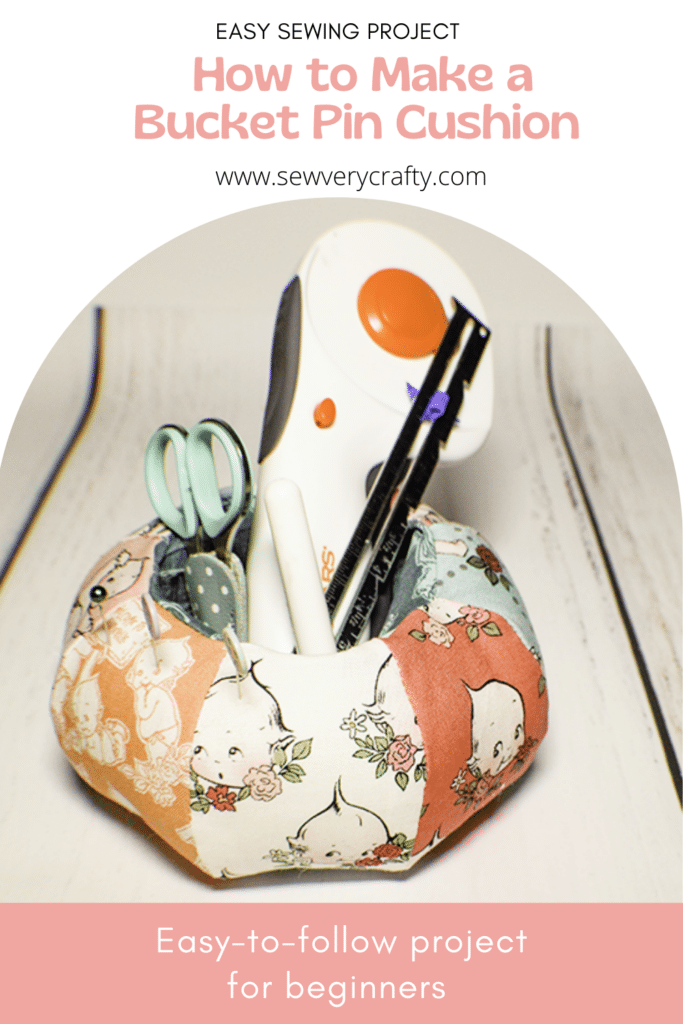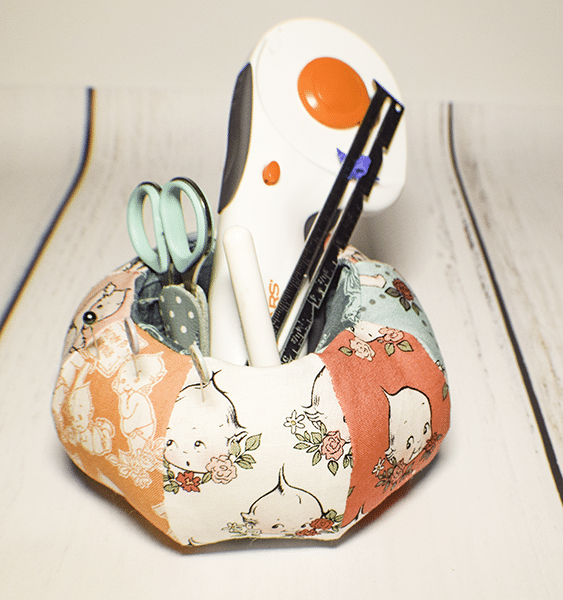
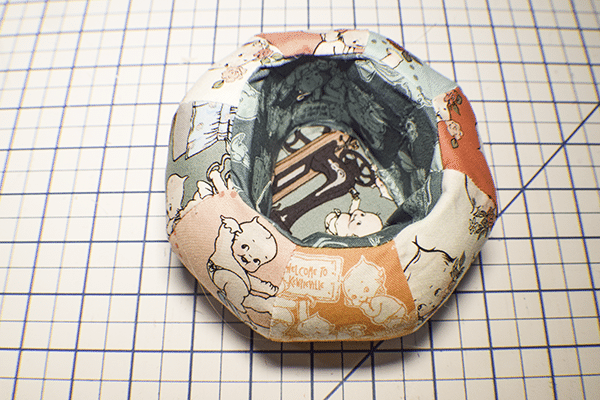
Here is another genius project from Sewing Times on Youtube. It is so fun and functional that I just had to make one and share it with you. This basket pin cushion is just so handy I just love it. There is machine sewing and hand sewing in this project and a free sewing pattern to go along with it. For those of you who regularly follow Sew Very Crafty I occassionaly convert the Sewing Times videos into posts for those who prefer this way of learning. I just thought this project was particularly genius so here it is in print form. Of course you can head to YouTube and watch the video if you like.
I used scrap fabrics from my Sew Kewpie quilting projects that I have been doing to make this project. I purchased those fabrics at Fabric.com but you could head to your stash, JOANN Fabric & Craft Stores![]() or onlinefabricstore.net to get exactly what you need for your basket pin cushion. This project contains affiliate links that if you click on them and make a purchase I may receive a small commission at no extra cost to you. As an Amazon Associate I earn from qualifying purchases.
or onlinefabricstore.net to get exactly what you need for your basket pin cushion. This project contains affiliate links that if you click on them and make a purchase I may receive a small commission at no extra cost to you. As an Amazon Associate I earn from qualifying purchases.
What you will Need: How to Make a Basket Pin Cushion
- Pattern you can get by clicking on this link
- 8 different scraps of fabric for outer shell of pin cushion
- 1/4 yd lining fabric
- 1/4 yd Pellon Peltex Interfacing
- Polyester fiberfill
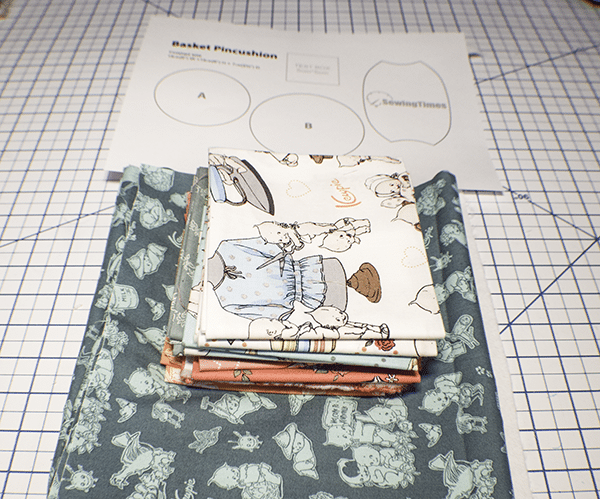
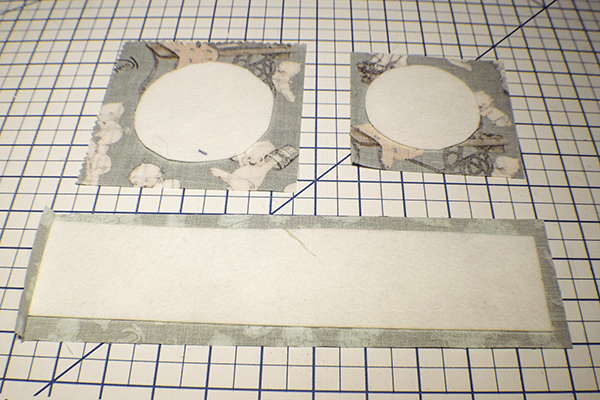
Step 1: Cut your Fabrics
From the lining fabric cut:
- 11 3/8″ x 3 1/8″
- 4 1/8″ x 4 1/8″
- 5 1/8″ x 5 1/8″
From the Scrap fabrics
- 8 pieces that measure 3 3/8″ x 5 3/8″ — Use the pattern piece to cut out the shapes
From the Peltex
- 10 5/8″ x 2 3/8″
- 3 3/8″ x 3 3/8″ — Use pattern piece A to cut a circle
- 4 ” x 4″ — Use pattern piece B to cut a circle

Step 2: Fuse the Peltex
Fuse the Peltex to the corresponding lining piece. Cut around the circles leaving a 3/8″ seam allowance.
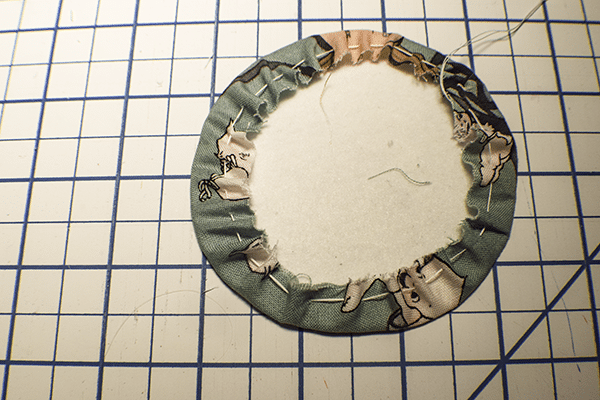
Step 3: Hand Stitch the Circle
Take circle B and hand stitch a running stitch along the edge. Pull the thread so that the fabric encloses the rim of the Peltex. Knot the thread and press.
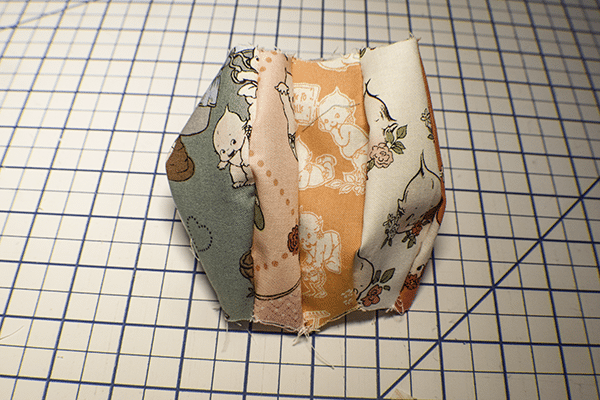
Step 4: Stitch the Outer Shell
Take the scraps that you cut with the pattern piece. Lay two of them right sides together and stitch along the right side using a 3/8″ seam allowance. Clip the curve. Place the next piece right sides together with the last and stitch. Clip the curve and proceed to add all of the pieces. When you have added all of the pieces stitch the first piece to the last piece creating a tube. Turn right sides out.

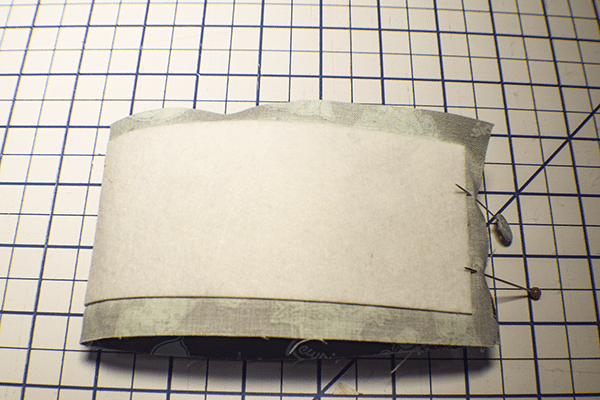
Step 5: Create the Lining
Take the long lining piece and fold it in half with right sides together. Stitch the short sides together using a 3/8″ seam allowance.
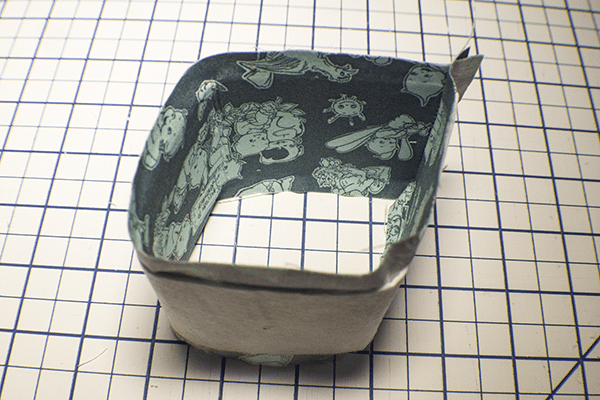
Step 6: Add the Outer Shell
Place the outer shell into the lining so that they are right sides together. Match the top raw edges. The outer shell will be longer than the lining. This is correct. Stitch the top of the outer shell to the lining using a 3/8″ seam allowance. This is a little fidgety so take your time.
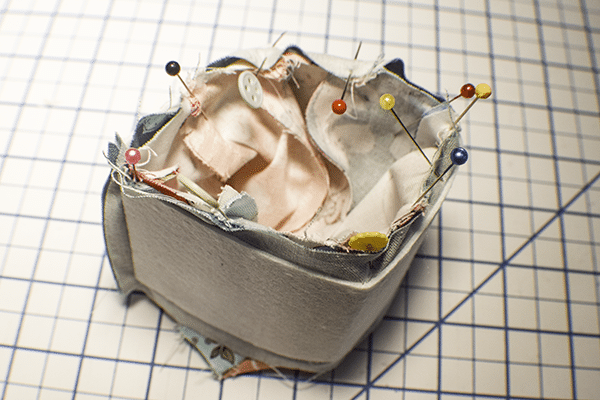
Step 7: Add the Lining Bottom
Clip around the lining shell. Take the circle piece A and fold it in half to find the center and mark both sides. Fold it in half the other way and mark the other two centers. Do the same for the lining shell. This will make it easier to match up the lining bottom. Place circle A right sides together with the lining shell and clip. Hand stitch the bottom to the lining shell. Fold the outer shell over the lining.
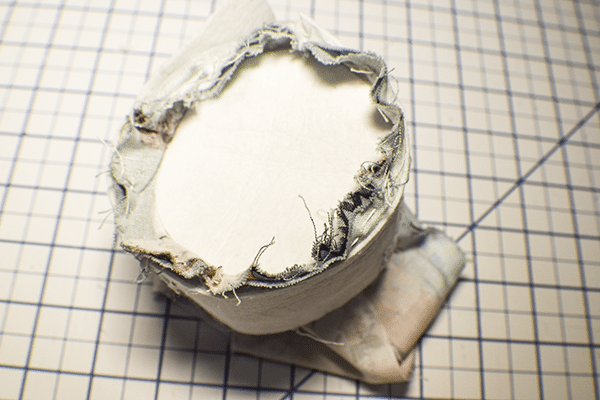

Step 8: Stuff the Basket Pin Cushion
You will notice that there is a space between the outer shell and the lining shell. Stuff that full of fiberfill until it is completely full. Hand stitch the sides of the outer shell to the bottom.
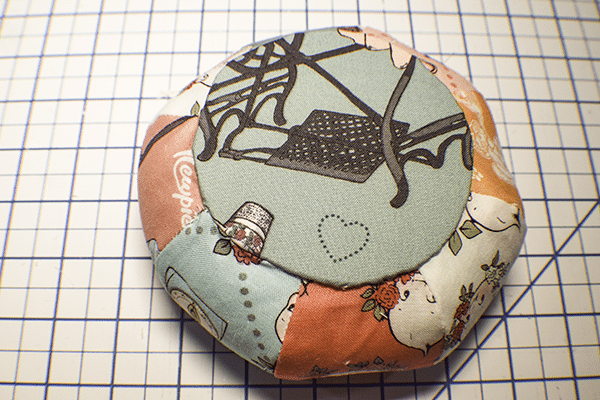
Step 9: Add the Piece B Bottom to the Basket Pin Cushion
Take Piece B and place it wrong sides together on the bottom of the basket pin cushion and hand stitch it to the outer shell using ladder stitch. If you are unfamiliar with ladder stitch check out this video. Once you have added the piece B bottom you have finished your basket pin cushion. Fill it and add pins and you enjoy.

I hope you enjoyed this bucket pin cushion project. If you would like more sewing and crafting projects sign up for our newsletter and receive access to our free Printables library.
If you would like video tutorials of some of Sew Very Crafty's most popular posts subscribe to our free YouTube Channel here.