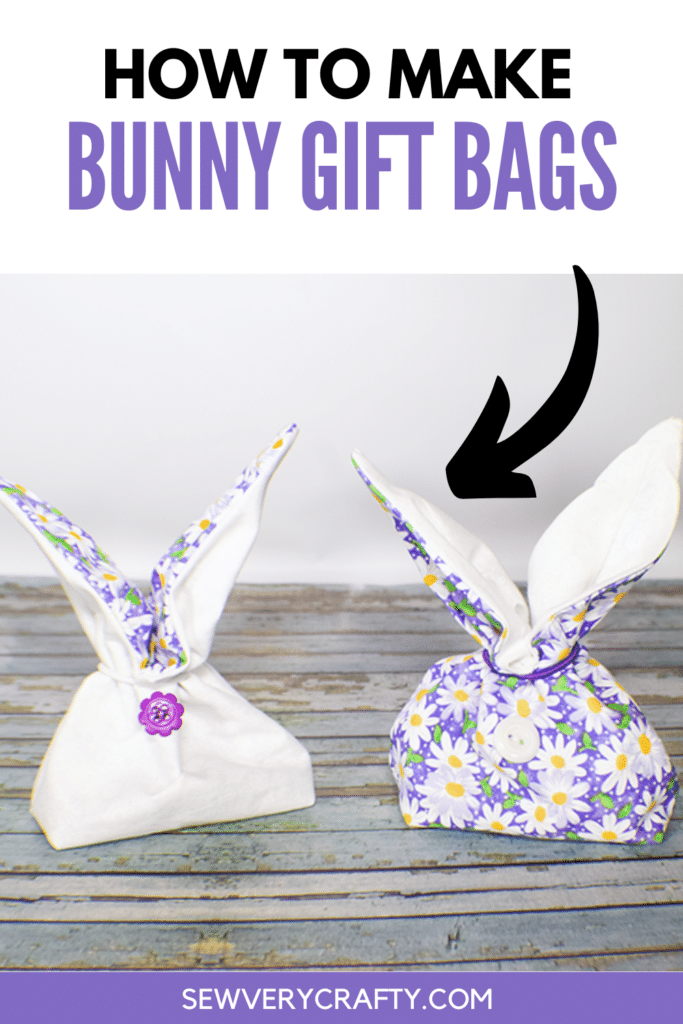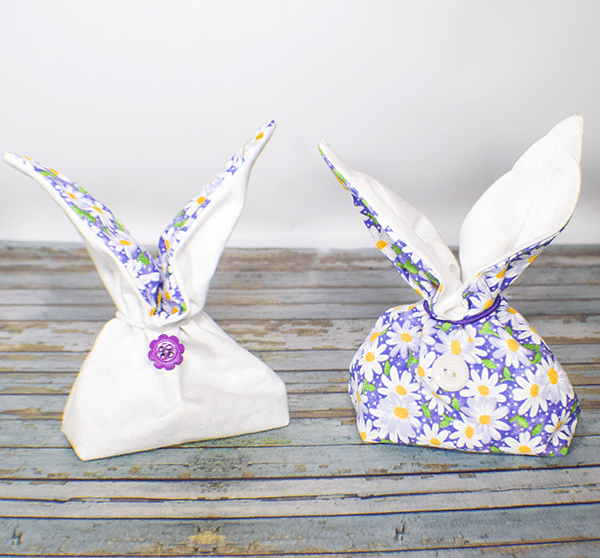
Today is Ash Wednesday so Easter is just around the corner. With that in mind I thought I would sew this simple Easter bunny treat bag that anyone with beginner sewing skills can make. It only takes a small amount of fabric and a few minutes of your time to create this adorable little bunny treat bag. I got this idea from the Quilted Forrest on YouTube. If you would like more treat bag ideas check out my other bunny treat bag here.
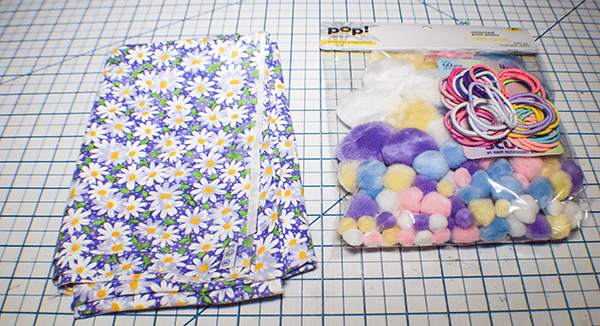
I used some remnants that I had one hand for this project but you could head to JOANN Fabric & Craft Stores![]() ,
,
What you will Need: How to Sew an Easter Bunny Treat Bag
- 2 different remnants or 6″ cuts of fabric
- 1 pom pom
- 1 button
- Small hair tie
- Standard sewing supplies
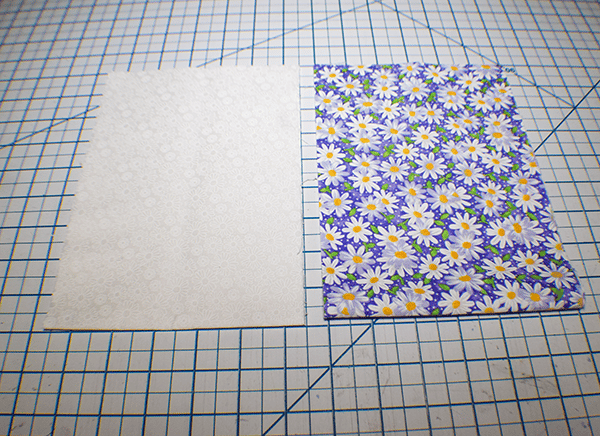
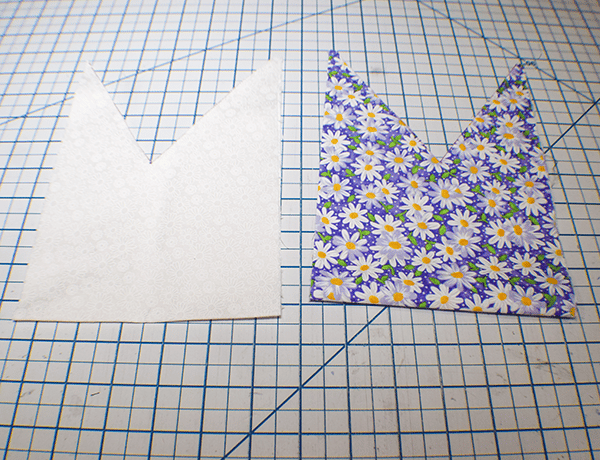
Step 1: Cut your Fabrics
From your two fabrics cut two 6″ pieces by the width of the fabric. Fold them in half and cut them 9″ from the fold to make the two pieces 18″ long. You will be making two bunnies with this technique.
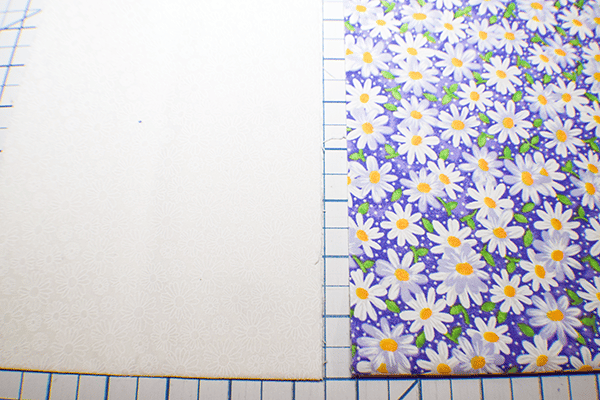
Step 2: Find the Center
Find the center of each piece by measuring 3″ from the side and 4 1/2″ from the bottom and make a mark.
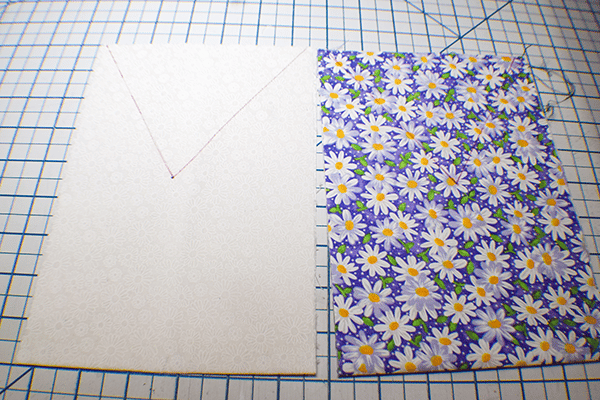
Step 3: Cut the Corners
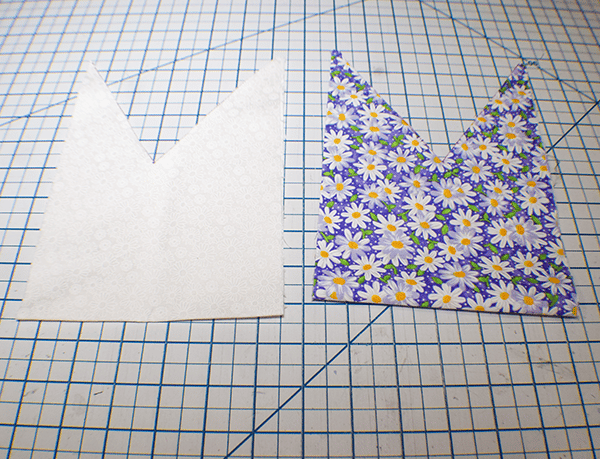
Measure from the center to 1/4″ from the top side of the fabric and draw a line. Turn the fabric upside down and draw a line exactly the same on the other side. Cut from the center mark to the mark on the side on each line to create the ears of the bunny.
Step 4: Stitch Each Bunny
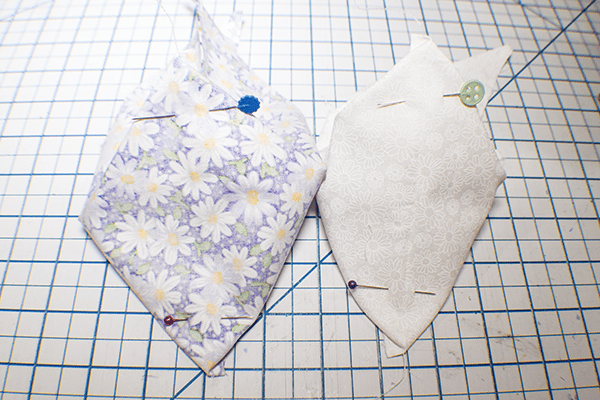
Place each piece right sides together. Stitch the sides of the outer bunny together using a 1/4″ seam allowance. Stitch the sides of the lining bunny the same way but leave an opening on one side for turning.
Step 5: Box the Corners
Take the bottom of the bag and match it up to the side of the bag to create a square. You will create points on each side. Stitch a line 1″ from each point. Do this for the outer bunny and the lining bunny. Trim off the excess corner to 1/4″. Press.
Step 6: Combine the Two Bunnies
Turn the outer bunny right sides out. Place the outer bunny inside the lining bunny so that they are right sides together. Pin the pieces together matching the side seams and the center Vs.
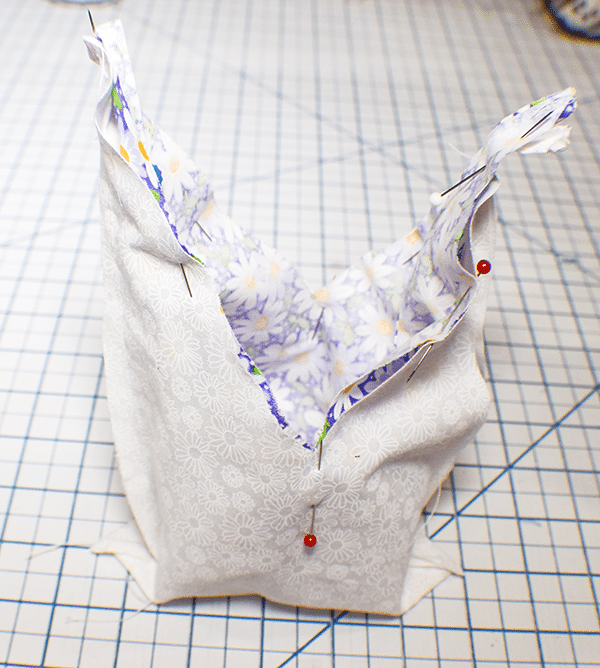
Step 7: Stitch Around the Top
Stitch all the way around the top of the bunny using a 1/4″ seam allowance. Make sure to stop and pivot with the needle down when you get to the center Vs and the top of the bunny ears. Backstitch on either side of the V to reinforce for turning. Trim off the excess fabric at the points of the bunny ears and snip the Vs without cutting through the stitching.
Step 8: Turn Right Sides Out
Turn the bunny right sides out through the opening you left in the lining. Poke out the ears using a point tool like That Purple Thang. Close the opening in the lining using ladder stitch or your machine. Stuff the lining into the outer bag and press.
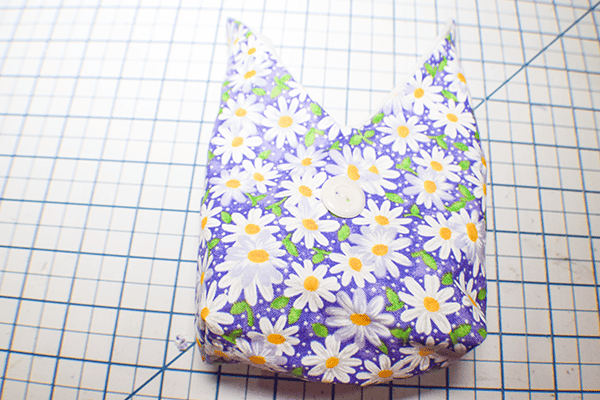
Step 9: Add the Tail and Nose
Stitch or hot glue the pom pom at the bottom center of the bag. Then stitch a button for the nose on the other side of the bag about 1″ from the V. Add your treats and close up the bag using the hair tie or even a ribbon. You have now completed your Easter Bunny Treat bag.


I hope you enjoyed his simple bunny project. If you would like more sewing and crafting projects subscribe to our newsletter and receive access to our free printables library.
If you would like video tutorials of some of Sew Very Crafty's most popular posts subscribe to our free YouTube channel here.