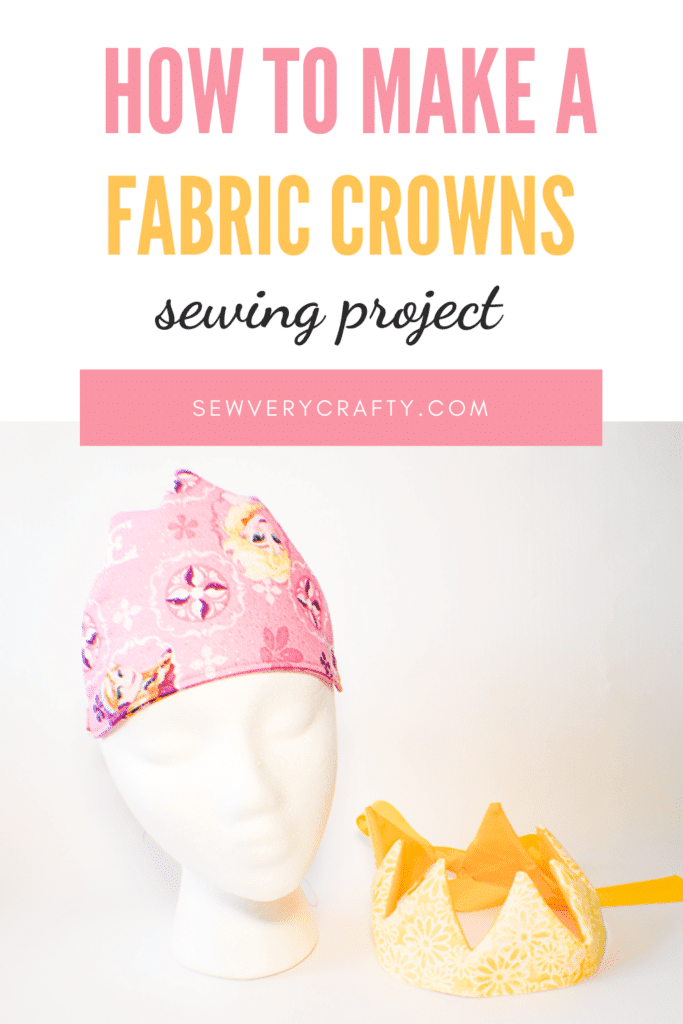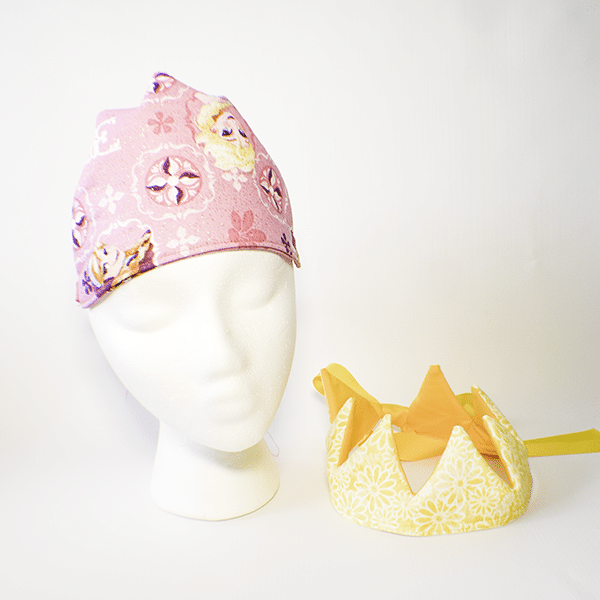
Little girls love to dress up as princesses so I decided to create a fabric crown for the princess in your life. This is a super simple sewing project that anyone with basic sewing skills can make in just a few minutes. This is a fun and functional sewing project that allows your little girl to be the princess that she is. I made my fabric crowns from golden yellow and pink. I used some fusible fleece to provide some support for my fabric crown but you could use some other type of interfacing if you like. There are two patterns to chose from for your crown but they are made exactly the same.
The fabrics I used for my project were fabrics that I had on hand. They are basic cotton fabrics that I purchased at JOANN Fabric & Craft Stores![]() . But you could head to fabric.com or onlinefabricstore.net to get whatever you would like for your fabric crown. This post contains affiliate links that if you click on them and make a purchase I may receive a small commission at no extra cost to you. As an Amazon Associate I earn from qualifying purchases.
. But you could head to fabric.com or onlinefabricstore.net to get whatever you would like for your fabric crown. This post contains affiliate links that if you click on them and make a purchase I may receive a small commission at no extra cost to you. As an Amazon Associate I earn from qualifying purchases.
What you will Need: How to Make a Fabric Crown
- Pattern you can get by clicking on this link
- Pattern you can get by clicking on this link
- 1/4 yd outer and lining fabric
- 1/4 yd fusible fleece or other fusible interfacing
- 40″ of ribbon
- Lace (Optional)
- Standard sewing supplies
Step 1: Cut out the Fabrics
Using the pattern piece cut one outer piece, one lining piece and one fleece or interfacing piece on the fold.
Step 2: Fuse the Fleece
Fuse the fleece to the wrong side of the outer fabric following the manufacturer's instructions.
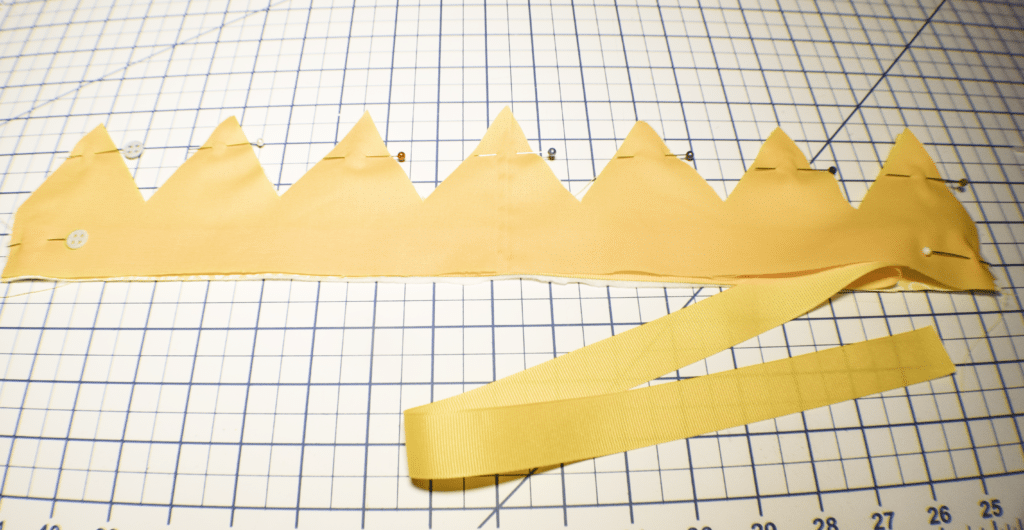
Step 3: Add the Ribbon
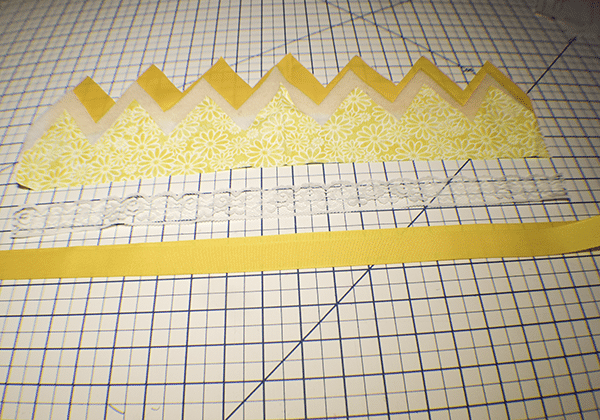
Cut the ribbon in half. Place one half of the ribbon right sides together on the center of the right side of the outer piece and one on the left side of the outer piece and stitch.
Step 4: Stitch the Crown
Place the lining piece right sides together with the outer piece making sure that the ribbon is sandwiched inside. Stitch the sides and the pointy part of the crown pivoting at each point and valley for a crisp look. Trim off the points without cutting through the stitching for a more pointy look and clip the valleys. Make sure not to stitch through the ribbon.
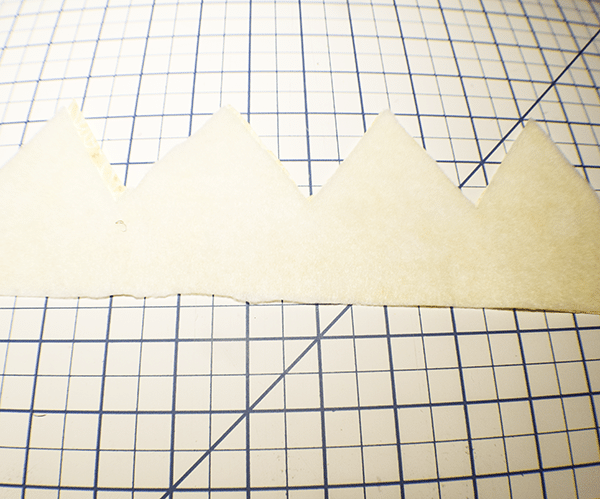
Step 5: Turn Right Sides Out
Turn the crown right sides out. Poke out the points using a poking stick like That Purple Thang.

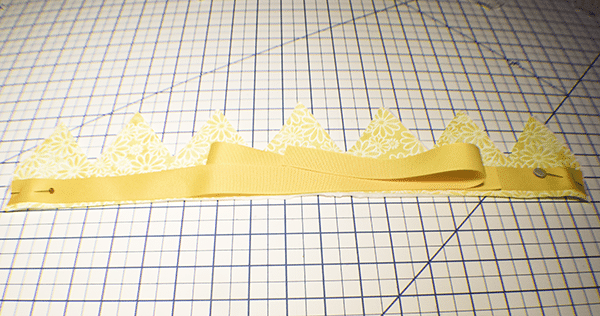
Step 6: Finish the Raw Edges
Fold under the raw edges by 1/4″ and press. Top stitch along the folded edges to enclose the raw edges.
Step 7: Add the Lace
Stitch some lace to the bottom of the crown as an embellishment. You have now finished your princess crown.
I hope you enjoyed this Princess Crown project. If you would like more sewing and crafting projects subscribe to our newsletter and receive access to our free Printables Library.
If you would like video tutorials of some of Sew Very Crafty's most popular posts subscribe to our free YouTube Channel Here.