
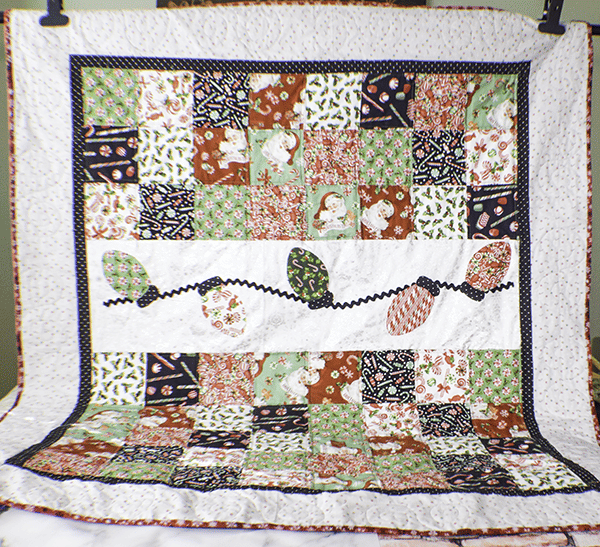
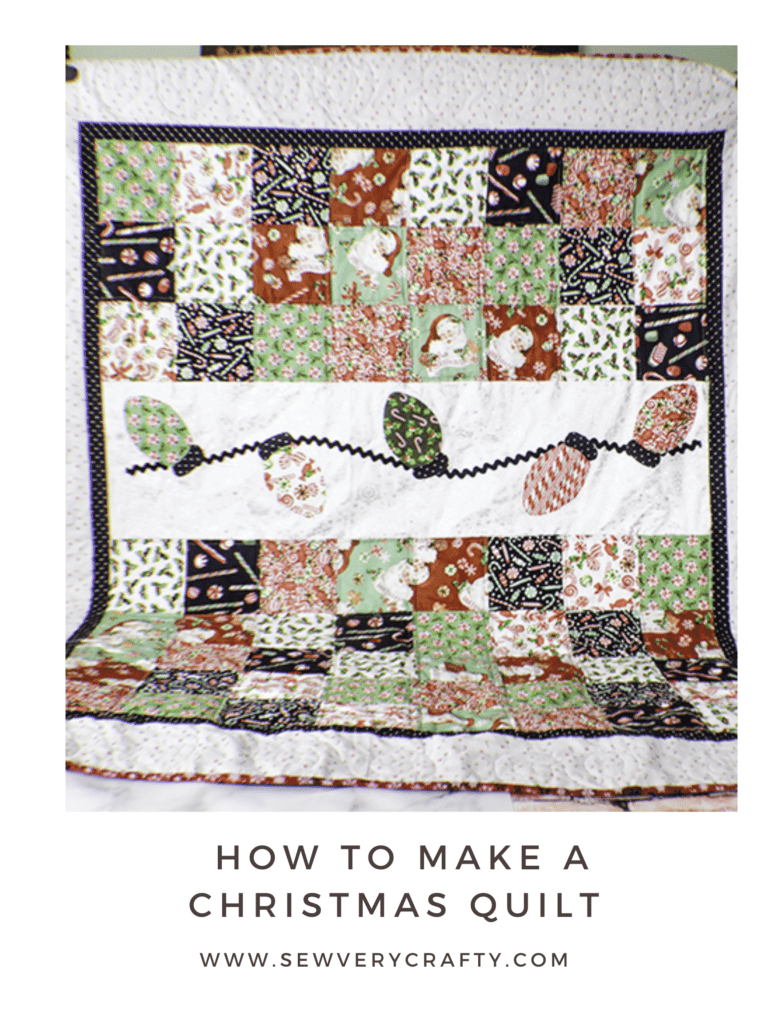
I came across this free quilt pattern online and decided to share it with you. It is a Christmas lights quilt called Merry and Bright Christmas Lights Kim Christopherson for Maywood Studio. It is a super simple quilt to make and comes together relatively quickly except for the cutting which I always find takes the most time. Given that I am a novice quilter this was the perfect pattern for me. If you would like to check out my other simple quilting projects head over to my quilting page.
I purchased all of my fabrics from JOANN Fabric & Craft Stores![]() so that I could order them online and get them immediately but you could head to
so that I could order them online and get them immediately but you could head to
What you will Need: How to Make a Christmas Lights Quilt
- Pattern you can get by clicking on this link
- Variety of Fabrics listed in the pattern
- Quilt Batting that is at least 55″ x 65″
- 3 yds of backing fabric
- Fusible web like Heat n Bond
- 1 yd of jumbo Ric Rac
Step 1: Cut your Fabrics
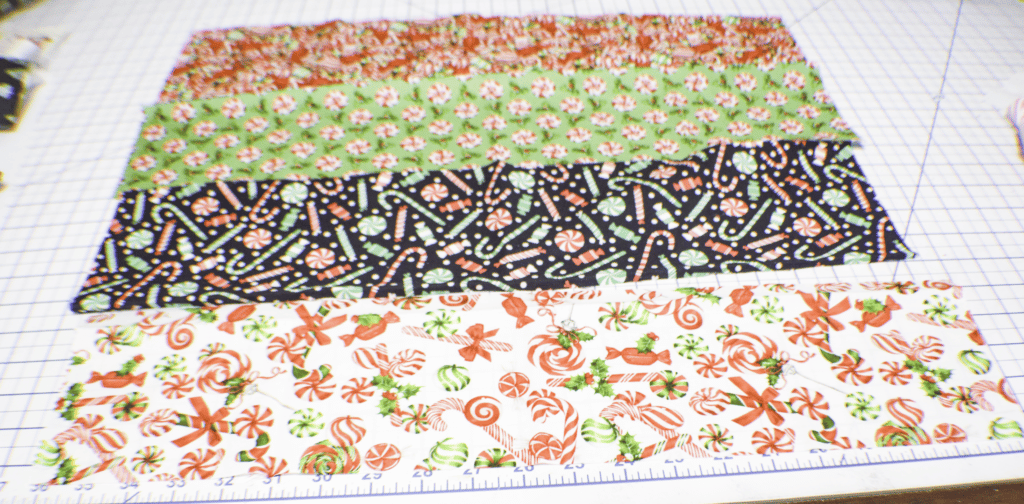
Using the pattern yardage sheet to cut your fabrics. You will need eight different fabrics cut to 5″ x 21″ strips x 2 pieces. One strip of a white on white background fabric for the appliqué that measures 10″ x 36 1/2″. Five 5 1/2″ x Width of Fabric (WOF) strips for inner border. Six 2 1/4″ strips for the binding and three yards for the backing.
Step 2: Stitch the Strips
Take your 16 strips and place them in four groups of four. Make sure that the order is mixed up in each group. Place the strips right sides together and stitch them along the long edges using a 1/4″ seam allowance. You will have four Rectangles of fabric.
Step 3: Cut the Strips
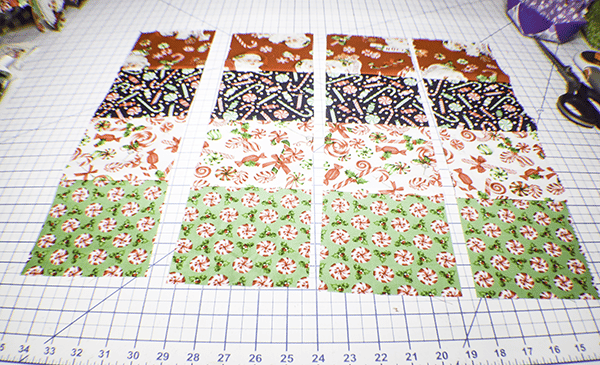
Using a rotary cutter and mat cut each group into four 5″ strips so that you have 16 5″ strips.
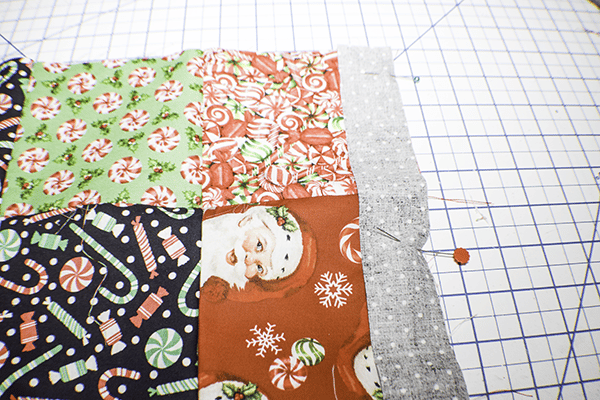
Step 4: Lay out the Strips
Arrange the strips so that the same patterns are not next to each other. Start with the first three rows and place two strips next to each other to create eight squares per row. Then place the white 10″ x 36 1/2″ Piece of Fabric next in line. Then the remainder of the squares in the same way as the first three.

Step 5: Stitch the Strips
With right sides together stitch the row one and two strips together at the short ends using a 1/4″ seam allowance. Stitch all of the rows with squares the same way so that you have eight rows of squares.
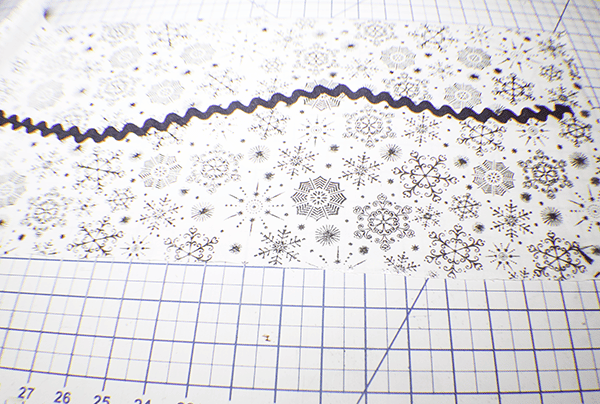
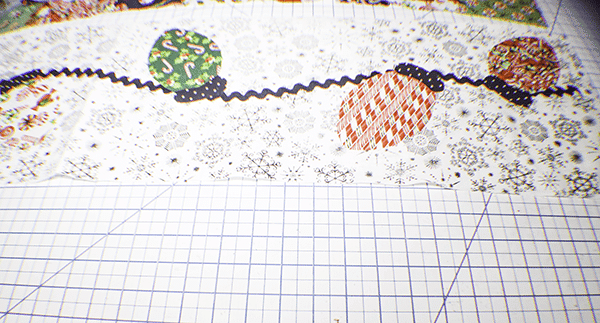
Step 6: Add the Appliqué
Before stitching the pieces together add the appliqué to the white fabric. To do this, Place the fusible web onto the Christmas light shape and trace the shape onto the paper side of the web. Do this five times. Notice that the light is actually two pieces. Cut around the pieces. Iron the fusible shapes onto any of the fabrics. Cut out the shapes.
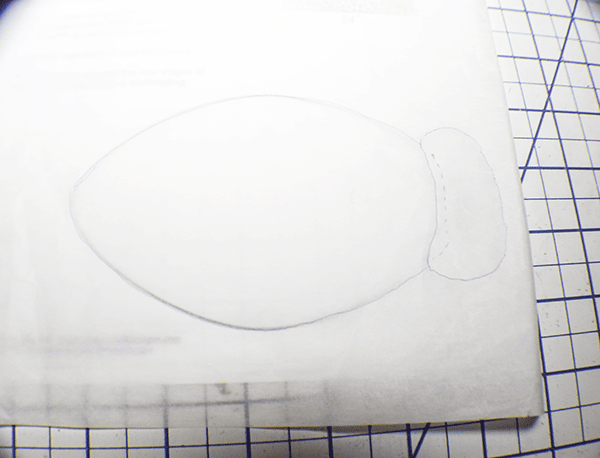
Before fusing the appliqué stitch on the ric rac. Place the ric rac across the white fabric so that it meanders a bit but is still in the middle. Use the pattern for reference. Stitch the ric rac in place. Remove the paper backing from the appliqué pieces and fuse them into place according to the pattern. Zig-zag around the raw edges of the appliqué pieces to secure.
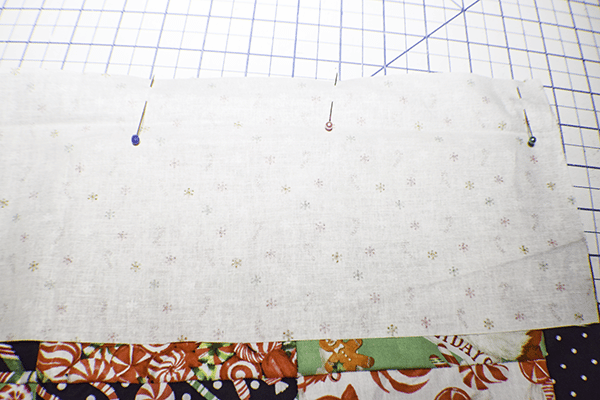
Step 7: Create the Inner Border
From your inner border fabric cut five 1 1/2″ x WOF pieces. Stitch three strips together at the short ends using a 1/4″ seam allowance. This long piece will be used for the vertical border pieces. The remaining two pieces will be used for the horizontal border pieces.
Step 8: Add the Inner Border
Measure your quilt lengthwise down the middle and cut two 1 1/2″ strips from the long piece you previously stitched of that length
Measure the width of your quilt through the middle and including the borders you just added. Cut two 1 1/2″ wide strips x the width of the quilt. Stitch to the top and bottom of the quilt using a 1/4″ seam allowance.
Place the strips on either side of the quilt and stitch using a 1/4″ seam allowance press the seam toward the border.
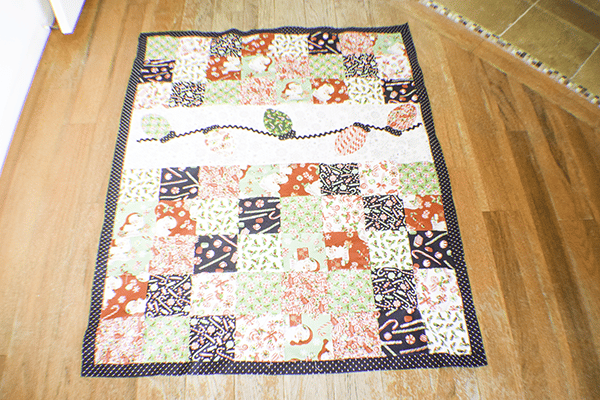
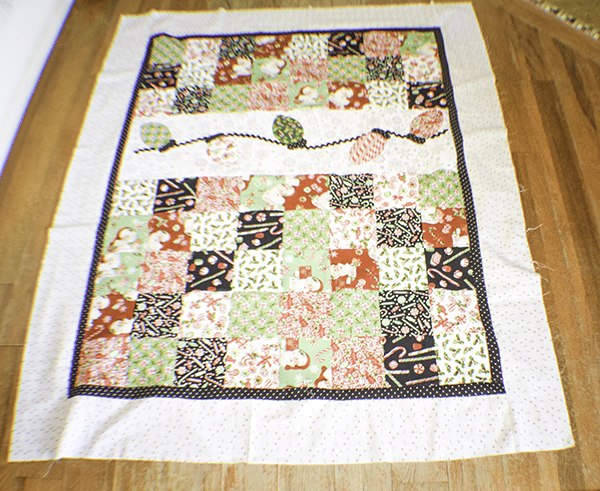
Step 9: Cut the Outer Border
From your outer border fabric cut five 5 1/2″ x WOF pieces. Stitch three strips together at the short ends using a 1/4″ seam allowance. This long piece will be used for the vertical border pieces. The remaining two pieces will be used for the horizontal border pieces.
Step 11: Add the Outer Border
Start by adding the horizontal pieces to the top and bottom of the quilt. Measure the width of your quilt through the middle. Cut two 5 1/2″ wide strips x the width of the quilt. Stitch to the top and bottom of the quilt using a 1/4″ seam allowance.
Repeat this process for the vertical pieces of outer border fabric just like you did for the inner border.
Step 10: Piece the Backing Fabric
If you are using standard quilting cotton like I am you will have to stitch two pieces of fabric together to piece the back. Cut your backing fabric into two 1 1/2 yd x WOF pieces. Place the 54″ side horizontally and the 40-42″ side vertically. Stitch the 54″ sides right sides together using a 1/2″ seam allowance.
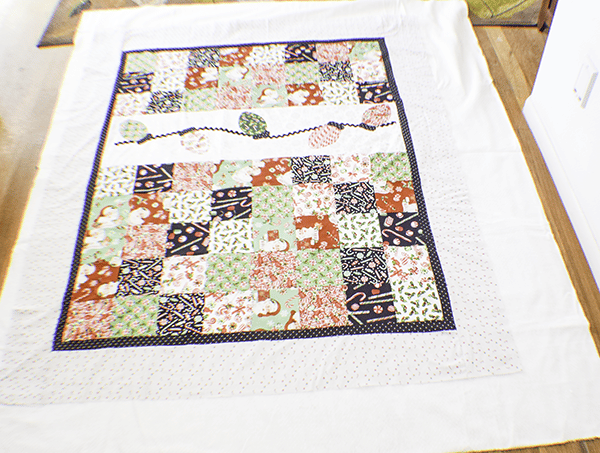
Step 11: Layer the Quilt
Place the backing fabric right down. Lay the batting on top of the backing fabric and place the quilt on top. You can use quilt adhesive to secure the layers or pins. Make sure that the layers are smooth.
Step 12: Quilt the Quilt
Quilt the quilt as desired. I used quilting rulers for my quilt to get a nice pattern. This is the first time I have tried these and they worked great. You can get them here. I am steadily building my quilting skills but I am still a beginner.
Step 13: Bind the Quilt
Bind the quilt. I use this video to help me with the binding.


Very cute quilt , but when you click the link for the pattern it says it’s unavailable.
I am so sorry. I have reached out to the designer to see if I can get a copy to share with you.
I too am looking for at least a materials list.. super cute quilt!
I still have not heard back. This is very disappointing.
The designer said that the pattern has been retired but I did manage to find it. Here is the link. https://sewverycrafty.com/wp-content/uploads/2024/10/Merry-Bright-Christmas-Lights.pdf