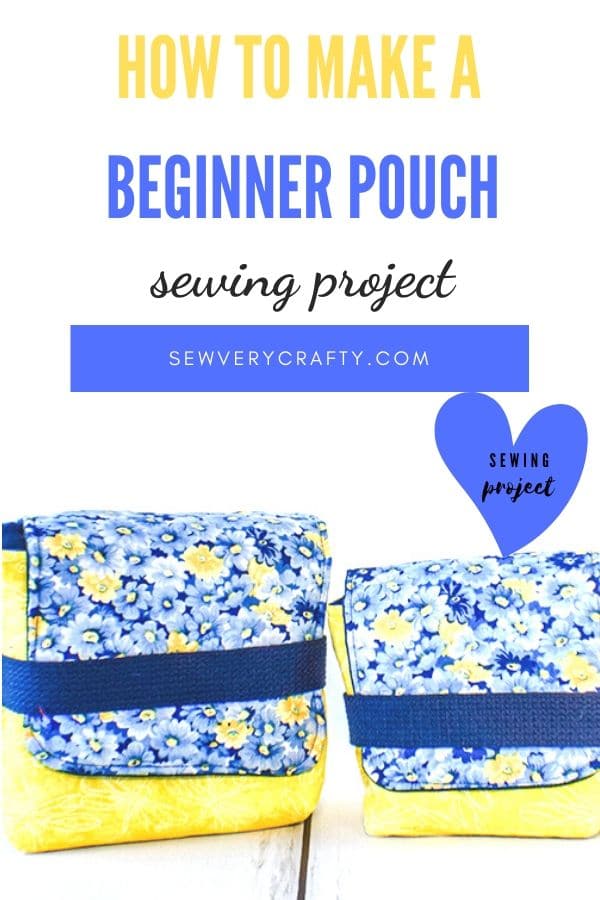
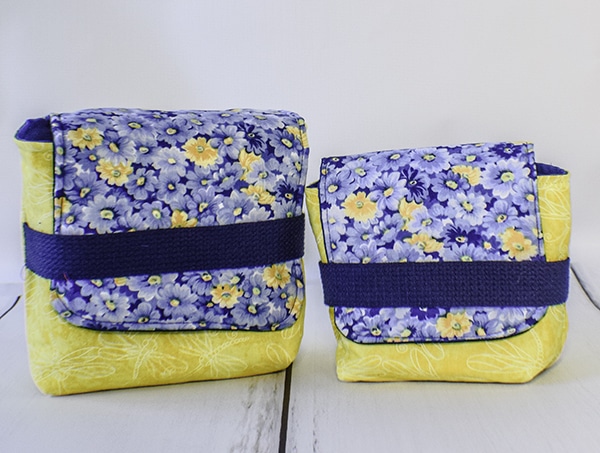
How to Make a Beginner Fold Over Pouch
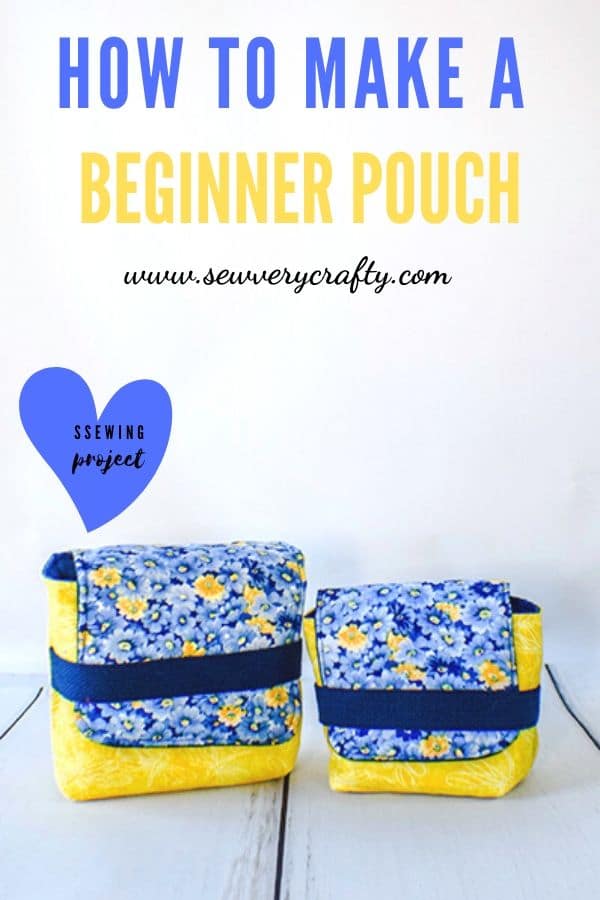
I am always on the lookout for beginner sewing projects to share with you. I came across this one at Sewing Times. Instead of the video that you have to start and stop, I have created this step by step pictorial tutorial. This tutorial will walk you through how to make a beginner fold over pouch. This is a simple sewing project that anyone with basic sewing skills can make in no time. It is fun and functional. I particularly like this pouch for travel. It is perfect for storing underwear and other small items. You can make it in any size you like using the same instructions. If you are a beginner sewist this is a great way to start making bags and developing your bag making skills.
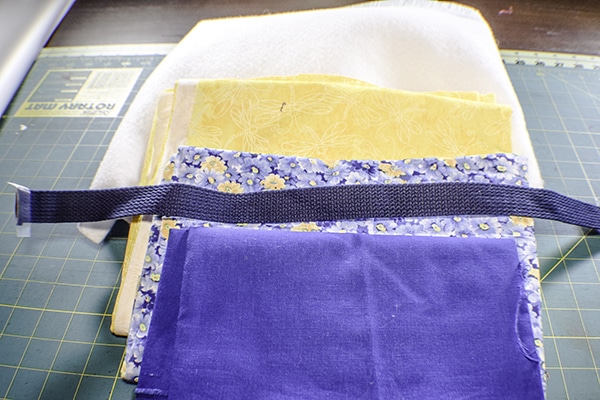
I chose some fun fabrics for my beginner fold over pouch that I purchased at JOANN Fabric & Craft Stores![]() . Two were remnants that I had on hand and the other I purchased online and picked up in store. I love this option. You could also find the perfect Fabric for your needs at Hobby Lobby or Fabric.com You will also need some high loft fusible fleece and some 3/4″ belting to complete this project. I actually used 1″ belting that I had on hand and it worked just fine. I purchased all of these at JOANN Fabric & Craft Stores
. Two were remnants that I had on hand and the other I purchased online and picked up in store. I love this option. You could also find the perfect Fabric for your needs at Hobby Lobby or Fabric.com You will also need some high loft fusible fleece and some 3/4″ belting to complete this project. I actually used 1″ belting that I had on hand and it worked just fine. I purchased all of these at JOANN Fabric & Craft Stores![]() online and picked up in store. This post contains affiliate links that if you click on them and make I purchase I will receive a small commission at no extra cost to you.
online and picked up in store. This post contains affiliate links that if you click on them and make I purchase I will receive a small commission at no extra cost to you.
What you will Need: How to Make a Beginner Fold Over Pouch
- 1/4 yd main outer fabric
- 1/8 yd Flap fabric
- 1/4 yd Lining fabric
- 16 3/4″ of 3/4″ – 1″ belting or strapping
- 1/4 yd Fusible fleece that is similar to Pellon TP971F
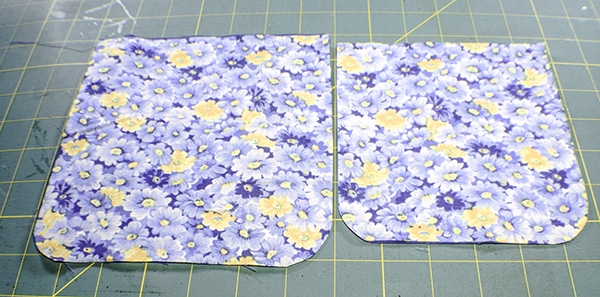
Step 1: Cut your Fabrics
Cut a 9″ x 15″ piece of main outer fabric and lining fabric for the large pouch and 7 3/4″ x 12 5/8″ for the small pouch. Cut 6 3/4″ x 7 1/8″ rectangle from your lining and flap fabric for the larger pouch and 5 3/4″ x 6 1/4″ for the small pouch to create the flap. The belting should measure 9″ and 7 3/4″ respectively. For the fleece, cut 8 1/4″ x 14 1/8″ for the large pouch and 6 7/8 x 11 7/8″ for the smaller pouch. Then cut 6″ x 6 1/4″ and 5 x 5 5/8″ for the small and large flaps.

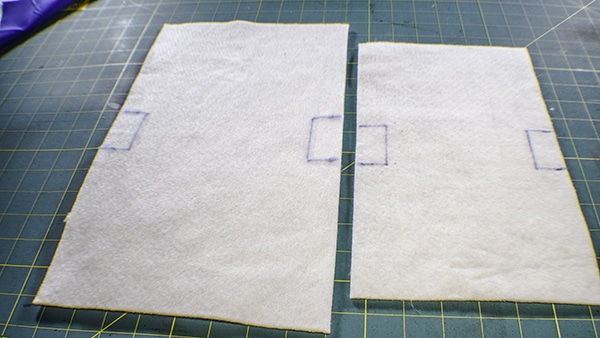
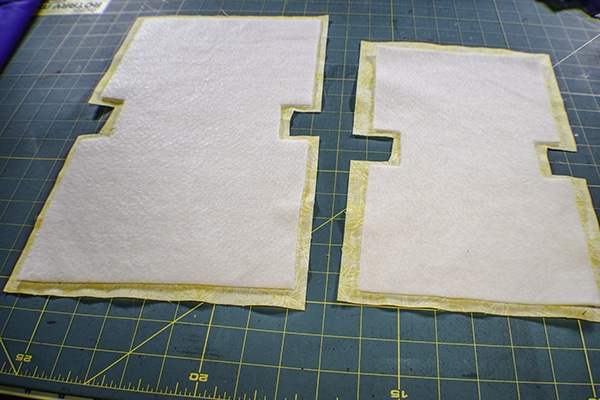
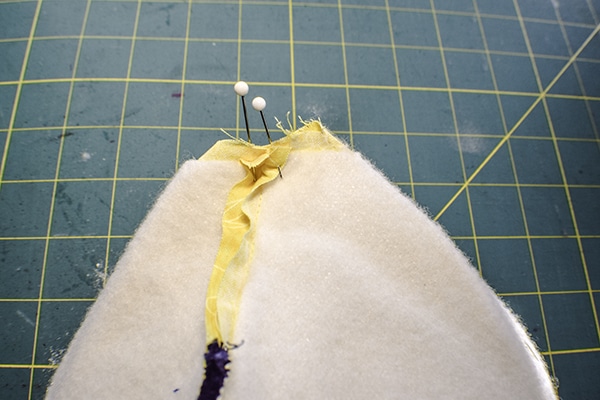
Step 2: Cut your Fleece
For the larger pouch measure down 6″ from each end on the long side and mark. There should be 2 3/8″ between the marks. Measure up 1 1/8″ from each mark and mark again. Join these two marks. You should have a box on the edge of the long side as shown. Repeat for the other side. For the smaller pouch. Measure down 5″ from each end so that there is 2″ between marks and draw up 1″ to create your box in the same way as you did for the large box. Cut out the boxes you just drew.
Step 3: Fuse the Fleece
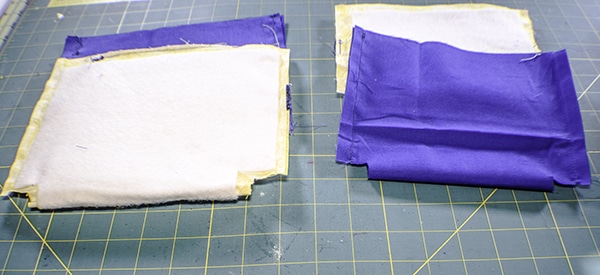
Fuse the fleece to the main outer fabric following the manufacturers instructions. Center the fleece so that the seam allowance is left free of fleece before you fuse. Cut out the box from the outer fabric and the lining fabric by lining up the fused pieces with the lining pieces and cutting 3/8″ away from the fleece.
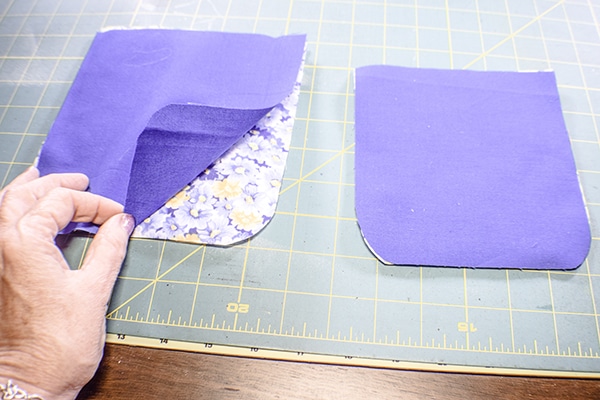
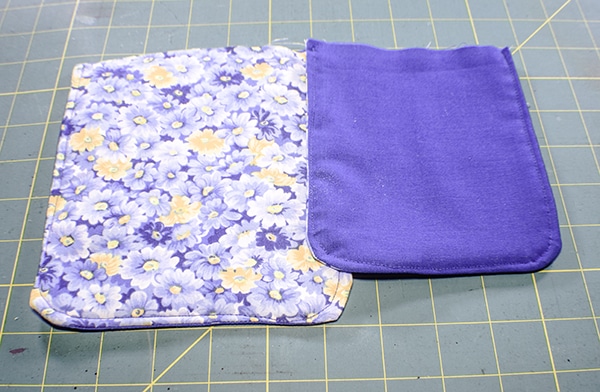
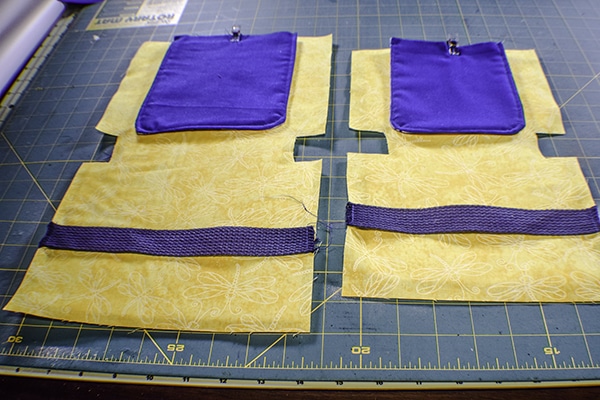
Step 4: create the flap
Round the corners of the flap fleece by folding the fleece in half lengthwise and cutting a small curve along the corners. Fuse the fleece to the outer flap fabric following the manufacturers instructions. Place the outer flap piece and the lining flap piece right sides together. Stitch from the top around the edge of the curve using a 3/8″ seam allowance. You should be stitching along the edge of the fleece without stitching the fleece. Leave the top open. Round the fabric curves keeping the 3/8″ seam allowance and clip the curves. Turn right sides out and press. Top stitch around the sides and bottom.
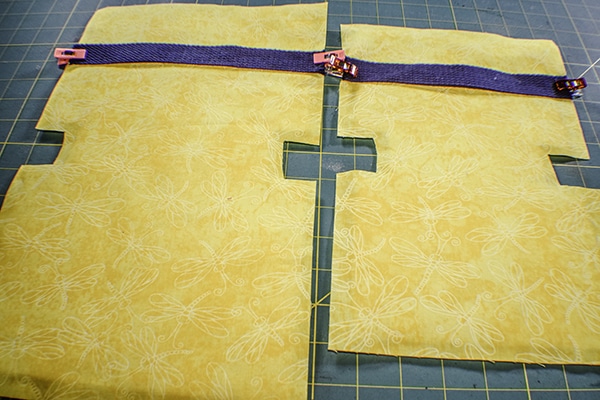
Step 5: Add the strapping
Add the strapping the outer fabric. On the large bag measure down 2 1/2″ from the top and place the belting and clip. On the smaller pouch measure down 2 1/4″ and clip the belting. Stitch along the sides of the belting to secure using a 1/4″ seam allowance.
Step 6: Add the flap
Find the center of the flap and mark. Then find the center of the opposite end of the pouch from the strap and mark. Clip the flap to the outer fabric right sides together. Stitch along the flap to secure using a 1/4″ seam allowance.
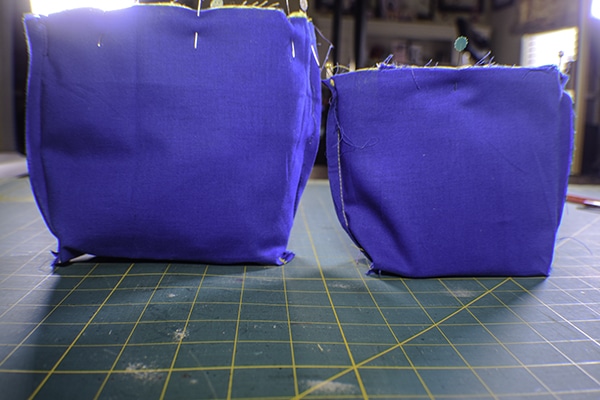
Step 7: create the pouch
Fold the outer fabric so that it is right sides together and pin the bottom corners. Repeat for the lining. Stitch along the sides of the lining and the outer pouch using a 3/8″ seam allowance. Remember to leave an opening on one side of the lining for turning. Box the corners. You will notice that there are holes in the corners. To Box them simply match the side seam you just stitched with the bottom so that it forms a line as shown. Stitch across the line using a 3/8″ seam allowance. Repeat for the other side and the lining. Trim off any excess fabric to reduce bulk. Turn the outer bag right sides out making sire that the belting is on the right side of the bag.
Step 8: Add the Lining
Place the outer bag into the lining bag so that they are right sides together and the flap is inside the bag. Pin the two bags together at the top. Stitch all the way around the top using a 3/8″ seam allowance. Turn the bag right sides out through the opening you left in the lining. Stitch the opening closed using ladder stitch. If you are unfamiliar with ladder stitch check out this video.

Step 9: Finish the pouch
Stuff the lining into the outer bag and press. Topstitch all the way around the top for a finished look. You have completed your beginner fold over pouch.
If you would like to view the video of this project head over to YouTube.

I hope you enjoyed this project. If you would like more Sewing and Crafting projects sign up for our newsletter and receive your free eBook of 15 handbag patterns and tutorials.
If you would like videos of some of Sew Very Crafty's most popular projects subscribe to our free YouTube Channel here.