DIY Three Ring Binder Pencil Case
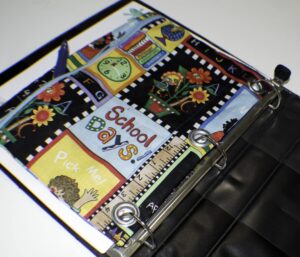
School is about to start so I thought I would create a tutorial on how to make a simple diy three ring binder pencil case that any child or teen can use for the upcoming school year without fear that it will come apart at the seams. The best part about this project is choosing the fabric. There are so many to choose from but you know me, I usually have a remnant on hand that will do the trick and this project was no different. I had a school themed child's fabric remnant that was just perfect.
If you don't have a remnant stash like me head over to JOANN Fabric & Craft Stores, Fabric.com or onlinefabricstore.net to get exactly what you need for this fun project. This post contains affiliate links that if you click on them and make a purchase I may receive a small commission at no extra cost to you.
What you will Need: DIY Three Ring Binder Pencil Case
- 1/2 yd outer fabric
- 1/2 yd lining fabric
- 12″ zipper
- 3 large grommets
- Standard sewing supplies
Step 1: Cut Your Fabrics
Measure your fabrics as follows:
- 6″ x 10 3/4″ main fabric and lining fabric
- 1 1/2″ x 10 3/4″ Main fabric and lining fabric
- 7 1/2″ x 10 3/4″ Main fabric and lining fabric
Step 2: Add First Half of the Zipper
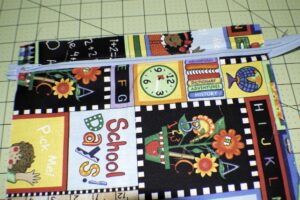
Take the 6″ x 10 3/4″ main and lining fabric and add the zipper to them. To do this, lay the right side of the main fabric up facing you. Then lay the zipper right side down on top of the outer fabric and lining right side down on top pf the zipper so that you have a zipper sandwich. Using a zipper foot, stitch the three layers together. Open the layers to expose the zipper and press. Then top stitch the zipper to prevent the zipper from catching and for a more professional look.

Step 3: Add the Second Half of the Zipper
Repeat the same process with the other side of the zipper and the smaller 1 1/2″ x 10 3/4″ pieces.
Step 4: Add the Remaining Outer Fabric Piece
Open the zipper half way. With right sides together, stitch the 7 1/2″ x 10 3/4″ piece of outer fabric to the zipper side you previously stitched making sure not to catch the lining. Remove some of the lining stitches around the zipper area if you need to. Sew all the way around so that you have created a zippered pouch. Clip the corners.
Step 5: Add the Remaining Lining Fabric Piece
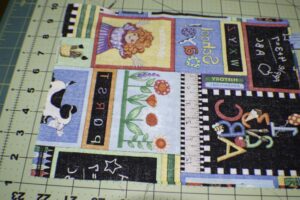
Repeat the process for the lining side of the pouch but leave an opening at the bottom for turning. Make sure that all of your seams are fully stitched as pens and pencils will be jabbing at them. Clip the corners.
Step 6: Turn the Pouch
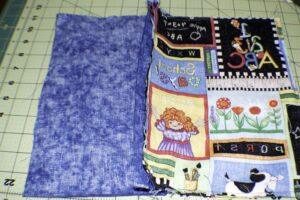
Turn the pouch using the opening you left in the lining and the open zipper. Push out all of the corners and sew the opening closed using ladder stitch or on the machine.
Step 7: Measure for the Grommet Casing
Measure up 1 1/2″ from the bottom of the pouch and sew a line straight across. The grommets will be installed just below this line.
Step 8: Measure for the Grommets
Now it is time to measure for the grommets. Each grommet will be centered 1″ down from the line you just stitched. Next, measure 1″ from the end and center the first grommet. The next grommet should be centered 4 1/4″ from the first and the last grommet should be centered 4 1/4″ from the second and 1″ from the other end. If you are not sure about the measurements simply use a piece of binder paper to line up your holes.
Step 9: Add the Grommets
Insert your grommets using the manufacturers directions. If you have never set grommets before I found this terrific video on Youtube to help you with the process.
Step 10: Finished DIY Binder Pencil Case
Add your pens and pencils to your case and add the case to your binder and you are ready to go.




Love the three ring binder pencil case. This will be perfect for my son!
Thank you. It is a super easy project and perfect for the upcoming school year.