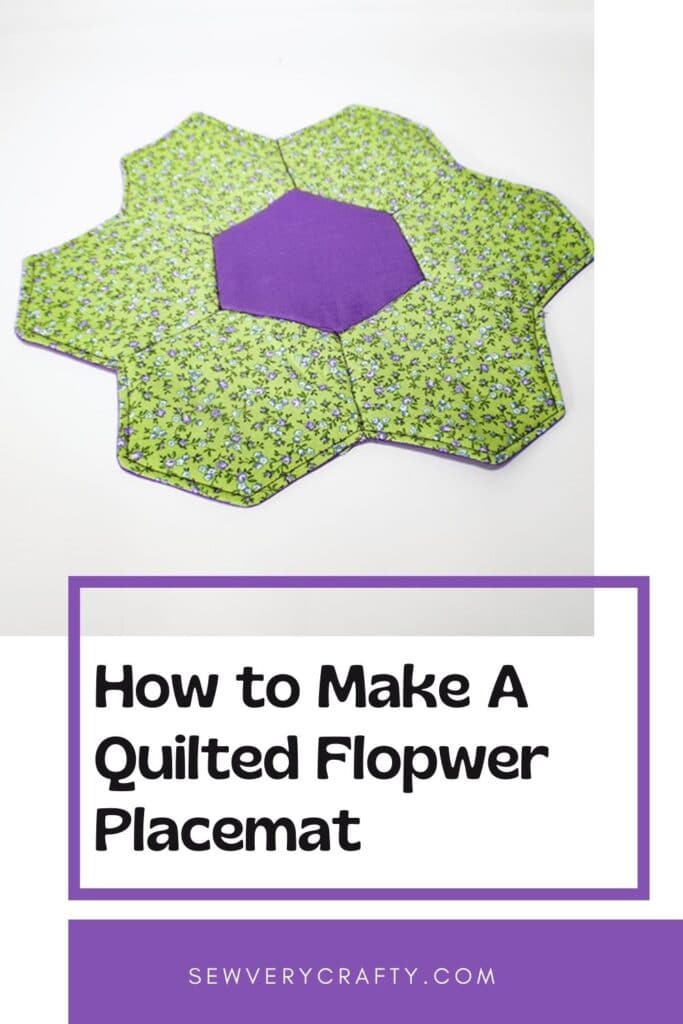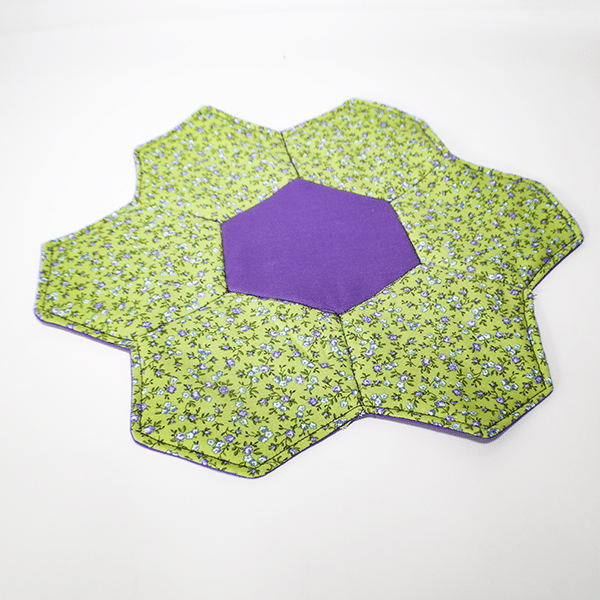
It won't be too long that spring will be upon us. I thought to make these fun quilted flower placemats to get out of the doldrums of winter. This is a fun little quilting project for the beginner sewist and quilter. All you need is the pattern, some fabric and some batting to create these cute flower placemats. These placemats do not require binding which make them even easier to make. If you would like another simple placemat project check out my simple quilted placemat project.
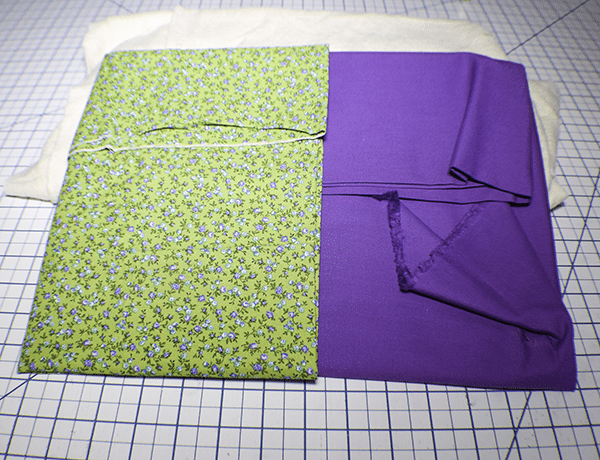
I used some floral fabrics from my stash that I purchased from JOANN Fabric & Craft Stores![]() but you could head to
but you could head to
What you will Need: How to make a Quilted Flower Placemat
- Pattern you can get by clicking on this link
- 1/2 yd outer fabric and backing fabric
- 1/2 yd quilt batting
- Standard sewing supplies
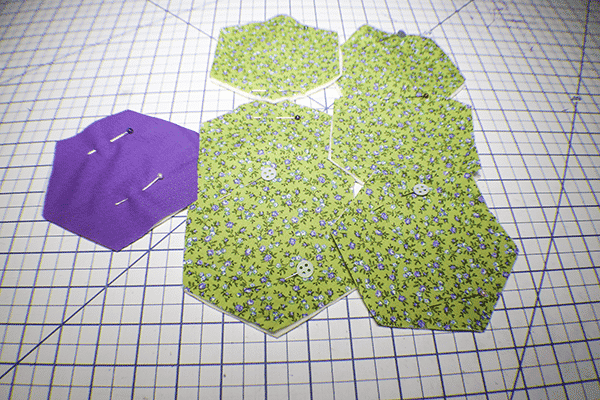
Step 1: Cut your fabrics
Using the pattern piece cut out 6 outer pieces and one backing piece. In addition, cut 7 batting pieces. Cut a backing piece that measures 20″ x 20″

Step 2: Stitch Fabric to Batting
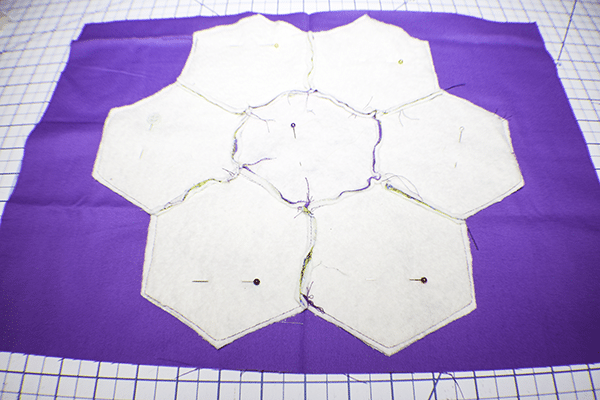
Stitch the outer and backing hexagon pieces to its corresponding batting piece using a 1/4″ seam allowance.
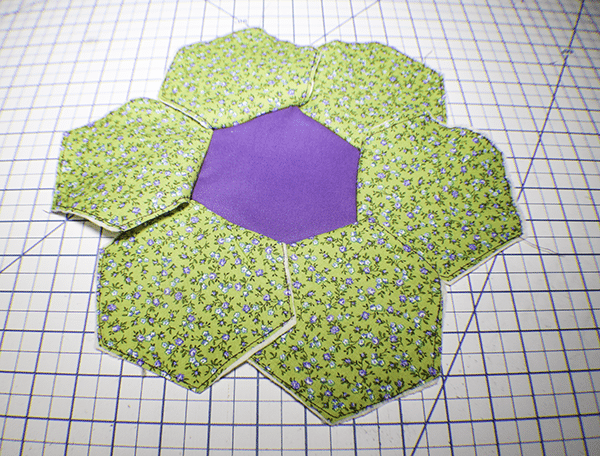
Step 3: Stitch Outer Hexagons to Center
Stitch each outer hexagon to the center hexagon right sides together using a 1/4″ seam allowance. Start and stop on the dots on there pattern piece.
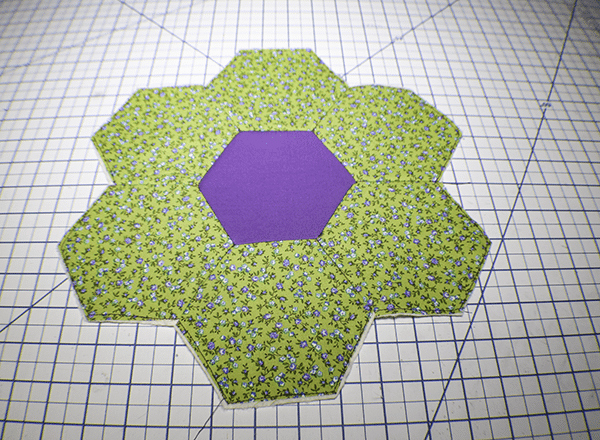
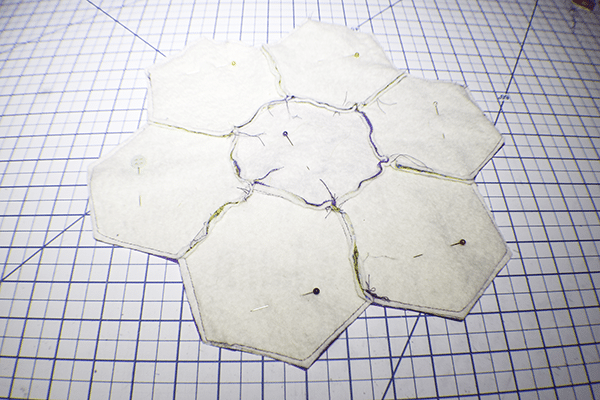
Step 4: Stitch Stitch Hexagons to Each Other
Now that you have stitched the hexagons to the center stitch them to each other right sides together along the sides using 1/4″ seam allowance.
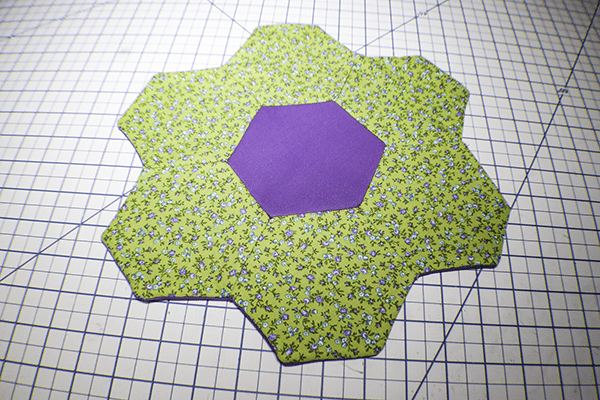
Step 5: Add the Top to the Backing to the Placemat
Place the Flower top to the backing right sides together and pin. Trim off the excess. Stitch all the way around the flower using a 1/4″ seam allowance but leave one side open for turning.
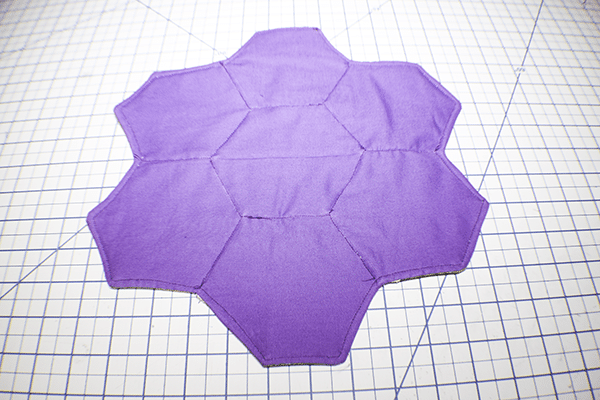
Step 6: Turn Right sides Out and Quilt
Turn the placemat right sides out, fold in the opening and topstitch all the way around the edge. Stitch in the ditch of all seams. This will be the only quilting you will do ion this project. You have now finished your quilted flower placemat.


I hope you enjoyed this placemat project. If you would like more sewing and crafting projects subscribe to our newsletter and receive access to our free Printables library
If you would. like video tutorials of some of Sew very Crafty's most popular posts subscribe to our free YouTube channel here.