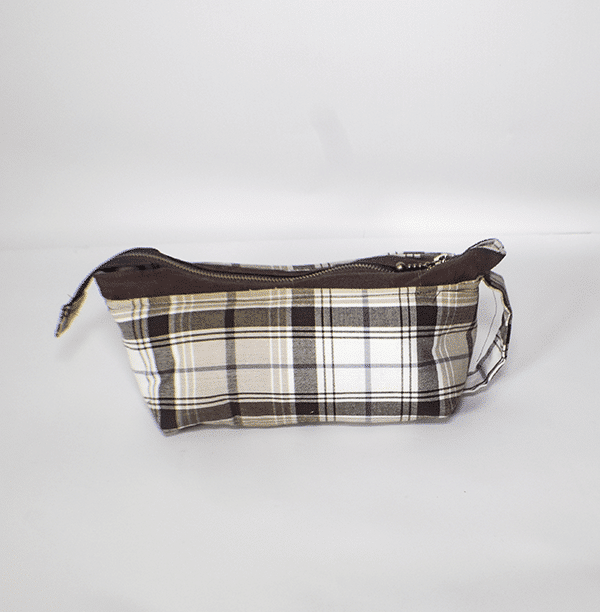
This small toiletry bag is great for home or travel and can fit all of your toiletry needs. This is a simple sewing project that is both fun and functional. A strong beginner or intermediate sewist can put together this toiletry bag. I thought to make this for my husband so I chose some more masculine looking fabrics. That is the beauty of sewing your own, you can make it look however you like. If you would like some other zipper pouches check out my double zipper box pouch which makes a great toiletry bag as well.
I used fabrics from my stash that purchased from JOANN Fabric & Craft Stores![]() but you could head to
but you could head to
What you will Need: How to Make a Toiletry Bag
- 1.2 yd outer fabric and lining fabric
- 1/4 yd accent fabric
- 1/4″ fusible fleece like Pellon 987F
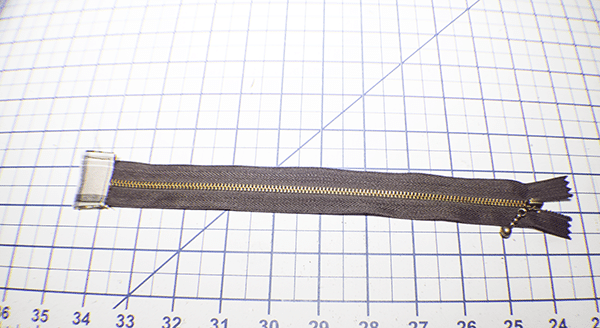
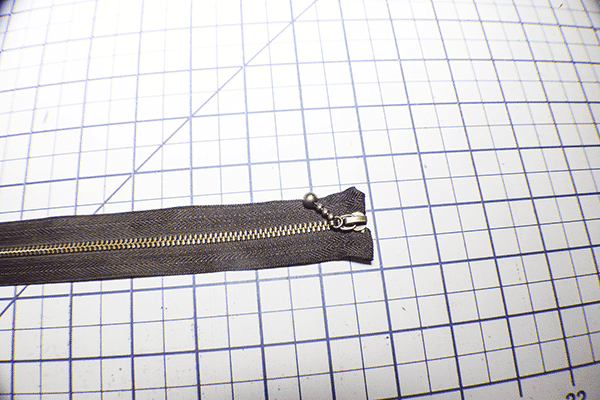
- 10″ zipper
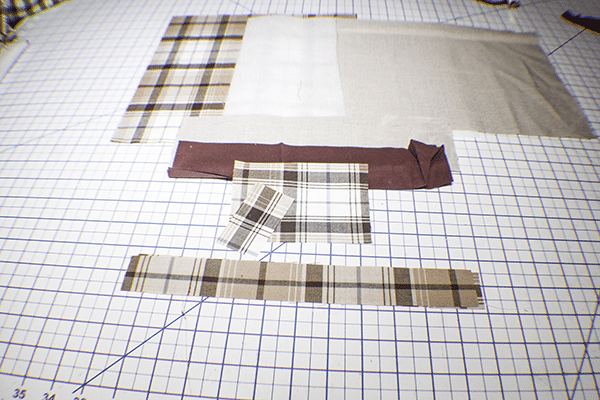
Step 1: Cut your Fabrics
Outer Fabrics
- 11 1/2″ x 10 7/8″
- 11 1/2″ x 1 3/8″ — 2 pieces
- 1 5/8″ x 2 3/4″ — Zipper Tab
- 3 1/2″ x 5″ — Handle
Lining Fabric
- 11 1/2″ x 9 5/8″
- 11 1/2″ x 2 3/8″ — 2
Accent Fabric
- 11 1/2″ x 2 3/8″ — 2
Fusible Fleece
- 10 3/4″ x 10 1/8″
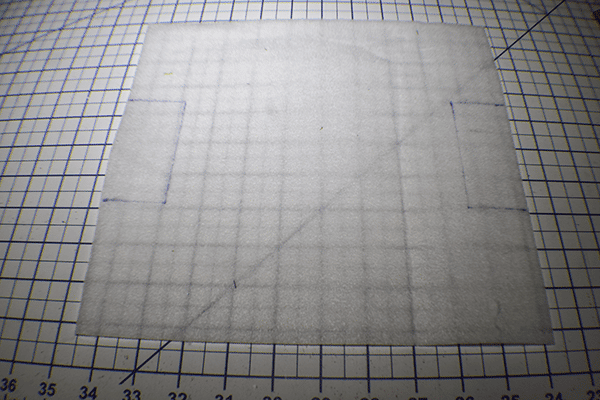
Step 2: Cut the Fleece
Starting at the top of the short side measure down 3 3/8″ and make a mark. Measure down another 3 3/8″ and make a mark.From the marks measure in 1 9/16″ or 4.25cm and draw a line. You should have two lines. Join the two lines creating a box. Repeat for the other short side. Cut out the boxes.
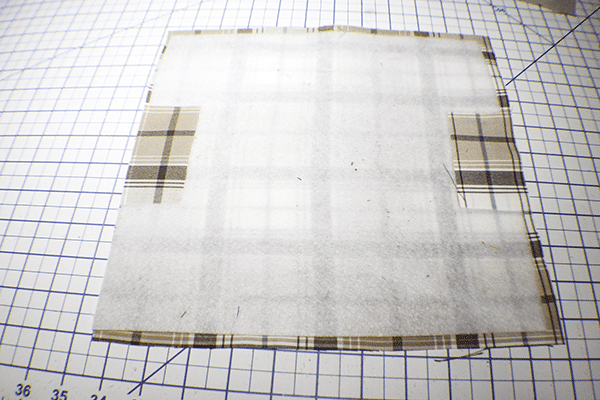
Step 3: Fuse the Fleece
Fuse the fleece to the wrong side of the outer piece following the manufacturers instructions.
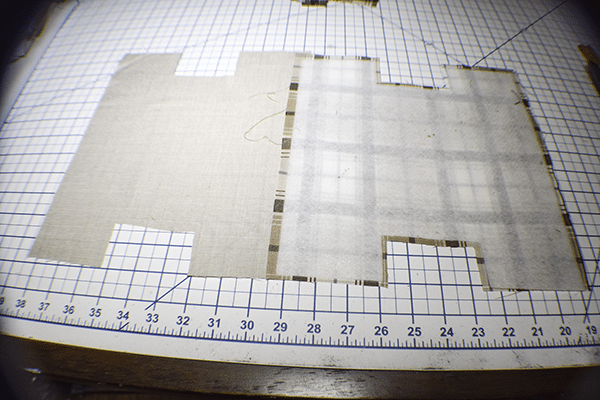
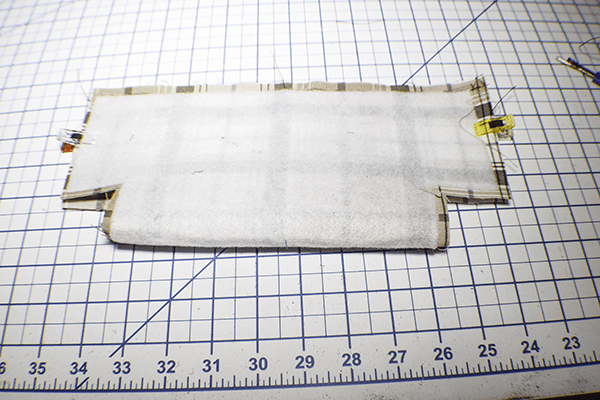
Step 4: Cut out the Boxes from the Lining and Outer Fabrics
Find the centers of the short sides of the outer and lining fabrics and mark. Place the lining fabric right sides together with the outer fabric matching the marks and pin or clip. You will notice that the lining is smaller than the outer fabric. This is correct. Cut out the boxes from the lining fabrics leaving a 3/8″ seam allowance.
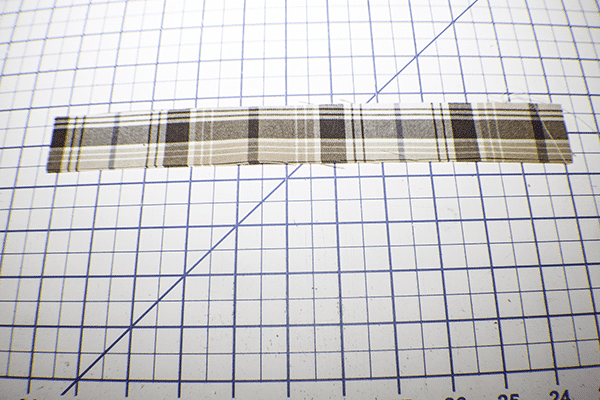
Step 5: Create the Strap
Take the strap piece and fold the long sides to the center and press. Fold in half again to enclose the raw edges and press. Stitch up both sides.
Step 6: Add the Strap
Place the strap in the center of one of the outer fabric boxes right asides together and stitch to secure.

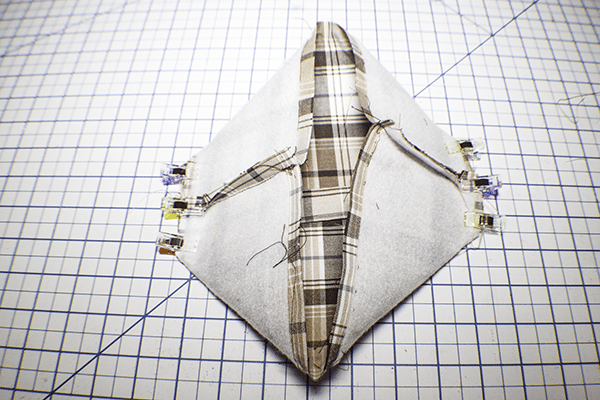
Step 7: Stitch the Outer Bag
Fold the bag in half and stitch the sides using a 3/8″ seam allowance. Box the corners by collapsing the sides against the bottoms creating a straight line. Stitch across the straight line using a 3/8″ seam allowance. Do this for both sides. Turn right sides out. Fold the unsewn strap piece to the top of the bag and stitch to secure.
Step 8: Stitch the Outer Band
Take the two 11 1/2″ x 1 3/8″ pieces and place them right sides together. Stitch both ends together using a 3/8″ seam allowance.

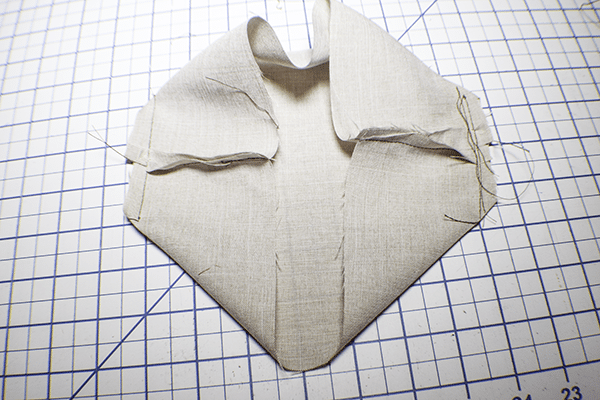
Step 9: Create the Lining
Create the lining the same way you created the outer bag but without the handle.
Step 10: Add the Zipper Tab
Fold the zipper tab so that the long edges meet in the center and press. Stitch one short end to the end of the zipper right sides together. Fold the tab over and the raw edge under so that it meets the stitched edge on the other side. Clip. Stitch a box all the way around to secure.
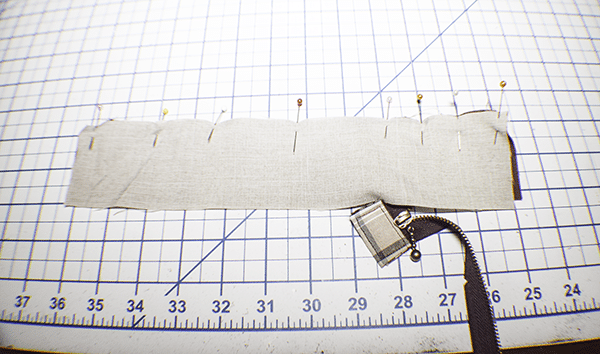
Step 11: Mark for the Zipper
Fold under the top zipper ears and hand stitch them to the wrong side of the zipper. Measure from the top of the zipper to 7 1/8″ and make a mark on both sides. Take the accent fabric and measure 2″ from the end and make a mark. Measure down an additional 7 1/8″ and make a second mark. Do this for the other accent [piece and the corresponding lining pieces.
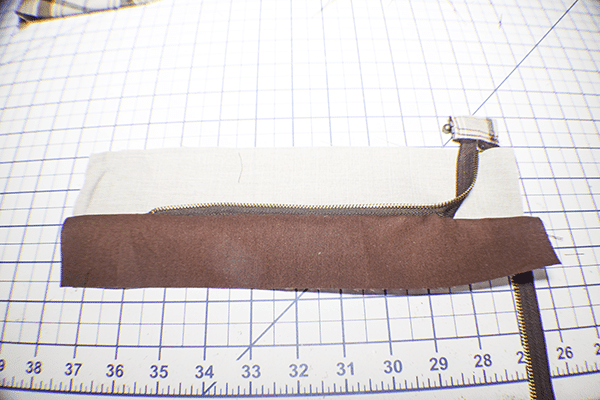
Step 12: Add the Zipper
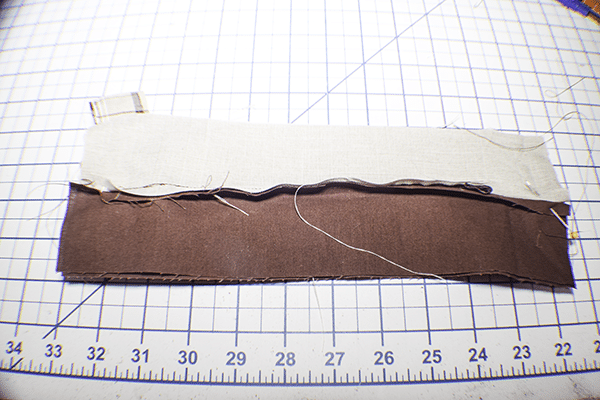
Place the accent piece right sides up on your work station. Place the zipper right sides down on the accent piece between the 2″ and 7 1/8″ mark. Pin just between the marks. Unzip the zipper and fold the end out of the way. Place the lining piece on top of the zipper matching the marks. Stitch all the across the lining and outer pieces through the zipper. Repeat for the remaining accent and lining pieces.
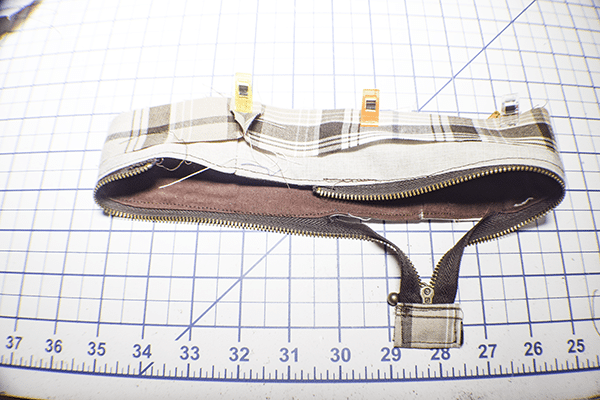
Step 13: Stitch the Zipper Placket
Open the zipper placket so that the lining pieces are right sides together and the outer pieces are right sides together. stitch them together along the short sides using a 3/8″ seam allowance. Place the Accent fabric over the lining fabric with the zipper exposed. Top stitch along the top and bottom of the zipper placket.
Step 14: Add the Outer Band
Place the outer band right sides together with the bottom of the accent side of the zipper placket. Stitch all the way around.
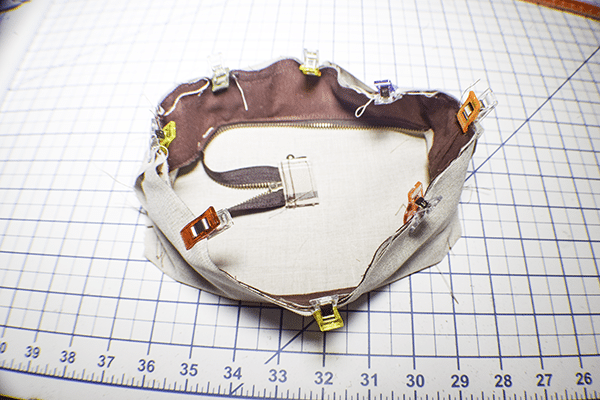
Step 15: Add the Zipper Placket to the Lining
Place the zipper placket inside the lining right sides together with raw edges matching. Stitch around the bag leaving an opening on one side for turning. Turn up the outer band.
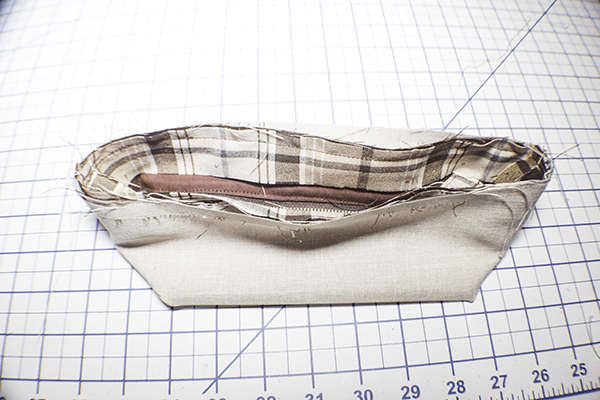
Step 16: Add the Outer Bag to the Lining
Place the outer bag into the lining bag so that they are right sides together. Match the raw edges and stitch all the way around.
Step 17: Turn Right Sides Out
Turn the bag right sides out through the opening you left in the lining. Fold up the accent fabric and pin. Turn under the outer band. Turn the bag wrong sides out. Stitch all the way around the center seam of the bag closing the opening as you go. Turn right sides out, fill and close. You have now finished your small toiletry bag.
I hope you enjoyed this small toiletry bag. if you would like more sewing and crafting projects subscribe to our newsletter and receive your free eBook of 15 handbag patterns and tutorials taken from the blog.
If you would like video tutorials of some of sew very Crafty's most popular posts subscribe to our free YouTube channel here.