
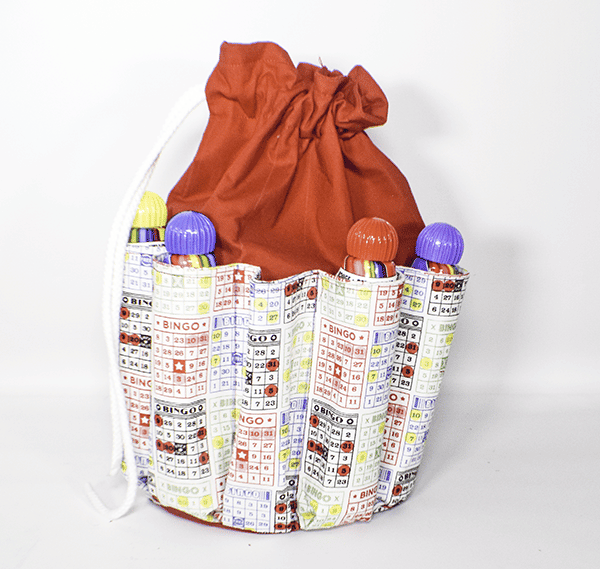
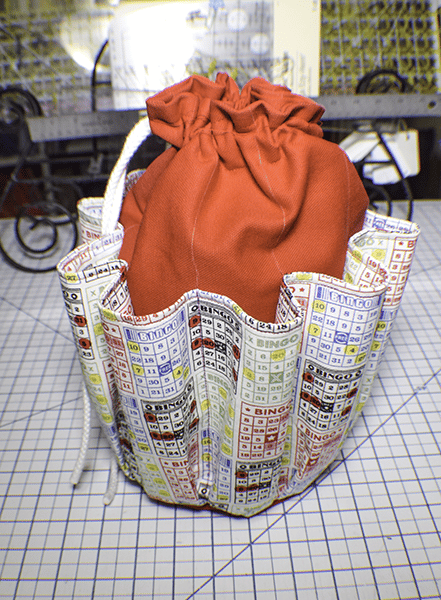
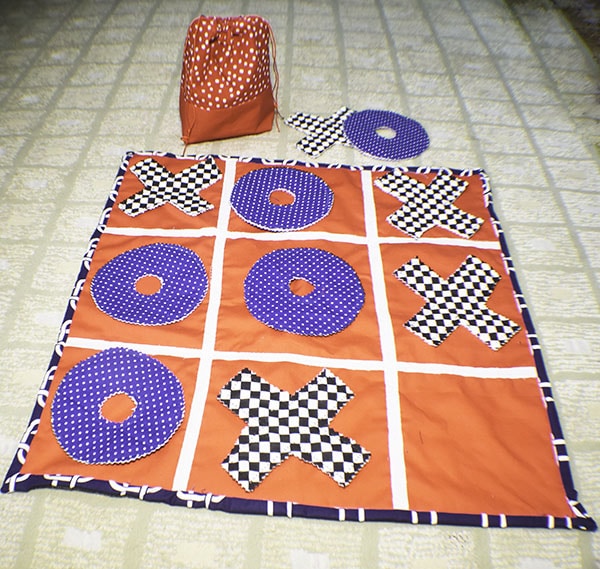
I have a viewer on the YouTube channel who requested that I make a bingo bag. I wasn't quite sure what that was so I did some research. This seemed like a good pattern for a bingo bag to carry all of the bingo daubers and other bingo related items you may need. I hope she likes it. It is a simple pattern that is basically a drawstring bag with some pouches so anyone should be able to put this bag together. If you would like other handbag tutorials check out my handbag page.
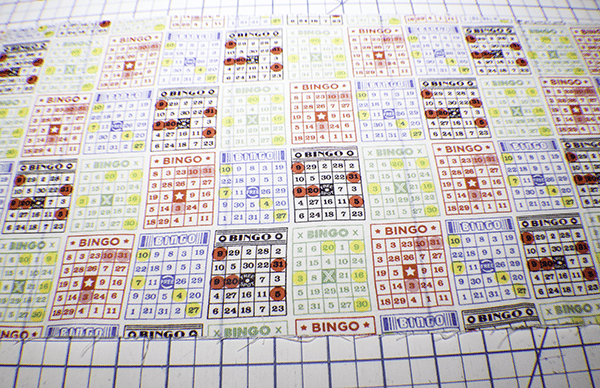
I chose a cute bingo card pattern for my dauber holders and a red cotton canvas for my bag, both of which I ordered online from JOANN Fabric & Craft Stores![]() and picked up in store. Of course you could head to
and picked up in store. Of course you could head to
If you would like a video tutorial of this project head over to YouTube and check out my video. While you are there subscribe to my free YouTube channel.

What you will Need: How to Make a Bingo Bag
- 1/2 yd cotton canvas for main bag
- 1/2 yd accent fabric
- 1/4 yd Pellon 808
- Cording for drawstring
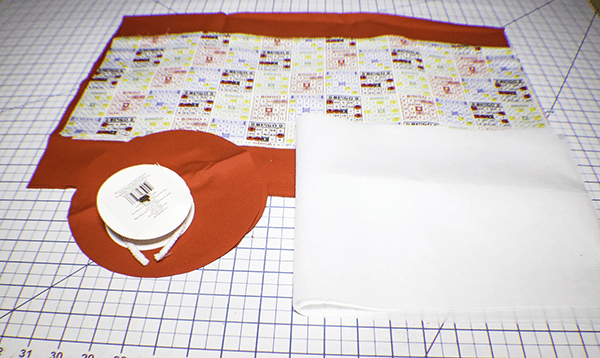
Step 1: Cut Your Fabrics
From the canvas cut two pieces that measure 14″ h x 21″ w. Cut two canvas pieces that are a 7″ diameter circle for the bottom. From the accent fabric cut two pieces that measure 7 1/2″ h x 41″ w. Cut one piece of Pellon 808 to measure 7 1/2″ h x 41″.
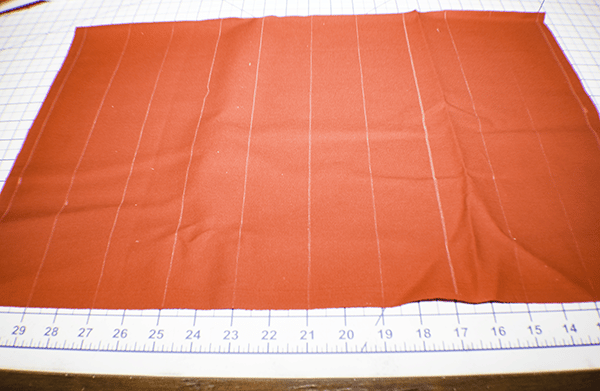
Step 2: Mark Your Canvas Fabric
Mark the canvas rectangle so that there is a 1/2″ seam allowance on each side. Then mark a line every 2″. Measure up 7 1/2″ from the bottom and draw a line. You should have 10 rectangles that will be the inner slots for the daubers for your games of bingo.
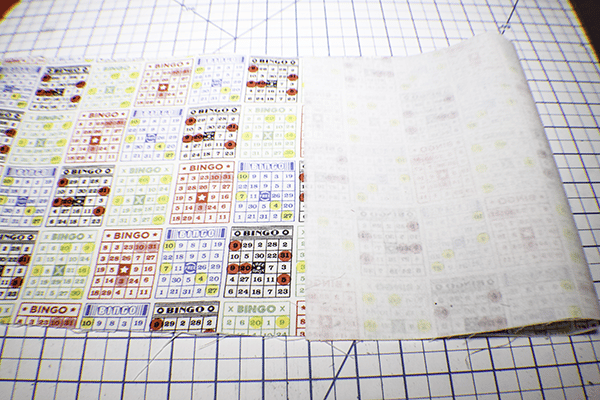
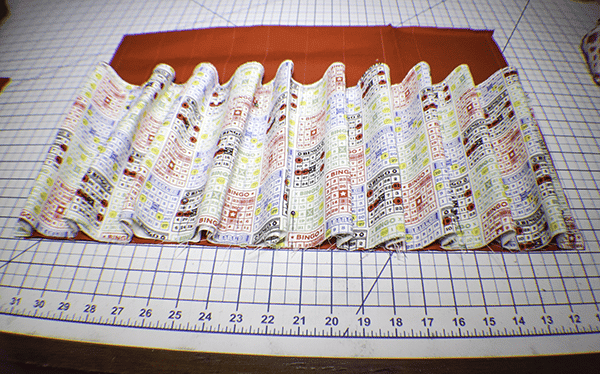
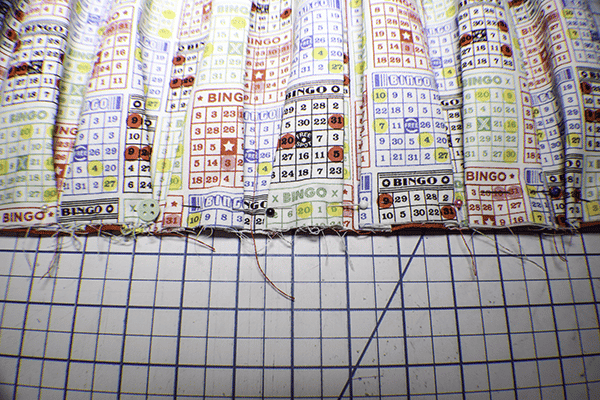
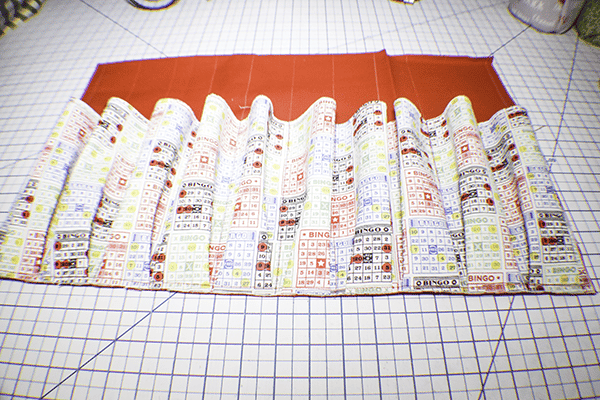
Step 3: Create your Accent Fabric
Fuse the interfacing to the wrong side of one of the accent pieces. Place the two pieces of accent fabric right sides together and stitch along there top using a 1/4″ seam allowance. Turn right sides out and press. Topstitch along the seam line.
Step 4: Mark Your Accent Fabric
Mark a 1/2″ seam allowance on each short end. From there, mark 4″ lines until you reach the end.
Step 5: Add the Accent Fabric to the Canvas
Line up the seam allowances and pin. Match up the lines you drew on the accent fabric with the lines on the canvas and pin. Stitch down each line. Pleat the excess accent fabric and pin on the bottom. Stitch on the bottom using a 1/2″ seam allowance.
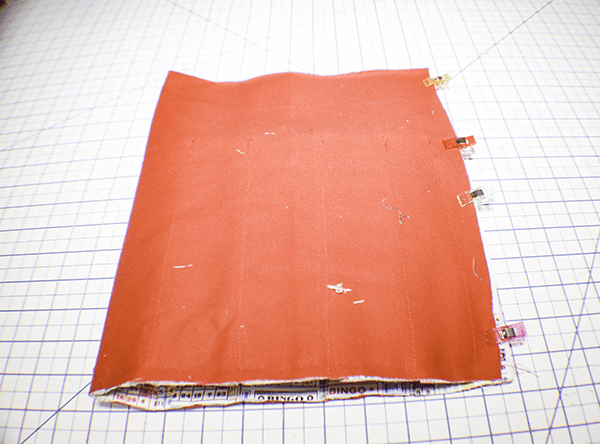
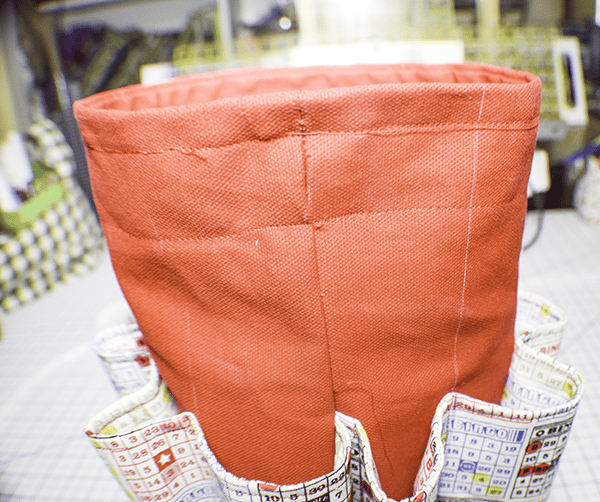
Step 6: Stitch the Bingo Bag Together
Place the piece right sides together. Stitch down 1″ then leave a 1″ opening. Stitch the remainder of the bag using a 1/2″ seam allowance. Make sure the dauber holder fabric is out of the way.
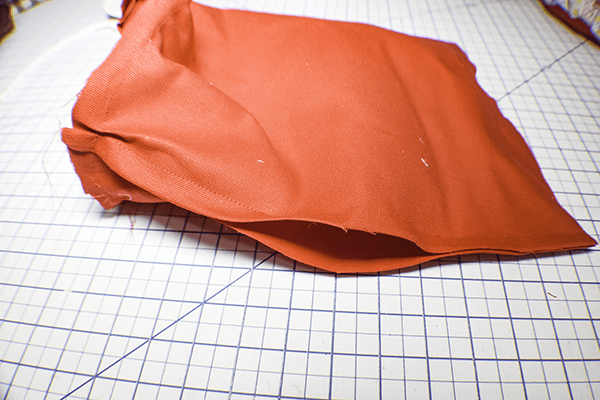
Step 7: Add the Bingo Bag Bottom
Take the 7″ circle and place it right sides together with the outer bag you just created. Pin. Stitch the bottom to the bag using a 1/2″ seam allowance.

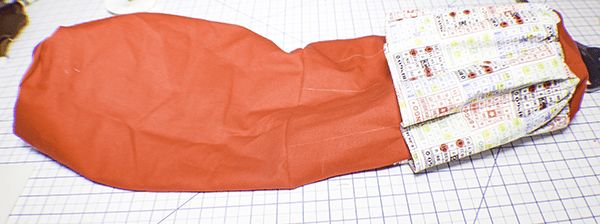
Step 8: Create the Lining
Create the lining by taking a canvas piece and and stitching the short ends right sides together using a 1/2″ seam allowance but leaving an opening for turning. Add the bottom circle in the same way you did for the main bingo bag.
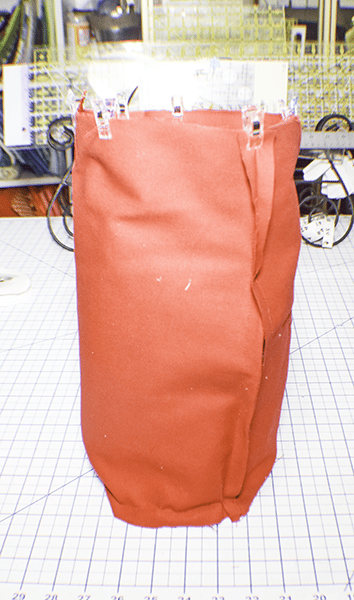
Step 9: Add the Lining to the Outer Bag
Place the outer bag with the dauber holders inside the lining bag so that they are right sides together. Stitch all the way around the top using a 1/4″ seam allowance. Turn the bingo bag right side out. Stitch the opening closed. Push the lining into the outer bag and topstitch around the top using a 1/8″ seam allowance.
Step 10: Create the Casing
Using an erasable pen draw a line just above the opening in the seam and just below the opening in the seam. Stitch along the two lines to create a casing for the cording.
Step 11: Insert the Cording
Insert the cording into the casing and thread it all the way around and out again. You have now finished your bingo bag.
I hope you enjoyed this Bingo Bag project. If you did subscribe to my newsletter and receive your free eBook of 15 handbag patterns and tutorials taken from the blog
If you would like video tutorials of some of Sew Very Crafty's most popular posts subscribe to our free YouTube channel here.


The video says 1/4 yd but the blog says 1/2 yd. Please clarify. Thanks.
If you are talking about the main fabric I believe it will be 1/2 yd. It has been a while since I did this project.