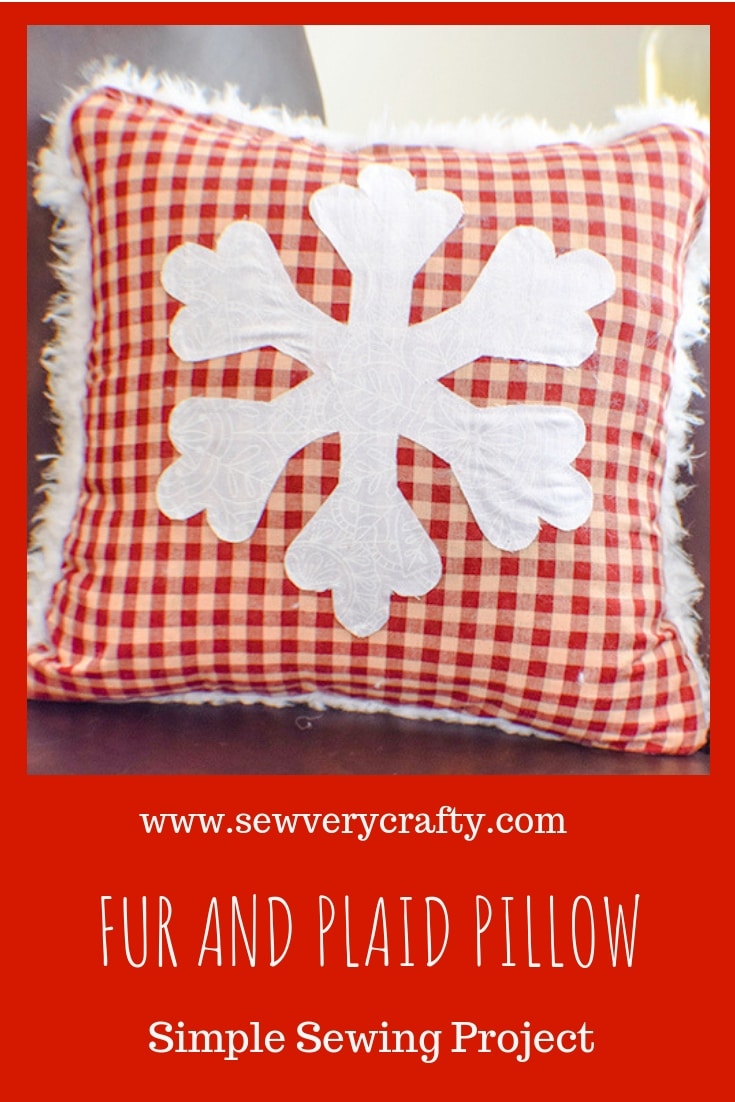
How to Make a Plaid and Faux Fur Pillow
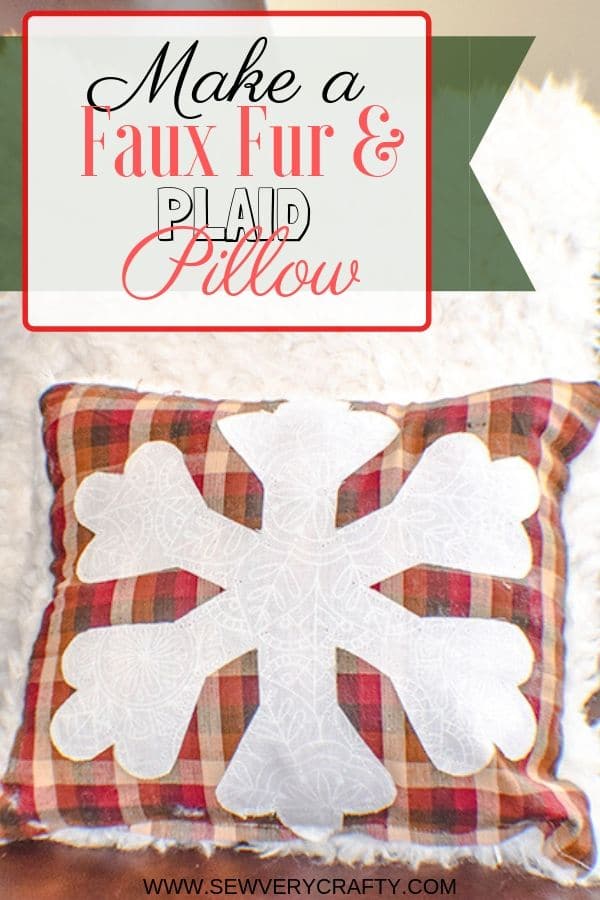
I love the feel of faux fur. It is so soft and cuddly. It is perfect for the winter months. I had some faux fur in my stash and thought I would show you all how to make a plaid and faux fur pillow. Of course I had the plaid in my stash as well. After all I am the queen of remnants. The plaid was a remnant that I purchased at JOANN Fabric & Craft Stores and the fur I had left over from another project also from Joann's. Of course you could go to Hobby Lobby or Fabric.com to get exactly what you need for this project without having to leave your house. I thought together they would make the perfect Christmas pillow. I decided to add an applique snowflake to add to that winter feel. This post contains affiliate links that if you click on them and make a purchase I may receive a small commission at no extra cost to you.
You may think that sewing with faux fur is difficult but it really isn't if you know a few tricks. I am here to help you through sewing with faux fur simply and easily while making a terrific furry pillow. This process works with any type of faux fur for any type of project. You could make a scarf, a blanket or even a furry vest using these tips. I chose this simple zippered pillow case project to give you the basics of sewing with fur. I must admit that adding a zipper to fur has its challenges but it can be done with just a little bit of patience.
As I was putting together this tutorial I realized that my camera did not have a memory card in it. I had to make a second version of the pillow in miniature to show you the steps because I did not have a zipper long enough for another full sized pillow. The steps are still the same as written but the photos are a smaller version of the project.
What you will need: How to make a plaid and faux fur pillow
- Applique Pattern Here.
- 1/2 yd cotton plaid
- 1/2 yd faux fur
- 1/4 yd white fabric for applique
- 1/4 yd Pellon 805 Wonder Under
- 1 14″ zipper
- 17″ pillow form
Step 1: Cut your Fabrics
Cut two 17″ x 17″ squares of fabric. One will be faux fur and the other will be plaid. You will notice that the fur has a nap to it. In other words the pile of the fabric lays in a particular direction. This is known as the nap. You will want to keep this in mind when you are cutting out your project. It is not important when cutting the square for this project but for more complicated projects the direction of the nap will be important. The best way to mark the nap is using a marker on the wrong side of the fabric with an arrow pointing in the direction of the nap.
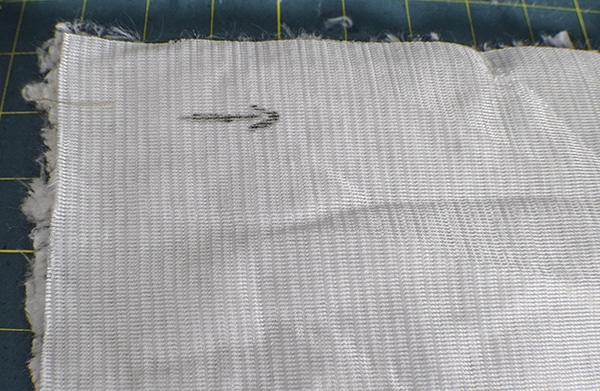
When it comes to cutting the fur it is best to cut it from the back side through only one layer. It is also important not to cut the fur itself. Rather, using the tips of your scissors, just cut the backing fabric and leave the fur in tact. This way the fur will appear smoother and more uniform.
Step 2: add the applique
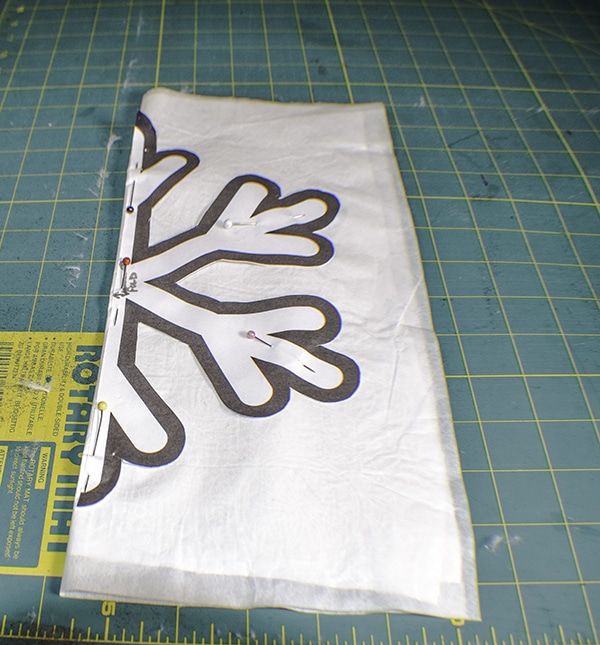
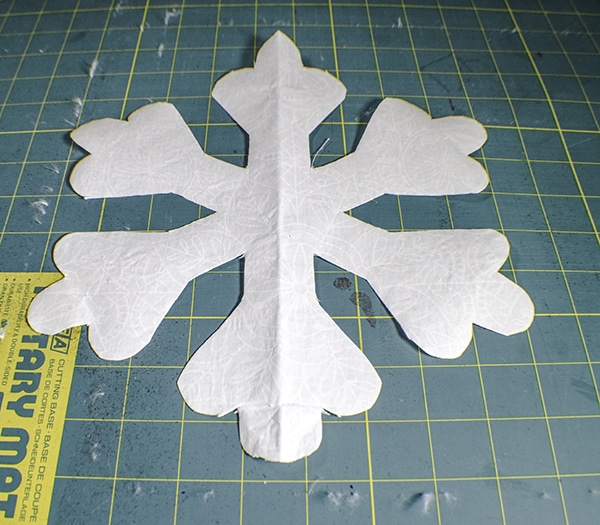
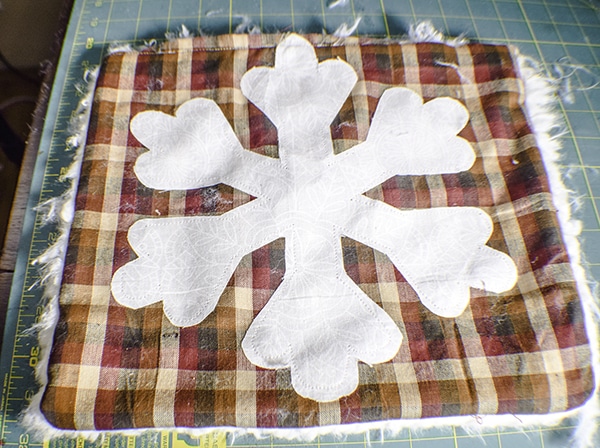
Add the non paper side of the Wonder Under to the wrong side of the white applique fabric and press. Fold the fabric in half leaving on the paper. Place the applique pattern on the fold and cut out the snowflake. You should have a single snowflake backed by Wonder Under. Remove the paper backing an center the snowflake onto the right side of the plaid fabric. Press so that the snowflake is adhered firmly. Stitch around the snowflake using either a straight or zig zag stitch. You have completed the applique.
Step 3: Add the zipper
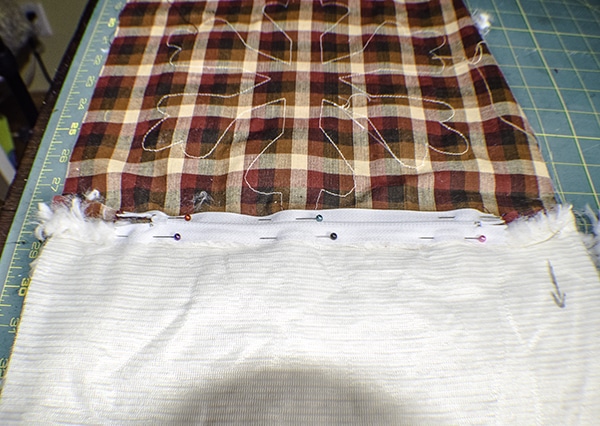
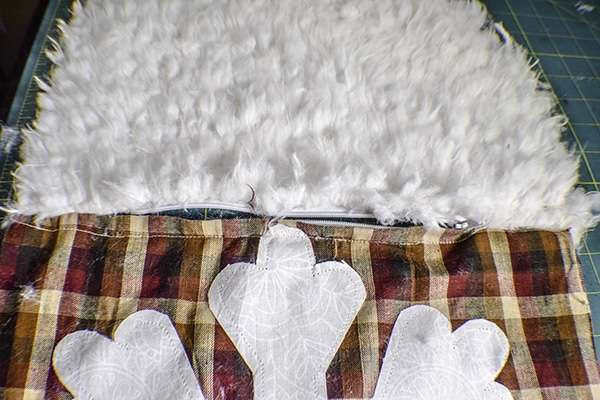
This is the easiest zipper add you will sew with the exception of the use of the fur. Take the Plaid fabric and the fur and place them right sides together. Baste one side together using the longest stitch on your machine making sure that the fur is facing downward. Use a 1/2″ seam allowance. Open the fabrics and lay them on your work surface right sides down. Center your zipper along the seam that you created so that the zipper tab is facing down. Pin the zipper to the two fabrics. Keep in mind that the fur backing is made of a knot fabric that has some stretch to it so the pins are really necessary to keep it from sliding.
Make sure that the fur nap is facing away from the zipper. Stitch the zipper to the seam using a zipper foot. Turn the fabrics right side up. Remove the basting stitches that cover the zipper only. The zipper is installed. You may have to pull out fur from the seam as you go along. Go back to the seam and re-stitch the seams on either side of the zipper using a 3.0 stitch length.
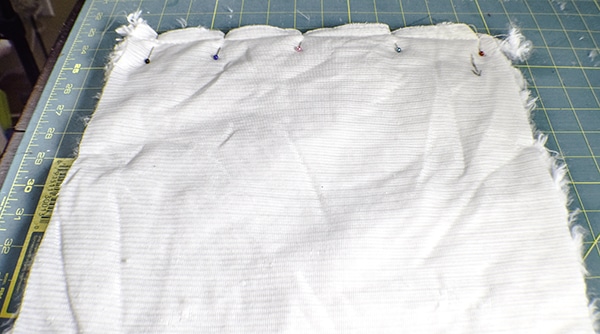
Step 4: Stitch the remaining sides
Open the zipper half way. Make sure the fur is out of the way. With right sides together pin the remaining sides. Stitch using a 3.0 stitch length making sure that the fur is facing away from the seam and is facing down on top of the plaid. Use a 1/2″ seam allowance.
Step 5: Turn the pillow case
Turn the pillow case right sides out through the opening in the zipper. Poke out the corners using a poking tool. I like to use That Purple Thing that you can find in my Amazon Shop. Insert the pillow form and zip up the case. You have finished your Plaid and faux fur pillow.
I hope you enjoyed this project. If you would like more sewing and crafting projects sign up for our newsletter and receive access to our free printables library.
If you would like more Christmas patterns and crafts check out our Holiday Projects Vault.