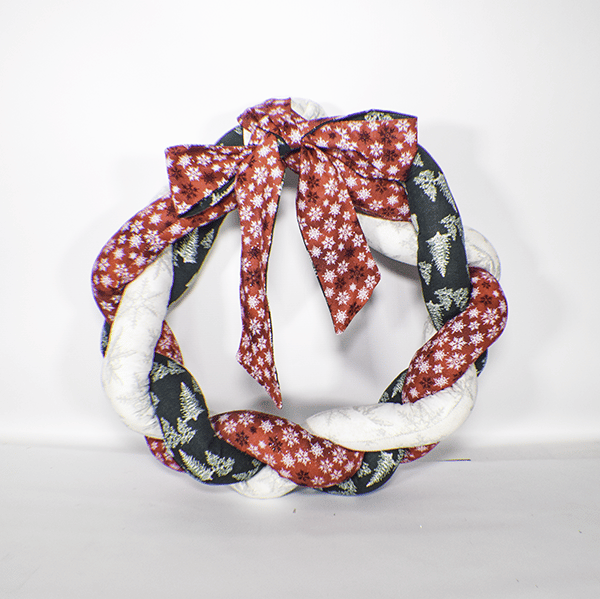
This is a simple Christmas sewing project that anyone with beginner sewing skills can make. This stuffed braided wreath is really pretty when it is done and it doesn't take long to make. If you can sew a straight seam and tie a braid you can make the project. Just fabric and fiberfil is all you need. I just love this project and I know you will too. If you would like more holiday projects check out my holiday project vault full of holiday sewing and crafting projects.
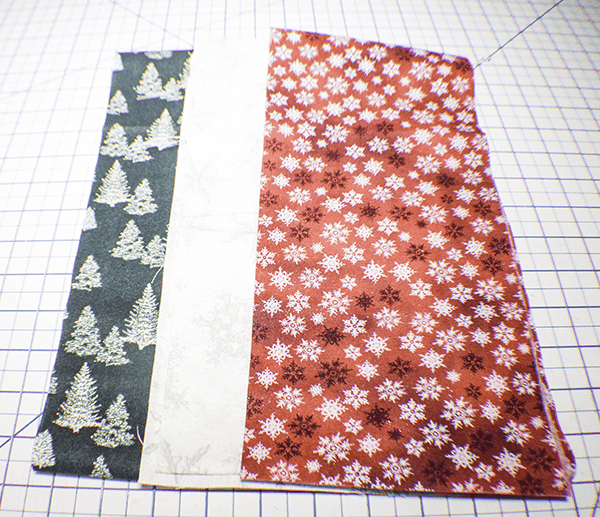
I used Christmas fabrics that I had on hand for this project. I actually joined some of them together to get the length that I needed for my stuffed braided wreath. Some of my fabrics were purchased at Joann's and some at fat quarter shop but you could head to Amazon Fabric Shop or
What You will Need: How to Make a Stuffed Braided Wreath
- 1/2 yd of three different Christmas fabrics
- Polyester fiberfill
- Standard Sewing Supplies
Step 1: Cut your Fabrics
Cut each of the three fabrics to measure 6″ x 50″ You may have to stitch fabrics together to create the length that you need. I did. I also cut a piece of fabric that measured 4″ x 11″ for the center cover and two different pieces that measure 3″ x 55″ for the bow.
Step 2: Stitch the Fabrics
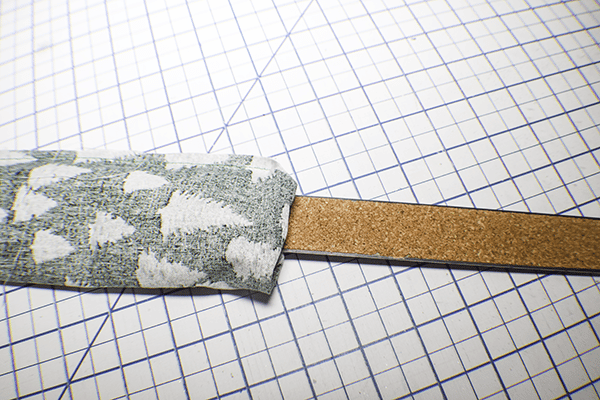
Fold the fabric in half lengthwise right sides together. Stitch along the long edge and one short end to create a tube. Turn right sides out. I used a ruler to help with this.

Step 3: Stuff each of the Tubes
Using the fiberfill, stuff each tube full but not so that it is overly stiff.
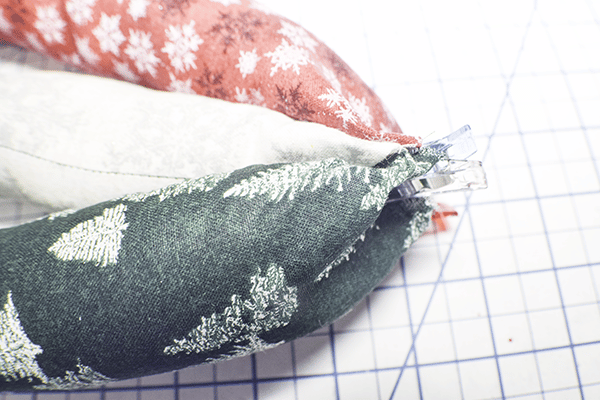
Step 4: Stitch the Three Tubes Together at the Open Ends
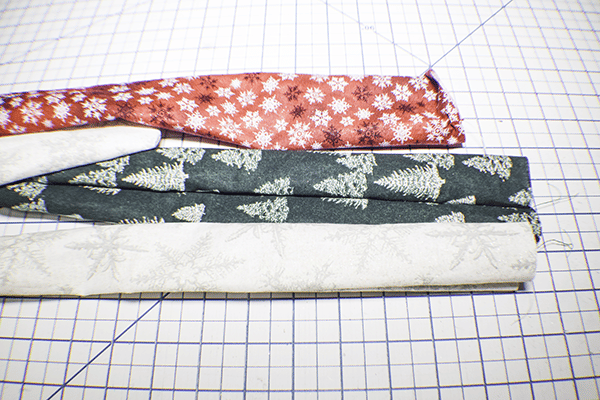
Using your machine or hand stitching, sew the three tubes together at the open ends.
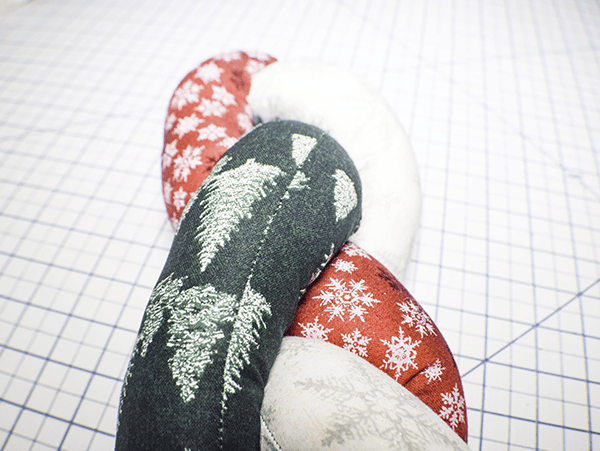
Step 5: Braid the Tubes
Braid the tubes using the standard over and under technique until you get to the end. Stitch the ends together using your machine or by hand.
Step 6: Stitch the Two Ends Together
Stitch the two ends together by hand creating a circle.
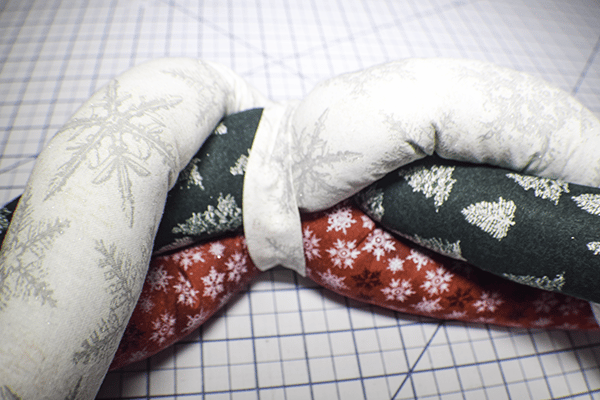
Step 7: Hide the Joint
Take a piece if fabric that measures 4″ x 10″ and fold under the short ends and press. Then, fold under the long edges to the center and press. Fold the long edges in half and and press again. Topstitch along both sides. Wrap around the wreath where you joined the two ends and hand stitch the ends together using ladder stitch.

Step 8: Create the Bow
Take a 55″ x 3″ piece of Fabric and fold the long edges right sides together. Clip the small edges so the they are at a diagonal. Stitch all the way around the strop leaving an opening on the side for turning. Clip the corners and turn right sides out. Press and topstitch all the way around closing the opening as you go.
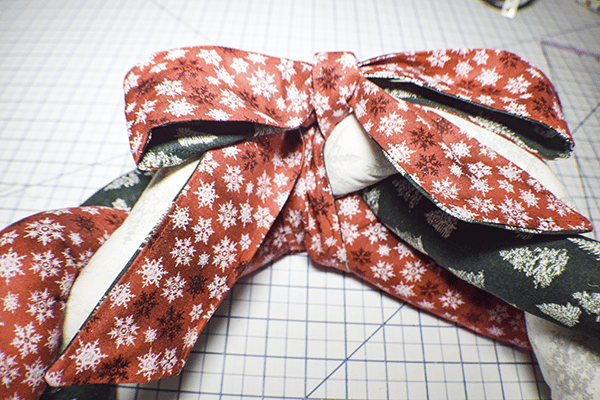
Step 7: Add the Bow
Wrap the bow fabric around the center and tie the fabric into a bow. You have finished your stuffed braided wreath.
I hope you enjoyed this Fabric wreath project. If you would like more sewing and crafting projects subscribe to newsletter and receive access to my free printables library.
If you would like video tutorials of some of Sew very Crafty's most popular posts subscribe to my free YouTube channel here.