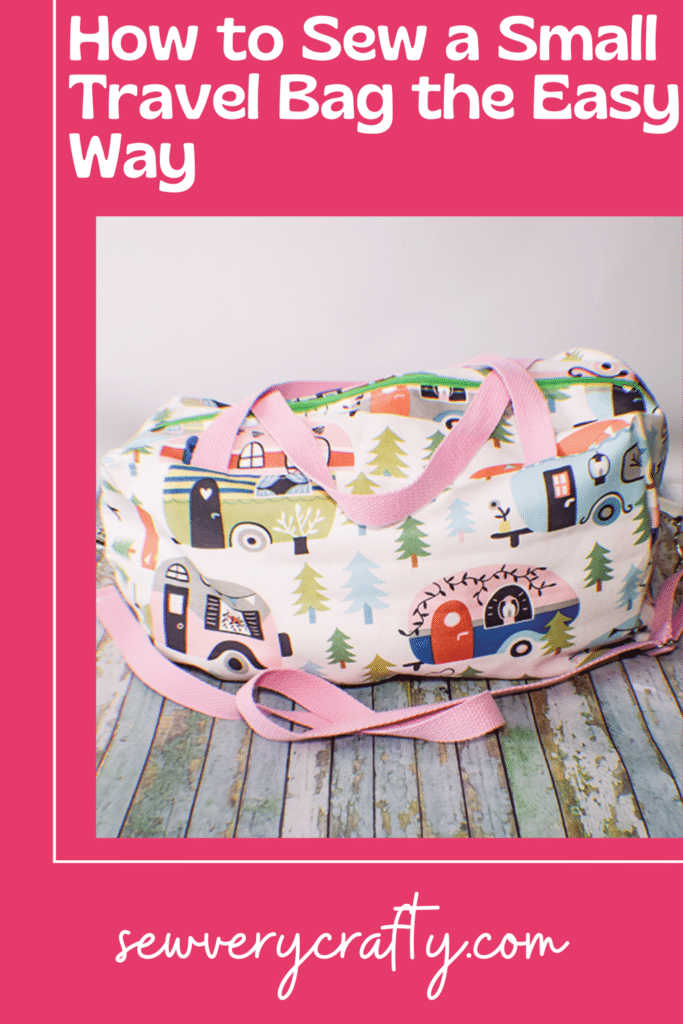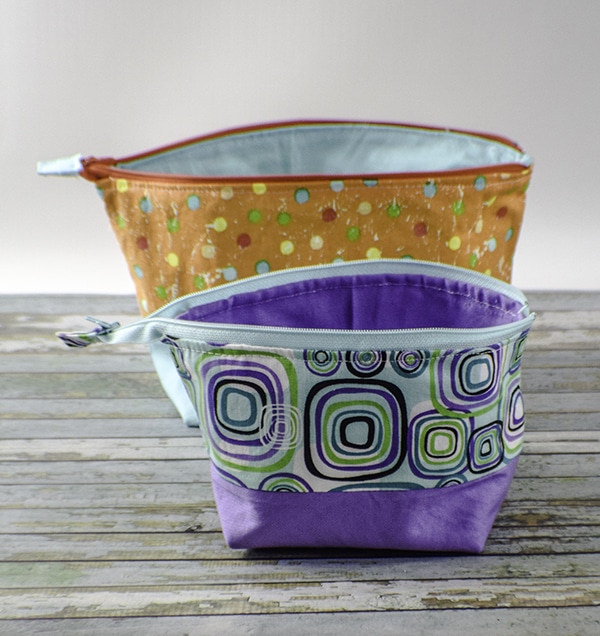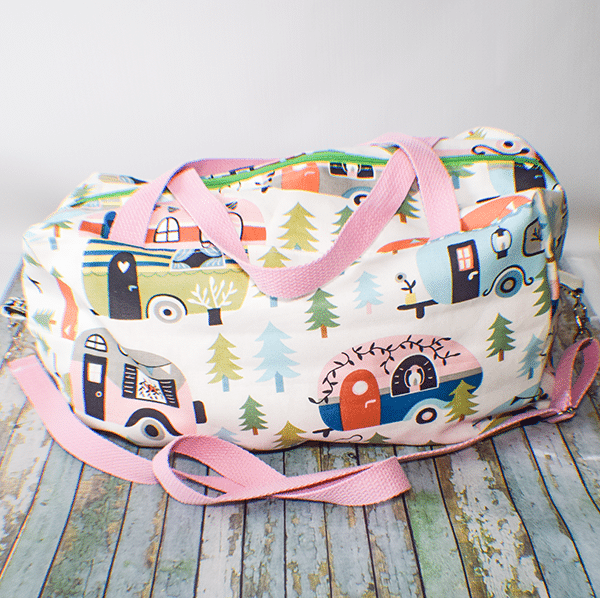
I came across this travel bag on Ae Poom on YouTube and wants to share it with you. It is a tutorial on how to sew a travel bag the easy way. I enjoy making handbags in general but Tavel bags are really fun. This one is so simple that anyone can make it using basic sewing skills. It is a beginner bag making project even though it has a zipper. The zipper is super simple to stitch. If you would like more handbag and travel bag making projects head over to my handbag page and check them out.
For this project I used decorator weight fabric for the outer bag and cotton for the lining. I purchased both of them at JOANN Fabric & Craft Stores![]() but you could head to Amazon Fabrics or
but you could head to Amazon Fabrics or
What you will Need: How to Sew a Travel Bag the Easy Way
- 1yd outer and lining fabric
- 25 1/2″ zipper – I used a #5 continuous zipper
- 4 yds 1″ cotton webbing
- 2 1″ swivel clips
- 2 1′ D-Rings
- 1 1″ triglide
Step 1: Cut your Fabrics
Starting with the outer fabric cut one piece that measures 25 1/8″ x 26″ and two pieces that measure 25 1/8″ x 4 5/16″. Cut two pieces that measure 4″ x 4″ for the tabs.
CAVEAT**** I used a directional fabric so I cut my outer fabric a half inch larger on the 26″ side and stitched it back together using a 1/4″ seam allowance so that when I finished the bag the print would be upright on both sides of the bag.
From the lining cut one piece that measures 25 1/8″ x 33″ and one piece that measures 14 1/8″ x 12 5/8″. Four pieces that measure 9 7/8″ x 2″ for binding.
From the webbing cut two pieces that measure 23 5/8″ for the handles and leave the remaining for the shoulder strap.
Step 2: Add the the Handles
On the 25 1/8″ sides find the center by folding the outer piece in half and finger pressing it. Place the short ends of the handles 7 7/8″ from the long raw edges on bth sides. Stitch on the handles using a 1/8″ seam allowance.

Step 3: Add the the Top Panel
Take the 25 1/8″ x 4 5 /16″ pieces of outer fabric and place them right sides down over the handles aligning the raw edges. Stitch the panels using a 3/8″ seam allowance. Topstitch along the seam on both sides


Step 4: Create the Lining Pocket
Take the 14 1/8″ x 12 5/8″ lining piece and fold it in half lengthwise right sides together. Stitch along the sides and partially on the bottom leaving an opening for turning. Clip the corners. Turn right sides out and press. Topstitch along the folded edge.

Step 5: Add the Pocket to the Lining
On one of the 25 1/8″ sides measure down 11 3/4″ and in the center and place the bottom of the pocket piece. Stitch along the sides and bottom closing up the opening in the pocket as you go. Stitch down the center to make it a divided pocket.

Step 6: Add the Zipper
Place the zipper right sides up on one of the 25 1/8″ sides of the lining. Place the outer bag right sides down on top of the zipper creating a zipper sandwich. Pin or clip. Stitch the zipper using a zipper foot. Turn right sides out and press. Stitch along the zipper. Stitch the other side of the zipper by folding up the lining and the outer fabric again creating a zipper sandwich. Again, stitch the zipper. Turn right sides out and topstitch.


Step 7: Create the Tabs
Take each of the tab pieces and fold two opposite raw edges to the center and press. Fold in half to enclose the raw edges. Topstitch on each side. Wrap around the D-Rings.


Step 8: Cut out the Corners
Fold the bag in half so that the zipper is at the top and the lining and the outer fabric are aligned. Place a small notch on all bottom corners through the outer and lining fabrics. Remove the lining from the outer bag. Line up the notched outer fabric and the notched lining fabric with the center of the zipper on each end with the zipper in the middle. Clip the layers together at the zipper. Line up the lining with the outer fabric.


From the four corners of the outer and lining bags cut four rectangles that measure 4 5/16″ from the raw edge and 4″ from the fold. Cut out the rectangles through all layers.


Step 9: Add the Tabs
Add the tabs to each end centering them on the zipper with the D-Ring toward the center. Stitch the ends using a 3/8″ seam allowance. Turn right sides out so that the lining side is on the outside and the outer bag is on the inside.

Step 10: Box the Corners
Box all the corners. To do this pinch the open corners together creating a straight line. Stitch along the line using a 3/8″ seam allowance. Do this for all our corners.

Step 11: Add the Binding
Place the binding right sides together with each of the corners and stitch using a 3/8″ seam allowance. Open up the binding and fold the short ends in toward the bag. Double fold the long edge over the corner and clip. Stitch the binding through all layers. Do this for all four corners. Turn the bag right sides out.


Step 12: Add the Shoulder Strap
First, place one end of the strap that around a swivel clip. Fold under and stitch to secure. Place the other end of the bag strap through the tri-glide then through the other swivel clip and back through the Tri-glide Stitch to secure. Clip the swivel clip to the D-Rings and you have finished your travel bag the easy way.


I hope you enjoyed this travel bag project. If you would like more swing and crafting tutorials subscribe to our free newsletter and receive your free eBook of 15 handbag patterns and tutorials taken from the blog.
If you would like video tutorials of se of Sew Very Crafty's most popular posts subscribe to our free YouTube channel here.