
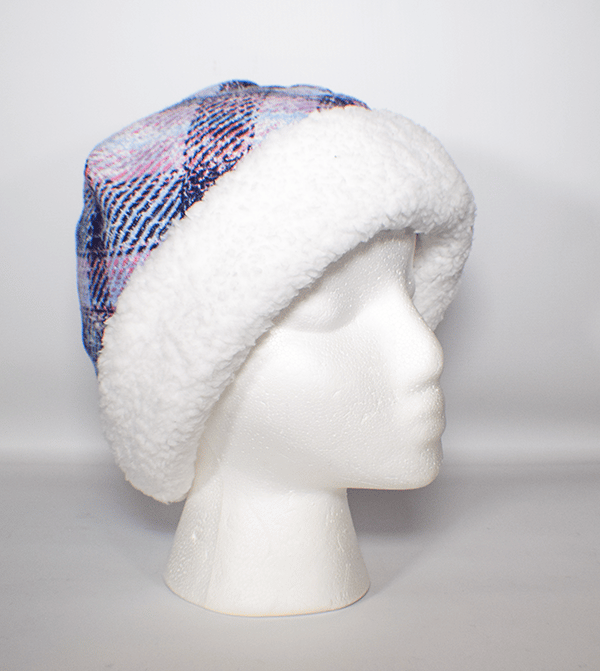
I recently made a flannel and sherpa neck warmer for the cold winter we are currently experiencing. I thought I would make a flannel and sherpa beanie to go with it. This beanie project is super simple and can be made in about an hour or less including cutting depending on your sewing skills. You can make this from two layers of fleece if you like but I decided to line mine with sherpa for extra warmth. How fun!
I used the flannel and sherpa I had left over from my previous project to make this cute little beanie. I purchased both at JOANN Fabric & Craft Stores![]() . You could head to Amazon Fabrics or
. You could head to Amazon Fabrics or
If you would like a video tutorial of this project head over to YouTube and check out my video. While you are there subscribe to my free YouTube channel.

What you will Need: How to Make a Flannel and Sherpa Beanie
- Pattern you can get by clicking on this link
- 1/2 yd Flannel
- 1/2 yd Sherpa
- Standard sewing supplies

Step 1: Cut out your Fabrics
Using the pattern piece cut two flannel on the fold. Also using the pattern piece cut two sherpa pieces 4″ longer than the bottom of the pattern piece so that it will fold up as a cuff.

Step 2: Stitch the Short Curves
Take each piece of the flannel and the sherpa and stitch the short curves together using a 1/2″ seam allowance.

Step 3: Join the Two Pieces Together
Place the two flannel pieces right sides together stitch the long curve using a 1/2″ seam allowance. This will create the outer beanie. Repeat for the sherpa but leave an opening for turning in a later step. You will have two beanies


Step 4: Join the Two Beanies
Place the two beanies right sides together so that the bottom raw edges are matching and stitch all the way around the bottom of the beanies.

Step 5: Turn Right Sides Out
Turn the beanie right sides out through the opening in the Sherpa. Hand stitch the opening closed using ladder stitch. turn the beanie so that the funnel iOS right sides out. Push the sherpa inside the flannel. You will notice that the sherpa is longer than the flannel. Turn up the sherpa to act as a cuff on the beanie. You have now finished your flannel and sherpa beanie.


I hope you enjoyed this beginner Beanie project. if you would like more sewing and crafting projects subscribe to our newsletter and receive access to our free Printables library.
If you would video tutorials of some of Sew Very Crafty's most popular posts subscribe to our free YouTube channel here.


As a newbie I wish you would have been more hands on to show what to do some of your instructions are vague. I still appreciate the pattern. Thank you
So sorry. I do not recall if I did a video for that project or not but the video my help if there is one.