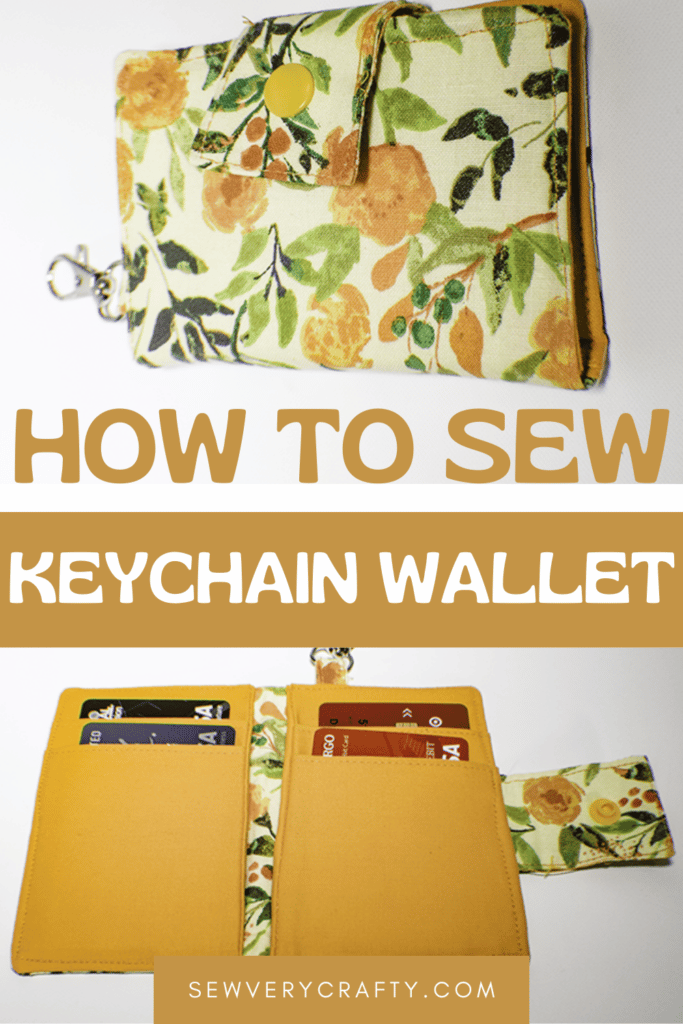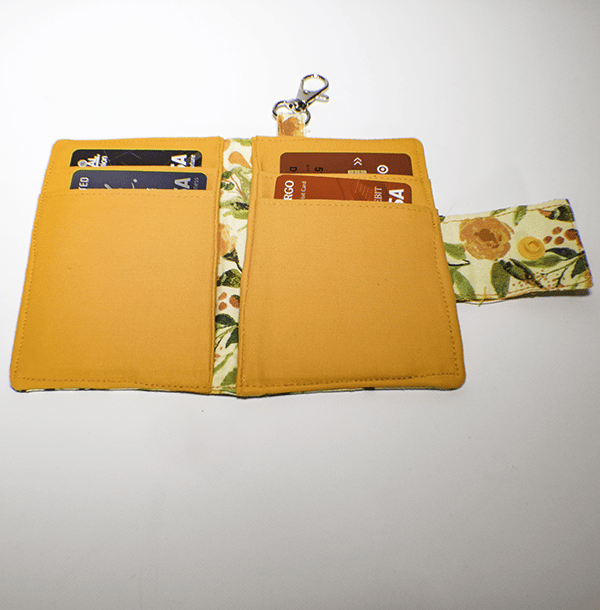
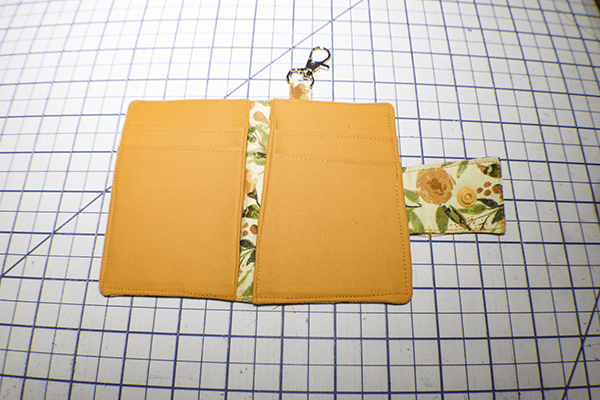
I am always looking for an easy way to carry my credit cards and cash for games and travel and this key chain wallet fits the bill. it is small enough to attach to my keys and large enough for all the stuff I need. It is also a super simple sewing project. The hardest part about this project is folding the card slots otherwise the sewing is super simple. I would recommend a walking foot for this project as there is a bit of bulk but it is not absolutely necessary. The walking foot will feed the fabric more evenly. If you would like more wallet projects check out my trifold wallet or my passport wallet.
I used some fun floral fabric and some Kona cotton on this project that order online from JOANN Fabric & Craft Stores![]() and picked up in store. It is so much easier. You could go to Amazon Fabrics or
and picked up in store. It is so much easier. You could go to Amazon Fabrics or
What you will Need: how to Make a Keychain Wallet
- 1/4 yd outer and lining fabric
- 1/4 yd Pellon SF 101 Interfacing
- 1/8 yd Pellon 808 interfaicing
- 1 kam Snap
- 1 keyring or swivel clip
- Standard sewing supplies
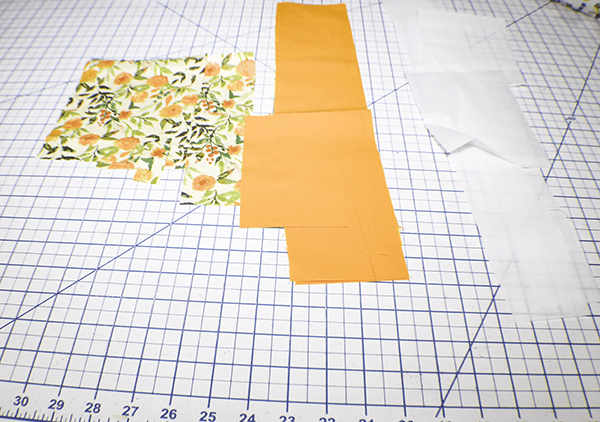
Step 1: Cut your Fabrics
- From the lining fabric cut two pieces that measure 18″ x 3 1/2″, 3 1/2″ x 5 1/2″
- From the outer Fabric cut two pieces that measure 7″ x 5 1/2″, one piece that measures 5″ x 2″, one piece that measures 2″ x 1″,
- SF 101 Interfacing cut two pieces that measure 17″ x 2 1/2″, one piece that measures 6″ x 4 1/2″, one piece that measures 4″ x 1″.
- From the Pellon 808 cut a piece that measures 6″ x 4 1/2″
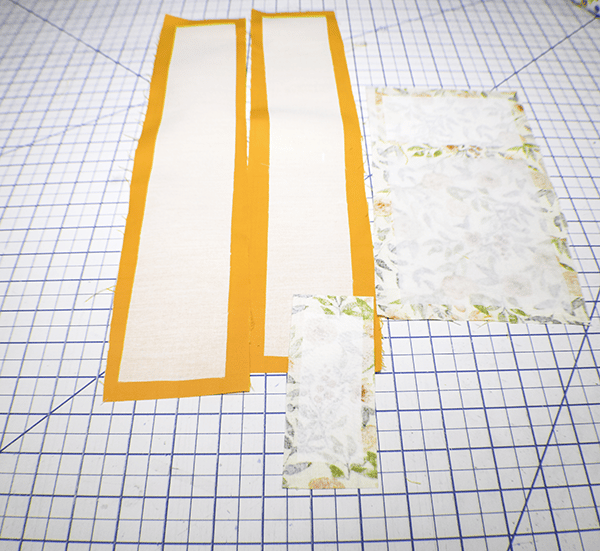
Step 2: Fuse the Interfacing
Following the manufacture's instructions fuse the 17″ x 2 1/2″ pieces of SF 101 onto the wrong side of the long lining pieces. Fuse the 6″ x 4 1/2″ piece to one of the outer pieces that measure 7″ x 5 1/2″ and the 4″ x 1″ piece to the 5″ x 2′ piece. Finally, fuse the Pellon 808 piece to the last remaining outer piece.
Step 3: Create the Credit Card Slots
Mark the two long lining pieces on the wrong side from one end to the other as follows:
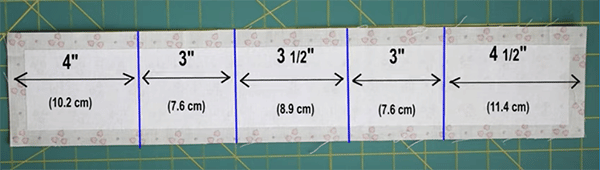
Fold the lining pieces on the lines and press as follows: The 4″ part will be the bottom part. Start there. Fold on the first line on the 4″ side toward the wrong side and press. Open up the fold you just made and fold the next line toward the bottom on the wrong side. Press. This will create the first card slot. On the next line fold the entire piece toward the top and press. Open up without disturbing the other pleats and fold the final line toward the bottom and press. Turn right sides out. You should have two slots. Topstitch along the folds and along the sides. Measure the pocket so that it is 5 1/2″ long and trim the bottom excess. Make sure that the card slots are even when you cut the second pocket piece.

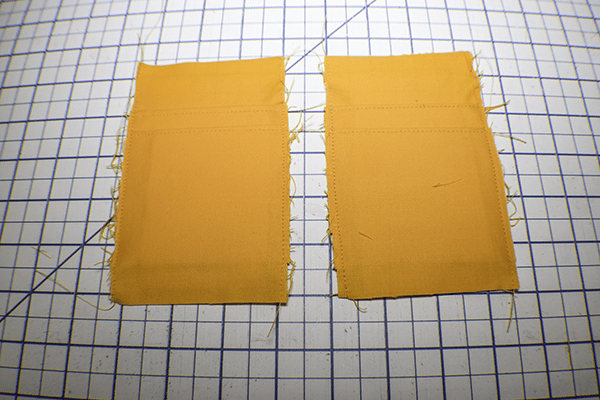
Step 4: Add the Back of the Pocket Pieces
On one of the pocket pieces place the 3 1/2″ x 5 1/2″ lining piece right sides together and stitch along the right side using a 1/4″ seam allowance. Open to the right side and press. Stitch along all sides using a 1/8″ seam allowance. Repeat for the other piece but stitch on the left side.

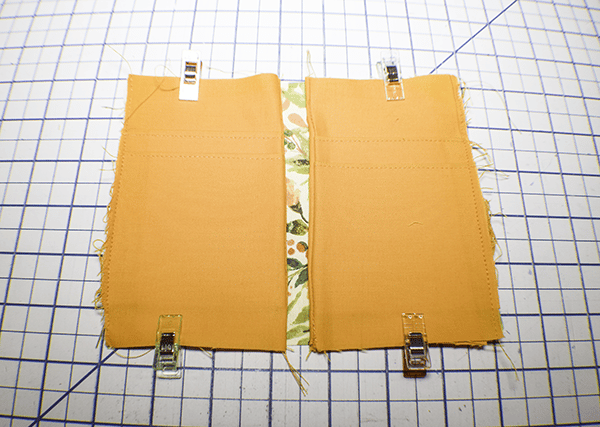
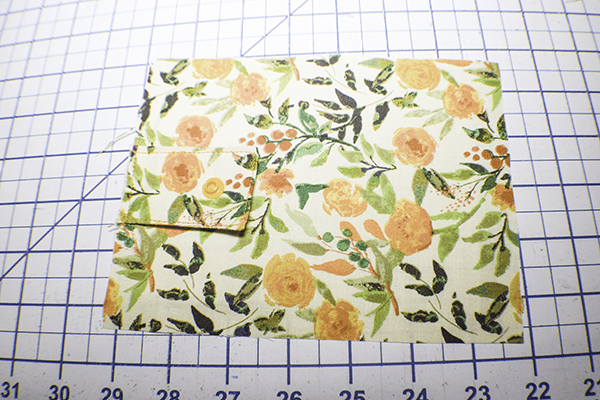
Step 5: Add the Pocket Pieces to the Outer Fabric
Take the outer fabric measuring 7″ x 5 1/2″ that you fused with the SF101 and place it right sides up on your work station. Place the pocket pieces on the outer fabric with the seams facing each other toward the center. Stitch all the way around using a 1/8″ seam allowance.
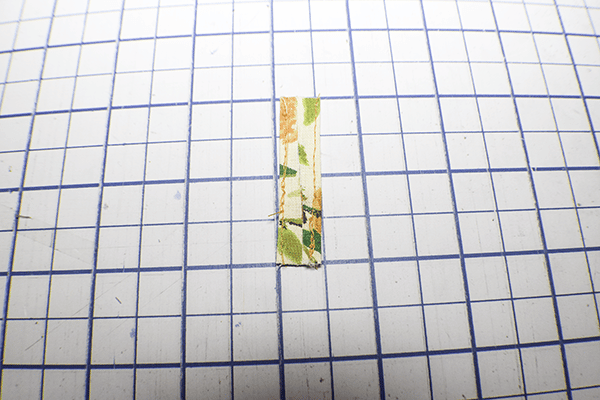
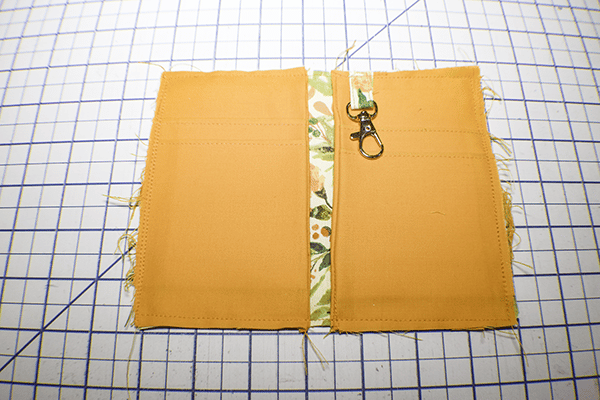
Step 6: Create the Ring Tab
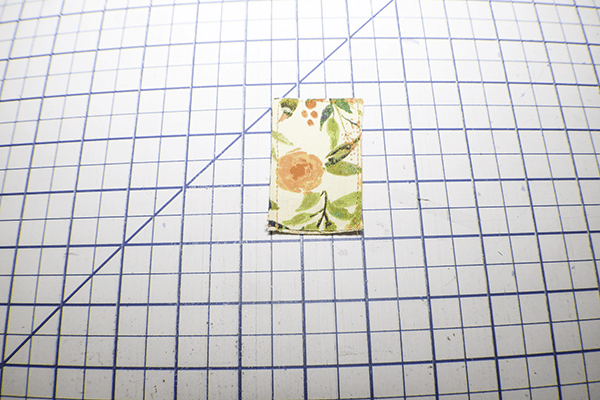
Take the 2″ x 1″ tab piece and fold the long raw edges in toward the center and press. Stitch along each side. Fold the tab in half around the key ring or swivel clip. Place it about 1/2′ away from the right folded edge and clip. Stitch to secure.
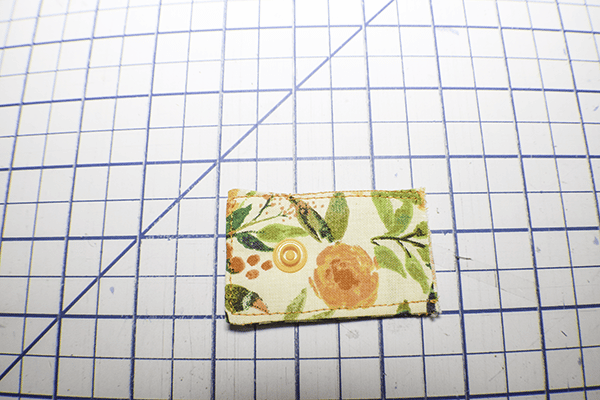
Step 7: Create the Closure
Fold the 5″ x 2″ piece right sides together and stitch along both sides using a 1/4″ seam allowance. Turn right sides out and press. Topstitch along the sides and top using a 1/8″ seam allowance. Measure 3/4″ from the top and place 1/2 of the Kam Snap.
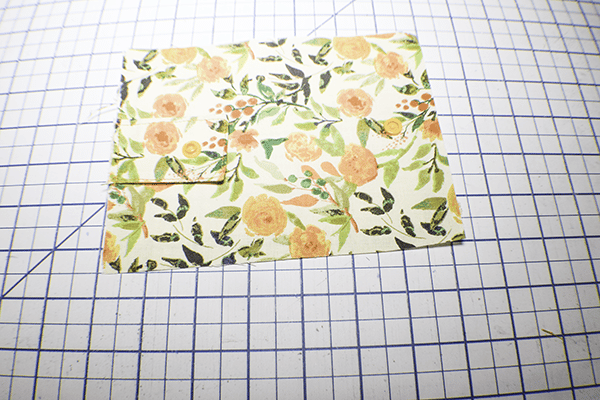
Step 8: Add the Closure
Place the closure on the center of the left side of the final outer piece that measures 7″ x 5 1/2″ right sides together and stitch using a 1/8″ seam allowance to secure. Measure 1″ from the opposite edge of the closure in the center and add the other half of the Kam Snap.
Step 9: Assemble the Keychain Wallet
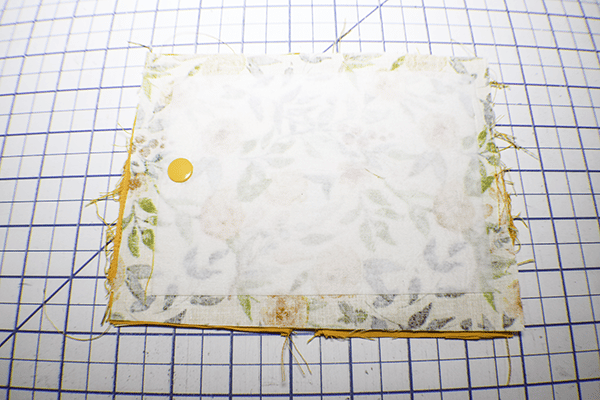
Place the outer piece with the closure right sides together with the pocket pieces. Stitch together using a 1/2″ seam allowance leaving a 4′ opening on the bottom for turning. Clip the corners and the seam allowances except for the side you left the opening. Turn right sides out and press. Topstitch all the way around the wallet closing the opening as you go. Press again and you have finished your keychain wallet

I hope you enjoyed this keychain wallet project. If you would like more sewing and crafting tutorials subscribe to our newsletter and receive your free Ebook of 15 Handbag patterns and tutorials taken from the blog.
If you would like video tutorials of some of sew Very Crafty's most popular posts subscribe to our free YouTube channel here.