
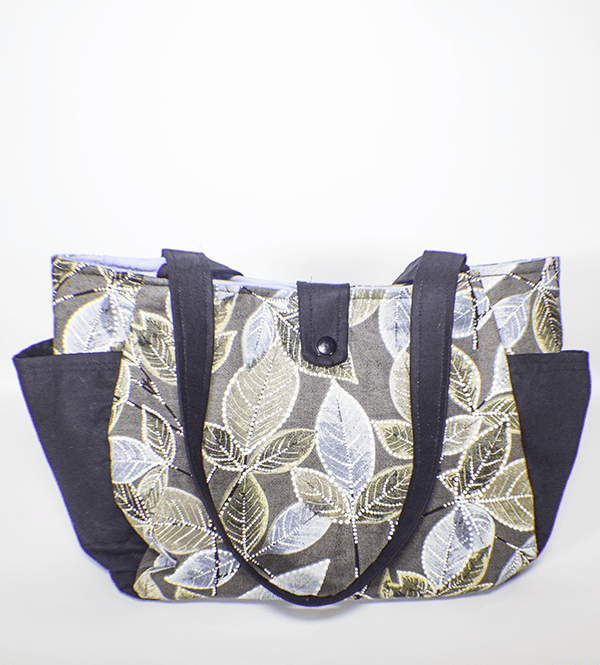
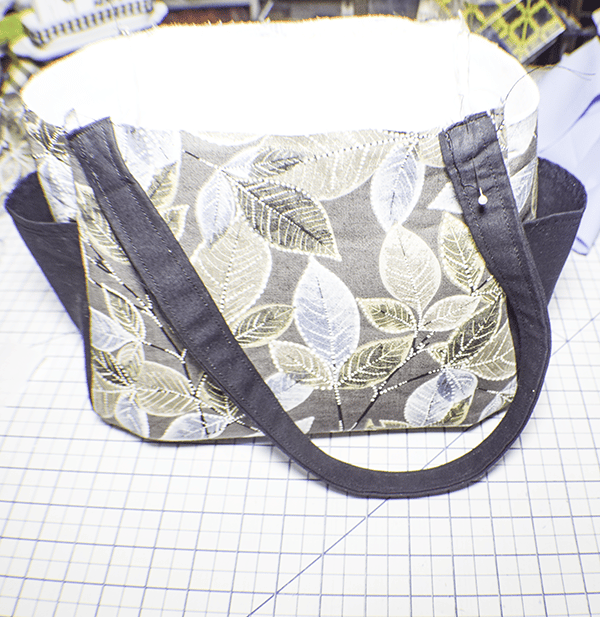
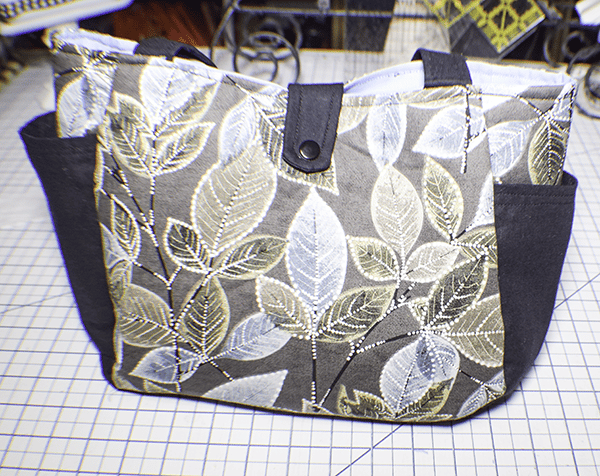
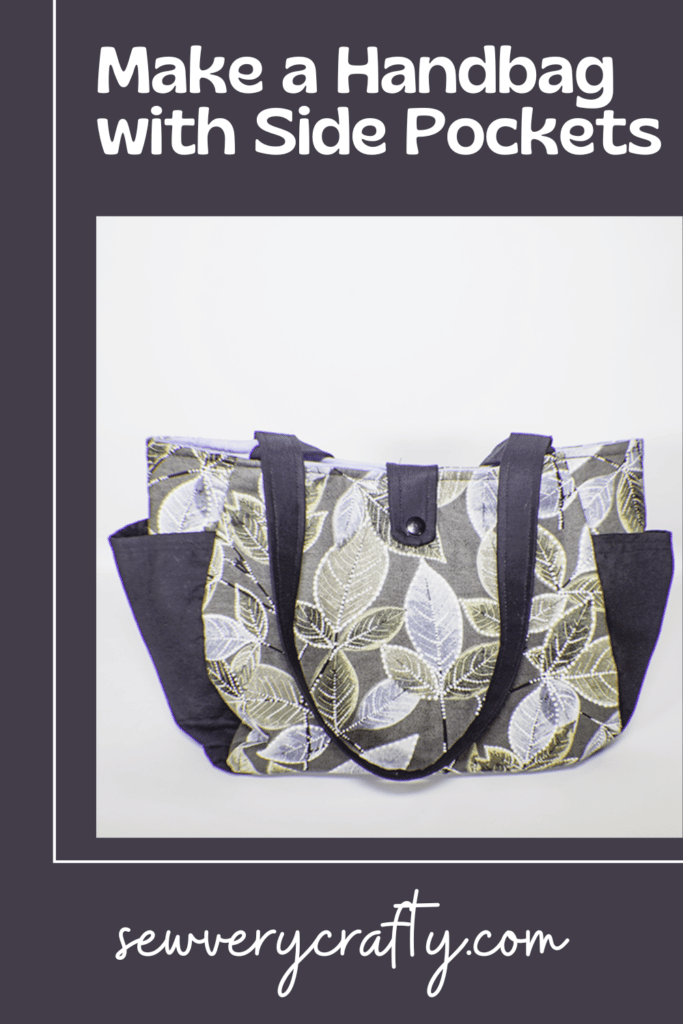
I found this terrific fabric at JOANN Fabric & Craft Stores![]() in their Black Friday sale and decided to make a new handbag out of it. This handbag is just what I was looking for to put all of my stuff in because it is a handbag with side pockets that I can put my two phones in for easy reach. I have a personal phone and a work phone that I carry with me so this was perfect. It is also a simple sewing project that comes with a free pattern provided by Sewing Times on YouTube. I have a number of handbag patterns on the site. If you are interested in one of my others head over to my handbag page and check them out.
in their Black Friday sale and decided to make a new handbag out of it. This handbag is just what I was looking for to put all of my stuff in because it is a handbag with side pockets that I can put my two phones in for easy reach. I have a personal phone and a work phone that I carry with me so this was perfect. It is also a simple sewing project that comes with a free pattern provided by Sewing Times on YouTube. I have a number of handbag patterns on the site. If you are interested in one of my others head over to my handbag page and check them out.
As I said I purchased the fabrics for this project online at JOANN Fabric & Craft Stores![]() and picked them up in store. If you don't have a JOANN Fabric & Craft Stores
and picked them up in store. If you don't have a JOANN Fabric & Craft Stores![]() near you head over to Amazon Fabrics or
near you head over to Amazon Fabrics or
What you will Need: How to Make a Handbag with Side Pockets
- Pattern you can get by clicking on this link
- 1/2 yd outer fabric and lining fabric
- 1/4 yd accent fabric
- 1/2 yd Fusible fleece Like Pellon 987F
- 1/4 yd Fusible interfacing like Pellon SF 101
- 1 8″ zipper
- 1 Kam Snap
- Standaard sewing supplies
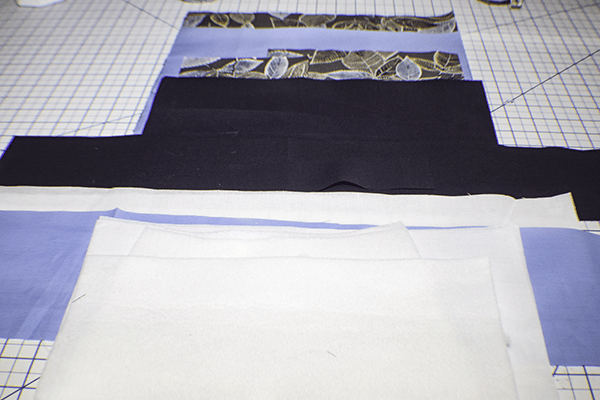
Step 1: Cut your Fabrics
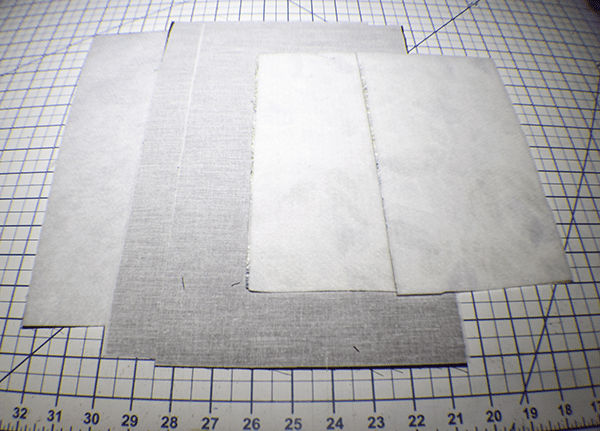
- From the fleece cut: two Pieces using the pattern piece on the fold, 5 1/2″ x 9 1/2″, 12 1/4″ x 5 1/2″
- Outer fabric cut: two pieces that measure 13 1/2″ x 11 1/2″, 2 pieces at 5 1/2″ x 9 1/2″, one piece at 8 3/4″ x 11 34″
- Lining Fabric cut: two pieces that measure 13 1/2″ x 11 1/2″, 5 1/2″ x 29 1/2″
- Accent Fabric cut: two Pieces that measure 4″ x 23 3/4″, one piece that measures 12 1/4″ x 5 1/2″, Two pieces at 8″ x 13 1/2″, 1 3/4″ x 7 1/8″
- Pellon SF 101 cut: two Pieces that measure 4″ x 23 3/4″, Two pieces at 8″ x 13 1/2″, 1 3/4″ x 7 1/8″
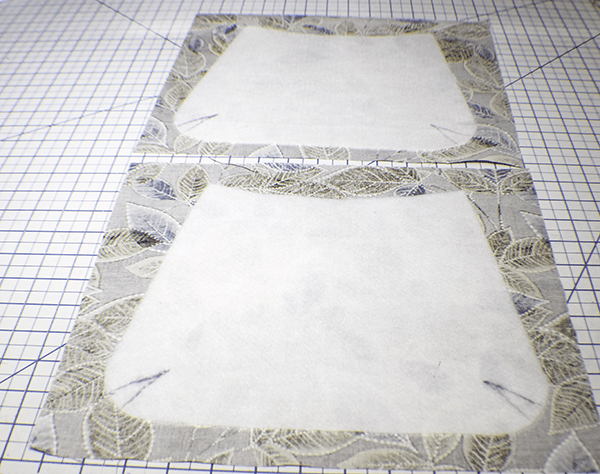
Step 1: Fuse the Fleece
Fuse the fleece pieces to the wrong side of the large outer pieces following the manufacturer instructions and using a hot iron. Place the outer piece on top of the lining piece and trim around the pieces leaving a 3/8″ seam allowance. Mark the darts on the lining.
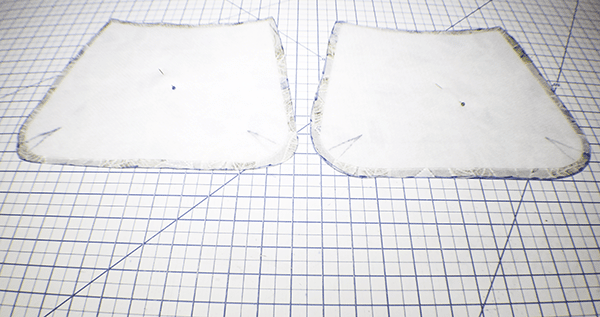
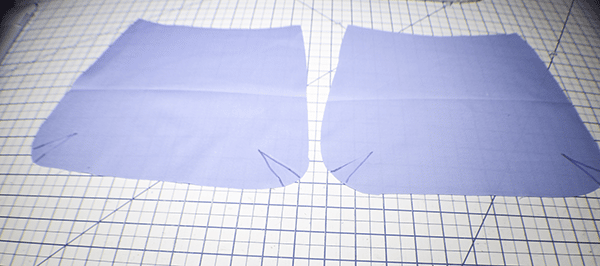
Step 2: Stitch the Darts
You will notice that there are darts on both corners of the outer pieces and lining pieces. Place the dart edges together and stitch using a 3/8″ seam allowance.
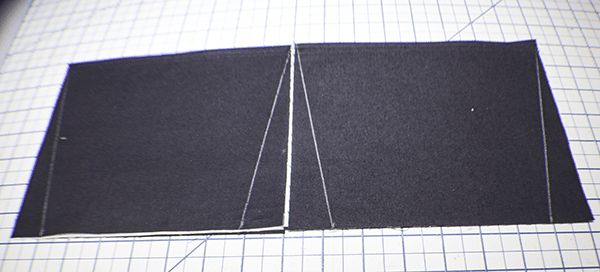
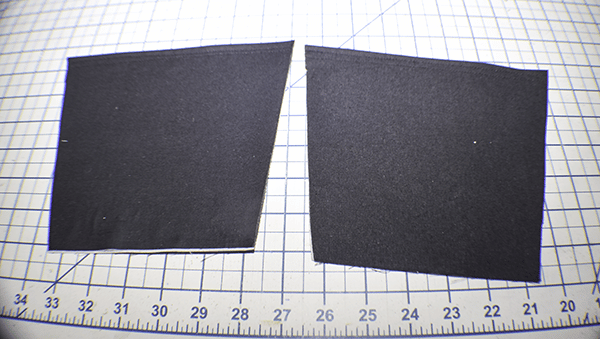
Step 3: Create the Straps
Take the 4″ x 23 3/4″ accent pieces and and fold the long raw edges to the center and press. Fold in half lengthwise and press to enclose the raw edges. Topstitch along both sides of the strap to secure. Do this for both pieces.
Step 4: Add the Straps
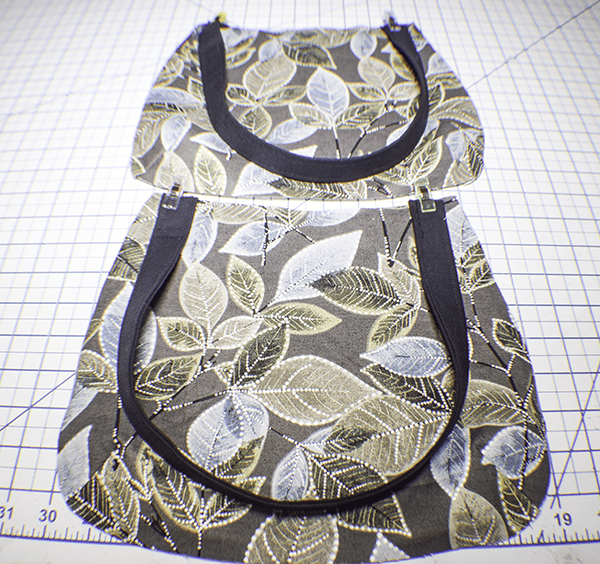
Measure in from each side of the bag 1/2″ and place the ends of the strap. Stitch the straps to the outer bag pieces using a zig zag stitch. Do this for both straps.
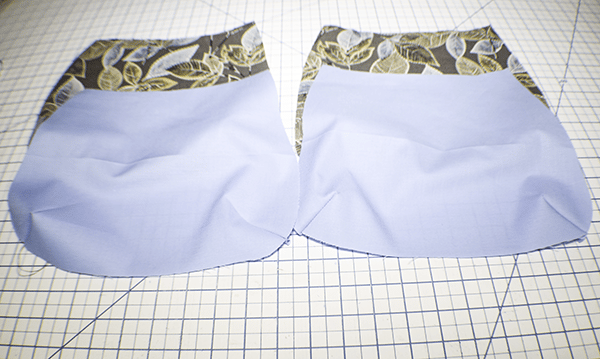
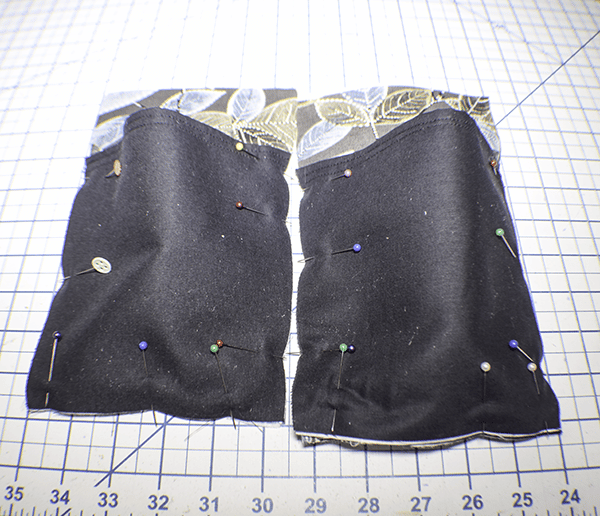
Step 5: Create the Side Pockets
Fuse the fleece and interfacing to the corresponding outer and accent pieces. Create the side pockets by taking the accent fabric that measures 8″ x 13 1/2″ and folding it in half so the short ends meet. Topstitch two lines along the fold. Measure in 1 1/8″ on each side of the bottom of the pocket piece and make a mark. Draw a diagonal line from each top corner to the mark. Cut along the line. Place the pocket pieces to the right side of the outer pieces that measure 5 1/2″ x 9 1/2″ matching the raw edges. Stitch along the sides using a 1/8″ seam allowance.
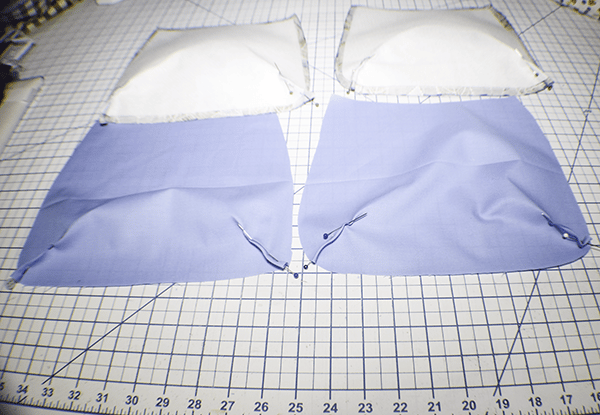
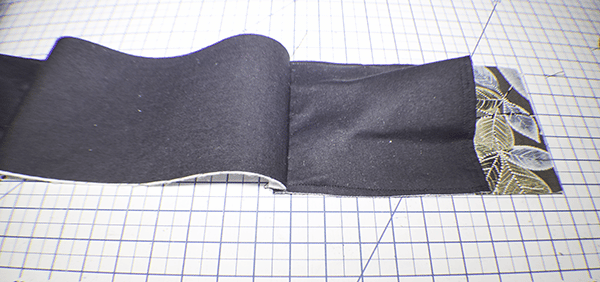
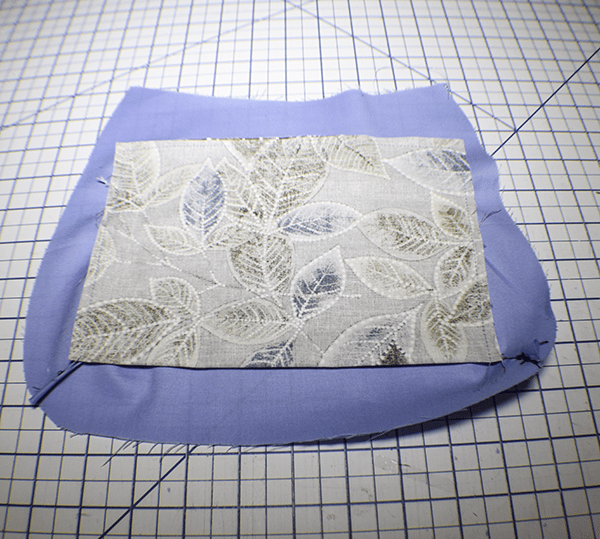
Step 6: Create the Gusset
Place the accent piece that measures 12 1/4″ x 5 1/2″ right sides together with the bottom of the pocket pieces you just stitched. Stitch using a 3/8″ seam allowance so that the accent piece is in between the two pocket pieces.
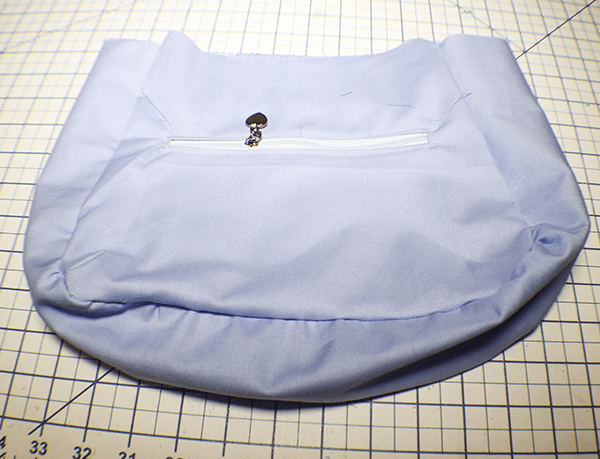
Step 7: Add the Gusset to the Outer Handbag
Fold the gusset in half and mark the center. Fold the outer bag pieces in half and mark the centers. Measure down 1 1/8″ from each side of the bag and make a mark. Place the gusset right sides together with one side of the outer bag matching the bottom center and pin. Pin the top of the pocket piece not he 1 1/8″ mark. Pin the remainder of the gusset. Clip the corners to match the curves. You will notice that the gusset is shorter than the bag. That is correct. Stitch the gusset to the outer bag using a 3/8″ seam allowance repeat for the other side. Turn right sides out.
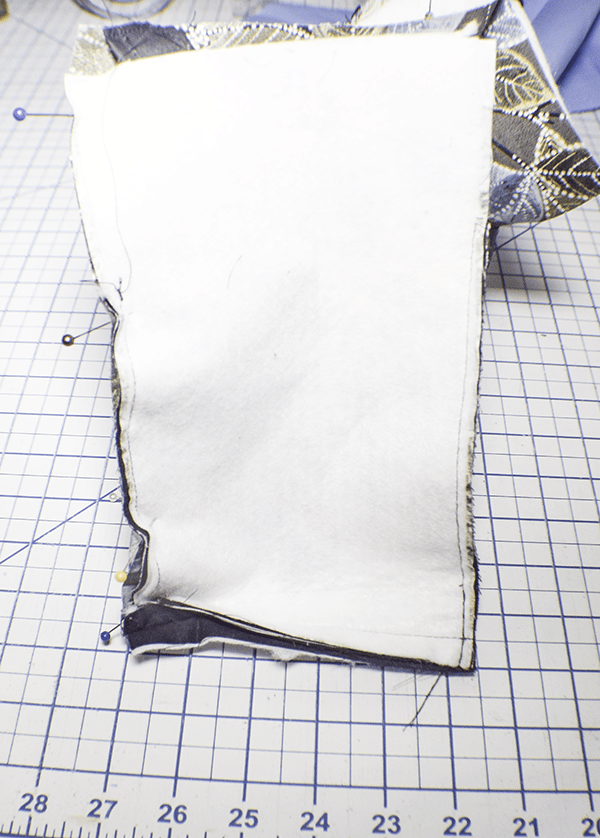
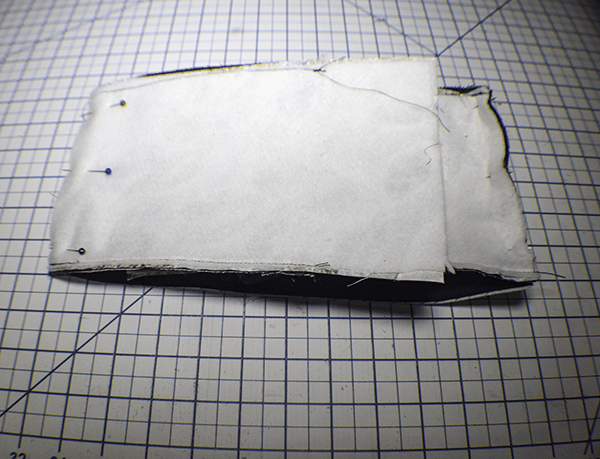
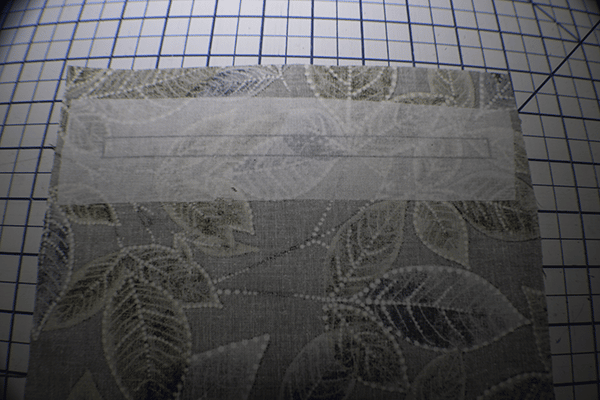
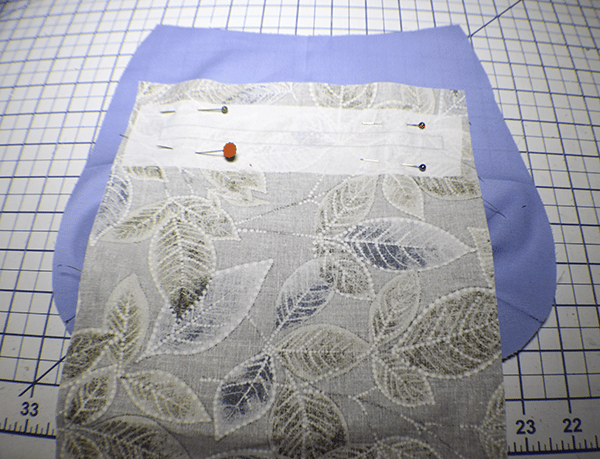
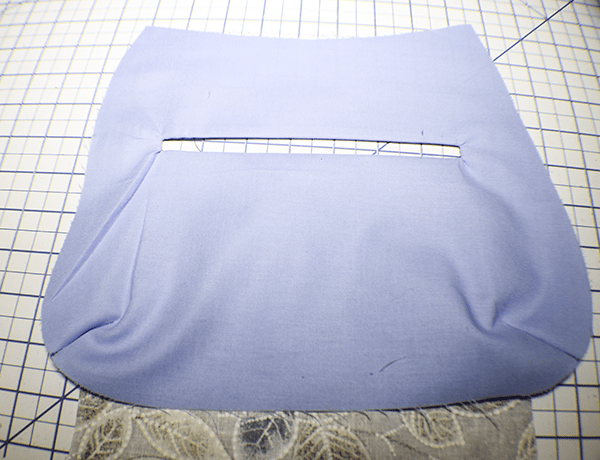
Step 8: Create the Inside Zipper Pocket
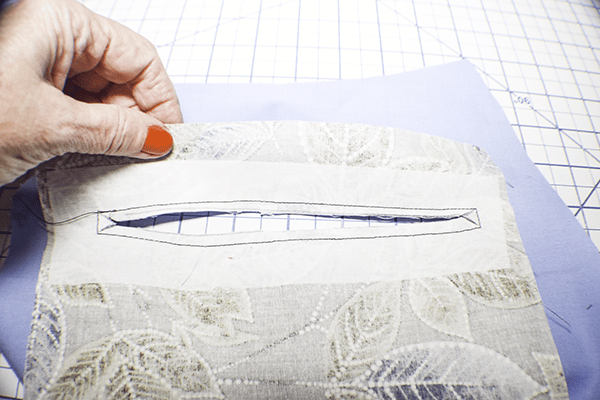
Take The final outer piece and measure down 1 1/2″ from the top on the wrong side and draw a rectangle that measures 7″ x 3/8″ and in the center of the top end. Place a piece of Pellon SF 101 over the box and fuse to give support to the zipper. Measure down 2″ from the top of one side of the lining bag one the right side and pin the outer piece in the center. Stitch around the box on the lines you just drew through all layers. Dra/8zw a line in the center with two triangles at each end. Cut the line and the triangle ends through all layers. Push the outer piece through the opening you just created and press.
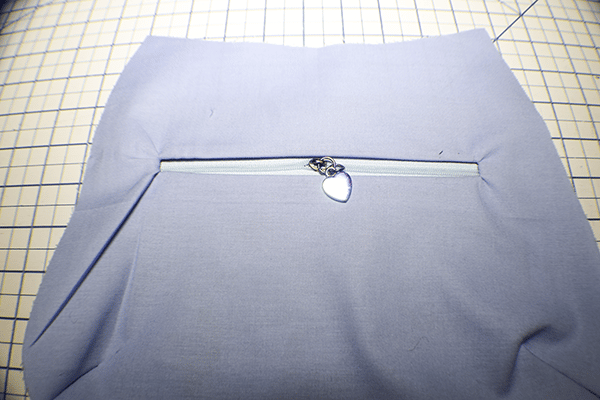
Place the zipper in the opening you just created on the wrong side so that the zipper pull I s facing the right side. Stitch all the way around the zipper to secure. Turn the piece to the wrong side. Fold up the outer piece so that the short ends meet. Stitch all the way around just the outer fabric to create the pocket.
Step 9: Add the Lining Gusset
Take the last remaining lining piece which is the gusset. Attach it in the same way you attached the outer gusset leaving an opening in one side for turning.
Step 10: Add the Lining to the Outer Bag
Play the outer bag inside the lining bag so that they are right sides together. Pin or clip matching any seams. Clip off any outer corners and snip the inner corners.
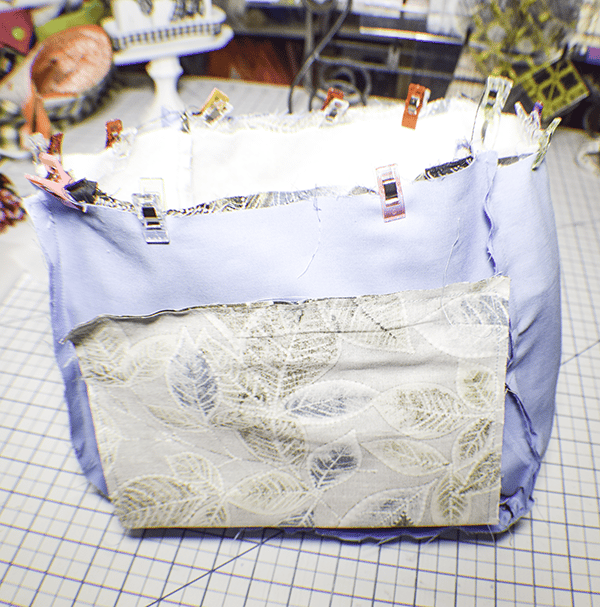
Step 11: Turn Right Sides Out
Reach into the opening you left in the lining and turn the bag right sides out. Close the opening in the lining using ladder stitch. Push the lining into the bag and press. Topstitch all the way around the top.
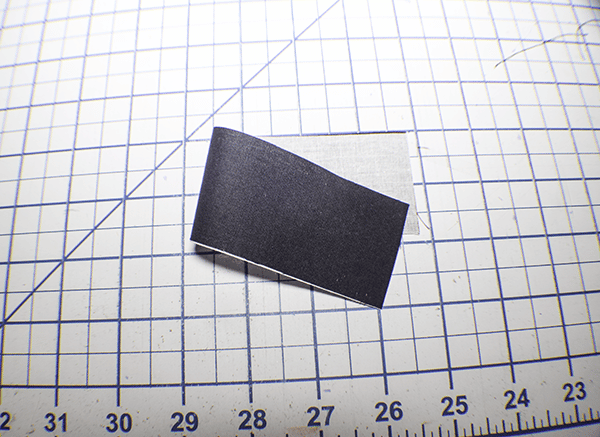
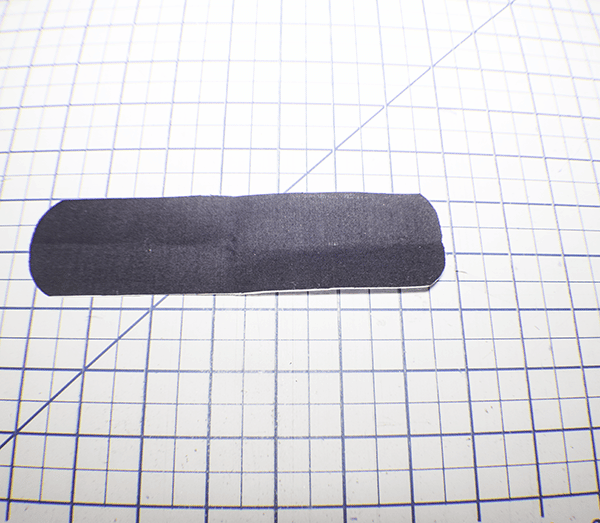
Step 12: Create the Closure
Take the final small piece of accent fabric and fuse the corresponding piece of interfacing. Fold it in half right sides together so that the short edges meet. Round the corners. Stitch the closure using a 3/8″ seam allowance but leaving an opening for turning. Trim the seams around the curved edge only. Turn right sides out and press. Topstitch all the way around closing the opening as you go. Add one half of the Kam snap to the rounded end of the closure. Measure down about 1″ from the top of the bag on the back of the bag in the center and stitch the square end of the closure to the bag. Fold over the closure to determine where the other half of the Kam Snap should go. Insert the other half of the cam Snap. You have now finished your handbag with side pockets.

I hope you enjoyed this handbag with side pockets. If you would like more sewing and crafting tutorials subscribe to our newsletter and receive your free eBook of 15 handbag patterns and tutorials taken from the blog.
If you would like video tutorials of some of Sew Very Crafty's most popular posts subscribe to our free YouTube channel here.


This is exactly what I would like to sew up, after my faux leather tote which I used constantly got grungy. Thank you
Excellent. Good luck with it.