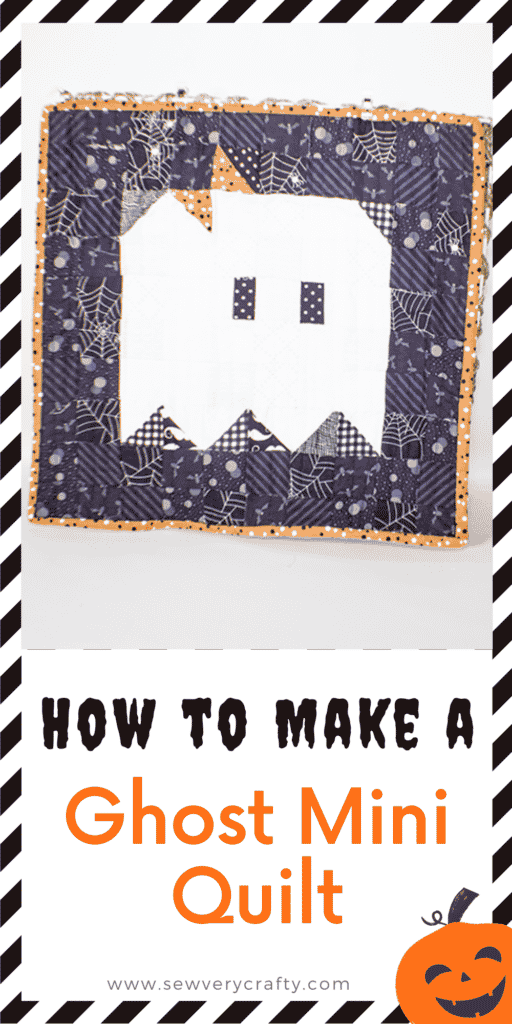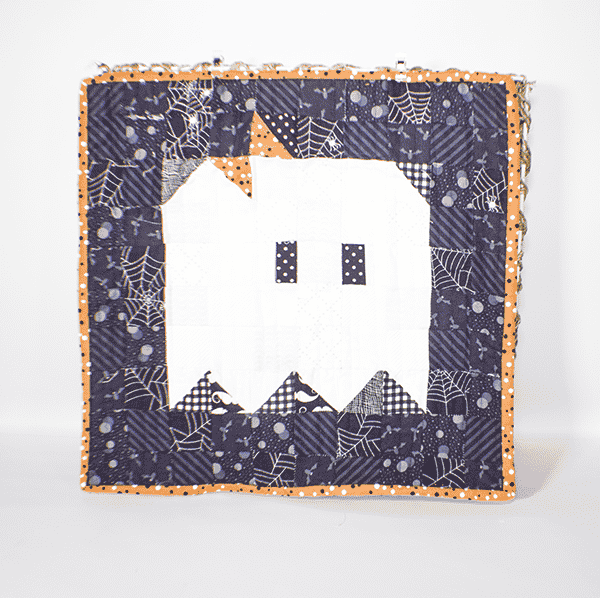
It may be the middle of summer but it is never too early to get ready for Halloween. I thought to share this ghost mini quilt so that you can get a start on your Halloween preparations. This is another beginner quilting project that can be made by any beginner quilter including me. It is a cute little quilting project that can be made with your scraps or stash. If you would like more of my beginner quilting projects head over to my quilting page and check them out.
I went to the fat quarter shop for the fabrics for this project but you could head to JOANN Fabric & Craft Stores![]() ,
,
What you will Need: How to Make a Ghost Mini Quilt
- Variety of white fabrics for ghost
- Scrap of black fabric for the eyes
- 1/2 yd of background fabric
- 1/2 yd of backing fabric and batting
- 1/4 yd binding fabric
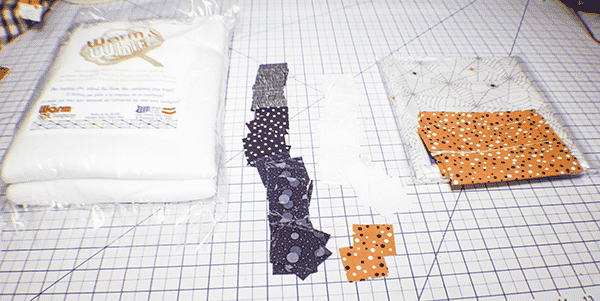
Step 1: Cut your Ghost Mini Quilt Fabrics
- 36 2″ white squares
- 87 2″ Black squares
- 2 2″ Orange squares
- 1/2 yd backing fabric
- 1/2 yd batting
- 2 1/2″ wide binding fabric
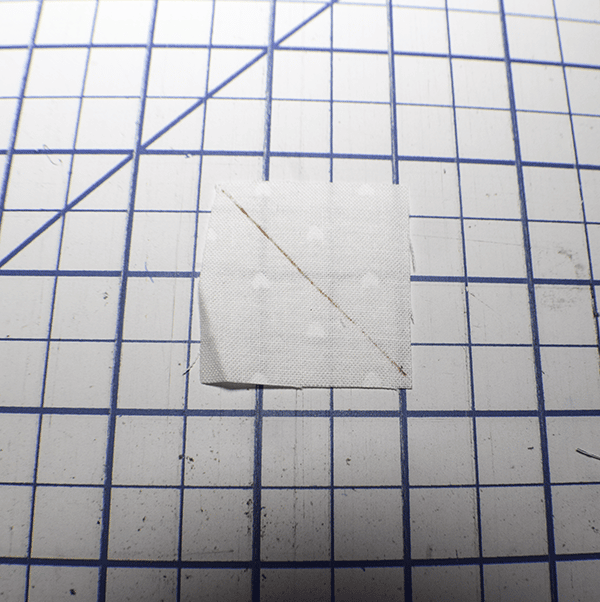
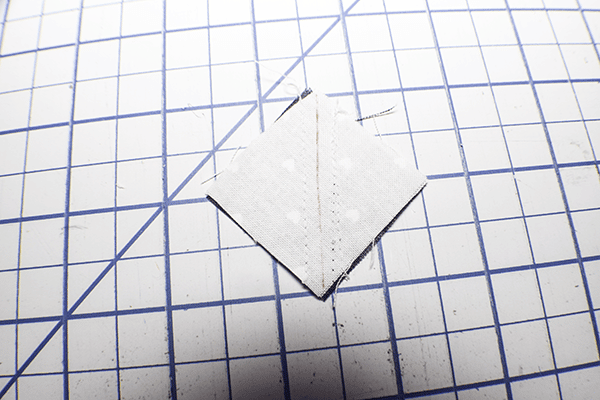
Step 1: Create the Half Square Triangles
There are ten half square triangles in this mini quilt pattern. Create eight using 2 3/8″ square white and 2 3/8″ black fabrics and one using 2 3/8″ black and 2 3/8″ and one using 2 3/8″ and white. In order to create the half square triangles take the lighter colored fabric and draw a line diagonally from corner to corner. Place the lighter colored fabric right sides together with the darker fabric and stitch 1/4″ on each side of the line that you drew. Cut the piece in half on the line. Open and press.

Step 2: Stitch the Ghost Eyes
Take a white piece measuring 2 1/2″ and draw a line down the center. Place it right sides together with a black square that measures 2 1/2″ and stitch 1/4″ on each side of the line. Cut it in half along the line that you drew. Open and press.
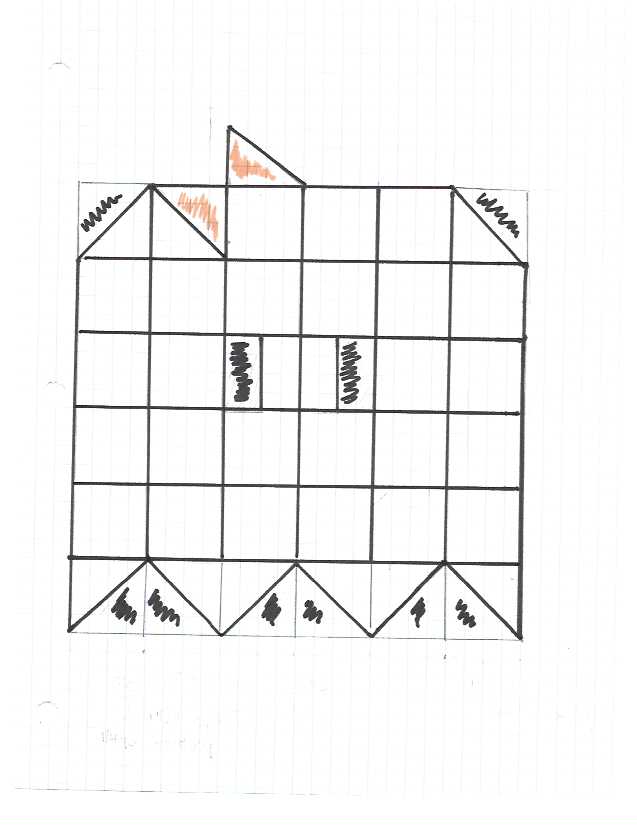
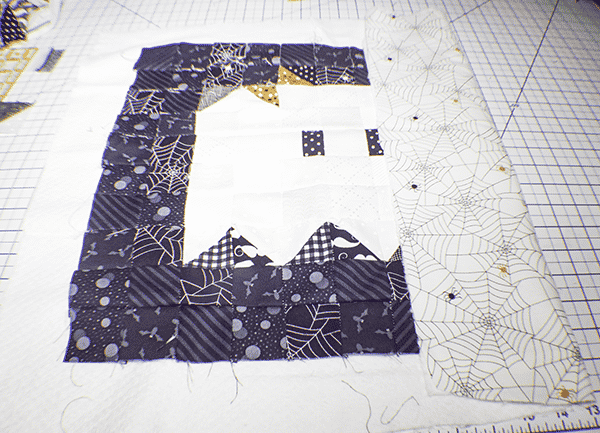
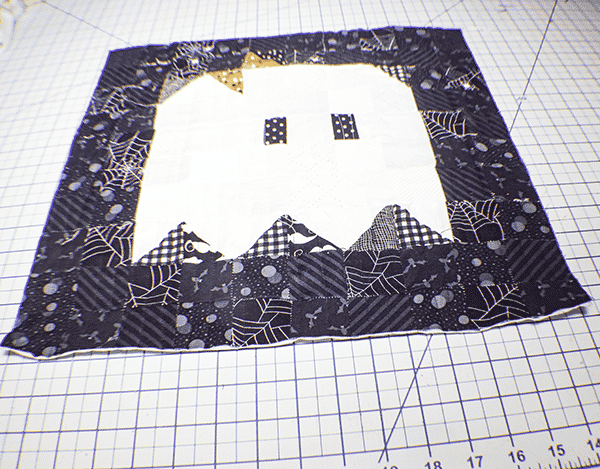
Step 3: Stitch the Ghost Mini Quilt
Stitch the squares together using a 1/4″ seam allowance. The squares should be stitched in accordance with the diagram below.
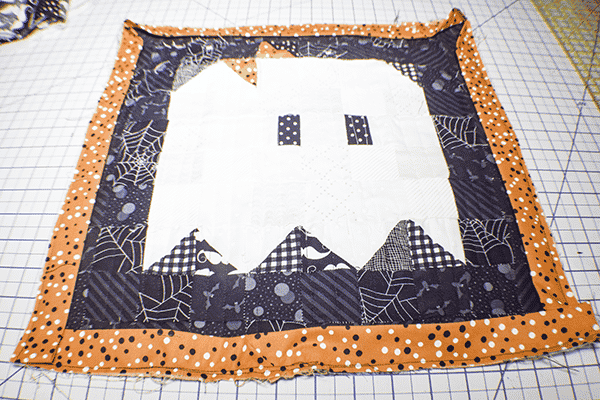
Step: 4 Layer the Ghost Mini Quilt
Lay the backing wrong side up on your work surface. Place the batting on top of the backing. Lay the quilt top over the batting and adhere using adhesive spray or pins.
Step 5: Quilt the Layers
Quilt the layers any way you like. I just stitched straight lines that were about 1/4″ apart. Trim the quilt to square it up.
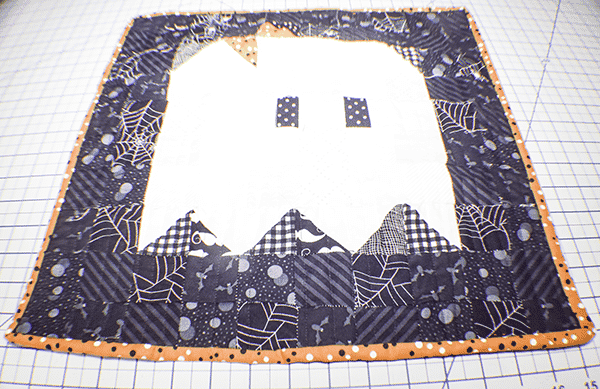
Step 6: Bind the Ghost Mini Quilt
Using the orange fabric bind the quilt following the instructions in the below video. Once you have bound the quilt you have finished this ghostly project.

I hope you enjoyed this ghostly quilting project. if you would like more sewing and crafting projects subscribe to our newsletter and receive access to our free printables library
If you would like video tutorials of some of Sew Very Crafty's mot popular posts subscribe to our free YouTube channel here.