
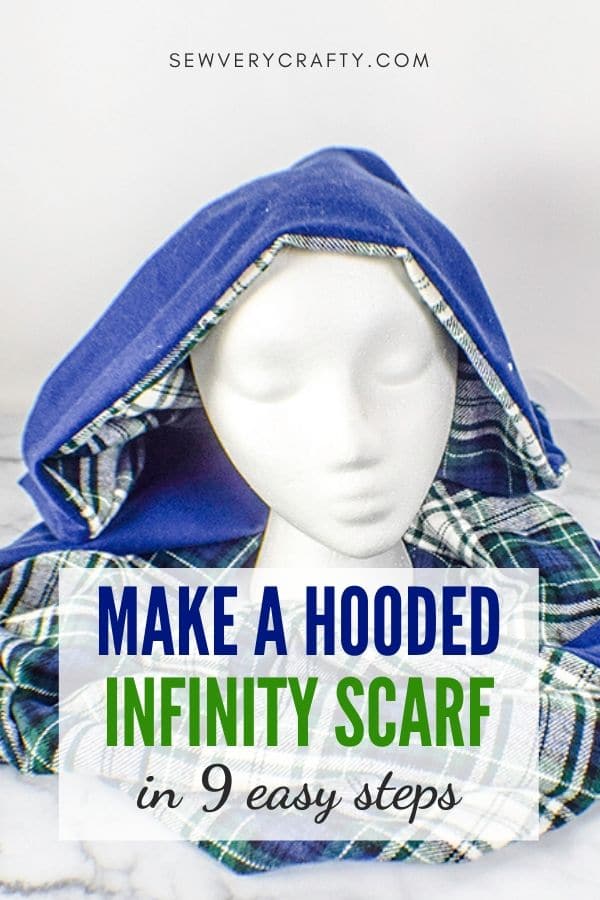
How to Make a Hooded Infinity Scarf
D
Now that it is winter I thought to share this terrific hooded infinity scarf that I found at DIBY Club. It is a fun, easy, and free pattern to create using your own choice of light weight wovens or two way stretch knits. I chose flannel for my project. It is the perfect winter accompaniment to any outer wardrobe. The pattern was a free instant downloadable and printable pattern with complete instructions. Even though the instructions were complete I thought I would do a photo tutorial for you as well using this terrific pattern.
I purchased my fabrics at Joann's online and picked it up in store but that is no longer an option so I would recommend that you head to Mood Fabrics, Michael's or Amazon Fabrics to get exactly what you want for this project. This post contains affiliate links that if you click on them and make a purchase I may receive a small commission at no extra cost to you.
If you would like a video of this project head over to YouTube and check out my video on how to make this lovely hooded infinity scarf. While you are there subscribe to my channel.

What you will Need: How to Make a Hooded Infinity Scarf
- Pattern you can get Here
- And here
- 1 3/8 yd main fabric
- 1 3/8 yd lining fabric
- Standard sewing supplies
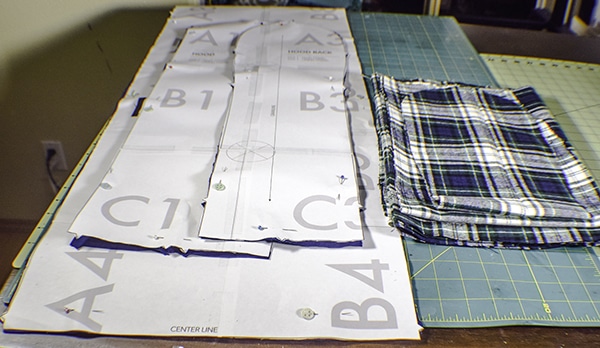
Step 1: Tape your Pattern
Download and print the pattern. Tape it together matching the markings. There are three pieces. A hood Piece, a hood back piece and a scarf piece.
Step 2: Cut your Fabrics
Cut your fabrics according to the directions on the pattern pieces. You will have 4 scarf pieces, 2 hood pieces and 2 hood back pieces in total. Make sure that you cut out the notches as they will be important when constructing the scarf.
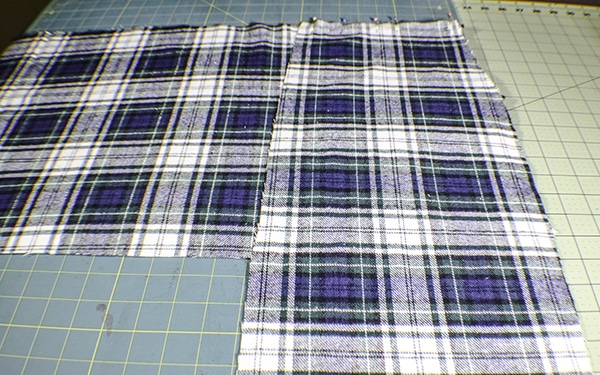
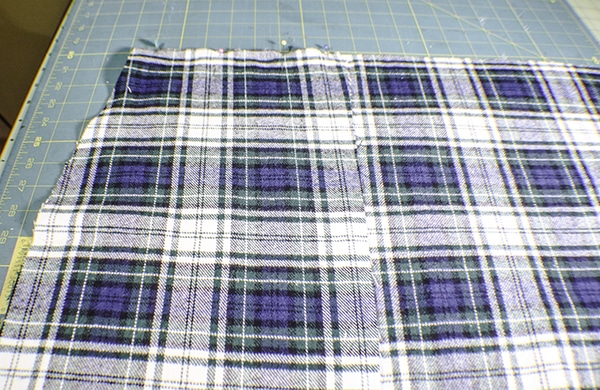
Step 3: Stitch the Hood Pieces
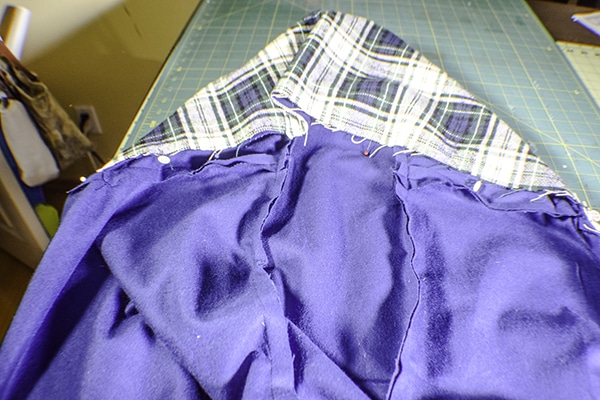
Place the outer hood piece right sides together with the outer hood scarf so that they are perpendicular and the three notches match. You will notice that there is a curved side to the hood piece. Make sure that it is facing toward the end of the scarf piece. Stitch the two pieces together using a 1/2″ seam allowance. Sew the other side of the hood piece to the second scarf piece in the same way using a 1/2″ seam allowance. You will have a giant “U” shaped piece of fabric with the hood piece in the center.
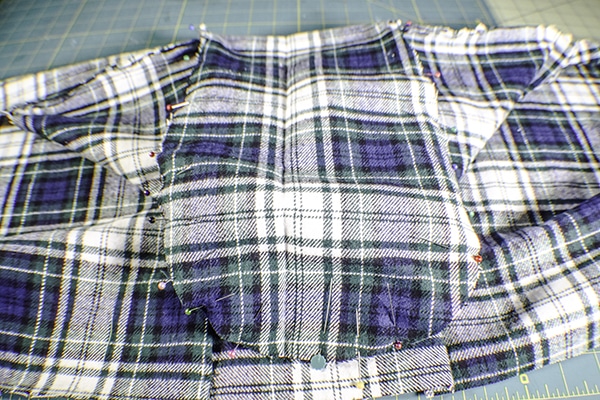
Step 4: Sew the Hood Back
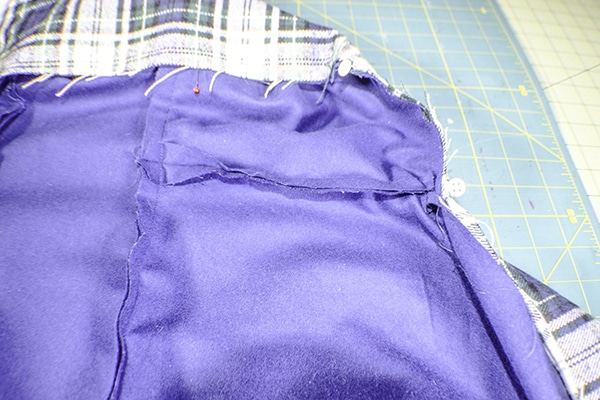
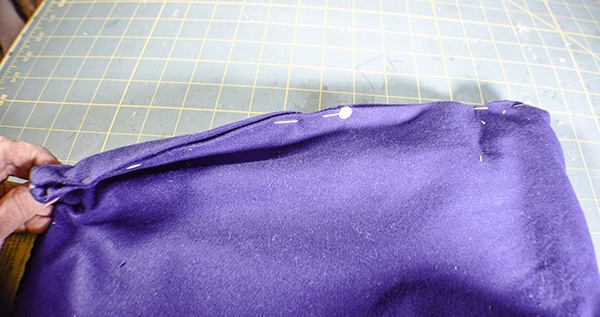
Place the Hood Back right sides together with the curved portion of the hood matching the center notches and pin. Continue to pin the curved hood back to the hood piece on both sides of the center notch until you reach the second notch on each side. Place enough pins in the hood so that the fabric does not ripple. Continue to pin the hood to the scarf. Match the the next set of notches with the seam where the hood and scarf pieces meet. Continue to pin the hood to the end of the piece matching the final set of notches. Using a 1/2″ seam allowance and starting at one end sew around the entire hood piece.
Step 5: Sew the Lining
Repeat steps 3 and 4 to complete the lining. You will now have two identical pieces; one outer and one lining.
Step 6: Stitch The Upper lining to the Outer Fabric
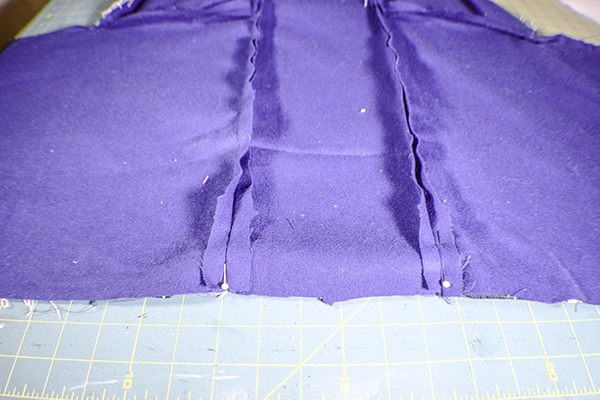
Place the lining to the outer fabric right sides together. Pin everything but the short bottom ends. Starting at the end of the scarf, sew around the top edge then around the hood and back to the end of the scarf using a 1/2″ seam allowance.
Step 7: Sew The Lower lining to the outer Fabric
Pin the lower part of the lining and outer piece together and stitch around the bottom using a 1/2″ seam allowance. This is really just one long seam. The scarf ends will still be raw. Do not sew them together.
Step 8: Turn the Scarf
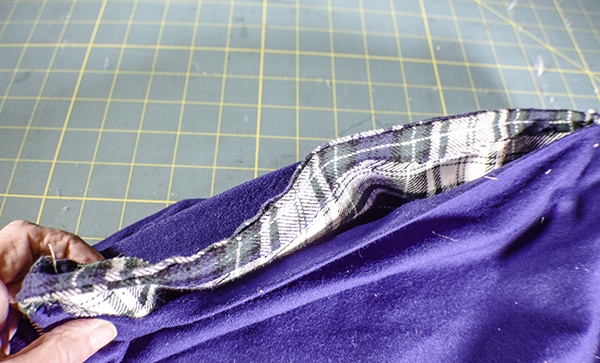
Turn the raw ends under by 1/2″ and press. Turn the scarf right sides out.
Step 9: Stitch the ends together
Start by stitching the outer ends right sides together using your machine. Sew the lining ends together by hand using ladder stitch. If you are unfamiliar with ladder stitch check out this video. You have now finished your hooded infinity scarf. It is reversible too!!!


I hope you enjoyed this project. If you would like more sewing and crafting projects sign up for our newsletter and receive access to our free printables library.
If you would like more scarf projects check out our infinity scarf tutorial or our how to make a pom pom scarf tutorial.
[mv_create key=”12″ title=”How to Make a Hooded Infinity Scarf” type=”diy”]


I totally love your scarf pattern!
I have a real nice fleece printed on both sides (my Alma Mater) would this be suitable for your pattern Then blanket stitch all my raw edges? Help!
Thank you. This scarf is a DIBY pattern and there should not be any raw edges to it. I would think that you could use any fleece for this project. I actually used flannel for mine. Your do not want the fabric to be too thick as it will be bulky in the finished product. Good luck making this project.
I have no idea how all these pieces fit together. Can you provide a schematic?
This is not my pattern so I do not have a schematic. However, the pattern pieces go together in order by letter and number. You should end up with three pattern pieces A,B and C. Just match the Xs to join the pieces together.