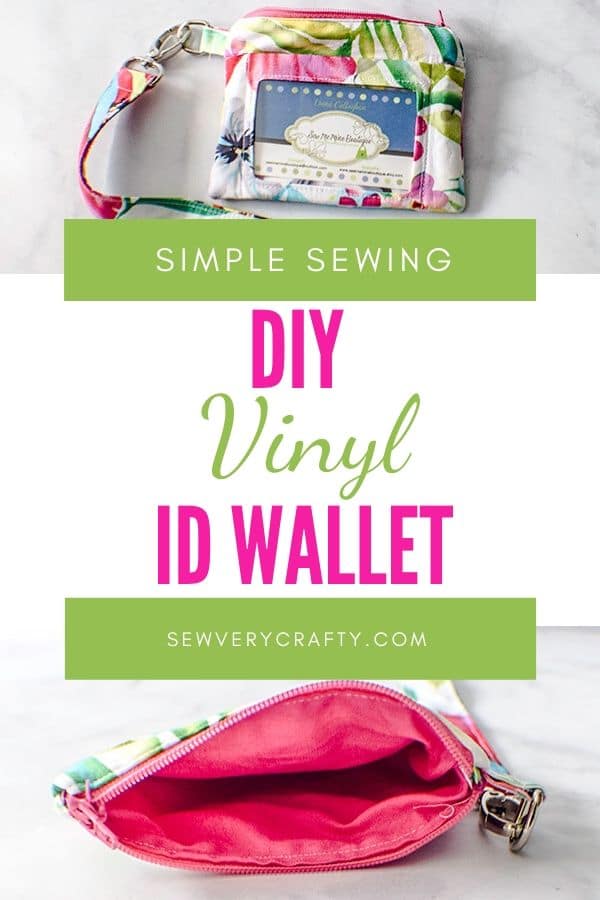
How to Make an ID Wallet
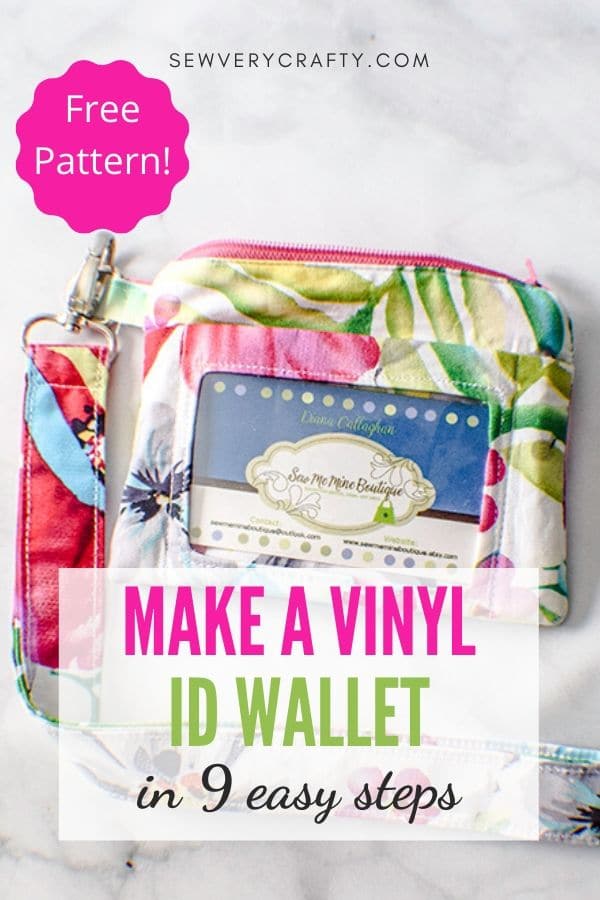
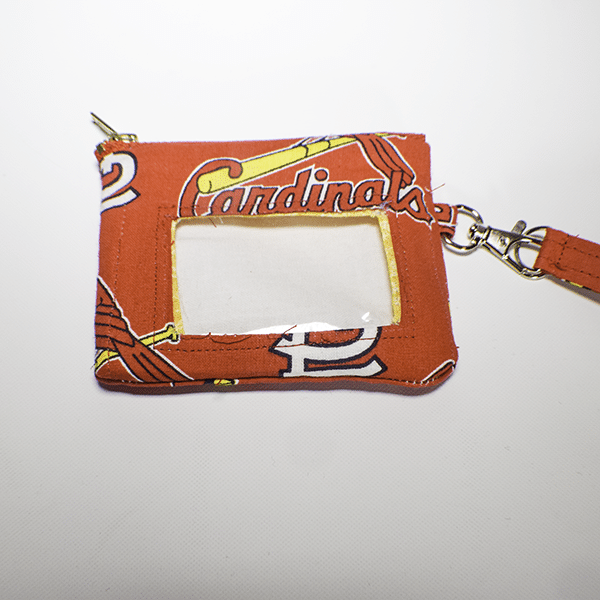
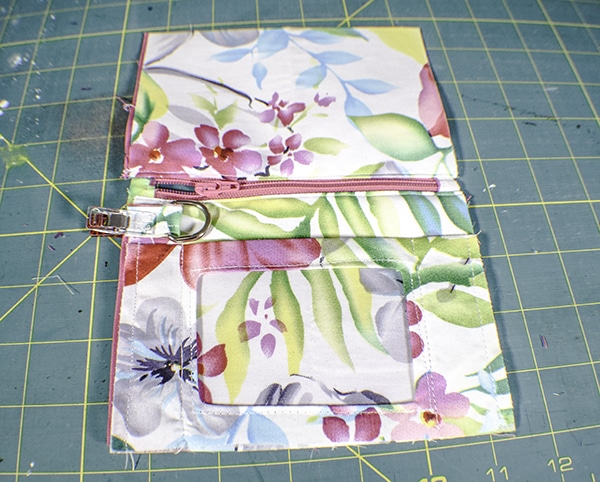
How to Make an ID Wallet. Sometimes you just need a simple ID wallet. You don't want to always take out your driver's license so you can just flash it through the clear vinyl pocket. Maybe you have a work ID or a bus pass that you need to flash all the time. Well this simple sewing project is the answer to your problems. Not only can you place your ID in the clear pocket there is a place for change and a lip gloss or other bits and bobs. You can also attach a wrist strap or a key ring for even more functionality. I work at a job where I need to flash a work ID to get into the building so this is the perfect project for me. This is a confident beginner project because of the zipper but overall it is pretty simple to make.
This is a perfect fat quarter or remnant project as the amount of fabric required is small. You can often find the vinyl as a remnant as well. I used remnants that I purchased at JOANN Fabric & Craft Stores![]() but you could head over to Hobby Lobby or Fabric.com to get exactly what you need. I like remnants because they are always at least 50% off and occasionally they are even 75% off so you get a lot of bang for your buck. Of course the selection isn't always great so it is a trade off. This post contains affiliate links that if you click on them and make a purchase I may receive a small commission at no extra cost to you. As an Amazon Associate I earn from qualifying purchases.
but you could head over to Hobby Lobby or Fabric.com to get exactly what you need. I like remnants because they are always at least 50% off and occasionally they are even 75% off so you get a lot of bang for your buck. Of course the selection isn't always great so it is a trade off. This post contains affiliate links that if you click on them and make a purchase I may receive a small commission at no extra cost to you. As an Amazon Associate I earn from qualifying purchases.
If you would like a video of this tutorial head over to YouTube and check out my video. While you are there subscribe to my free youTube channel.

What you will Need: How to Make an ID Wallet
- Card Pocket Pattern
- 1/4 yd outer fabric
- 1/4 yd lining fabric
- 6″ zipper
- 1/4 yd Pellon SF101 interfacing
- Clear vinyl 3″ x 4 1/2″
- 1/2″ D Ring or Key Ring
- 1″ swivel clip (Optional)
- Standard sewing supplies
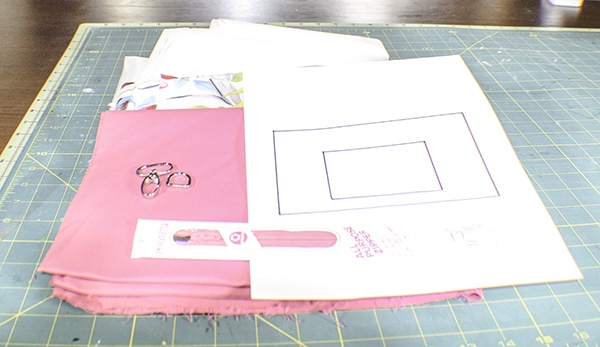
Step 1: Cut your Fabrics
Cut two pieces of outer fabric and lining fabric that measure 4 1/2″ x 6″. Cut two pieces of outer fabric that measure 2 1/2″ x 4″ for the zipper tabs. You should have one clear vinyl piece that measures 3″ x 4 1/2″. Cut out the outer part of the card pocket template with interfacing to match. You will not cut out the center until after you have attached the interfacing. Cut a 2″ x 2″ piece of outer fabric for the ring tab. If you want a wrist or neck strap measure the length that you would like it to be x 4″ wide. Add interfacing to the strap. You will need additional fabric and interfacing if you choose to go this route.
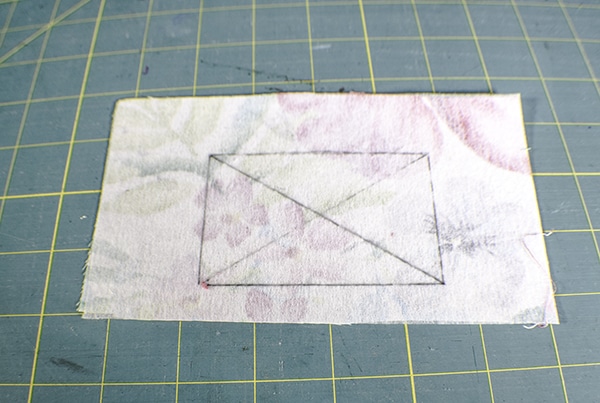
Step 2: Create the Window Pocket
Fuse the interfacing to the wrong side of the one of the 4 1/2″ x 6″ pieces which will become the window pocket fabric following the manufacturers instructions. Place the pattern piece on top of the wrong side of the fabric on top of the interfacing and trace the inner box. Using a ruler, draw an X inside the inner box from corner to corner. Cut along just the diagonal lines of the X. Press the flaps open.

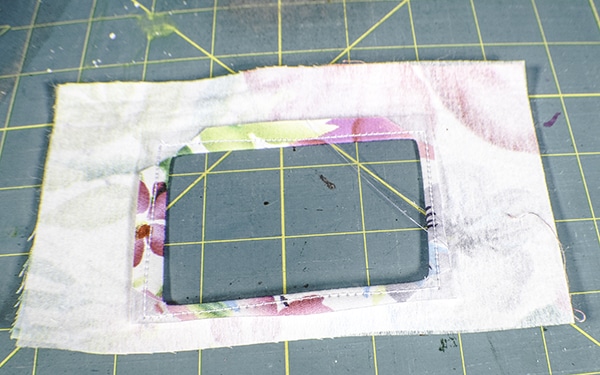
Step 3: Add the Window
Center the vinyl sheet on the wrong side of the window pocket on the opening you just created. Stitch the vinyl to the pocket using a 1/8″ seam allowance. Trim off the excess flap pieces.

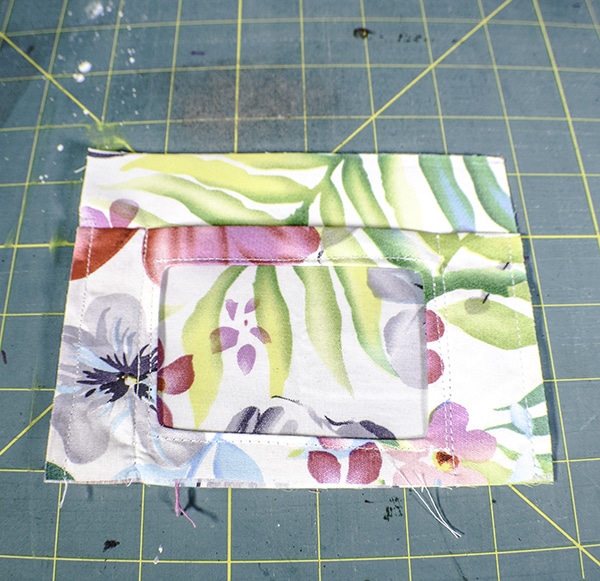
Step 4: Add the Window Pocket
Fold the top edge under 1/4″ and then again by 1/4″ to create a finished edge and press. Be careful not to press the vinyl because it will melt. Place the completed card pocket onto one of the outer pieces so that the raw edges are aligned. Sew the card pocket to the outer piece 1/4″ from the finished edge of the window on each side.
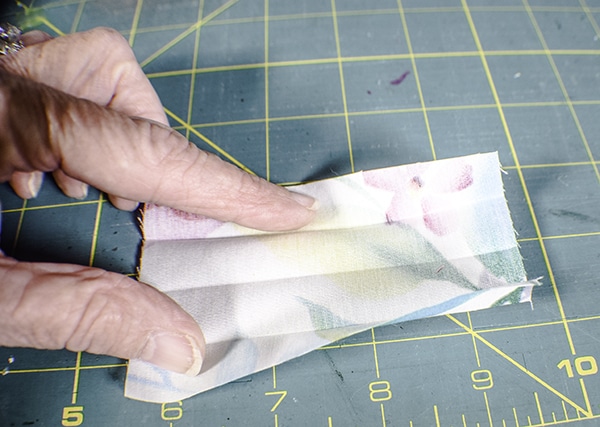
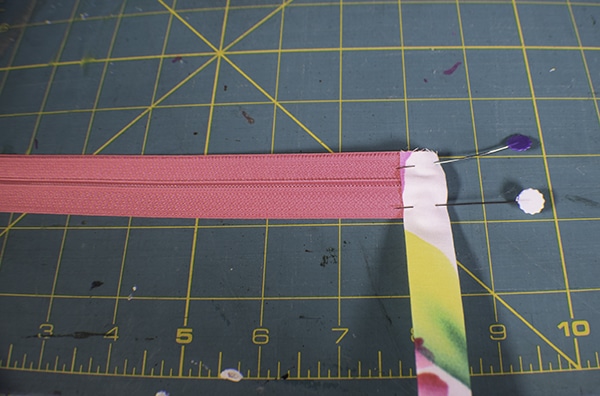
Step 5: Add the zipper Tabs
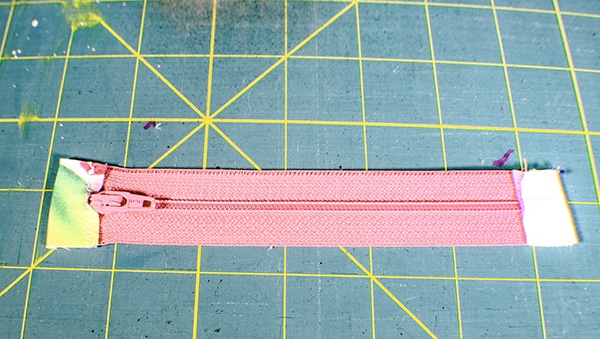
Create the zipper tabs by folding the tab piece in half wrong sides together and pressing. Open the piece and fold the raw edges to the center and press again. Fold in half again. Put the zipper pull in the center of the zipper. Cut the zipper so it measures 6″ long. I cut the top and the bottom of the zipper equally. Wrap the bottom of the zipper with the tab. Using a 1/8″ seam allowance stitch along the edge closest to the zipper. Cut the tab so that it is even on both sides of the zipper. Repeat with the other end of the zipper. Your zipper should measure 6″ long. The zipper tabs will make sewing the wallet easier and opening the zipper easier as well.
Step 6: Sew the zipper to the wallet
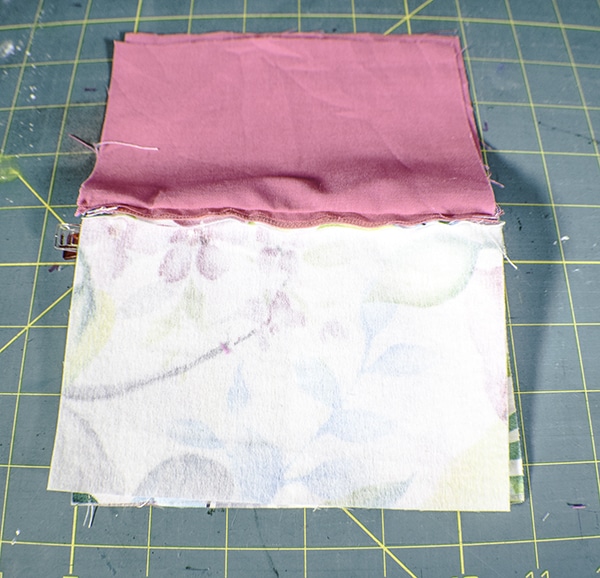
In order to sew the outer wallet and the lining to the zipper lay your outer fabric right sides up on your work space. Lay the zipper right sides down on the outer fabric then lay the lining piece right sides down on the zipper. You will be making a zipper sandwich. Stitch the zipper to the fabrics using a zipper foot. Turn the fabrics right sides out and press. Top stitch the zipper using a 1/8″ seam allowance. Repeat for the other side of the zipper.

Step 7: Stitch the Ring Tab
Take the 2″ x 2″ square of outer fabric and fold the raw edges to the center and press. Fold in half so that the raw edges are enclosed. Top stitch along both sides of the tab. Place a D-ring or a key ring between the tab.
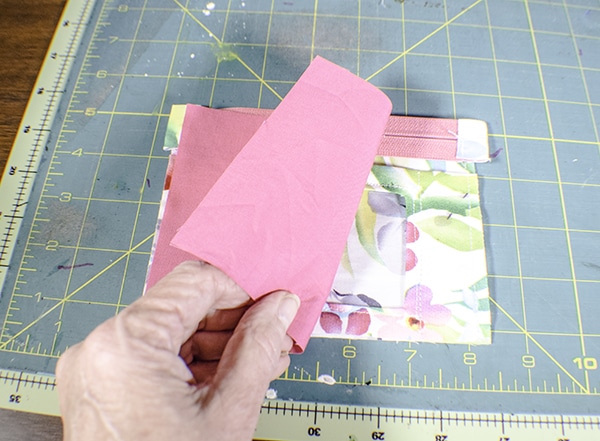
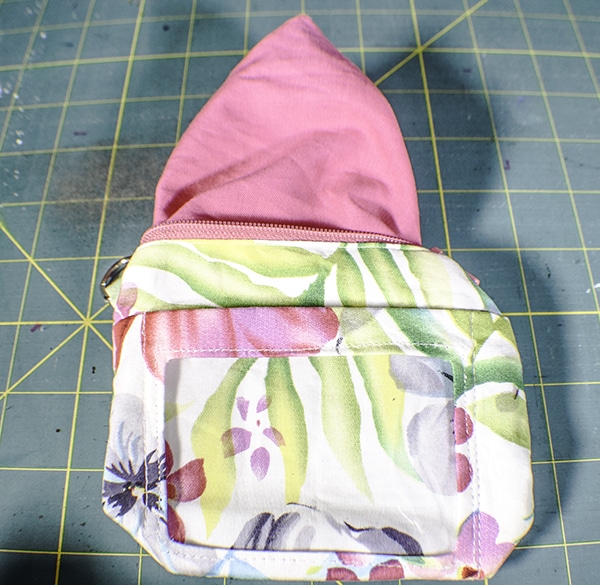
Step 8: Stitch the wallet
Place the ring tab with the D-ring or key ring just below the zipper on the window side of the wallet so that the tab is facing toward the wallet and pin. Unzip the zipper half way. This is important. Place the two outer pieces right sides together and the lining pieces right sides together with the zipper in the center. Sew all the way around the wallet leaving a 2″ opening at the bottom of the lining.
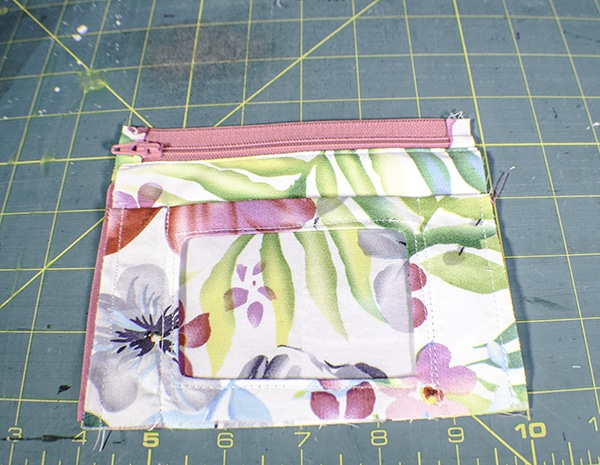
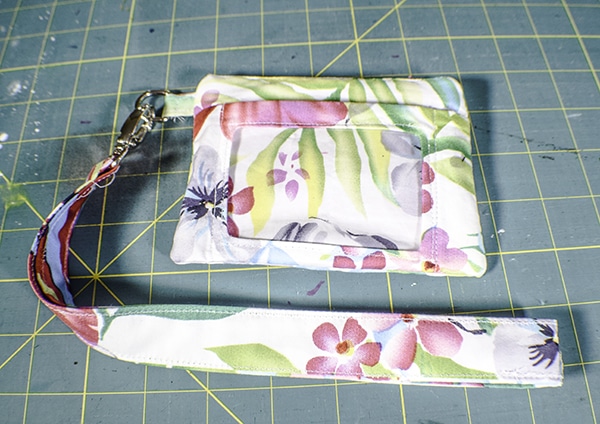
Step 9: Turn the Wallet
Turn the wallet through the opening in the lining and the opening in the zipper so that the wallet is right side out. Poke out the corners using a poking tool like That Purple Thang. Sew the opening in the lining closed using ladder stitch or by machine. The wallet is complete at this point. If you want to add a strap to your wallet go to step 10.
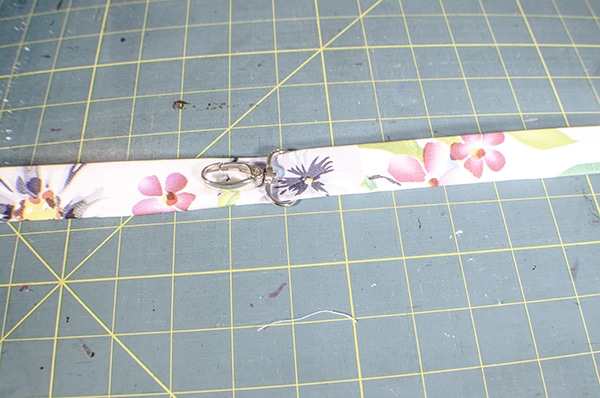
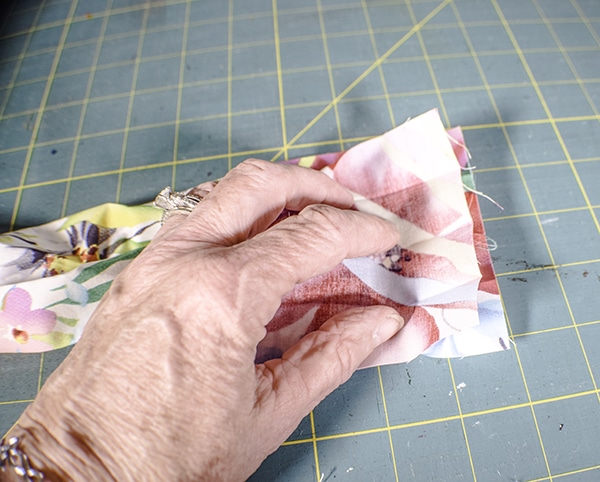
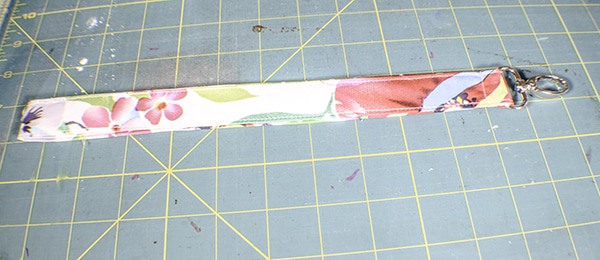
Step 10: Create the strap
Measure and cut your strap to the dimensions specified. Fold the strap in half lengthwise and press. Open the strap and fold in the raw edges to the center and press. Fold in half again to enclose the raw edges and press. Add the swivel clip to the strap. Unfold and place the short edges right sides together and stitch using a 1/4″ seam allowance. Press open the seam and refold the strap. Top stitch both sides of the strap all the way around. Stitch across the strap near the swivel clip so that it doesn't slide around. You have now finished your strap. Clip the strap to the D-ring or key ring and your wallet is ready to go where you go. I hope this tutorial showed you how to make an ID wallet of your own.
I hope you enjoyed this project. If you would like more sewing and crafting projects sign up for our newsletter and receive your free eBook of 15 handbag patterns and tutorials.
If you would like another simple wallet project check out my BI-fold wallet project or If you would like a DIY Lanyard and ID holder check out that tutorial as well.