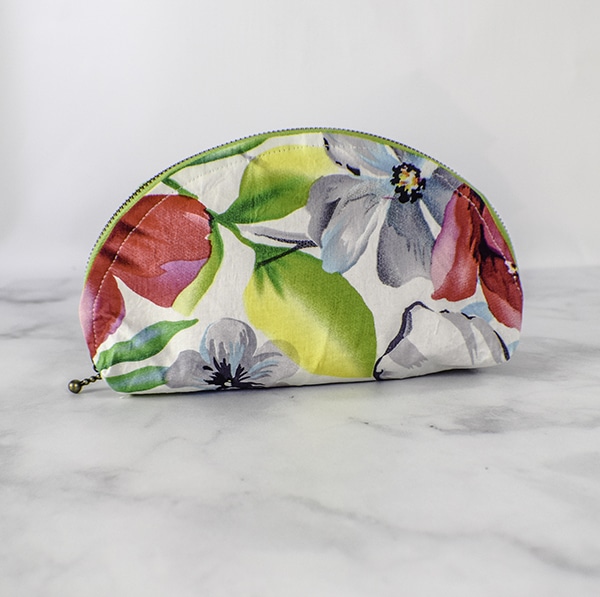
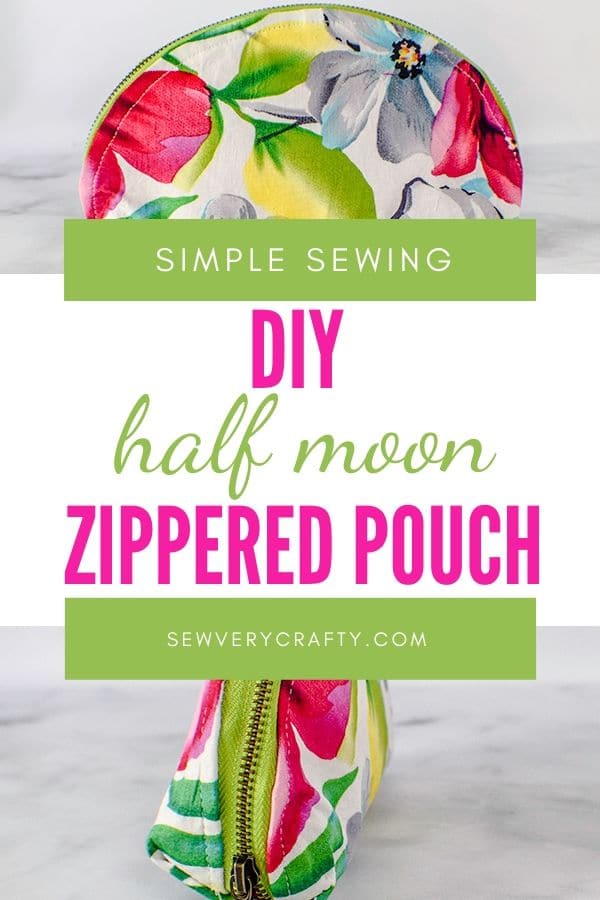
How to Make a Half Moon Zippered Pouch
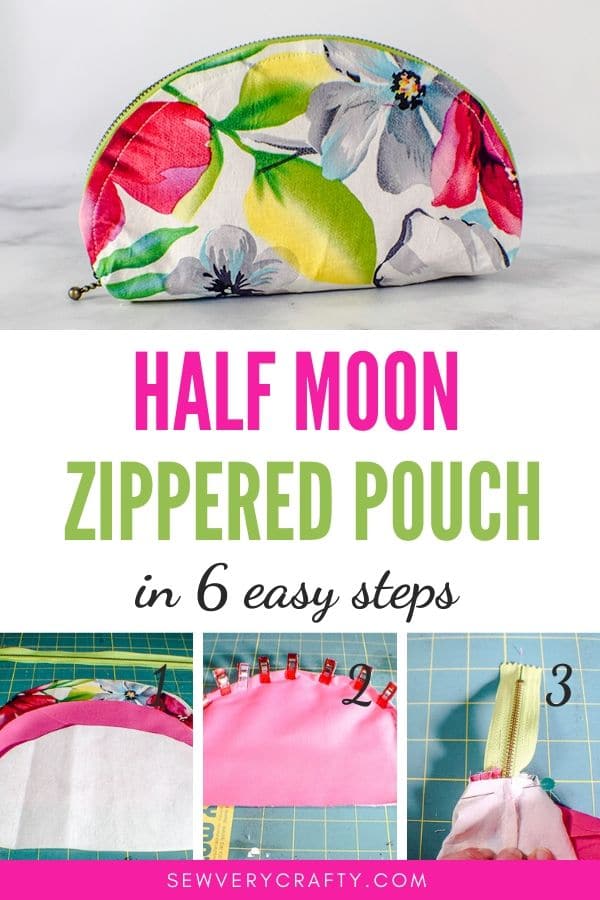
I love making zippered pouches and this half moon zippered pouch was no exception. I love the shape of this pouch. It is fun and functional. This pouch is perfect for makeup, supplies and other small items. It is also a perfect fat quarter project. I used a floral remnant for this project with a bright pink lining. I used a green zipper as an accent. The fabrics really make this a fun project. You can definitely make it your own.
I obtained this remnant from Joann's but you can head to Hobby Lobby or Fabric.com to find the perfect fabric for your project. I added some interfacing to my pouch to give it a little more structure but otherwise it is just fabric and a zipper. This post contains affiliate links that if you click on them and make a purchase I may receive a small commission at no extra cost to you. As an Amazon Associate I earn from qualifying purchases.
What you will Need: How to Make a Half Moon Zippered Pouch
- Pattern that you can get here!!
- 1/4 yd outer fabric
- 1/4 yd lining fabric
- 16″ or longer zipper
- 1/4 yd. Pellon 808 interfacing
- Standard Sewing supplies
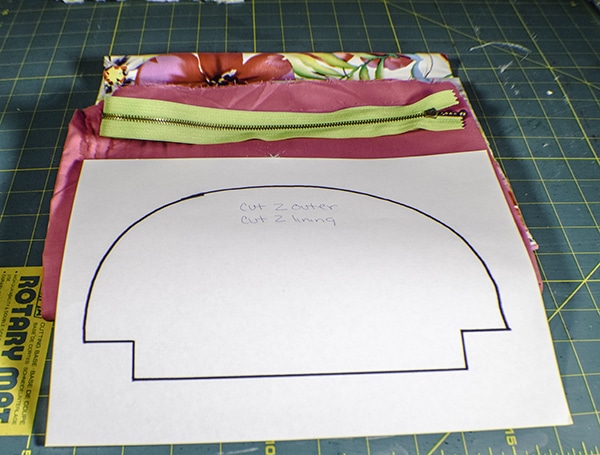
Step 1: Cut out your Fabrics
Using the pattern cut out two outer pieces, two lining pieces and two interfacing pieces.
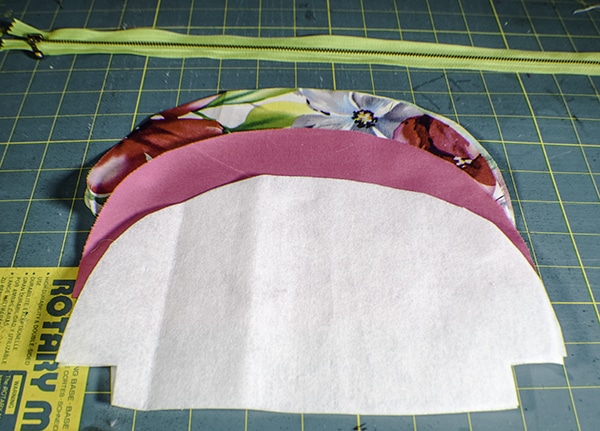
Step 2: Fuse the Interfacing
Fuse the interfacing to the outer fabric following the manufacturer's instructions. If you are unfamiliar with how to fuse interfacing it is a simple process. Simply place the shiny glue side on the wrong side of the outer fabric and press with a hot iron. The glue will begin to melt and fuse with the fabric so the two pieces will act as one.
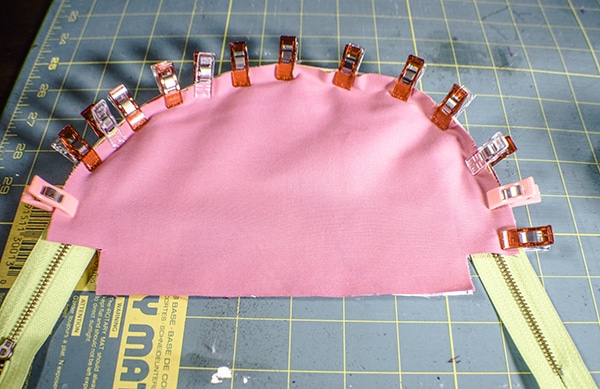
Step 3: Attach the zipper
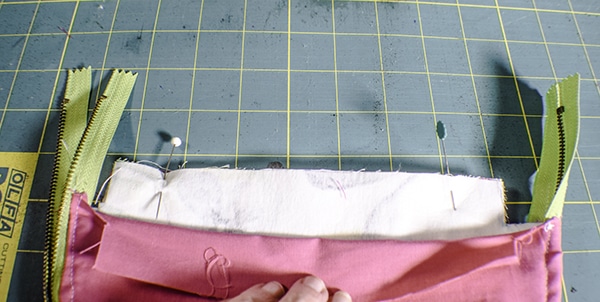
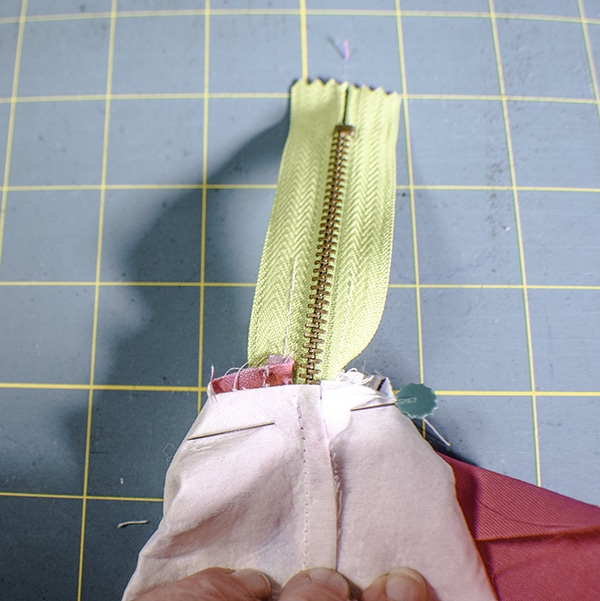
Find the center of your zipper and the center of your half moons and mark. Place the outer fabric right sides up on your work space. Lay the zipper right side down on the outer fabric matching the center markings. Place the lining fabric right side down on the zipper matching the center markings so that you have a zipper sandwich. Clip the zipper all the way around the moon part of the bag using wonder clips. If you don't have wonder clips you can get them here.
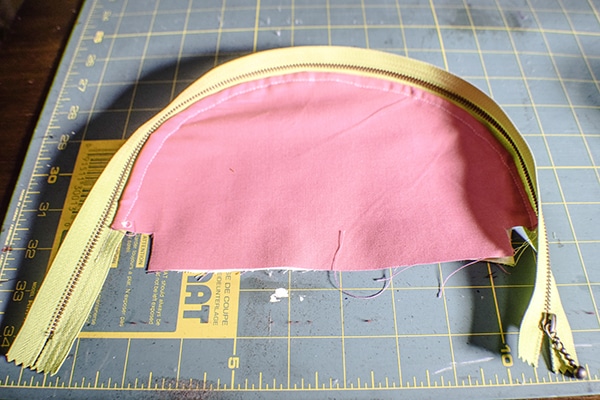
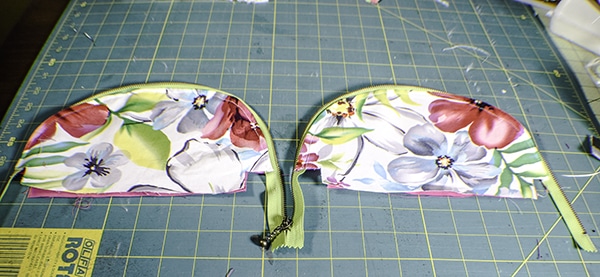
Stitch using a zipper foot. Repeat for the other side of the zipper. Top stitch the zipper on both sides. You should now have two sides of the pouch with the zipper in the center. You will notice that I used a longer than necessary zipper. I did this because it is what I had on hand. I find it a little easier to use the longer zipper and just cut off the ends. Open the zipper about half way.
Step 4: Sew the bag
Sew the bottom of the outer bag using a 1/4″ seam allowance. Stitch the bottom lining pieces together using 1/4″ seam allowance but leaving an opening for turning.
Step 5: Box the Bottoms
Box the bottoms of the outer bag and the lining by pinching the square opening closed on both sides. You will catch part of the zipper when you do this which is the correct thing to do. Stitch using a 1/4″ seam allowance. You can box the lining and the outer bog separately or together it doesn't really matter.
Step 6: turn the bag
Turn the bag right side out through the opening you left in the lining and through the open zipper. Sew the opening closed using ladder stitch. You have now finished your half moon zippered pouch.
I hope you enjoyed this project. If you would like more sewing and crafting projects sign up for our newsletter and receive your free eBook of 15 handbag patterns and tutorials.
If you would like more zippered pouch tutorials check out our pencil case tutorial or our makeup bag tutorial.
[mv_create title=”How to Make a Half Moon Zippered Pouch” key=”11″ type=”diy”]