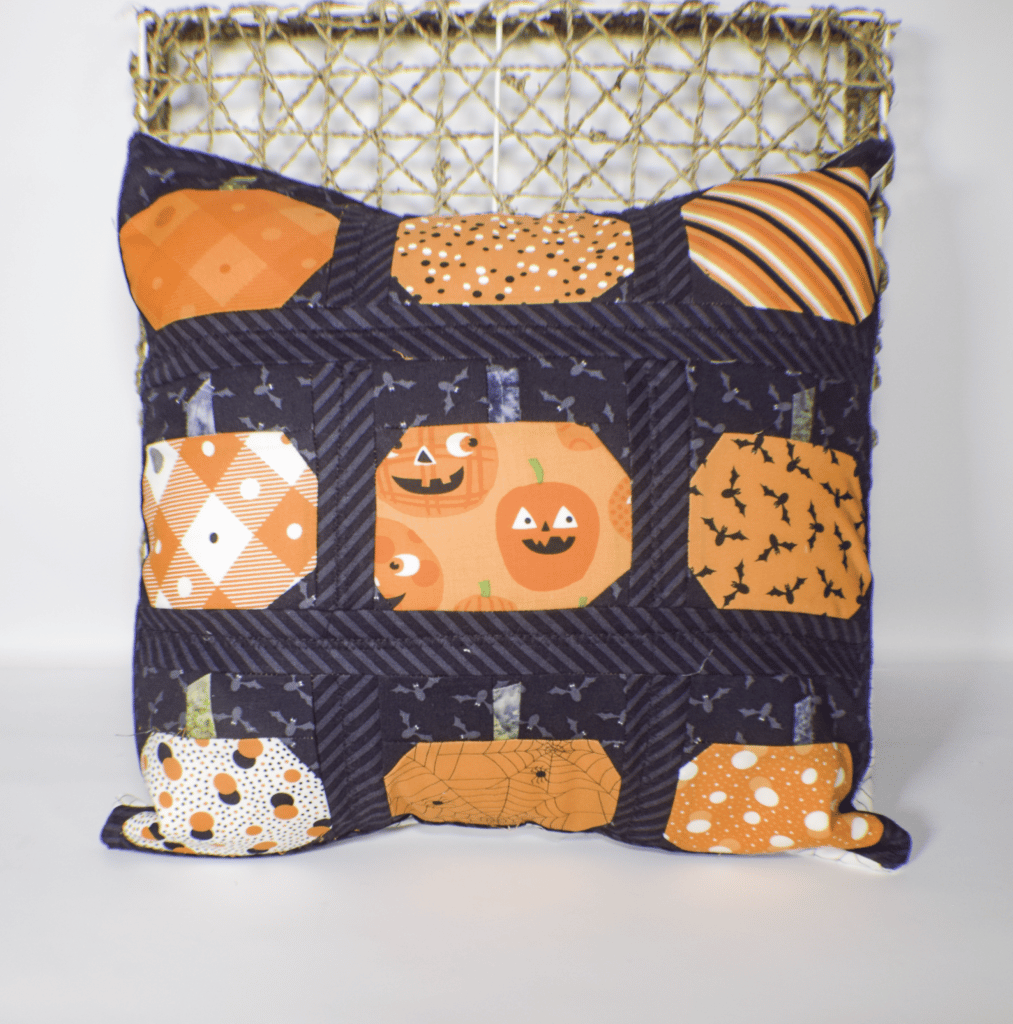
Halloween is closer than we think. Decorating for Halloween is always fun. This year I decided to create this terrific quilted pumpkin pillow cover to add to my Halloween decor. This is a simple beginner quilting project that any beginner quilter can make. I also made a companion quilted pumpkin table runner that you will see in a companion post. This is a really fun little Halloween pumpkin project to make so I hope you will give it a try. If you would like more of my beginner quilting projects check out my quilting page here.
I purchased fabrics for this project at the Fat Quarter Shop. I used the Too Cute to Spook line from Moda fabrics designed by Me and My Sister Designs. It was a little more pricey than I usually spend on fabrics for my projects but I really liked this line. You, of course, could head to Mood, Michaels or
What you will Need: How to Make a Quilted Pumpkin Pillow Cover
- Pattern Pieces you can get by clicking on this Link
- Variety of orange fat quarters or scraps
- Variety of black fat quarters
- 1/4 yd batting
- 1/4 yd backing fabric

Step 1: Cut Your Fabrics
Using the pattern pieces cut the fabrics according to the attached Diagram. You will also need two strips that measure 14 1/2″ x 1 1/2″ and two that measure 16 1/2″ x 1 1/2″ for the border. For the sashing cut six 4 1/2″ x 1 1/2 strips for the vertical sashing strips and two 14 1/2″ x 1 1/2″ pieces. You will then cut two pieces for the back of the pillow. The best way to do this is to cut one piece the length of the pillow form + 6″ x the width of the pillow form. For my pillow I cut a single piece that measured 22″ x 16″. Cut the second piece in half. That left me with two pieces that measured 11″ x 16″. Your measurement will be different depending on the size of your pillow form.

Step 2: Create the Pumpkin Block
Stitch the pieces together using a 1/4″ seam allowance starting at the corners of the pumpkin. Once you have completed the main part of the pumpkin create the top part of the block. Stitch the top to the bottom to create the pumpkin. Create all nine pumpkins.


Step 3: Add the Sashing
The sashing are the strips that separate the the pumpkins. To do this add the 4 1/2″ horizontal sashing pieces between the pumpkin blocks so that you have three rows of pumpkins. Then add the 14 1/2″ x 1 1/2″ sashing pieces to combine the rows

Step 4: Add the Border
Add the 1 1/2″ x 14 1/2″ top and bottom borders first. Once you have added those borders add the side borders.

Step 5: Square up the Pumpkin Top
You will notice that the top of your pumpkin pillow over will be a little wonky. Using a rotary cutter and mat square up the top so that it measures 16″ square.

Step 6: Layer and Quilt
Layer the top with batting and backing and quilt as desired. I just quilted the sashing and borders in a triangle design. Trim off the excess batting and backing.
Step 7: Add the Back of the Pill0w Case
Hem one of the 16″ sides of both of the back pieces by folding the raw edge under 1/2″ then again by 1/4″. Sew the hem either by hand or machine.

Step 8: Place the Back to the Front
Pin the front and back pieces right sides together with the hemmed edges toward the center and over lapping. Sew all the way around the perimeter using a 1/4″ seam allowance.

Step 9: Turn Right Sides Out
Turn the cover right side out and poke out the corners. Insert the pillow form and you have finished your envelope pillow cover for any size square pillow. Turn right sides out and poke out the corners.
I hope you enjoyed this quilted pumpkin pillow cover project. if you would like more sewing and crafting projects subscribe to our newsletter and receive access to our free printables library
If you would like video tutorials of some of Sew Very Crafty's most popular projects subscribe to our free YouTube channel here.