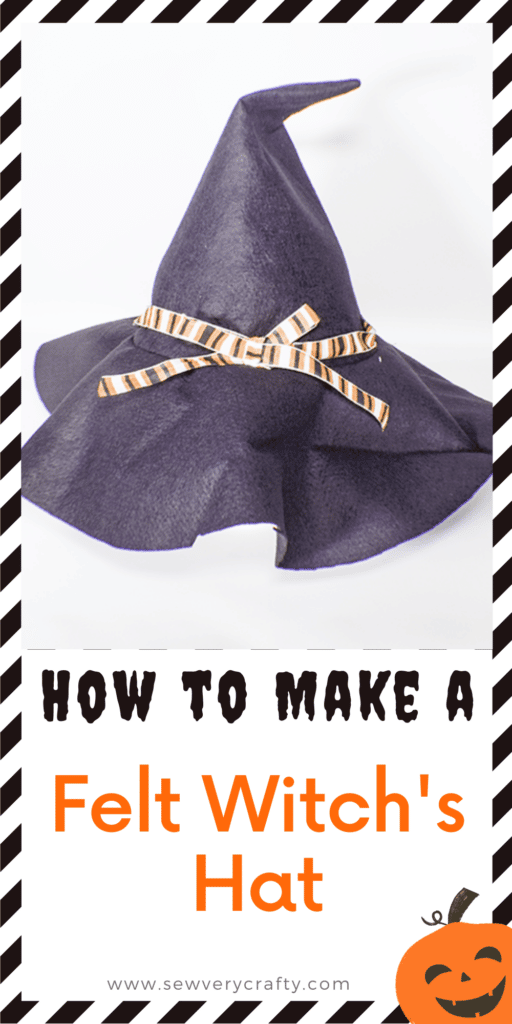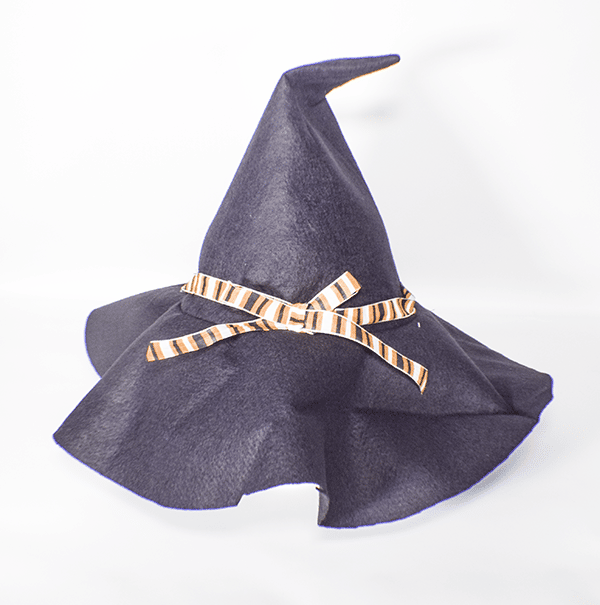
Halloween is just around the corner. In the spirit of halloween, I decided. to create this witch's hat and share the process with you. This is a very simple hat making project for Halloween night. The most difficult part of this project is the measurements. You will want to measure it to fit you or your child so I have not included a pattern with this tutorial. Instead I will walk you through how to measure to make this hat the perfect fit for you. If you would like more of my holiday tutorials head over to my holiday page and check out the other patterns and tutorials for your favorite holiday.
I used black felt for this project and some fun Halloween fabric for the embellishment. I purchased my felt at JOANN Fabric & Craft Stores![]() but you could head to
but you could head to
What you will Need: How to Make a Witch's Hat
- 1/2 yd of black felt
- Scrap of orange Halloween fabric o ribbon for embellishment
- Standard sewing supplies
Step 1: Measure for Your Hat
Measure your head around your forehead and add about 1/2 inch. This is the circumference. My head measures 22″. With the additional 1/2″ my circumference is 22 1/2″. Once you have determined your head circumference you need to decide how wide you want your brim. I wanted a fairly large brim so I made mine 19″.
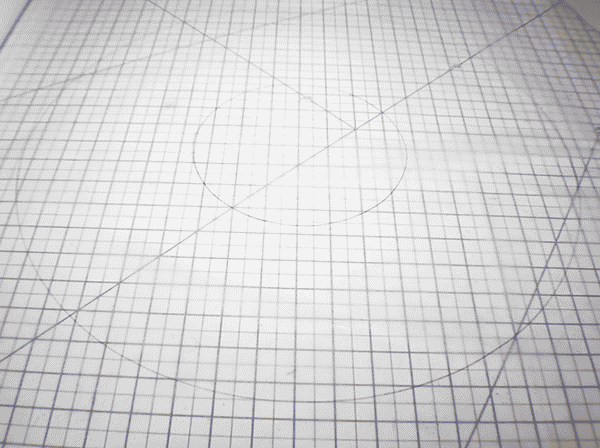
Step 2: Create the Brim Pattern
First, determine your head diameter. To do this take your head diameter x pi = head circumference. For me it was diameter x 3.14 = 22.5 or diameter = 22.5 /3.14. Diameter = 7.16″.
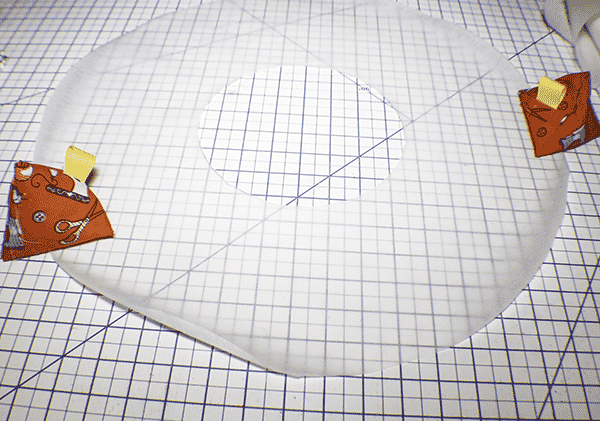
On a large piece of paper, draw out a circle with your brim diameter. I used a large compass but you could use a pencil and string to draw out your brim.
In the center of the brim circle draw a circle the measures your head diameter. This is your brim pattern.
Step 3: Create the Top of the Witch's hat
Decide how tall you want your hat. Mine is 11″ tall. Then determine the radius of your head measurement which is simply half of your head diameter. For me the measurement is 3.58″
But, the hat is slanted so we need to determine the slant height and not the straight up and down height. To get the measurement use this √ r^2 + h^2 = slant height. In other words square the head radius and the hat height. Add them together, and then square root that number. For me the numbers were √ 3.58^2 + 11^2 which resulted in 11.17″
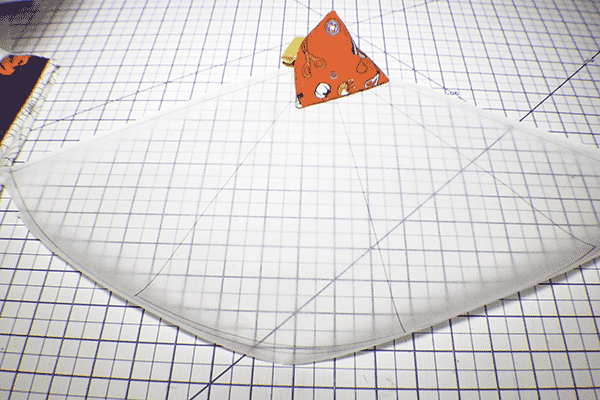
Now that you know what the slant is, draw a line on your paper the length of the slant height. I use doctor's office paper for my pattern making. Choose one end as the anchor point. From that point draw the slant height in two directions that create about a 1/3 of a cone shape. Then take your measuring tape and measure out your head circumference plus 1/2 inch for seam allowance and draw an arc as wide as the head circumference plus 1/2 inch for seam allowance.
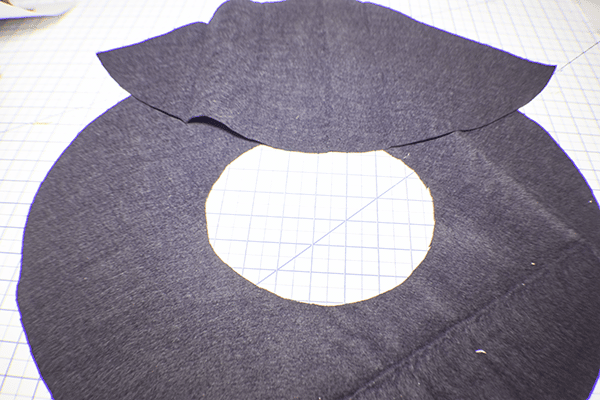
Step 3: Cut the Felt
Using the pattern pieces you just created cut out your felt pieces. You should have a brim and top.
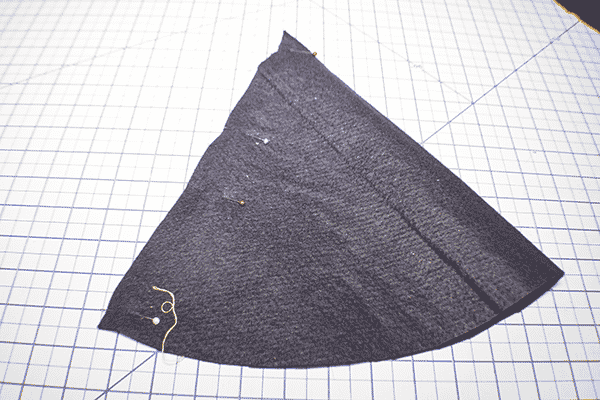
Step 4: Stitch the Cone of the Witch's Hat
First, fold the cone piece in half. Stitch together using a 1/4″ seam allowance. Press the seam open and turn the cone right sides out.
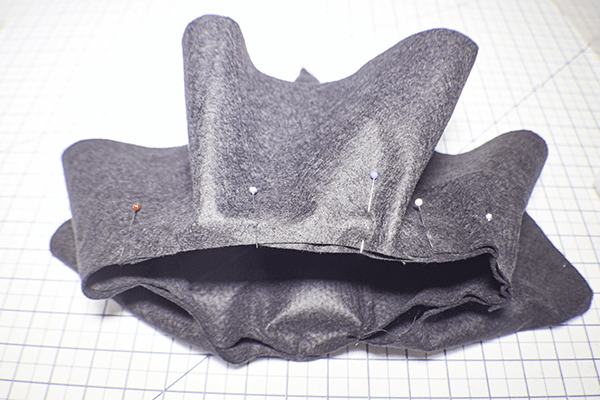
Step 5: Stitch on the Brim of the Witch's Hat
Place the brim of the with's hat so that the raw edges match the raw edges of the cone. Stitch there two pieces together suing a 1/4″ seam allowance. Press the seam open.
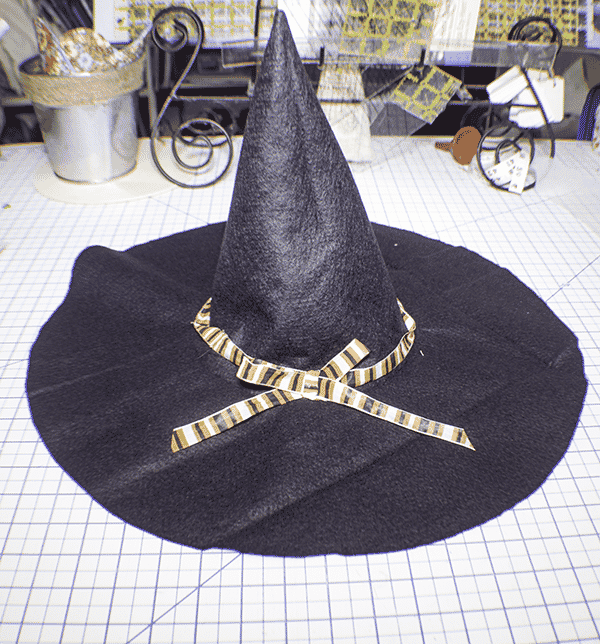
Step 6: Add the Ribbon
Using a piece of Halloween ribbon place it around the cone. Attach to the cone. Tie a bow and attach it to the ribbon. You have now finished your witch's hat.
I hope you enjoyed this witch's hat project. If you would like more sewing and crafting projects subscribe to our newsletter and receive access to our free Printables library.
If you would like video tutorials of some of Sew very Crafty's most popular posts subscribe to ur free Youtube channel here.