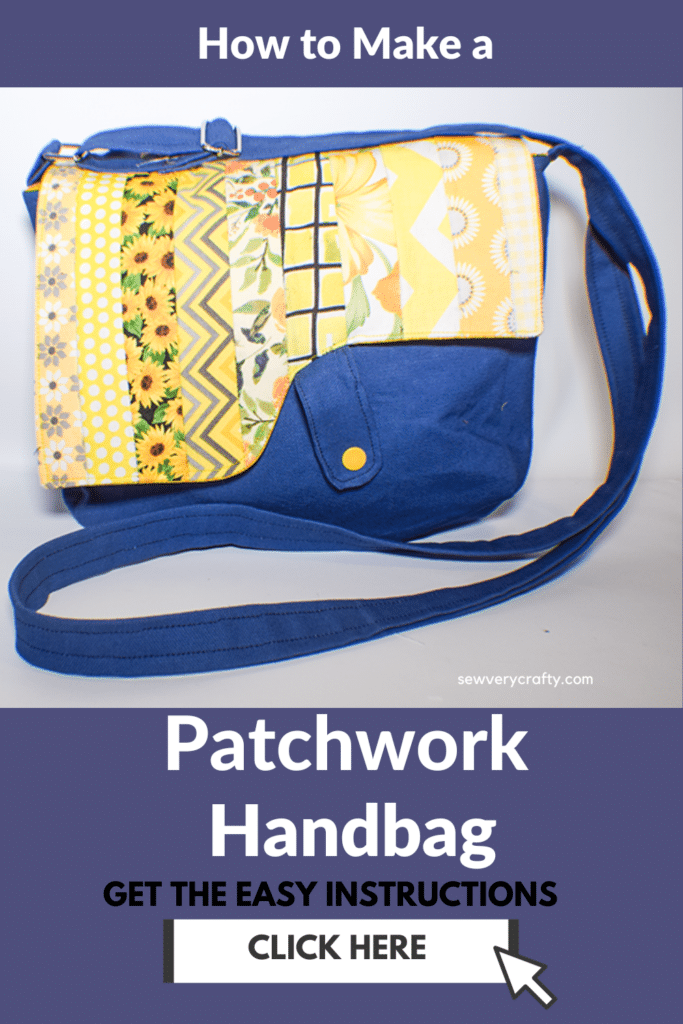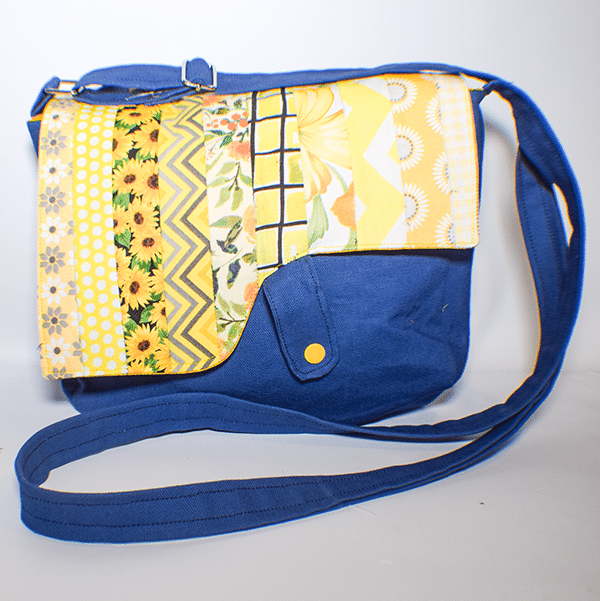
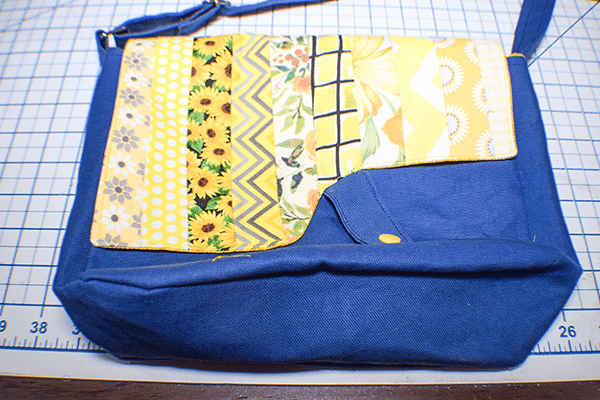
Here is another handbag project that I thought was fun to make. This patchwork crossbody handbag is colorful and fun. It is also super simple to make. This is a great bag making project to increase your bag making skills. If you like making handbags as much as I do check out my handbag page for many more patterns and tutorials.
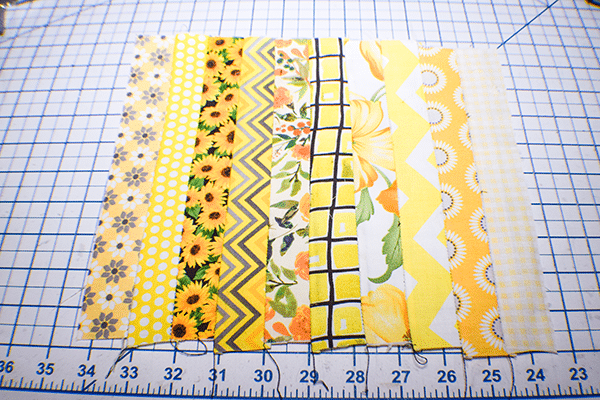
For this project you will need a main outer fabric, lining fabric and a variety of fabrics for the patchwork. I used cotton fabrics that I had in my stash to make this handbag. These fabrics were purchased at Joann's but you could head to Amazon Fabrics or
What you will Need: How to Make a Patchwork Crossbody Handbag
- Pattern you can get by clicking on this link
- 1 yd outer and lining fabric
- 1 yd Pellon 808 interfacing
- Strips of fabric for the patchwork
- 1 1″ rectangle ring
- 6″ Zipper
- 1 Kam Snap
- 1 1″ Triglide

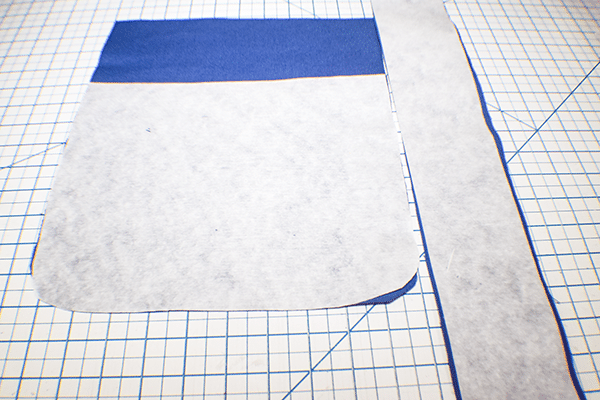
Step 1: Cut out the Fabrics
Using pattern piece A cut two outer pieces, two interfacing pieces and two lining pieces. For the side panels cut one each of the outer interfacing and lining that measures 3″ x 28″. Cut 10 strips of different fabrics measuring 9 1/2″ x 1 1/2″ for the patchwork flap. I used remnants and fat quarters for this. Cut a 10 1/2″ x 9 1/2″ rectangle of interfacing for the flap panel. Using the pattern piece B cut 1 lining piece. Cut a lining piece that measures 8 1/4″ x 11 1/2″ for the zipper pocket. Finally for the strap cut a piece of fabric that measures 4″ x the Width of Fabric and a loop piece that measures 2″ x 3″.
Step 2: Fuse the Interfacing
Using a hot iron and following the manufacturer's instructions fuse the interfacing to the main outer fabric pieces A and the side panel.
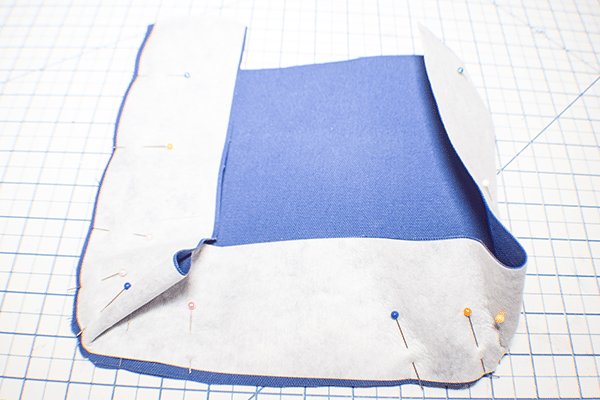
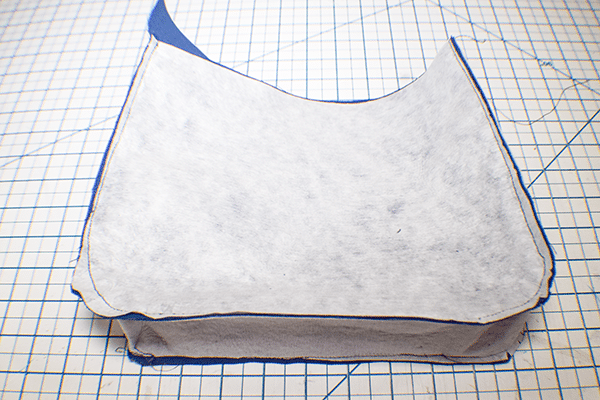
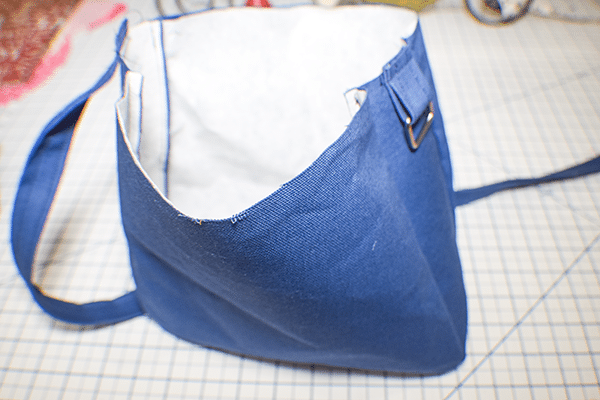
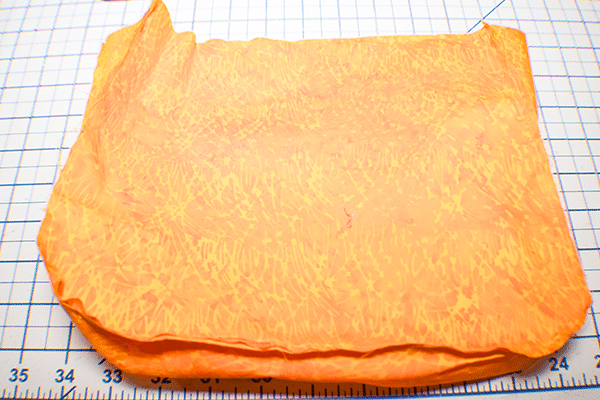
Step 3: Add the Side Panel
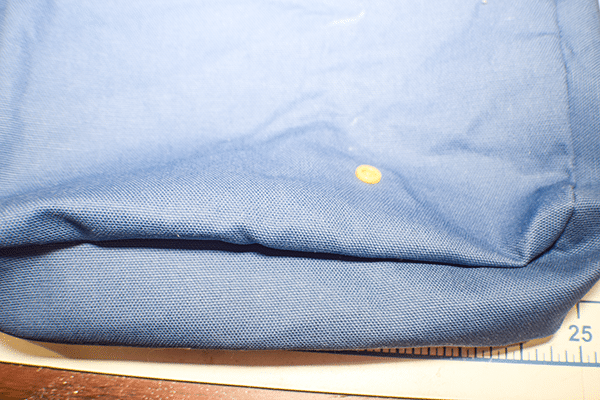
With right sides together place the side panel all the way around the outer edge of piece A to create a gusset. Snip the pie piece to curve it around the Botton of piece A. Stitch using a 1/4 seam allowance. Add the other side of the bag to the side panel in exactly the same way. Trim off ay excess side panel fabric.
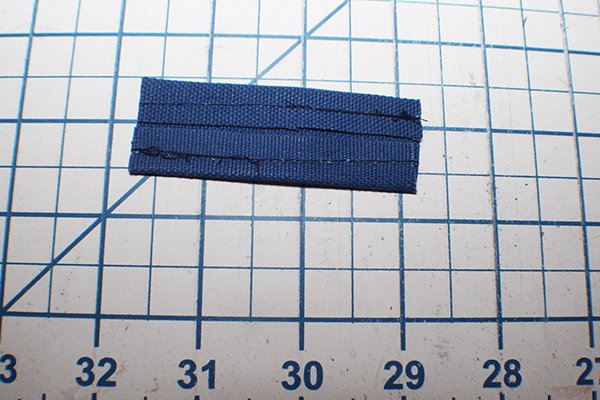
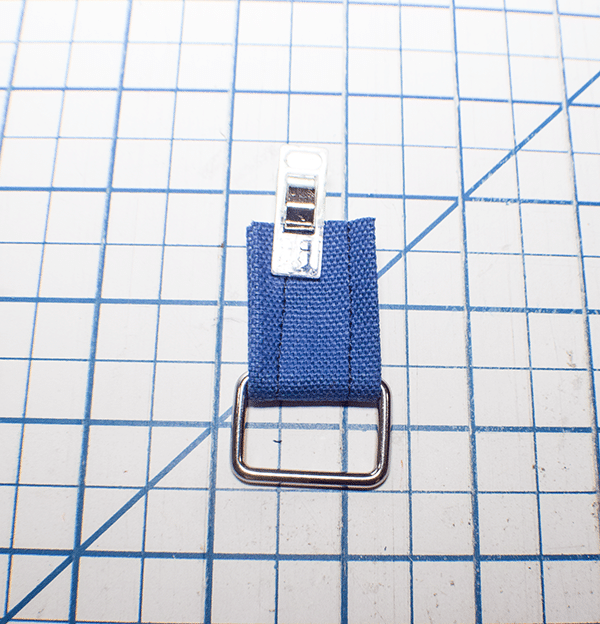
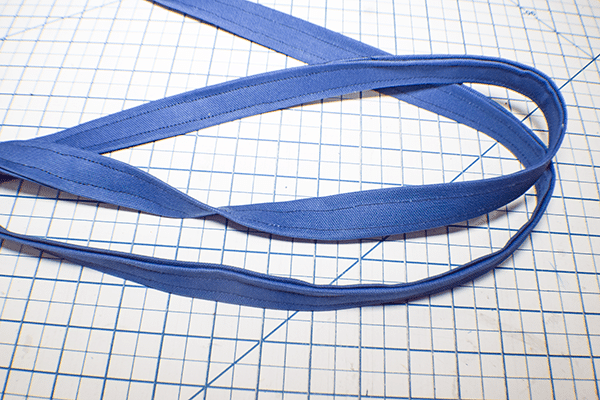
Step 4: Create the Loop for the Rectangle Ring
Fold the long raw edges to the center and press. Stitch along both sides to secure. Fold the piece around the rectangle ring and set aside.
Step 5: Create the Strap
Fold the long raw edges to the center and press. Fold in half lengthwise and press again. Topstitch along both leg sides to secure.
Step 6: Add the Loop and the Strap
Place the loop with the rectangle ring on one side of the outer bag centering it on the side panel and stitch to secure. Place one end of the strap on the other side panel and stitch.
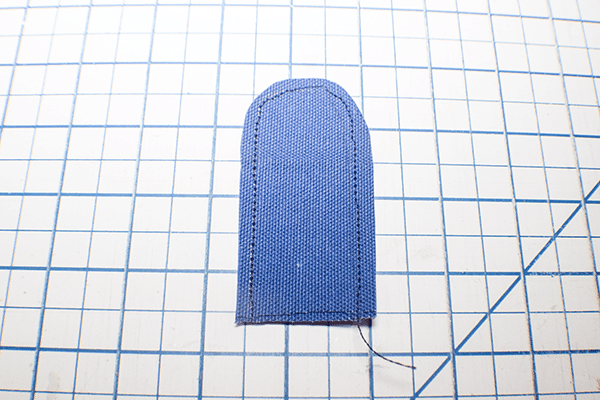
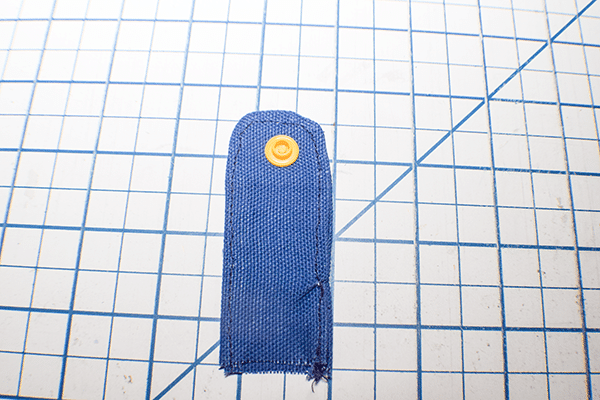
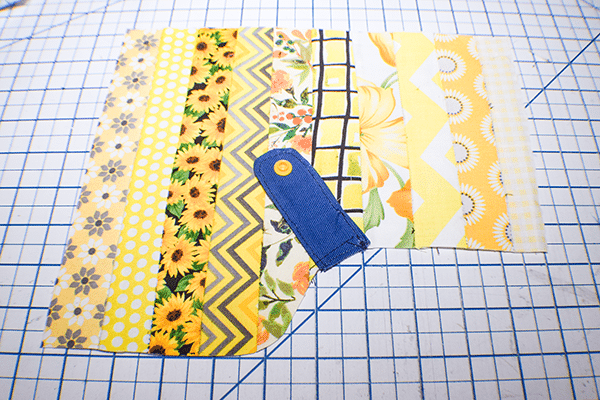
Step 7: Create the Snap Tab
Take two pieces of outer fabric and place them right sides together. Using pattern piece C draw the snap tab on the wrong side of the fabric. Stitch along the lines that you drew leaving the bottom one. Trim around the tab leaving a 1/4″ seam allowance. Turn right sides out and press. Topstitch all the way around. Add one half of the snap.
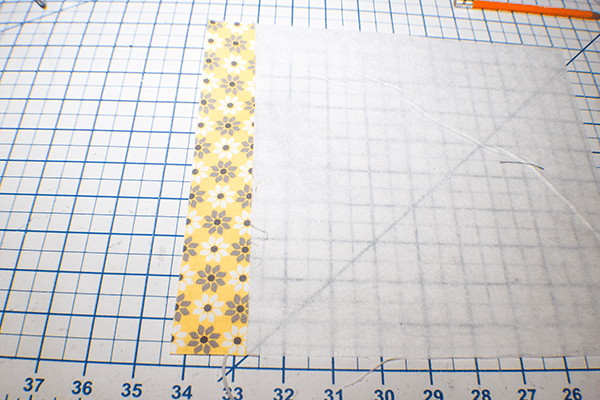
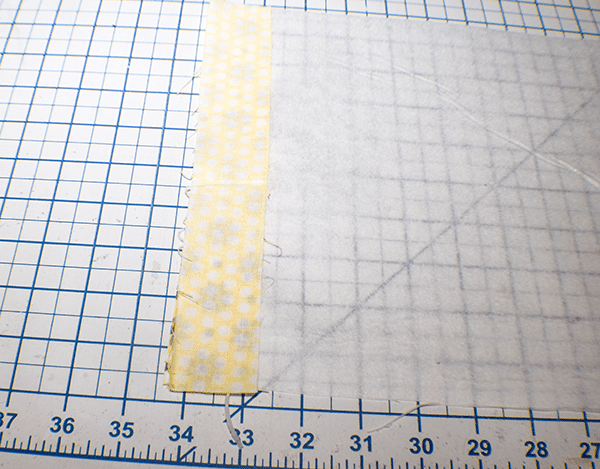
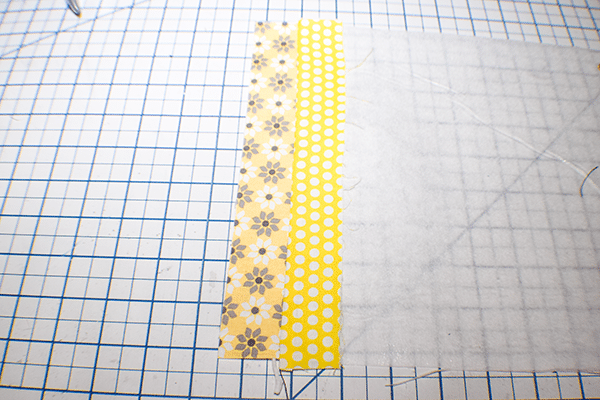
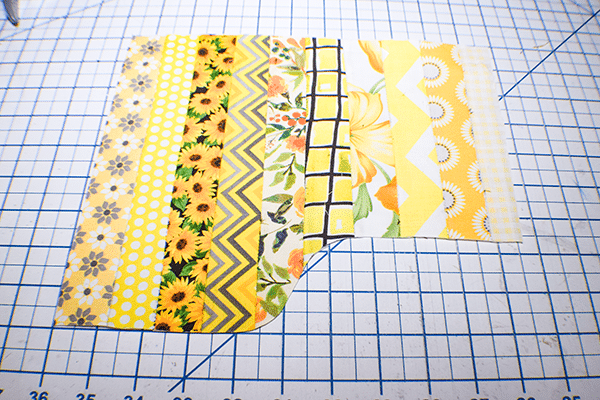
Step 8: Create the Patchwork Panel
Take the flap piece of interfacing and start creating the patchwork panel. Lay the first strip onto the interfacing and fuse using a hot iron. Take the next strip and place it right sides together with the first strip and stitch it using a 1/4 seam allowance. Once it is stitched fold the second piece to the right side and fuse it to the interfacing. Repeat the process for all of the strips. Place the pattern piece B onto the right side of the patchwork panel and cut it out.
Step 9: Add the Snap Tab
Place the snap tab in the center of the inside curve of the patchwork panel matching the raw edges. Stitch together to secure.
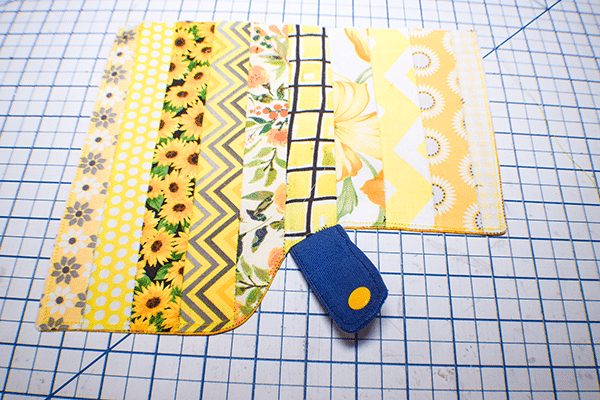
Step 10: Finish the Patchwork Flap
Place the lining flap piece right sides together with the patchwork flap piece and stitch along the sides and bottom using a 1/4″ seam allowance. Turn right sides out. Press. Topstitch long the sides and bottom.
Step 11: Add the Flap to the Outer Bag
Place the flap on one side of the outer bag right sides together and centering it. Stitch the flap to the bag using a 1/4″ seam allowance.
Step 12: Add the Other Half of the Snap
Fold the flap over and note where the snap falls. make a mark and add the other half of the snap.
Step 13: Create the Lining Pocket
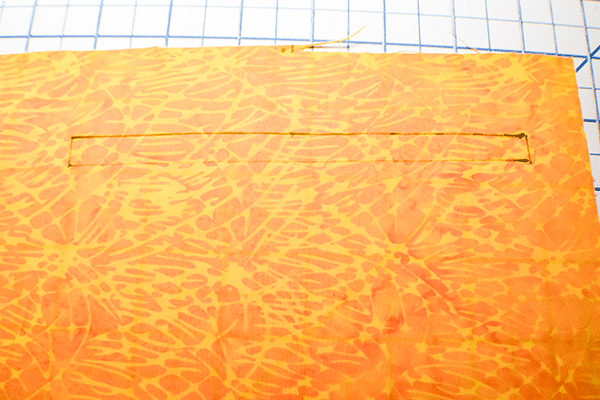
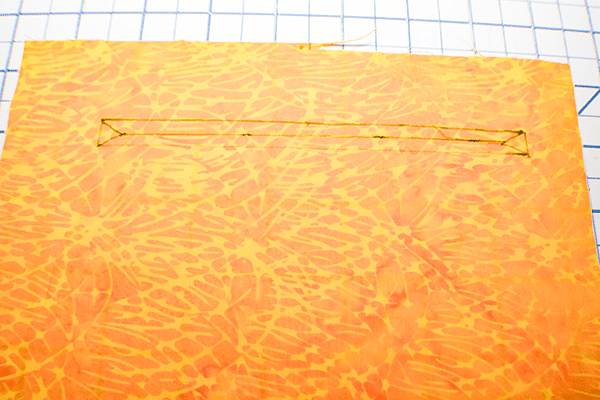
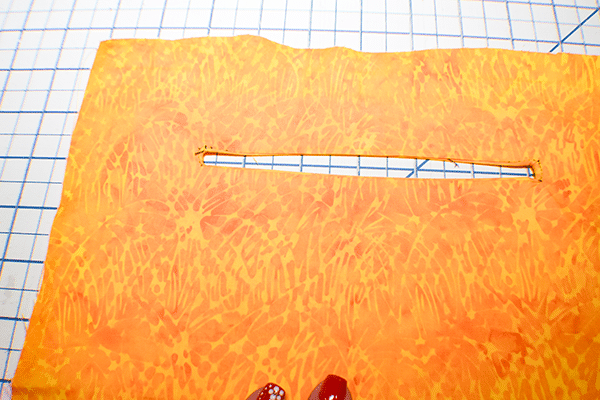
Start by creating the zipper pocket. Take the zipper piece and find the center top. Measure down 1″ and draw a line that is 6″ long and centered. Measure down 3/8″ from each end and draw a line. Join the two lines and create a box. Inside the box draw a line down the center with triangles at both end.
Place the zipper pocket piece in the center of the lining piece A 1″ from the top. Stitch all the way around the box through both layers. Using a seam ripper or a small pair of scissors Cut the center line and triangles so there is a hole left in the fabrics. Push the pocket piece through the opening and press.
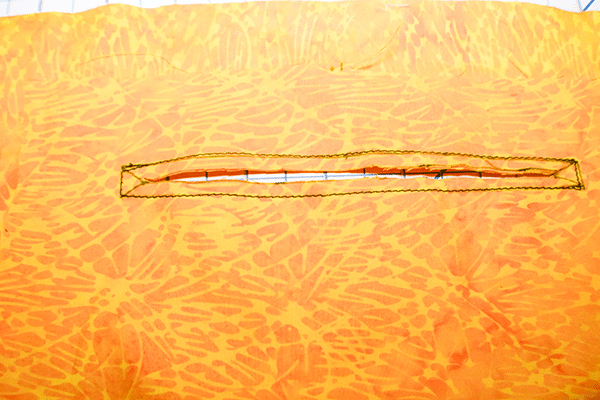
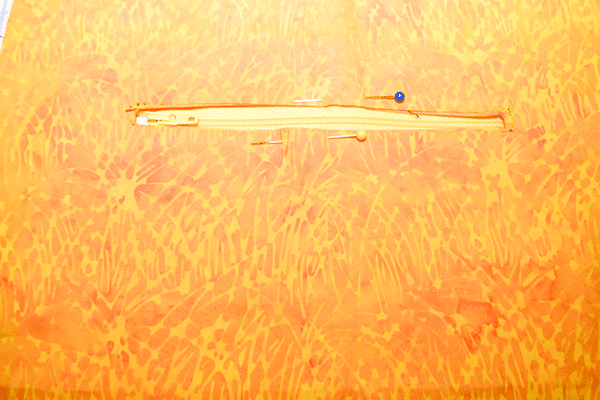
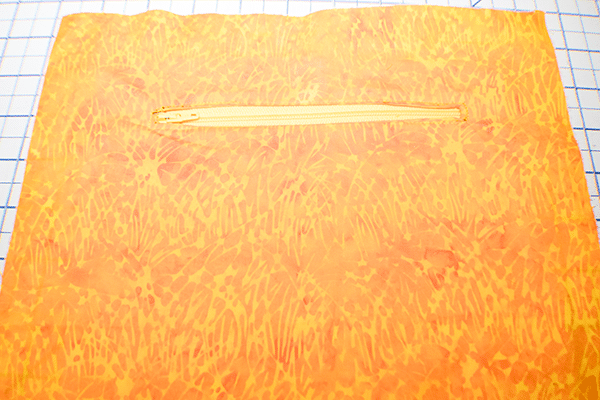
Place the zipper not the wrong side of the lining in the center of the hole. Stitch the zipper to the pocket piece and the lining piece A. Turn the piece over. Fold up the pocket piece matching he raw edges. Stitch along he to and sides of the pocket piece only. This creates the pocket.
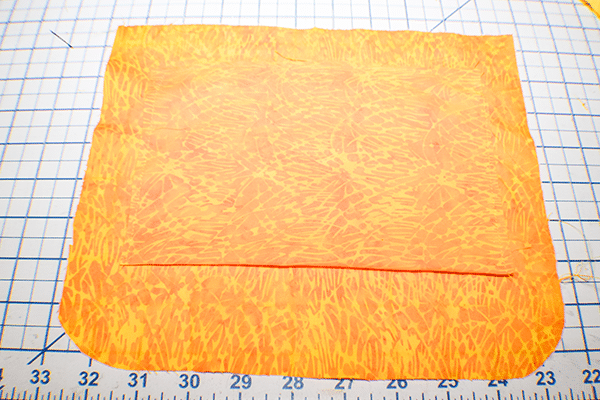
Step 14: Create the Rest of the Lining
Add the side panel and opposite side to the lining in the same way that you did the outer piece but this time leave an opening on the bottom of one of the sides for turning.
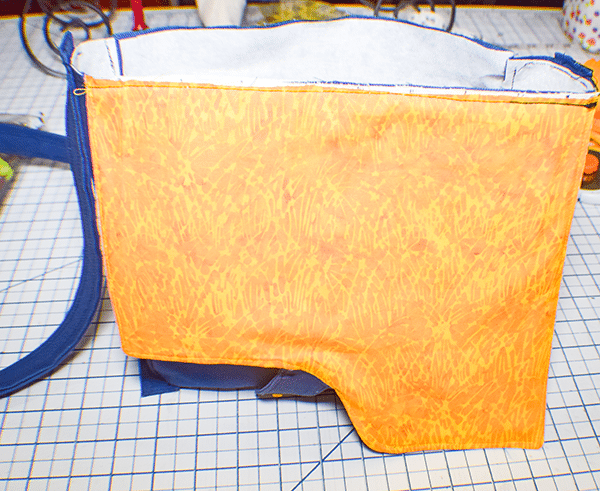
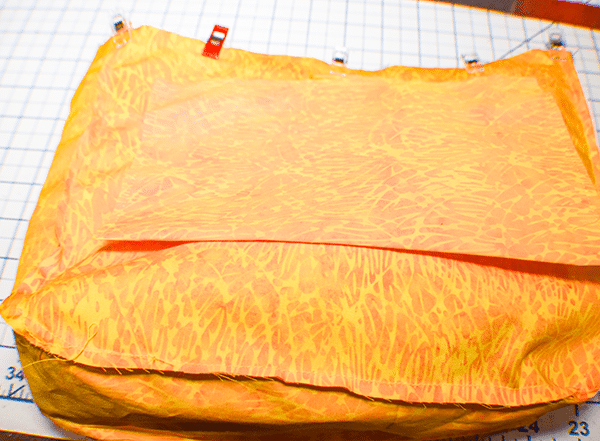
Step 15: Join the Lining to the Outer Bag
Place the outer bag into the lining bag so that the zipper side is on the same side as the flap. Make sure that everything including the strap is tucked inside the lining bag and the seams align. Stitch all the way around the to of the bag joining the two together.
Step 16: Turn Right Sides Out
Turn the bag right sides out. Stitch the opening closed. Push the lining into the bag and topstitch all the way around.
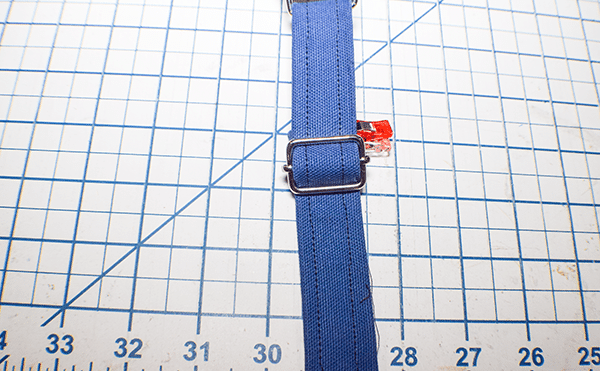
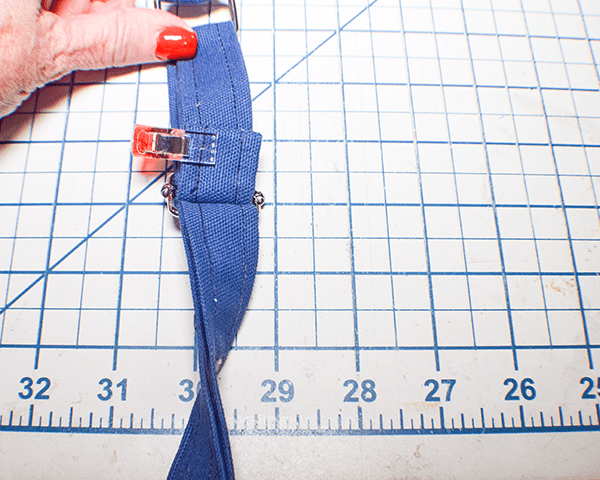
Step 17: Add the TriGlide
Insert the end of the strap into the triglide and feed it through. Insert the end of the strap through the rectangle ring and back through the back of the triglide. Fold over the center divider and stitch the end to strap to secure. The strap is now adjustable and the patchwork crossbody handbag is finished.
I hope you enjoyed the handbag project. If you would like more sewing and crafting projects subscribe to our newsletter and receive your free eBook of 15 handbag patterns and tutorials then from the blog.
If you would like video tutorials of some of Sew Very Crafty's most popular posts subscribe to our free YouTube channel here.