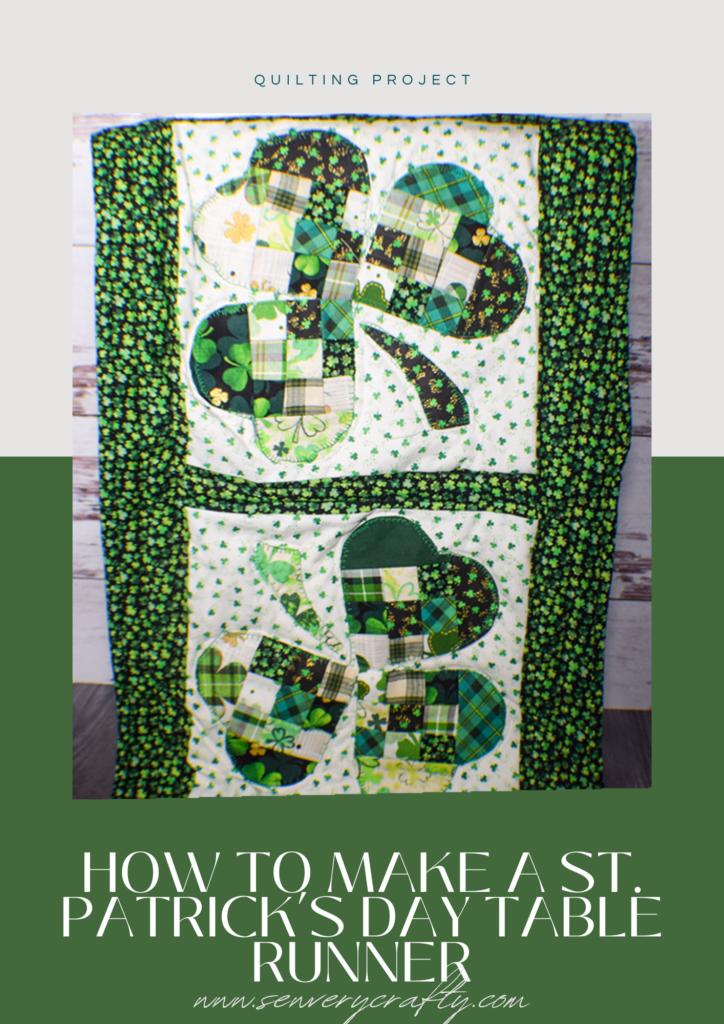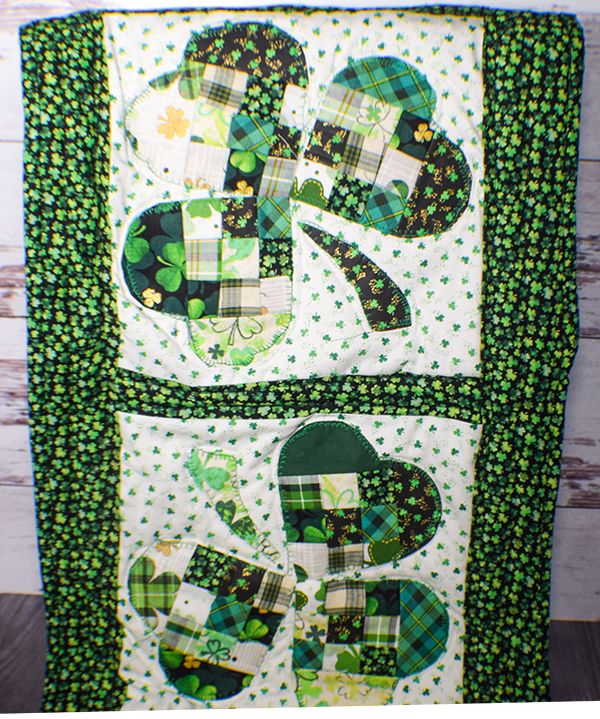
Yes, St. Patrick's Day is just around the corner. Being a dual US/Irish citizen I love this holiday so I thought to do another quilting project to show off the green. I made a table runner but you could easily expand this pattern to a full sized quilt. As people who follow Sew Very Crafty know I am not much of a quilter but I had a yen to create this runner offered up by Bernina. This is a step by step tutorial on how to make a quilted shamrock table runner. I hope you enjoy it. If you would like more quilting projects check out my quilting page for more.
Note: This post contains affiliate links that if you click on them and make a purchase I will receive a small commission at no extra cost to you. As an Amazon Associate I earn from qualifying purchases.
Use this pattern for other holidays by changing out the applique and colors
Step 1: Cut the Fabrics
Start by cutting the border. Cut two 3″ x 44 1/4″ strips and two 3″ x 15 1/2″ strips. Next cut the sashing strips. Cut four 1 3/4″ x 10 1/2″ strips for the sashing. Cut Three 2 1/4″ x 58″ binding strips. Keep 24″ x 58″ piece for the backing.
Cut 4 10 1/2″ x 10 1/2″ squares of low volume white. 108 1 1/2″ x 1 1/2″ squares in multiple green prints. Cut 12 2″ x 3 1/2″ green print strips and 16 2″ x 5″ green print strips.
For the applique cut twelve 5″ squares and four 2″ x 5″ strips of the fusible web. Keep the remaining web for the stems.
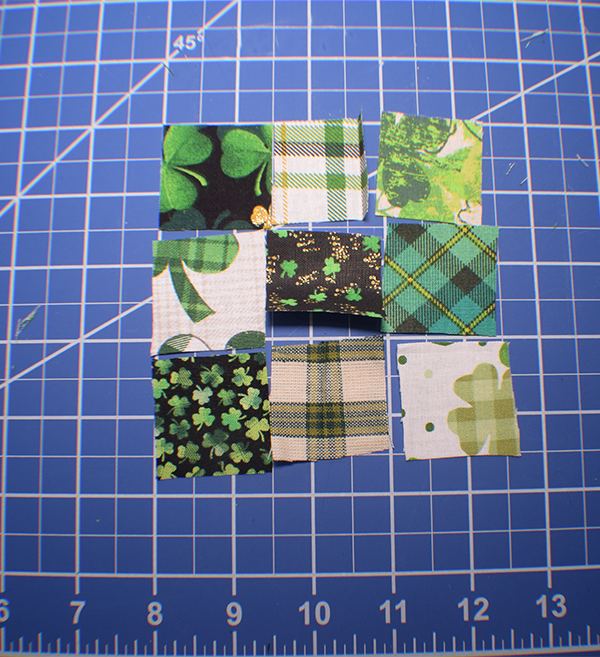
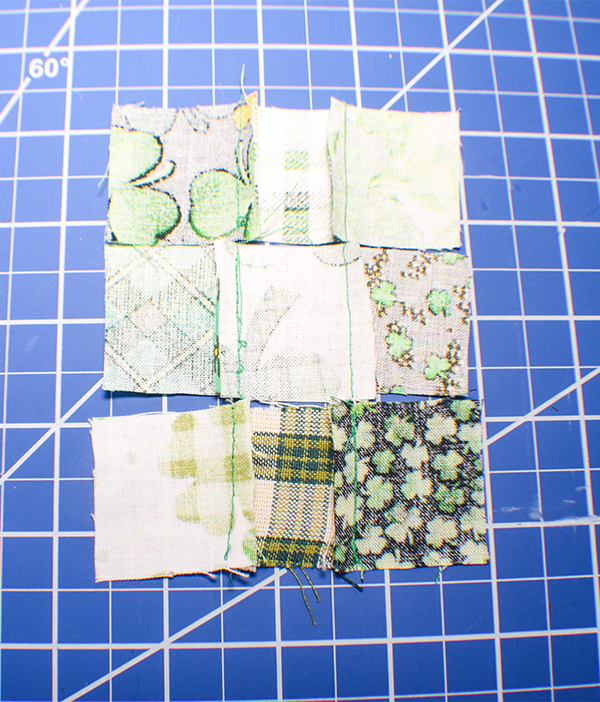
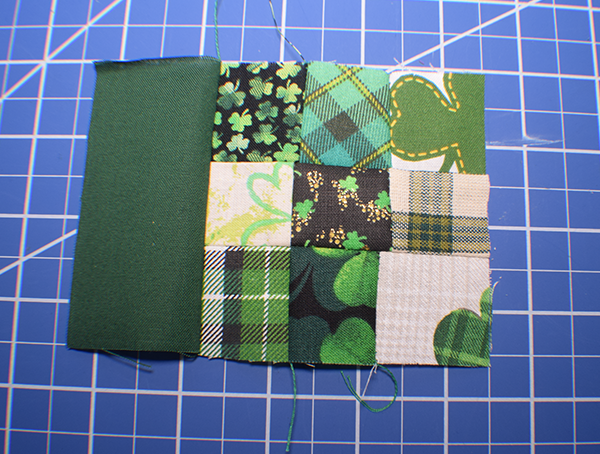
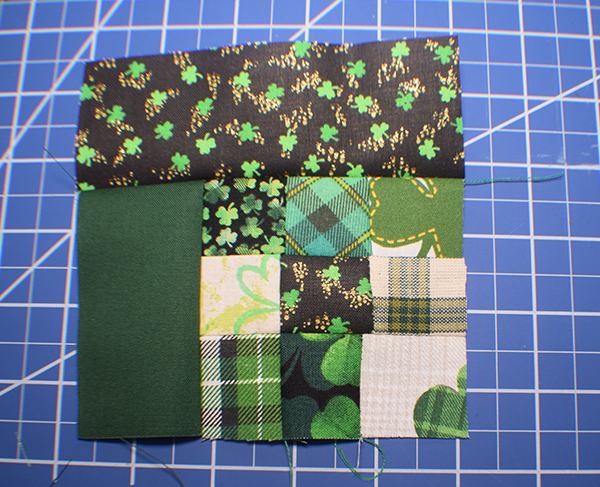
Step 1: Stitch the Small Squares
Start with nine 1 1/2″ x 1 /2″ squares. Place them in 3 rows of three. Stitch the top row of three using a 1/4″ seam allowance. Press the seams to the center. Repeat for the next two groups of three. Press the second row seams toward the outer edges and the third set to the center. Once you have the three rows, stitch the rows together by placing the first row right sides together with the second row and stitching using a 1/4″ seam allowance making sure to nest the seams. Repeat for the third row to create a pieced square. Create 12 of these squares. Each square should measure 3 1/2″ x 3 1/2″.

Step 2: Press the Square
Using a seam ripper remove one or two stitches between the raw edges and the seams. Working from the right furl the seams. To do this press the seams using rotation around the center seam intersection. This way you reduce the bulk the seams create.
Step 3: Add the Strips
Using a 1/4″ seam allowance stitch a 2″ x 3 1/2″ strip to the left side of the block. Then, stitch a 2″ x 5″ strip to the top of the block. Repeat for all 12 blocks.
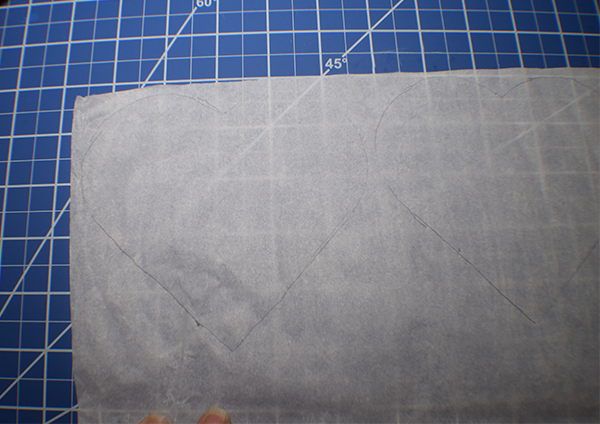
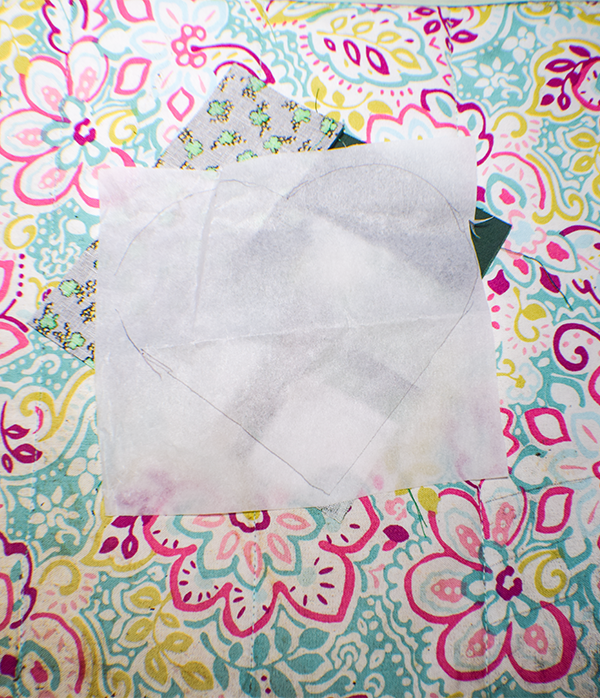
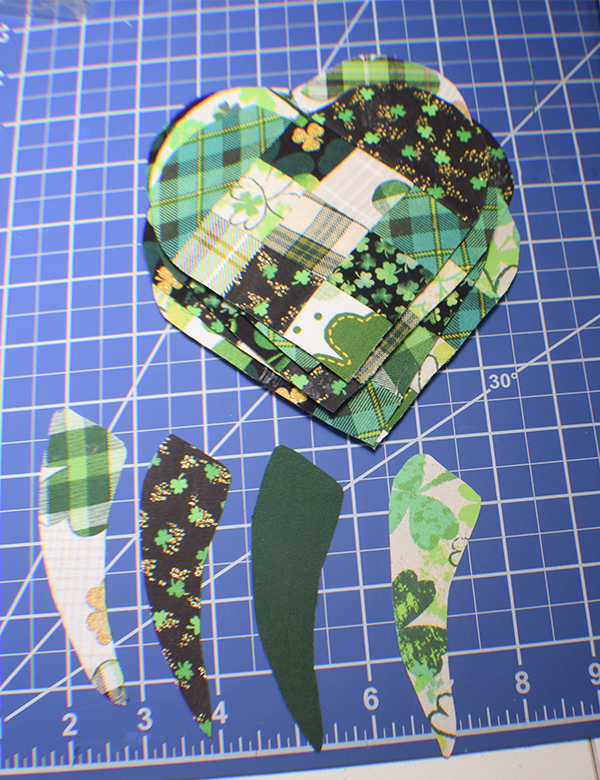
Step 4: Draw the Fusible Web
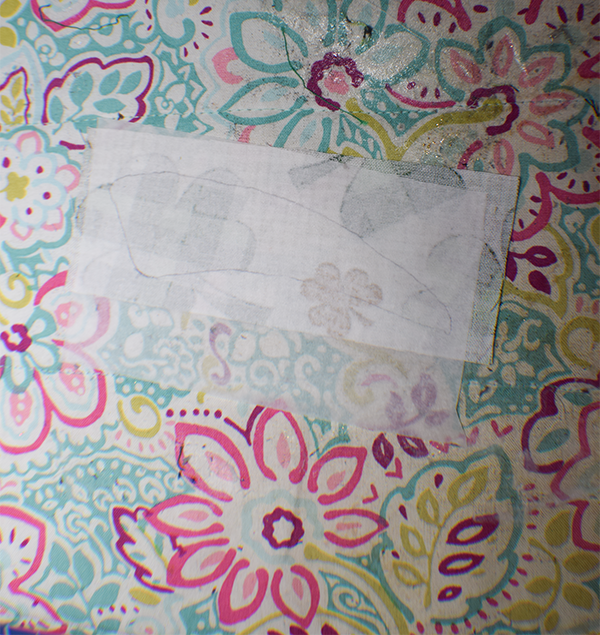
Using the pattern piece trace the pattern to the paper side of the web, Repeat this for all 12 heart shapes. Trace the stem piece to the 2″ x 5″ strips of web.
Step 5: Fuse the Web
Place the web paper side up on the wrong side of each of the blocks. Make sure that the center of the heart is placed at the corner of the strips you added to the block. Using a hot iron and following the manufacturer's instructions fuse the web to the wrong side of the block. Cut along the lines to create a patchwork heart. Repeat this process for the stem.
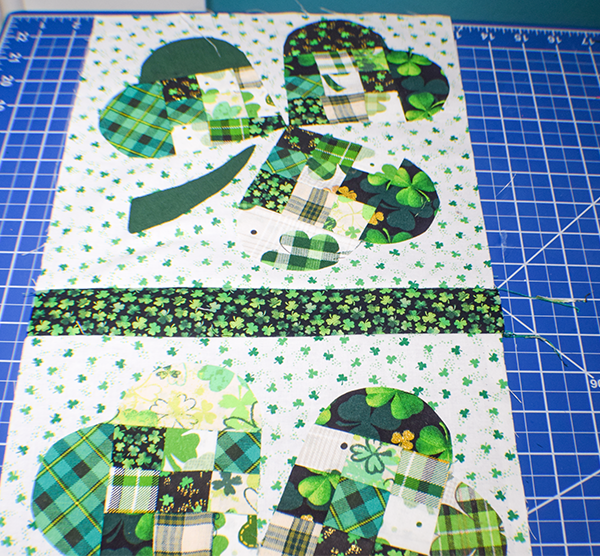
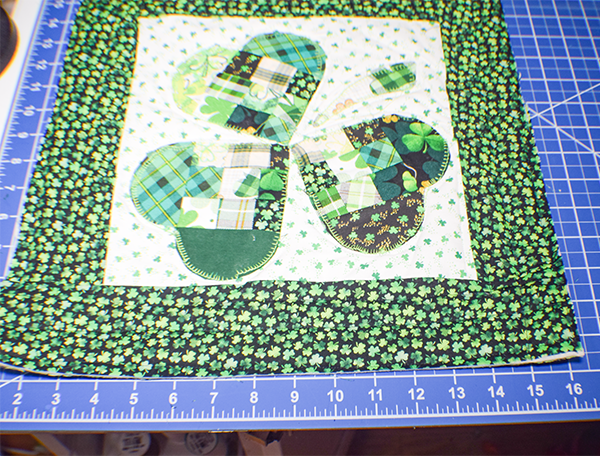
Step 5: Applique the Hearts and Stems
Take three heart shaped pieces and a stem piece. Remove the paper backing. Place the heart shapes and stem in the shape of a shamrock on the right side of the white fabric as shown. Make sure that all of the shapes are 3/8″ from each raw edge. Fuse the shapes to the background. Repeat to make four shamrock blocks.

Step 6: Add the Sashing
Place the 1 3/4″ x 10 1/2″ sashing strips between the four blocks. Stitch using a 1/4″ seam allowance. Press the seam toward the sashing strip.
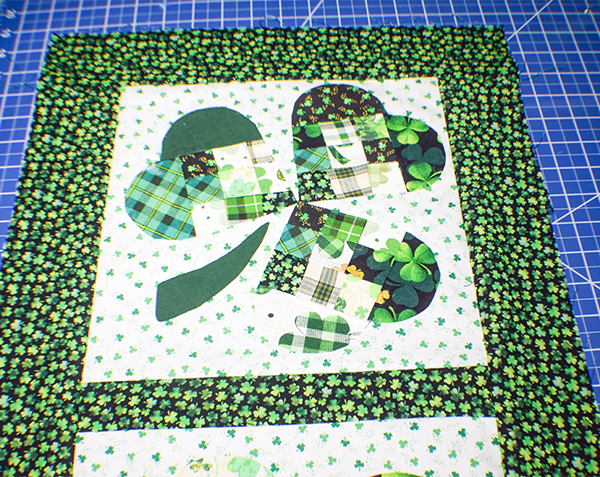
Step 7: Add the Boarders
Place the 3″ x 44 1/4″ along the sides right sides together. Stitch using a 1/4″ seam allowance. Add the 4″ x 15 1/2″ strip on the ends in the same way. Press seams toward the border side.
Step 8″ Layer the Pieces
Place the backing piece right sides down on your work surface. Lay the batting on top of the backing and the shamrock piece on top. You can use basting spray to keep the pieces together or use safety pins.
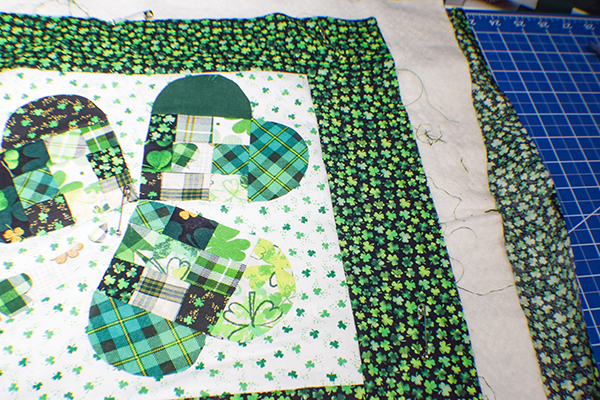
Step 9: Quilt
Stitch around the pieces using straight stitch, blanket stitch, zig zag or satin stitch. I recommend using a walking foot for more even stitching through the layers.
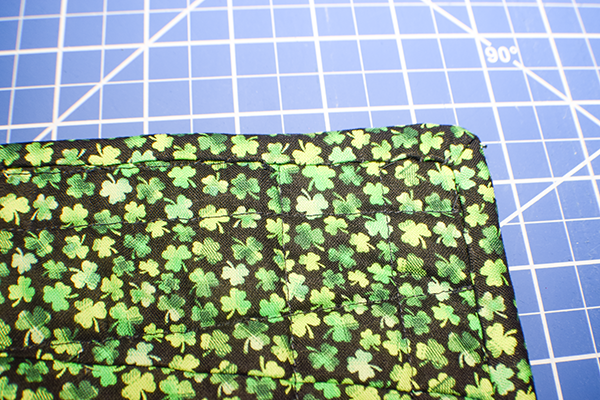
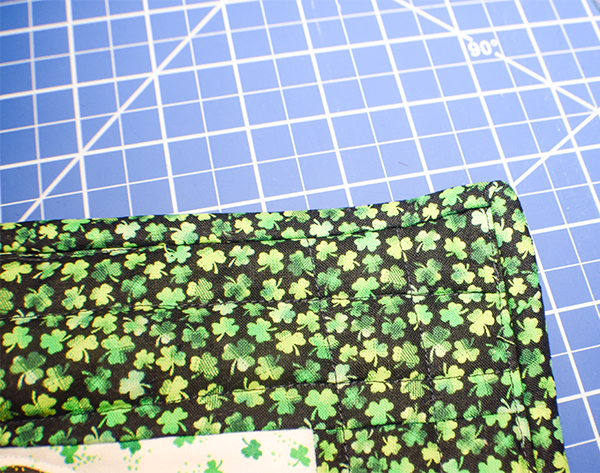
Step 11: Trim the Runner
Trim the excess batting and backing.
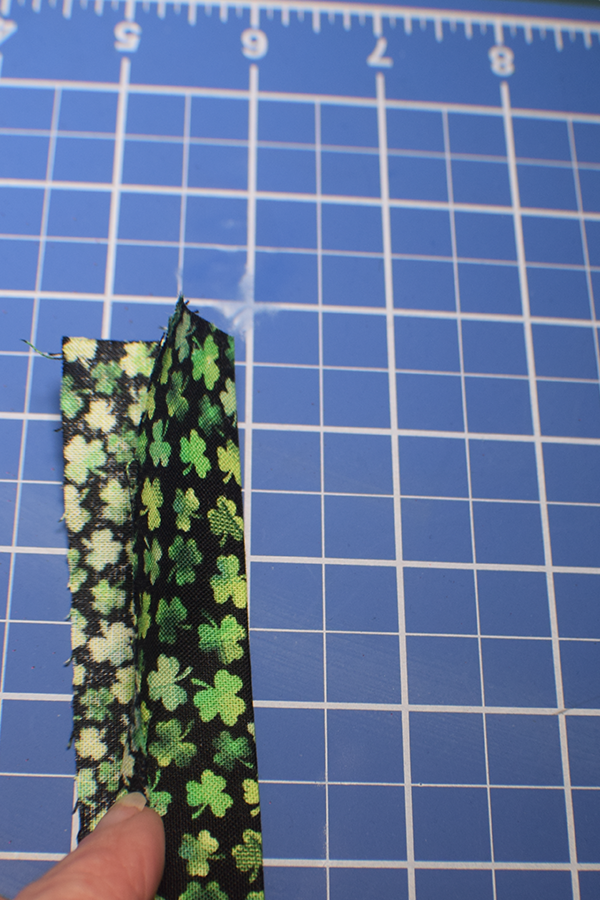
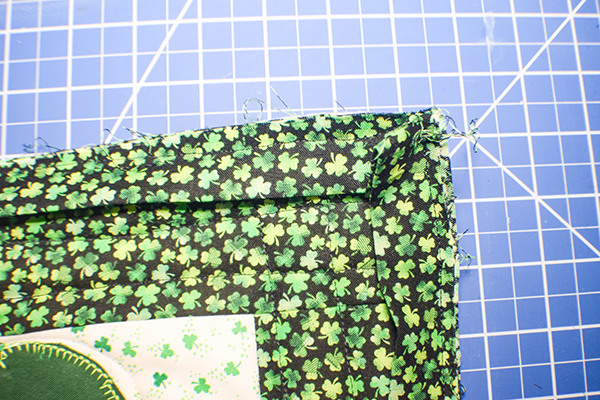
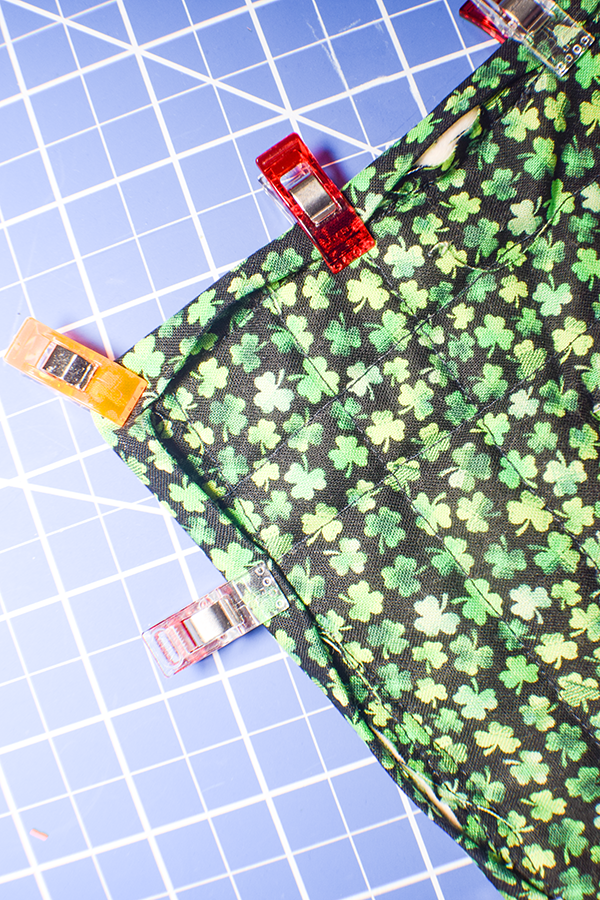
Step 12: Add the Binding
Stitch the binding strips together on the diagonal. Fold the binding strips wrong sides together lengthwise and press. Starting in the middle of one side of the runner place the binding on top of the runner matching the raw edges, Stitch the binding to the runner using a 1/4″ seam allowance. Miter the binding corners. If you are unfamiliar with this process see the included video. Fold the biding to the other side and hand stitch using blind stitch. You have now finished your quilted shamrock table runner.
I hope you enjoyed this St. Patrick's Day sewing project. If you would like more sewing and crafting projects subscribe to our free newsletter and receive access to our free printables library.
If you would like video tutorials of some of Sew Very Crafty's most popular posts subscribe to our free YouTube channel here.
Join our Sew Very Crafty Fans Facebook group
If you want to ask questions and share your projects join our Facebook group here. The community will help to achieve your sewing and crafting dreams.