
How to Make a Tablet Carrying Case

I love my Ipad and use it all the time. I also travel a lot and use it on the road. With this in mind I decided to make a tablet carrying case that I could easily transport my Ipad without risk of losing it or getting it damaged. I put together this step-by-step tutorial on how to make a tablet carrying case that can be used to create a carrying case for any tablet no matter the size. This pattern includes a zippered pouch for a tablet and a zippered pocket for other supplies including a charger and pens and pencils. It is an easy project that only requires basic sewing skills even though there are two zippers involved.
I, as usual, used remnants that I had in my stash for this project but if you need fabrics and zippers for your project I recommend that you head over to Hobby Lobby or Fabric.com to get exactly what you need. Just click the links to get right to those sites. These are affiliate links that if you click on them and make a purchase I may receive a small commission at no extra cost to you.
What you will Need:
- 1/2 yd exterior fabric
- 1/2 yd lining fabric
- 1/2 yd fusible fleece
- 1/2 yd of medium weight interfacing like Pellon 808
- 16″ zipper
- 9″ zipper
- 2 1″ D rings
- 2 1″ swivel clips
Step 1: How to Make a Tablet Carrying Case
Measure the tablet height and width. Add 3″ to the height and the width and cut two outer pieces and two lining pieces to match those measurements. My Ipad measured 9 1/2″ x 7 1/4″ so my fabric measured 12 1/2″ x 10 1/4″. Cut 2 pieces of fusible fleece the same measurement. Cut a lining piece 9 1/4″ x 15″ for the pocket lining along with the Pellon 808. For the strap cut an exterior piece and a Pellon 808 piece that are 4″ x 41″. For the tabs cut 2 exterior pieces and Pellon 808 that are 4″ x 4″ square.
Step 2: How to Make a Tablet Carrying Case
Fuse the fleece to the exterior main fabric and fuse the Pellon 808 to the pocket lining piece, the strap and the tabs. If you are unfamiliar with fusible interfacing just follow the instructions that come with the product. You will find that fusible interfacing has a glue side and a non glue side. Place the glue side on the wrong side of the fabric. Press on the fabric using a hot iron so that the glue melts and fuses with the fabric and the two pieces become one. Do this for all five pieces.
Step 3: How to Make a Tablet Carrying Case
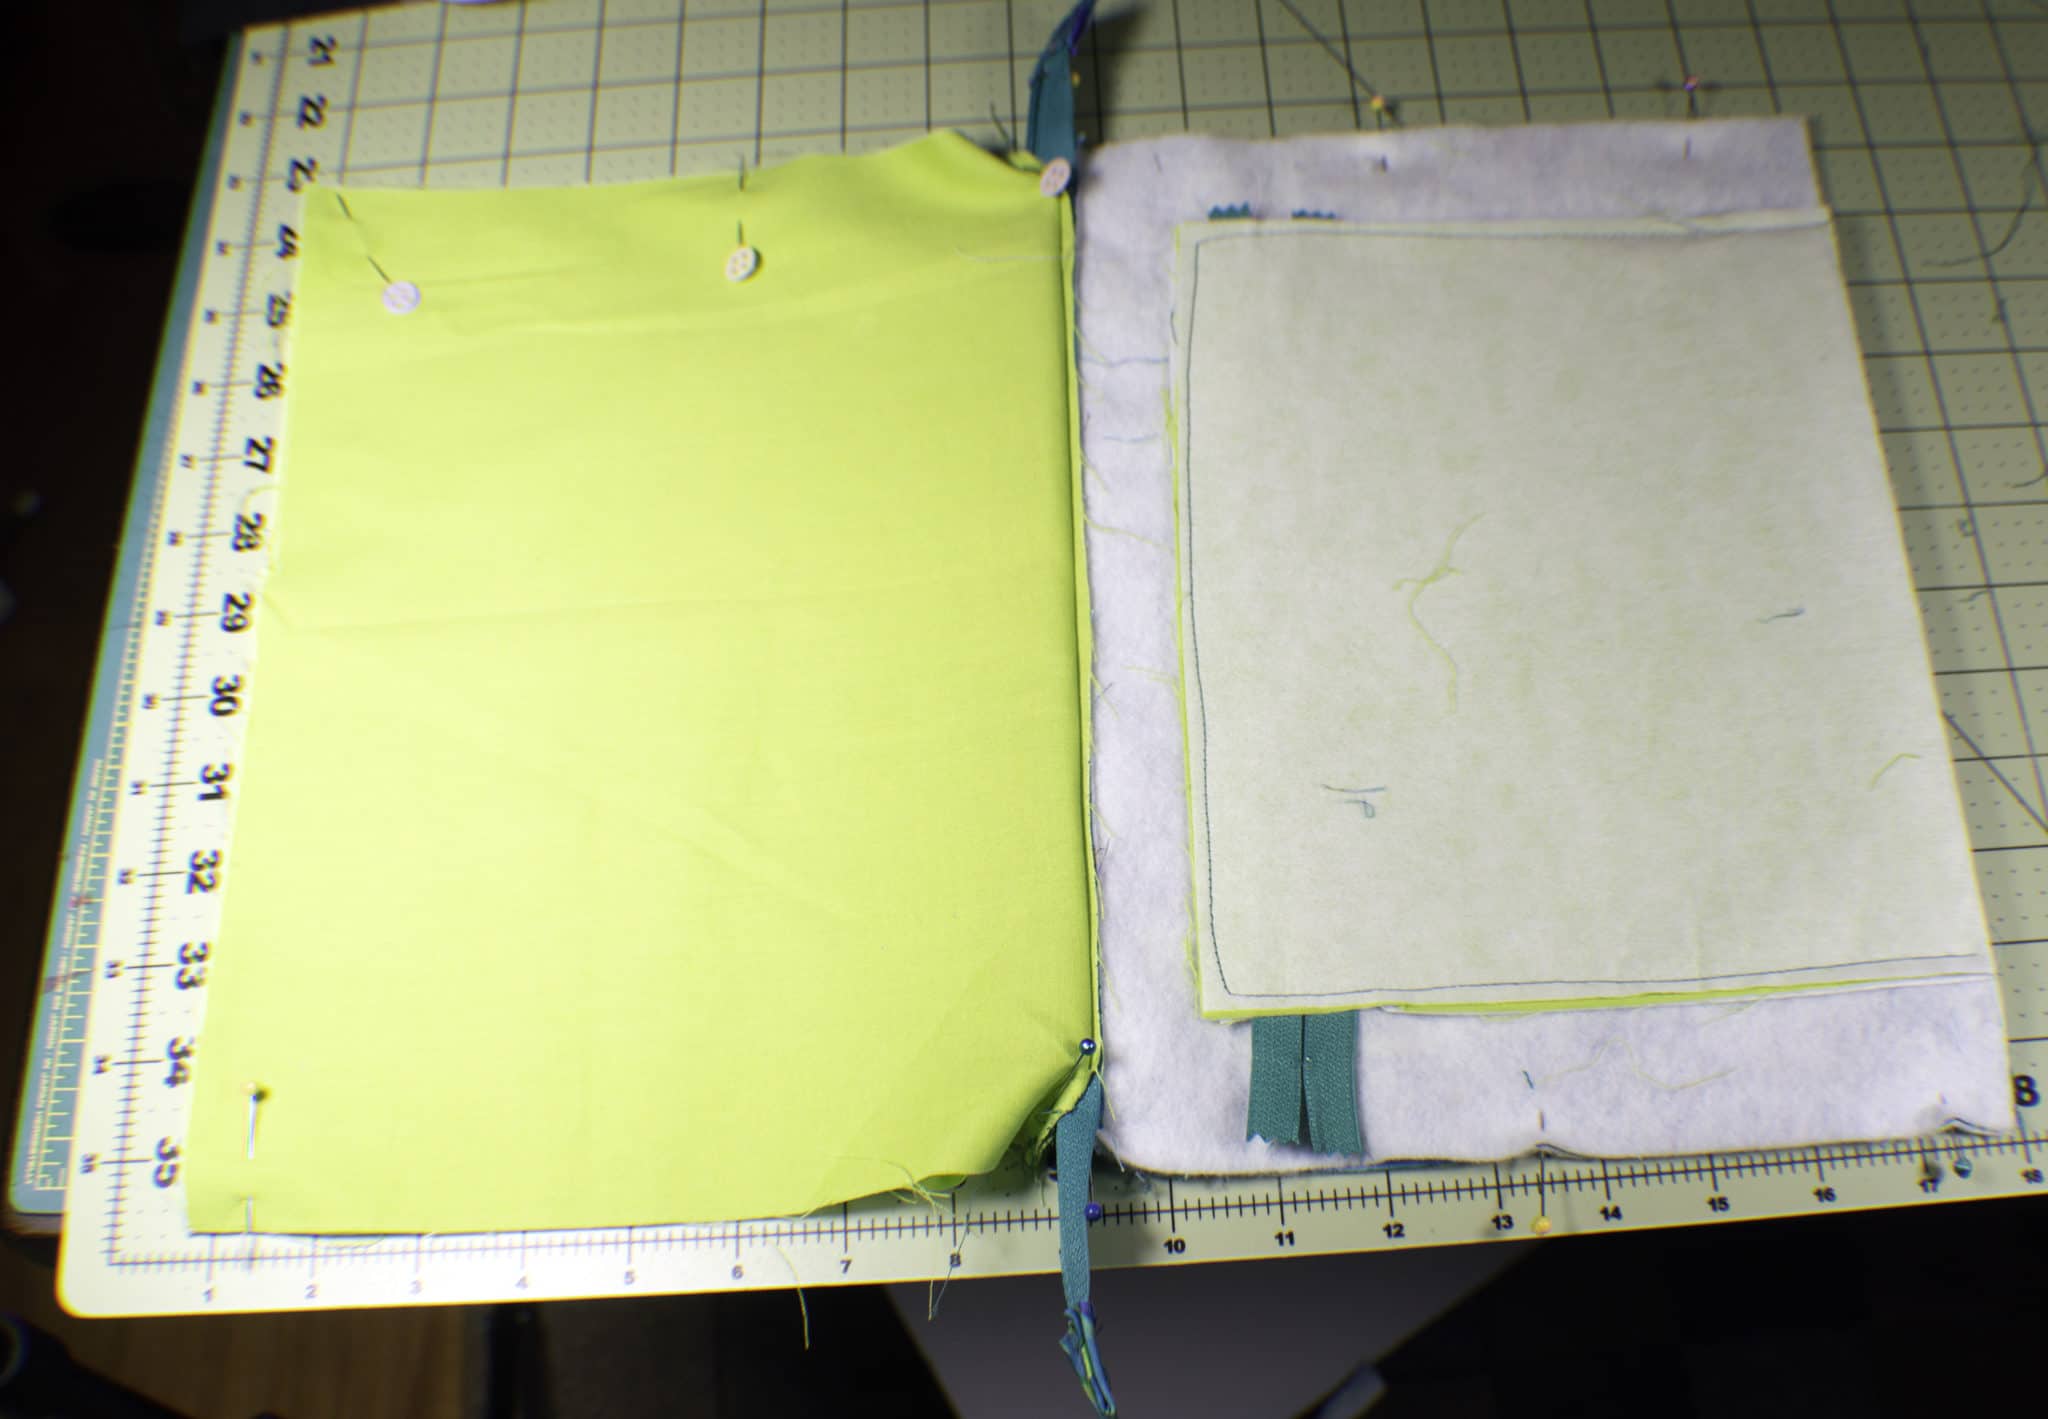
Measure down 1 1/2″ from the long side of one of the main outer pieces and place the pocket lining piece centered in the middle right sides together and pin.

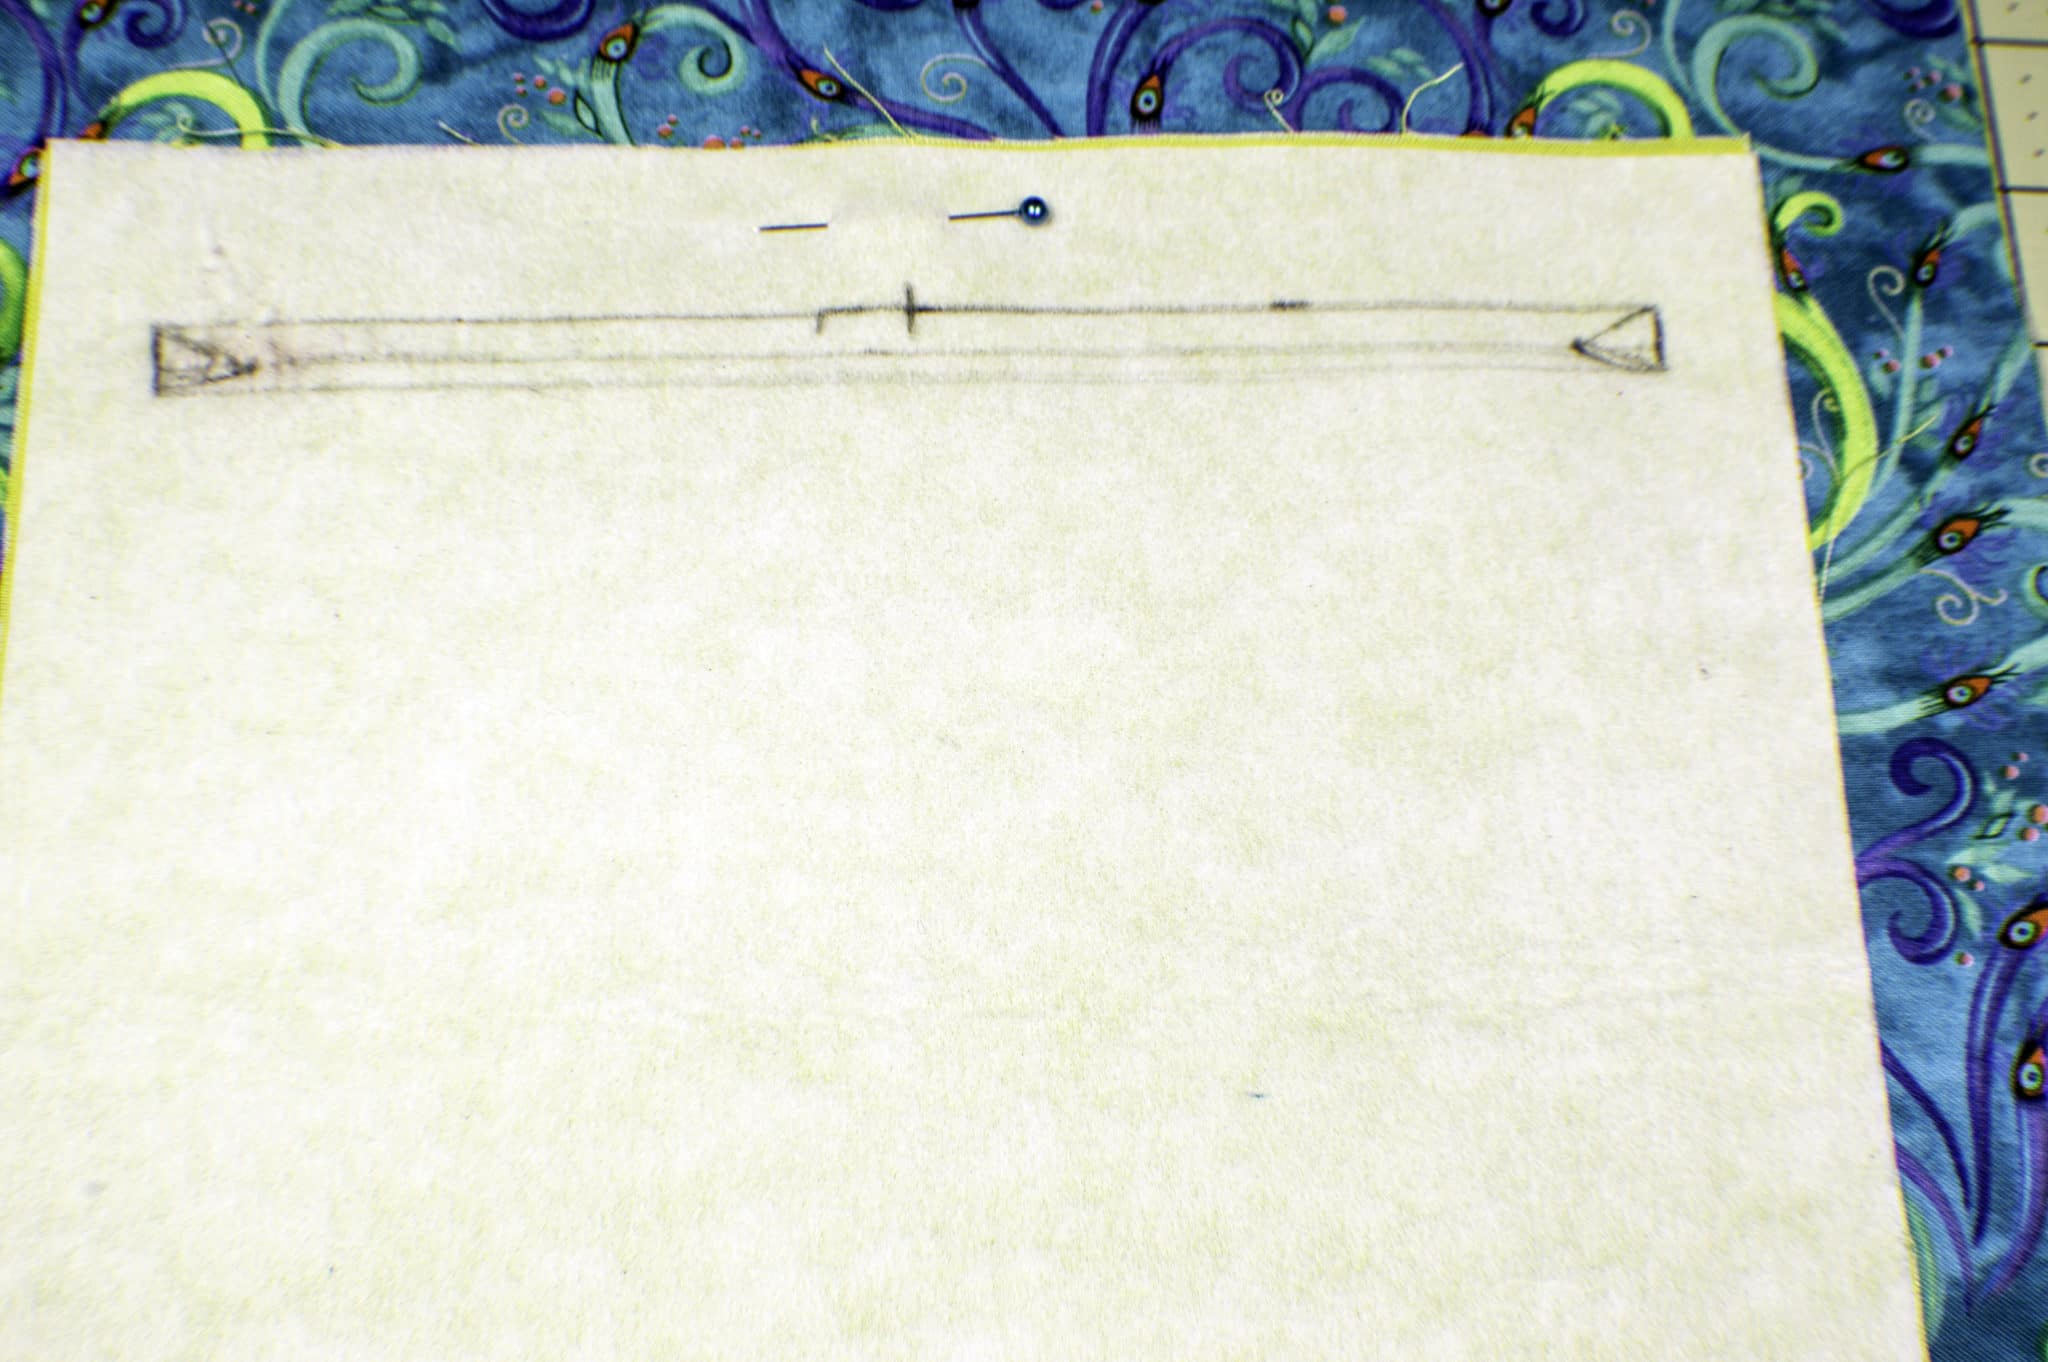
Step 4: How to Make a Tablet Carrying Case
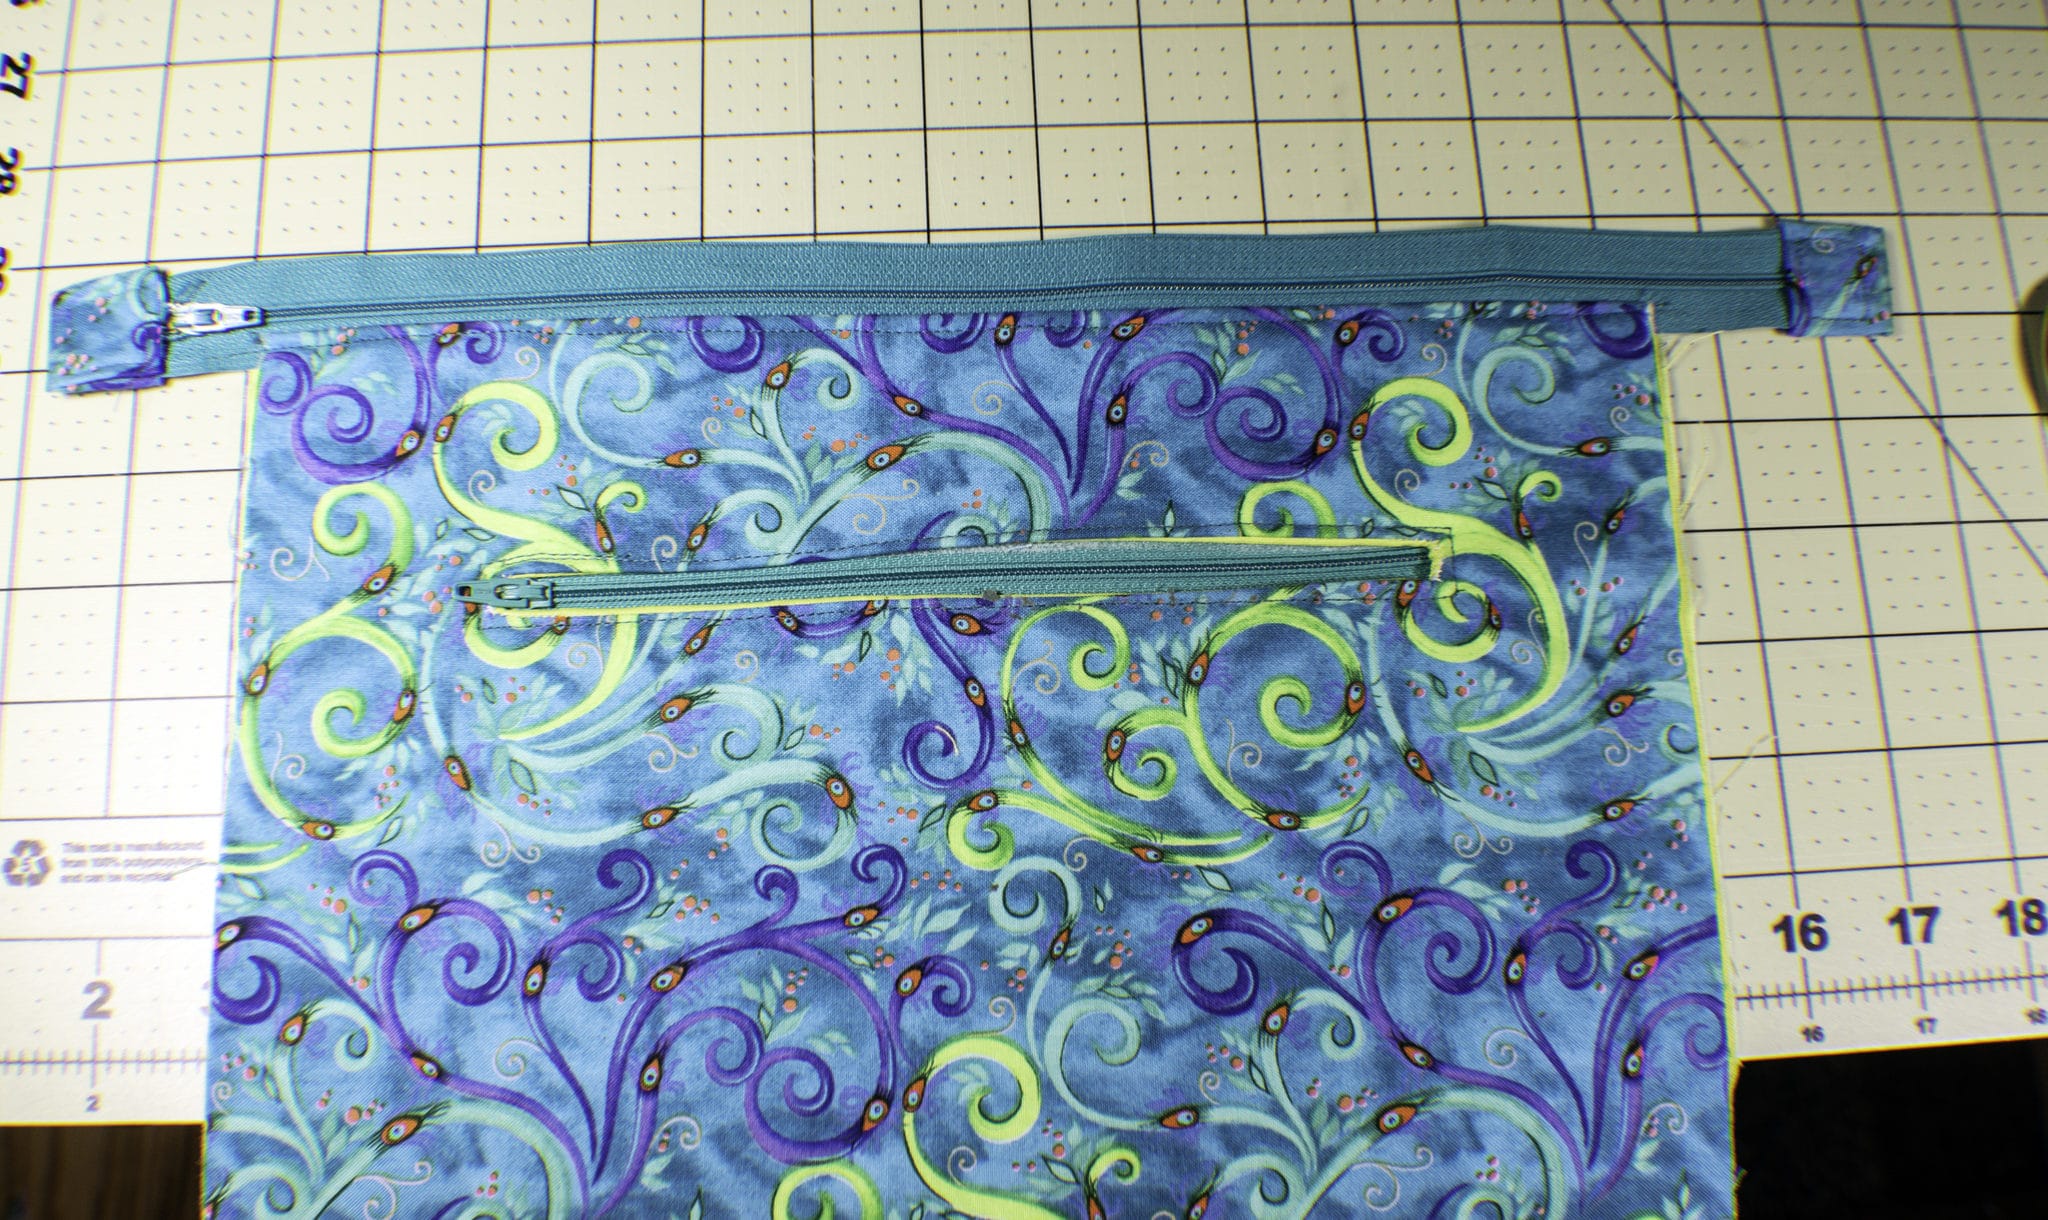
From the top of the pocket piece measure down 1″ and draw an 8″ x 3/8″ box centered on the wrong side of the pocket piece. Draw a line down the center with triangles at each end. Stitch around the box to secure the two pieces of fabric. Cut the line and the legs of the triangles through all layers. Push the pocket piece through opening that you have created and press. This creates an opening with a long pocket piece on the wrong side.
Step 5: How to Make a Tablet Carrying Case
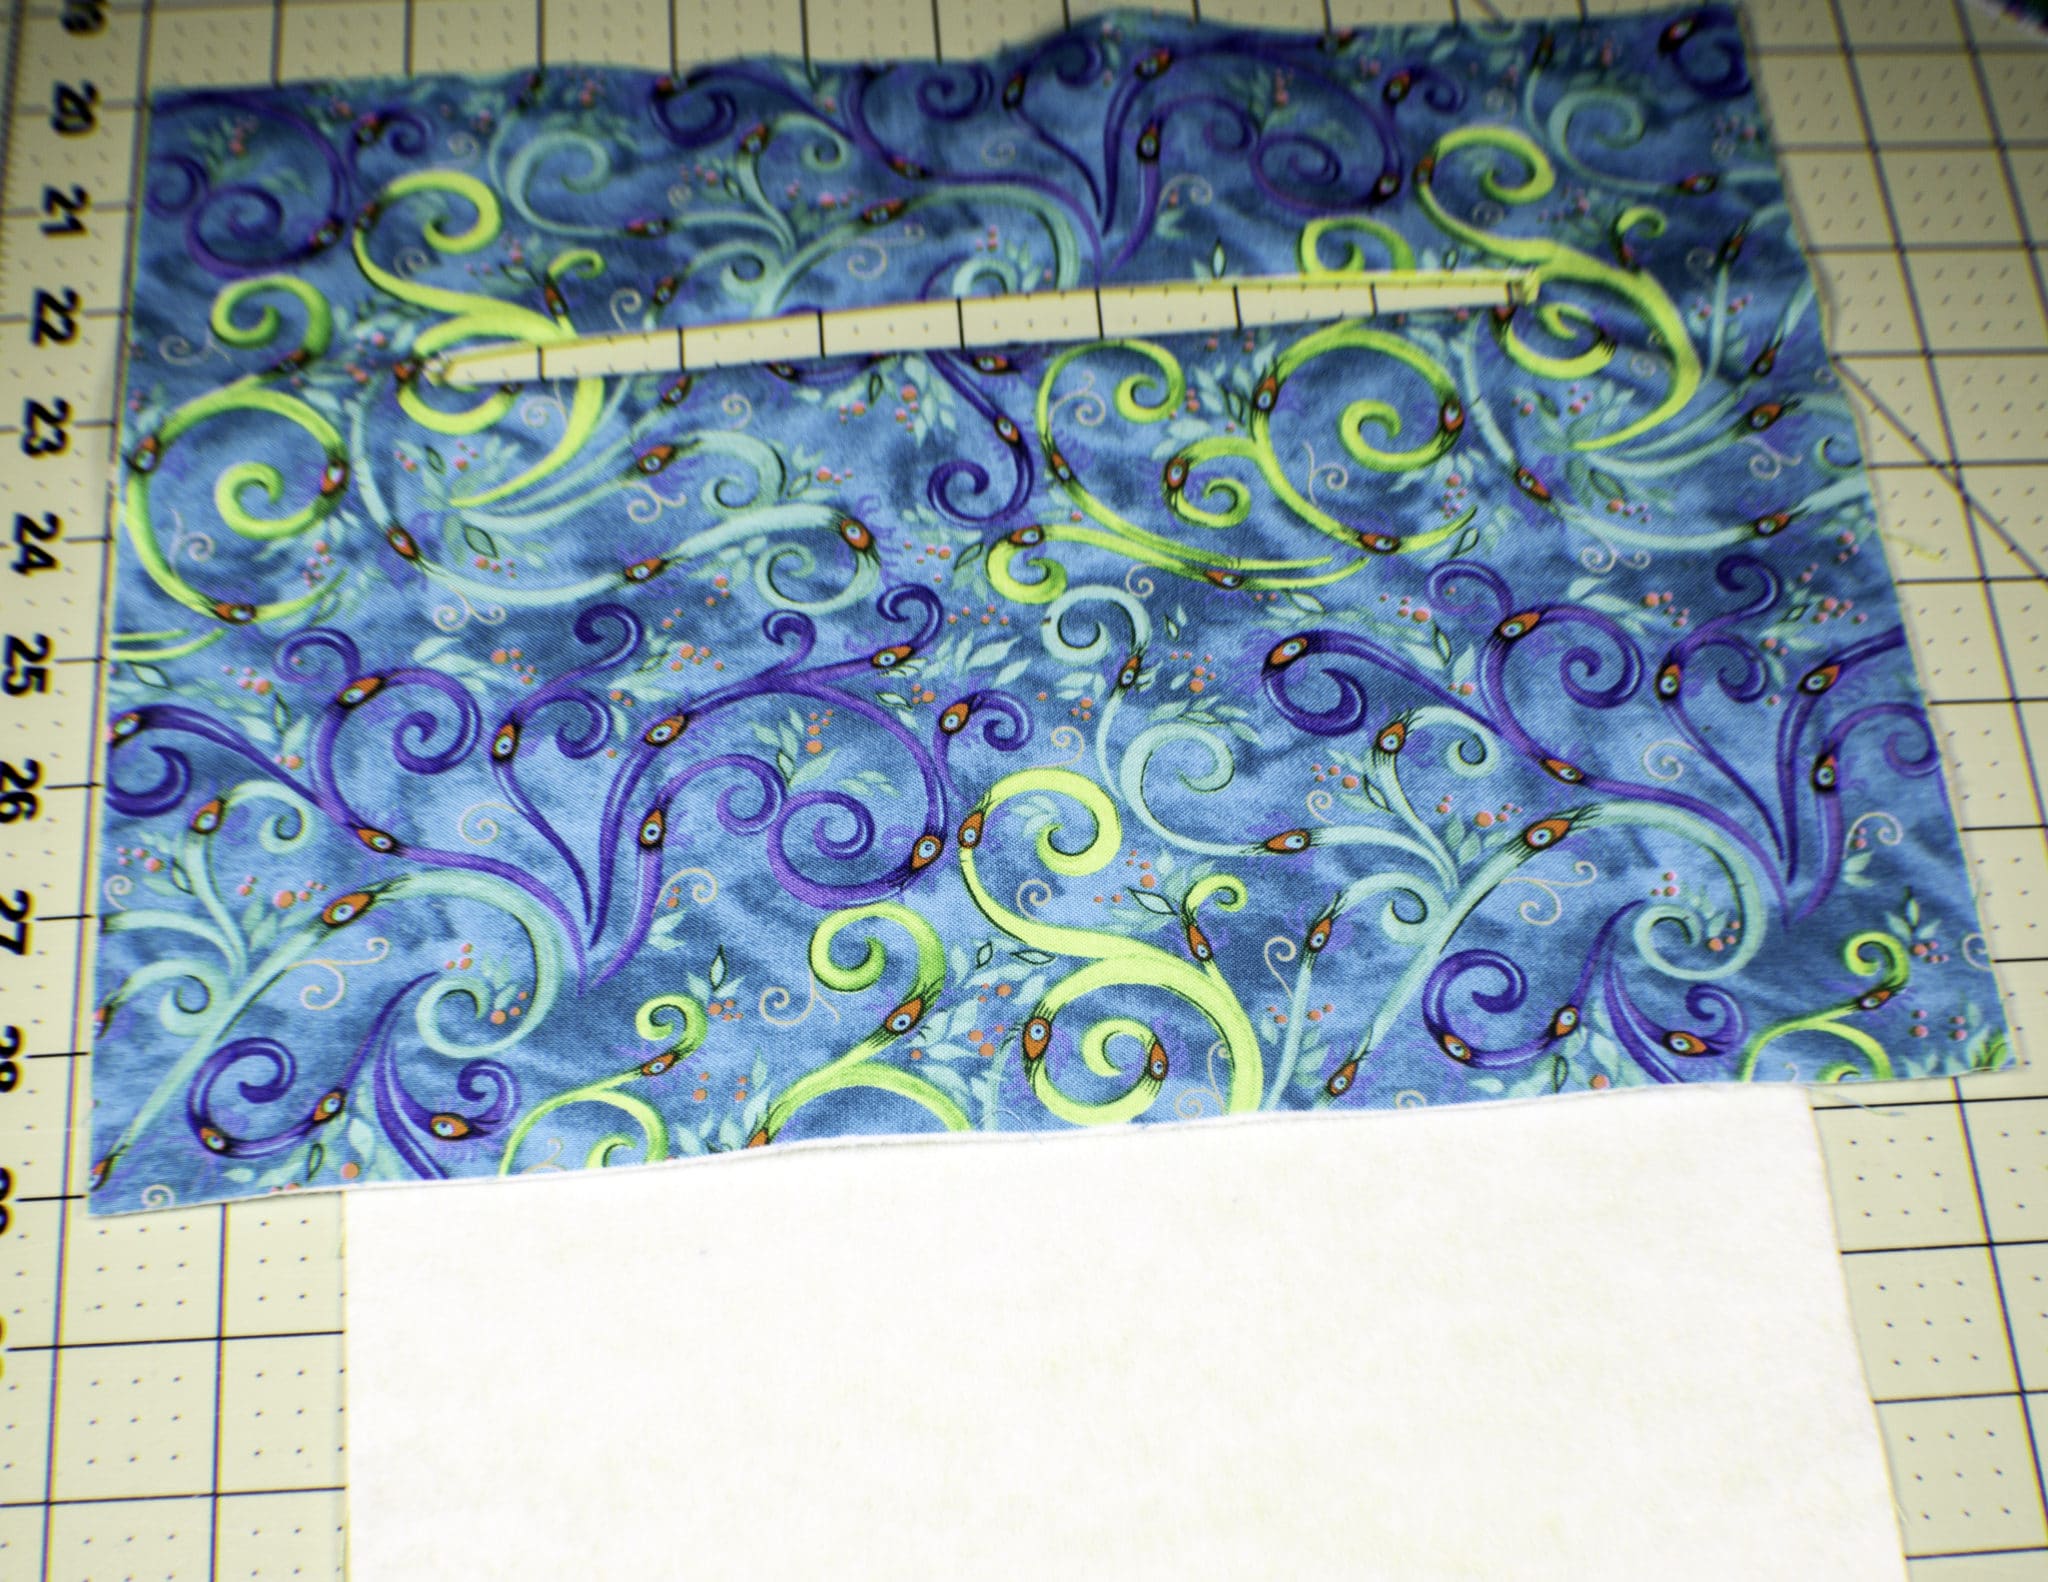
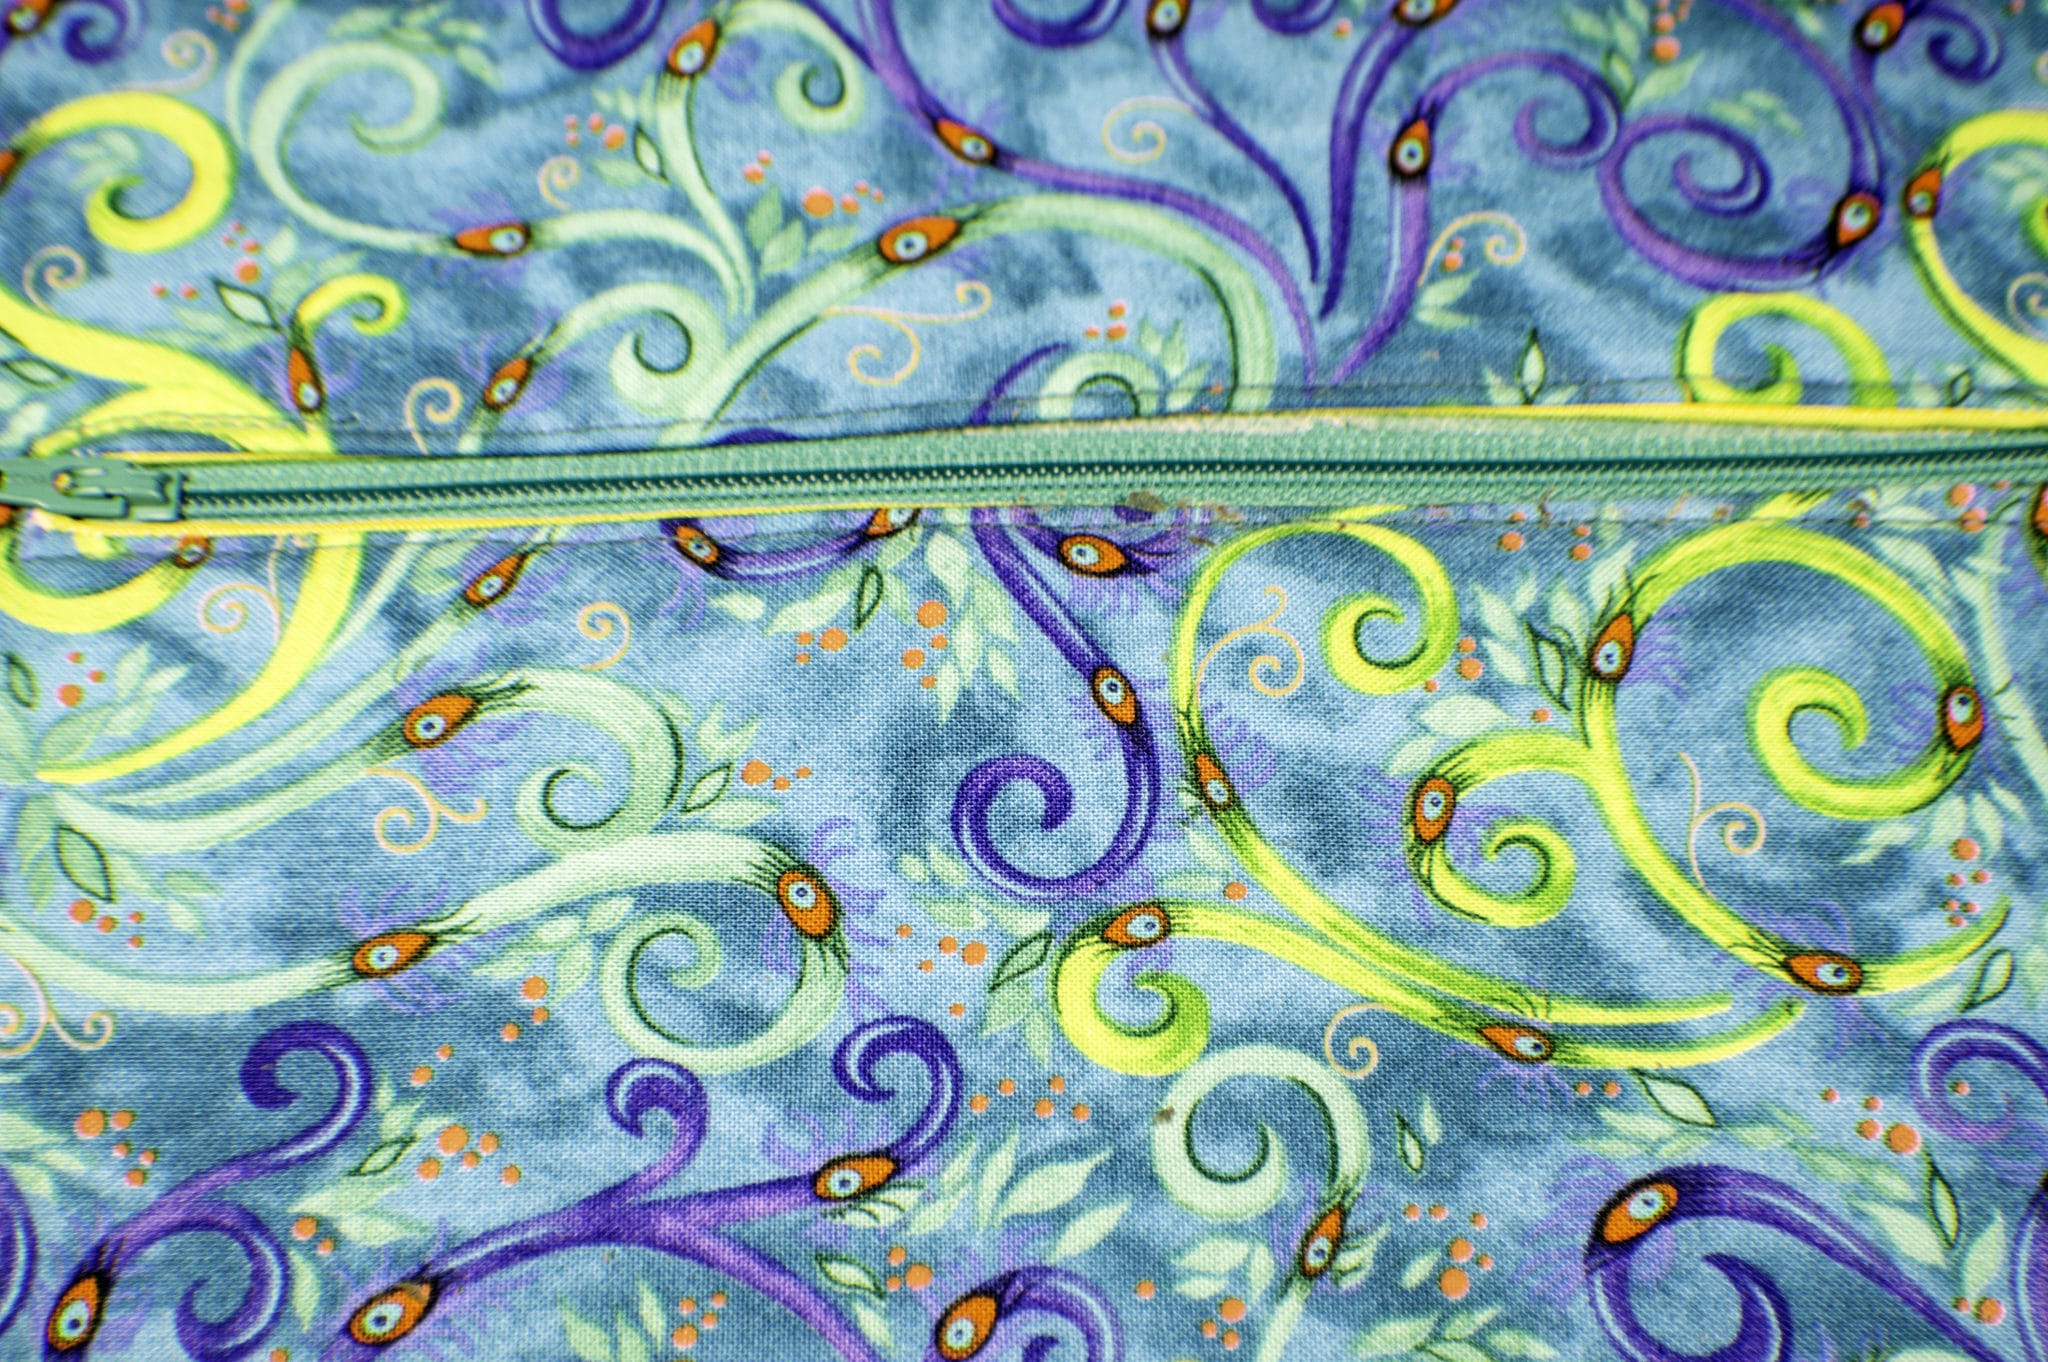
Place the zipper in the center of the opening and either pin or use zipper tape to hold it in place. Sew around the zipper near the opening. Turn the piece over and fold up the pocket in the back of the piece and sew around the three raw edges. Make sure not to sew any part of the outer piece. You have now created the outer pocket.

Step 6: How to Make a Tablet Carrying Case
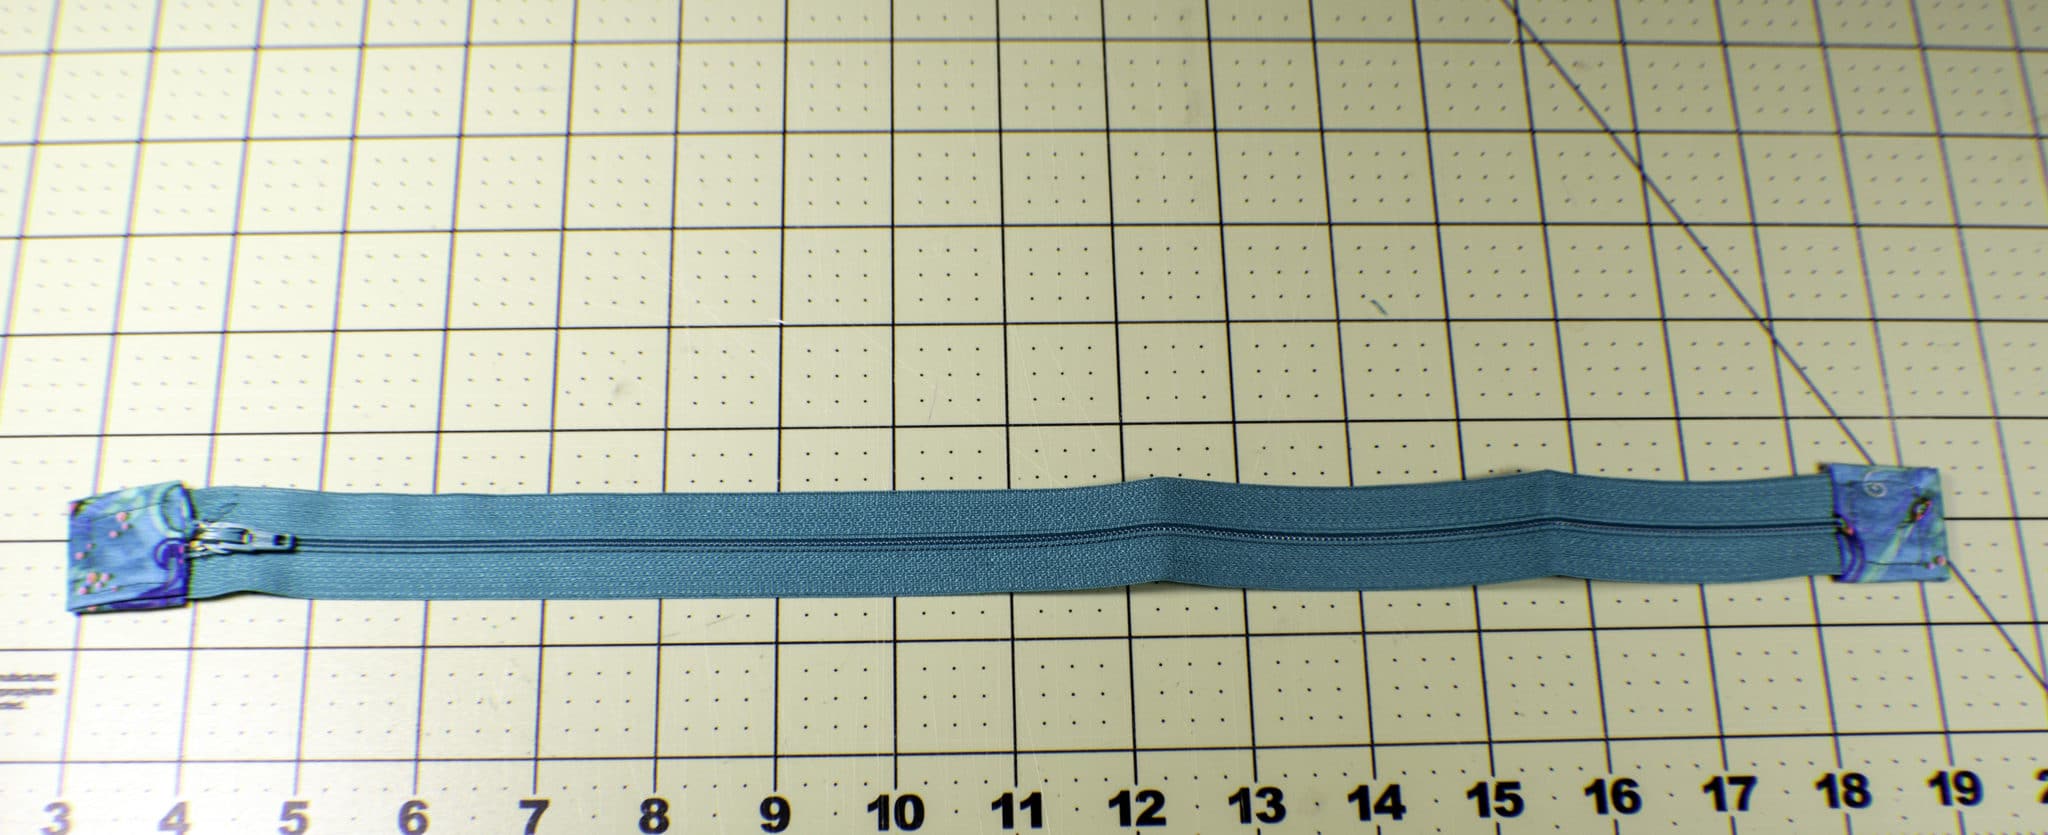
Add zipper tabs to each end of your 16″ zipper. If you are unfamiliar with this process see this tutorial on how to easily add zipper tabs to your zipper.
Step 7: How to Make a Tablet Carrying Case
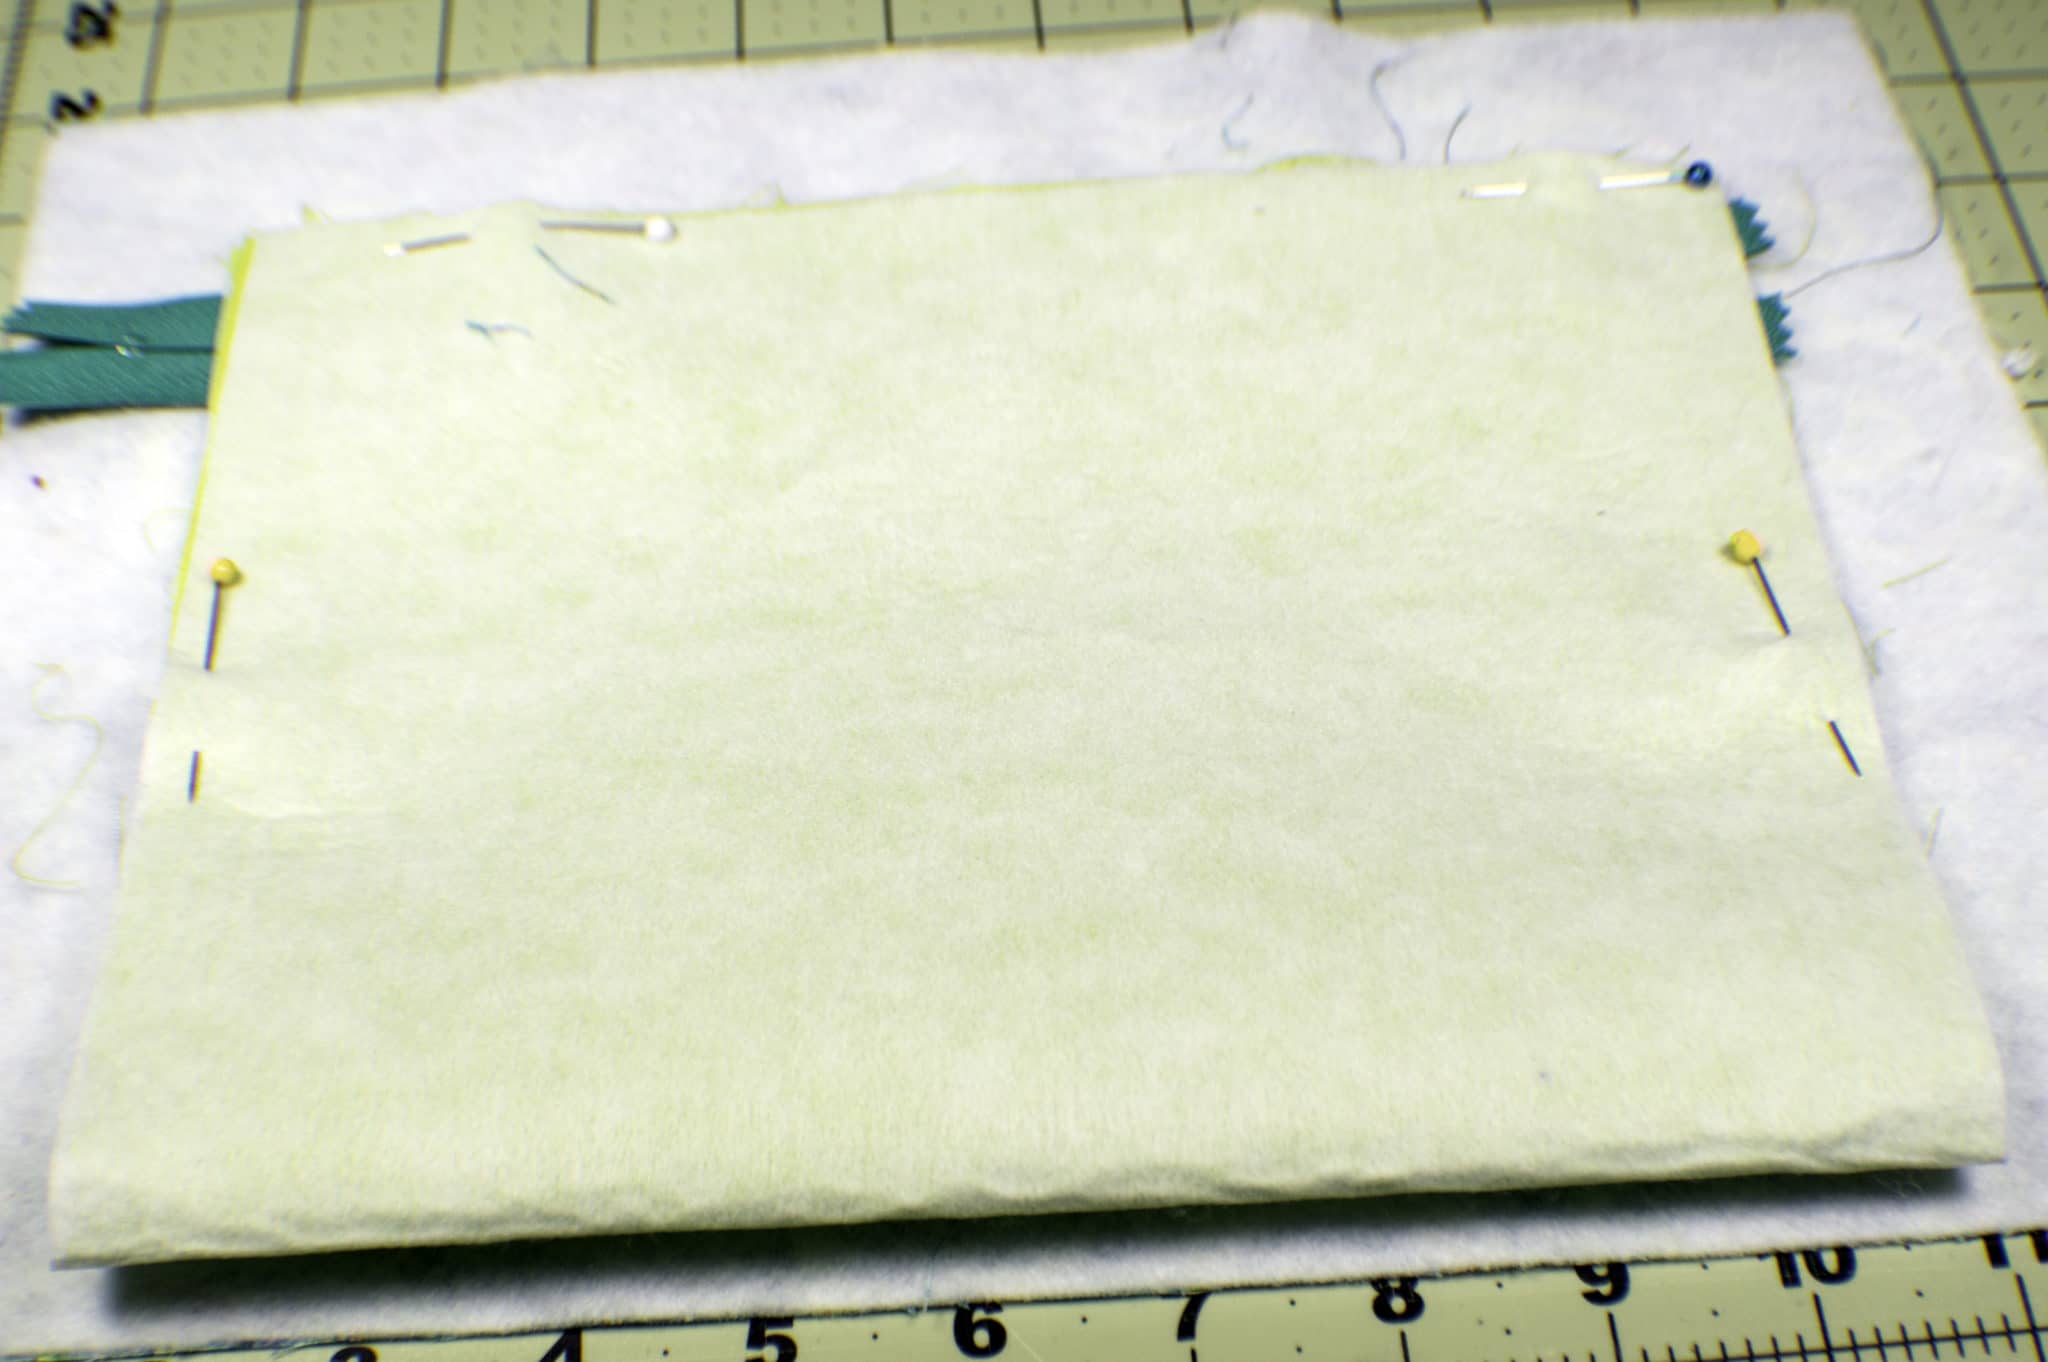
Lay one of your outer pieces right side up on your cutting table. Center the zipper right side down on the outer piece so that both ends are sticking out. Place the lining fabric right sides down on top of the zipper so that you have a zipper sandwich and the lining lines up with the outer fabric. Start sewing the zipper 3/4″ in from the end of the fabric close to the teeth and end 3/4″ from the end. Repeat for the other side of the zipper.

Step 8: How to Make a Tablet Carrying Case
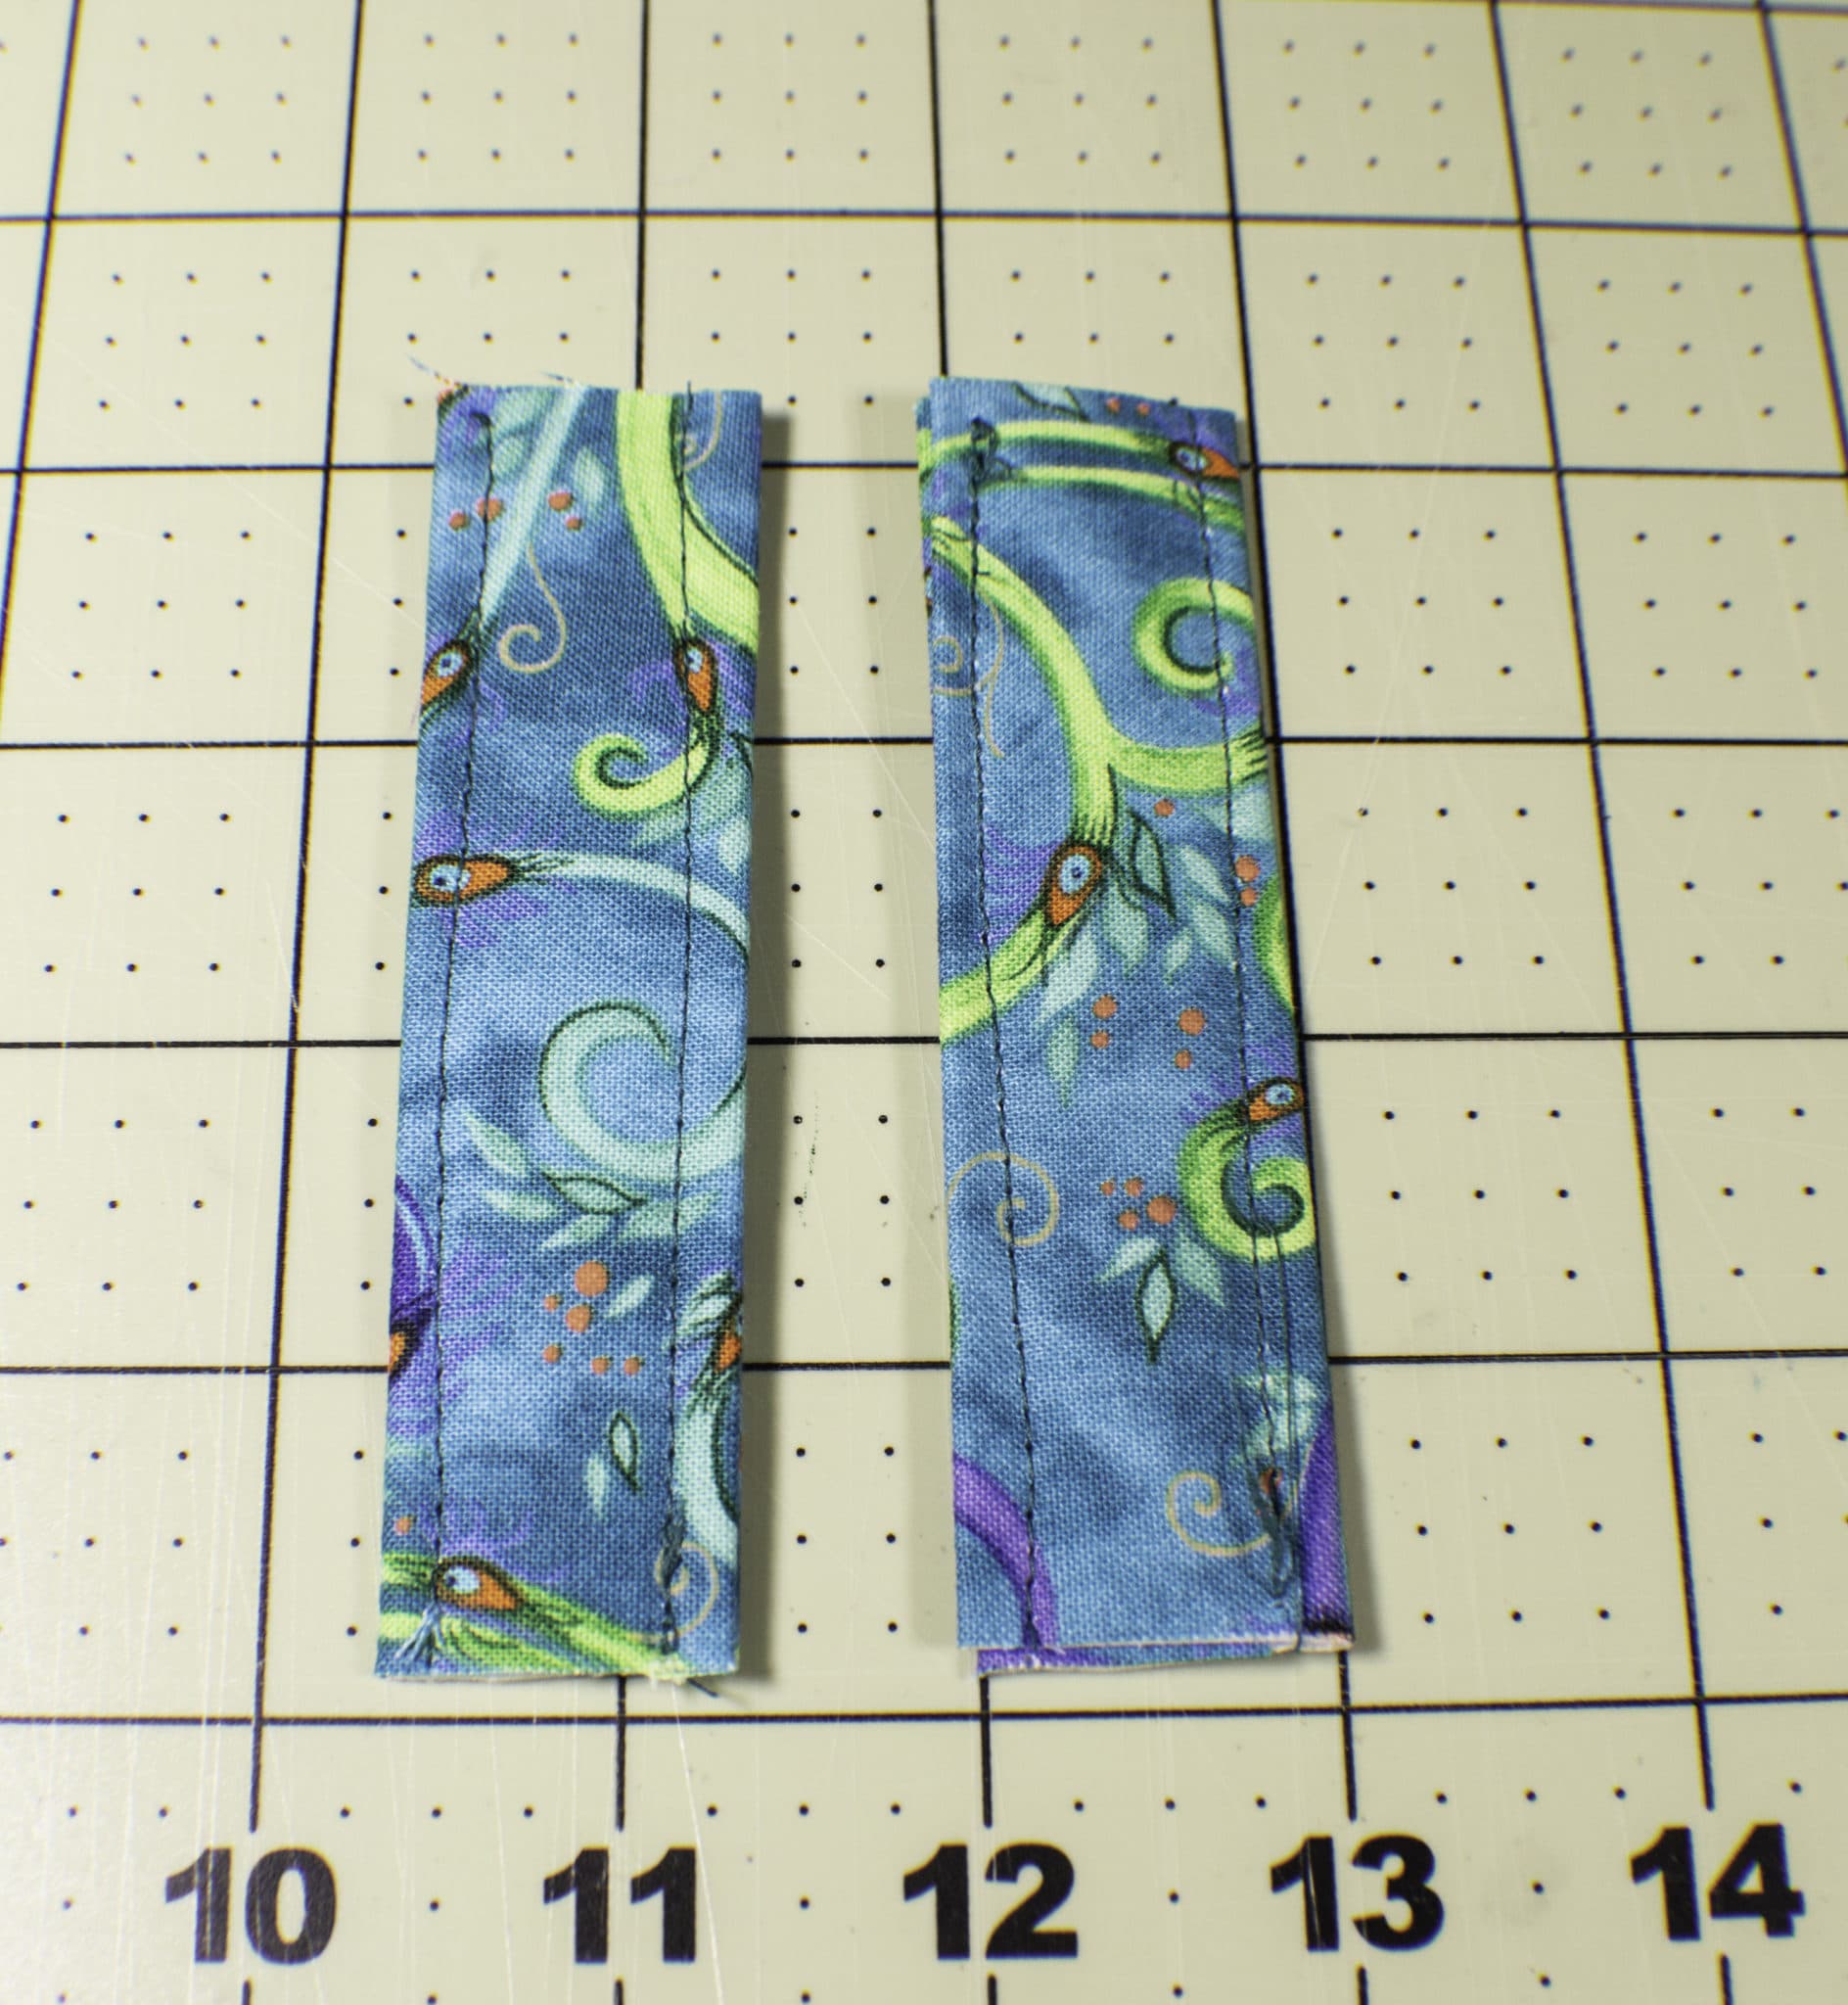
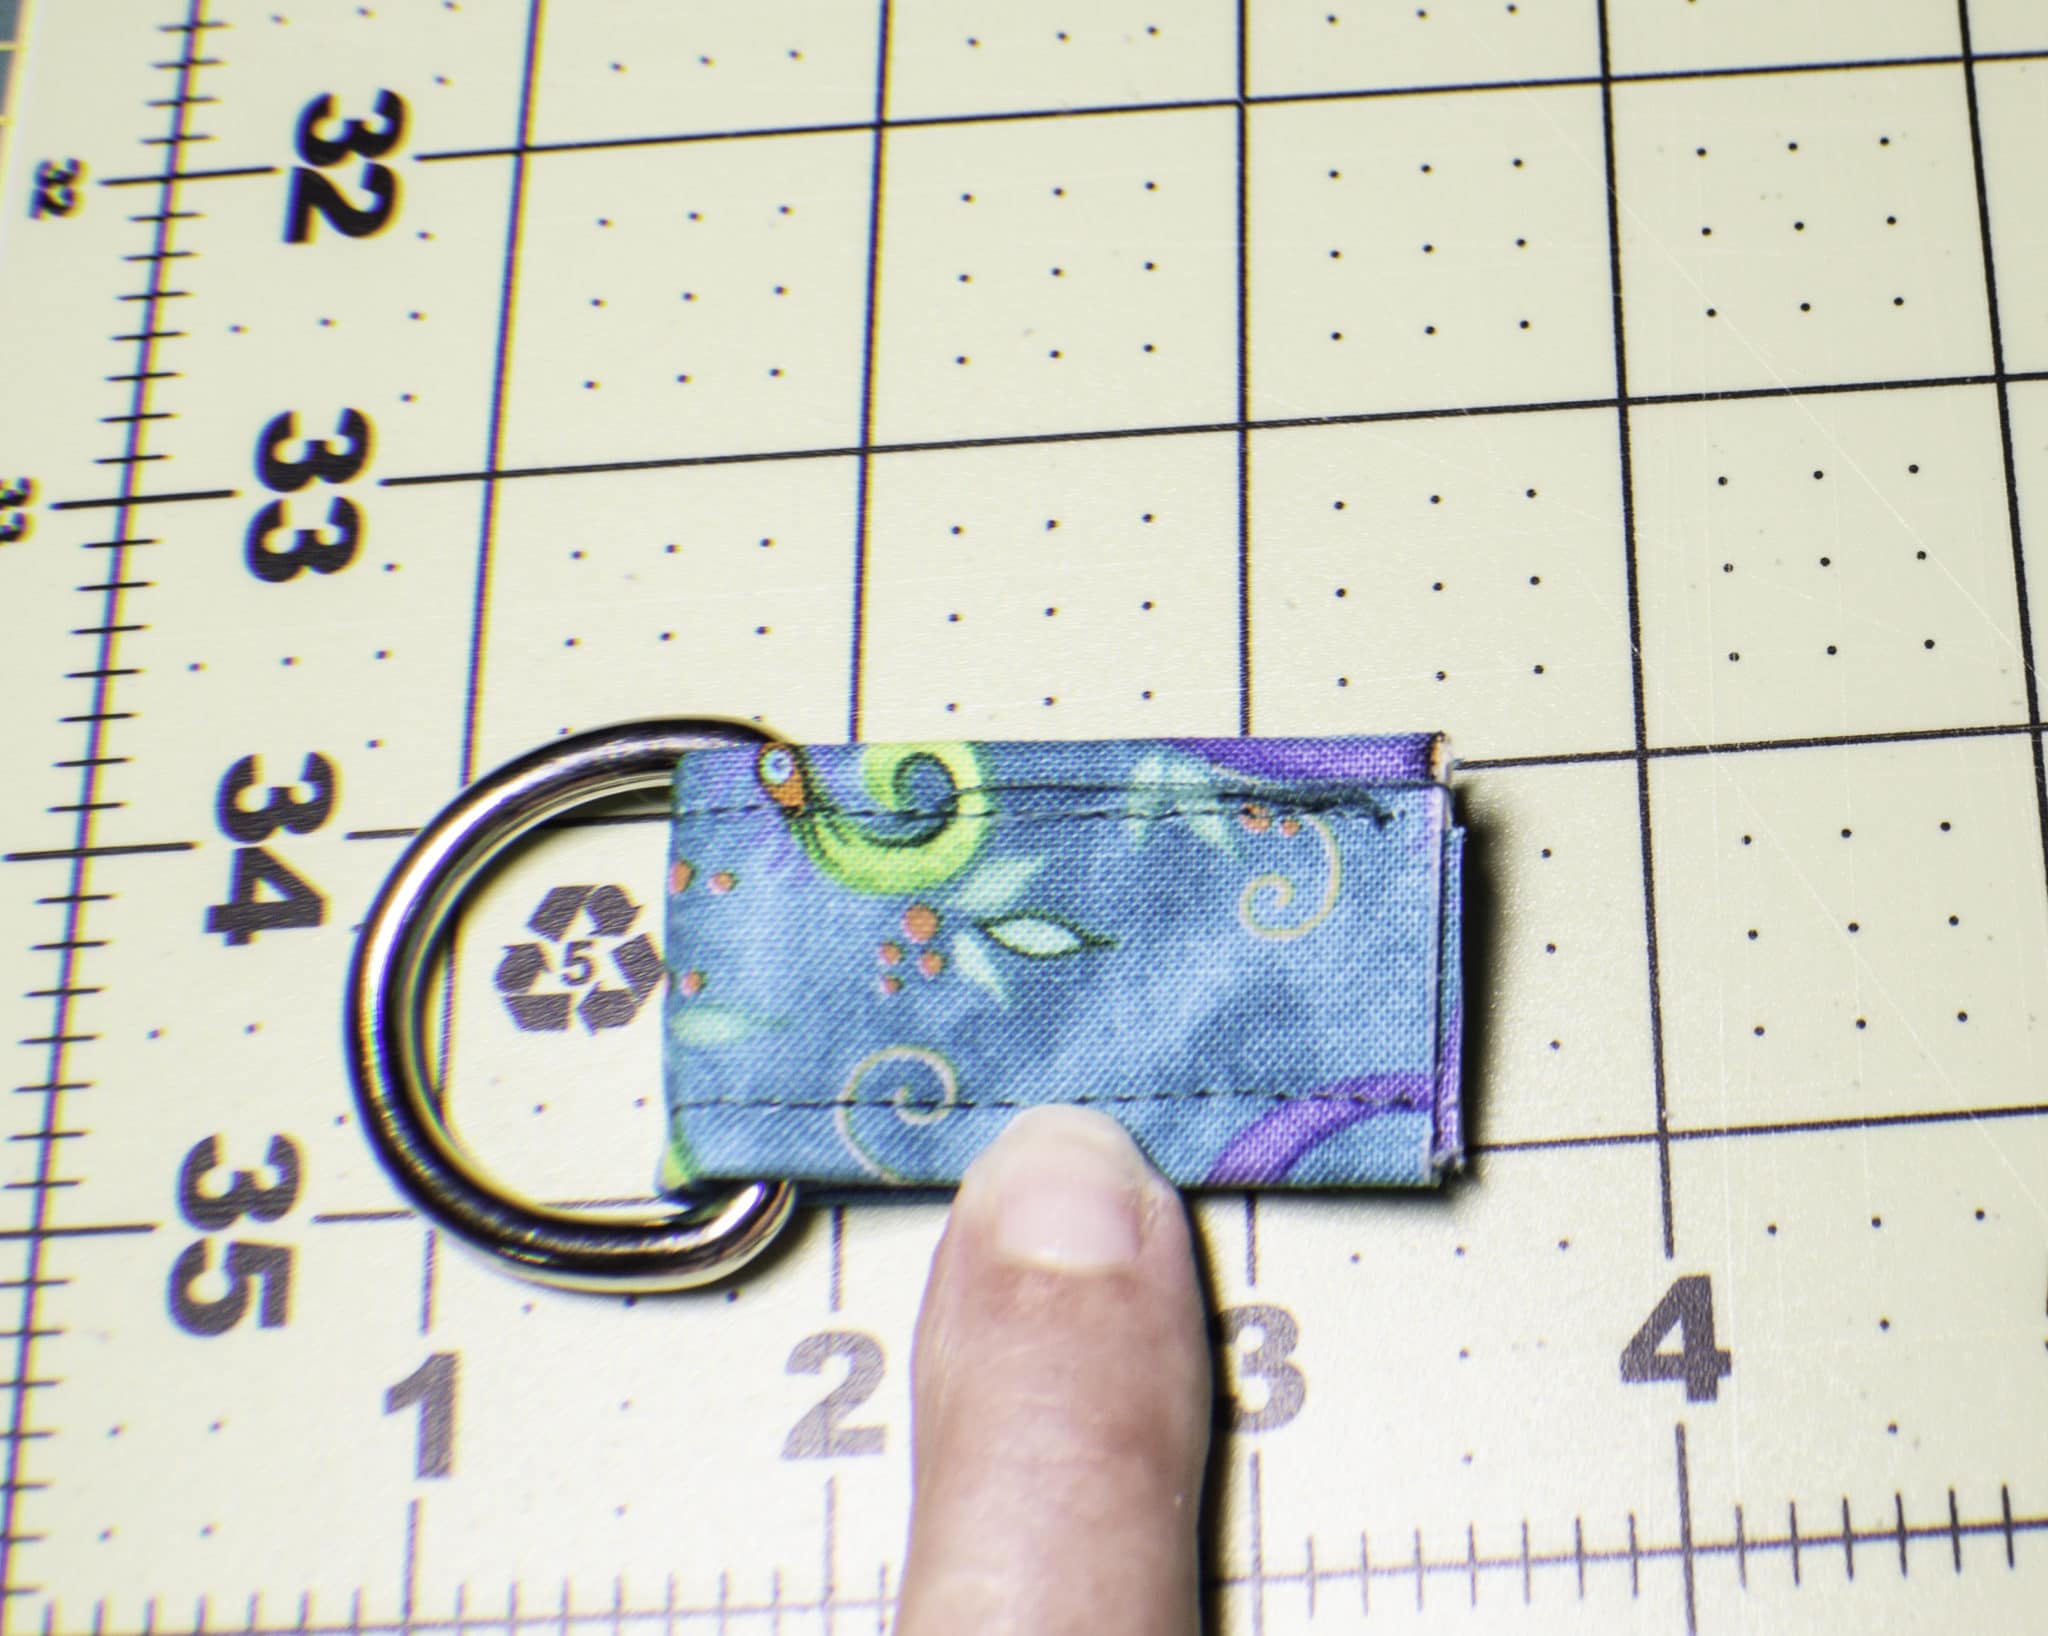
Make the D-Ring tabs. Fold the edges of the tab to the center then fold the tab in half enclosing the raw edges. Top stitch along both long edges for a professional look. Place the Tab around the D-Ring bar so that it folds in half and the round part of the D-Ring is free from fabric.
Step 9: How to Make a Tablet Carrying Case
Unzip the zipper. Pin the lining pieces right sides together and the outer pieces right sides together. Measure down 2 1/2″ from the zipper on both sides of the outer fabric and place the D-Ring tabs so that the D-Rings are facing inside the case and clip. Sew around the outer fabric. Sew around the lining fabric leaving an opening in the bottom for turning.
Step 10: How to Make a Tablet Carrying Case
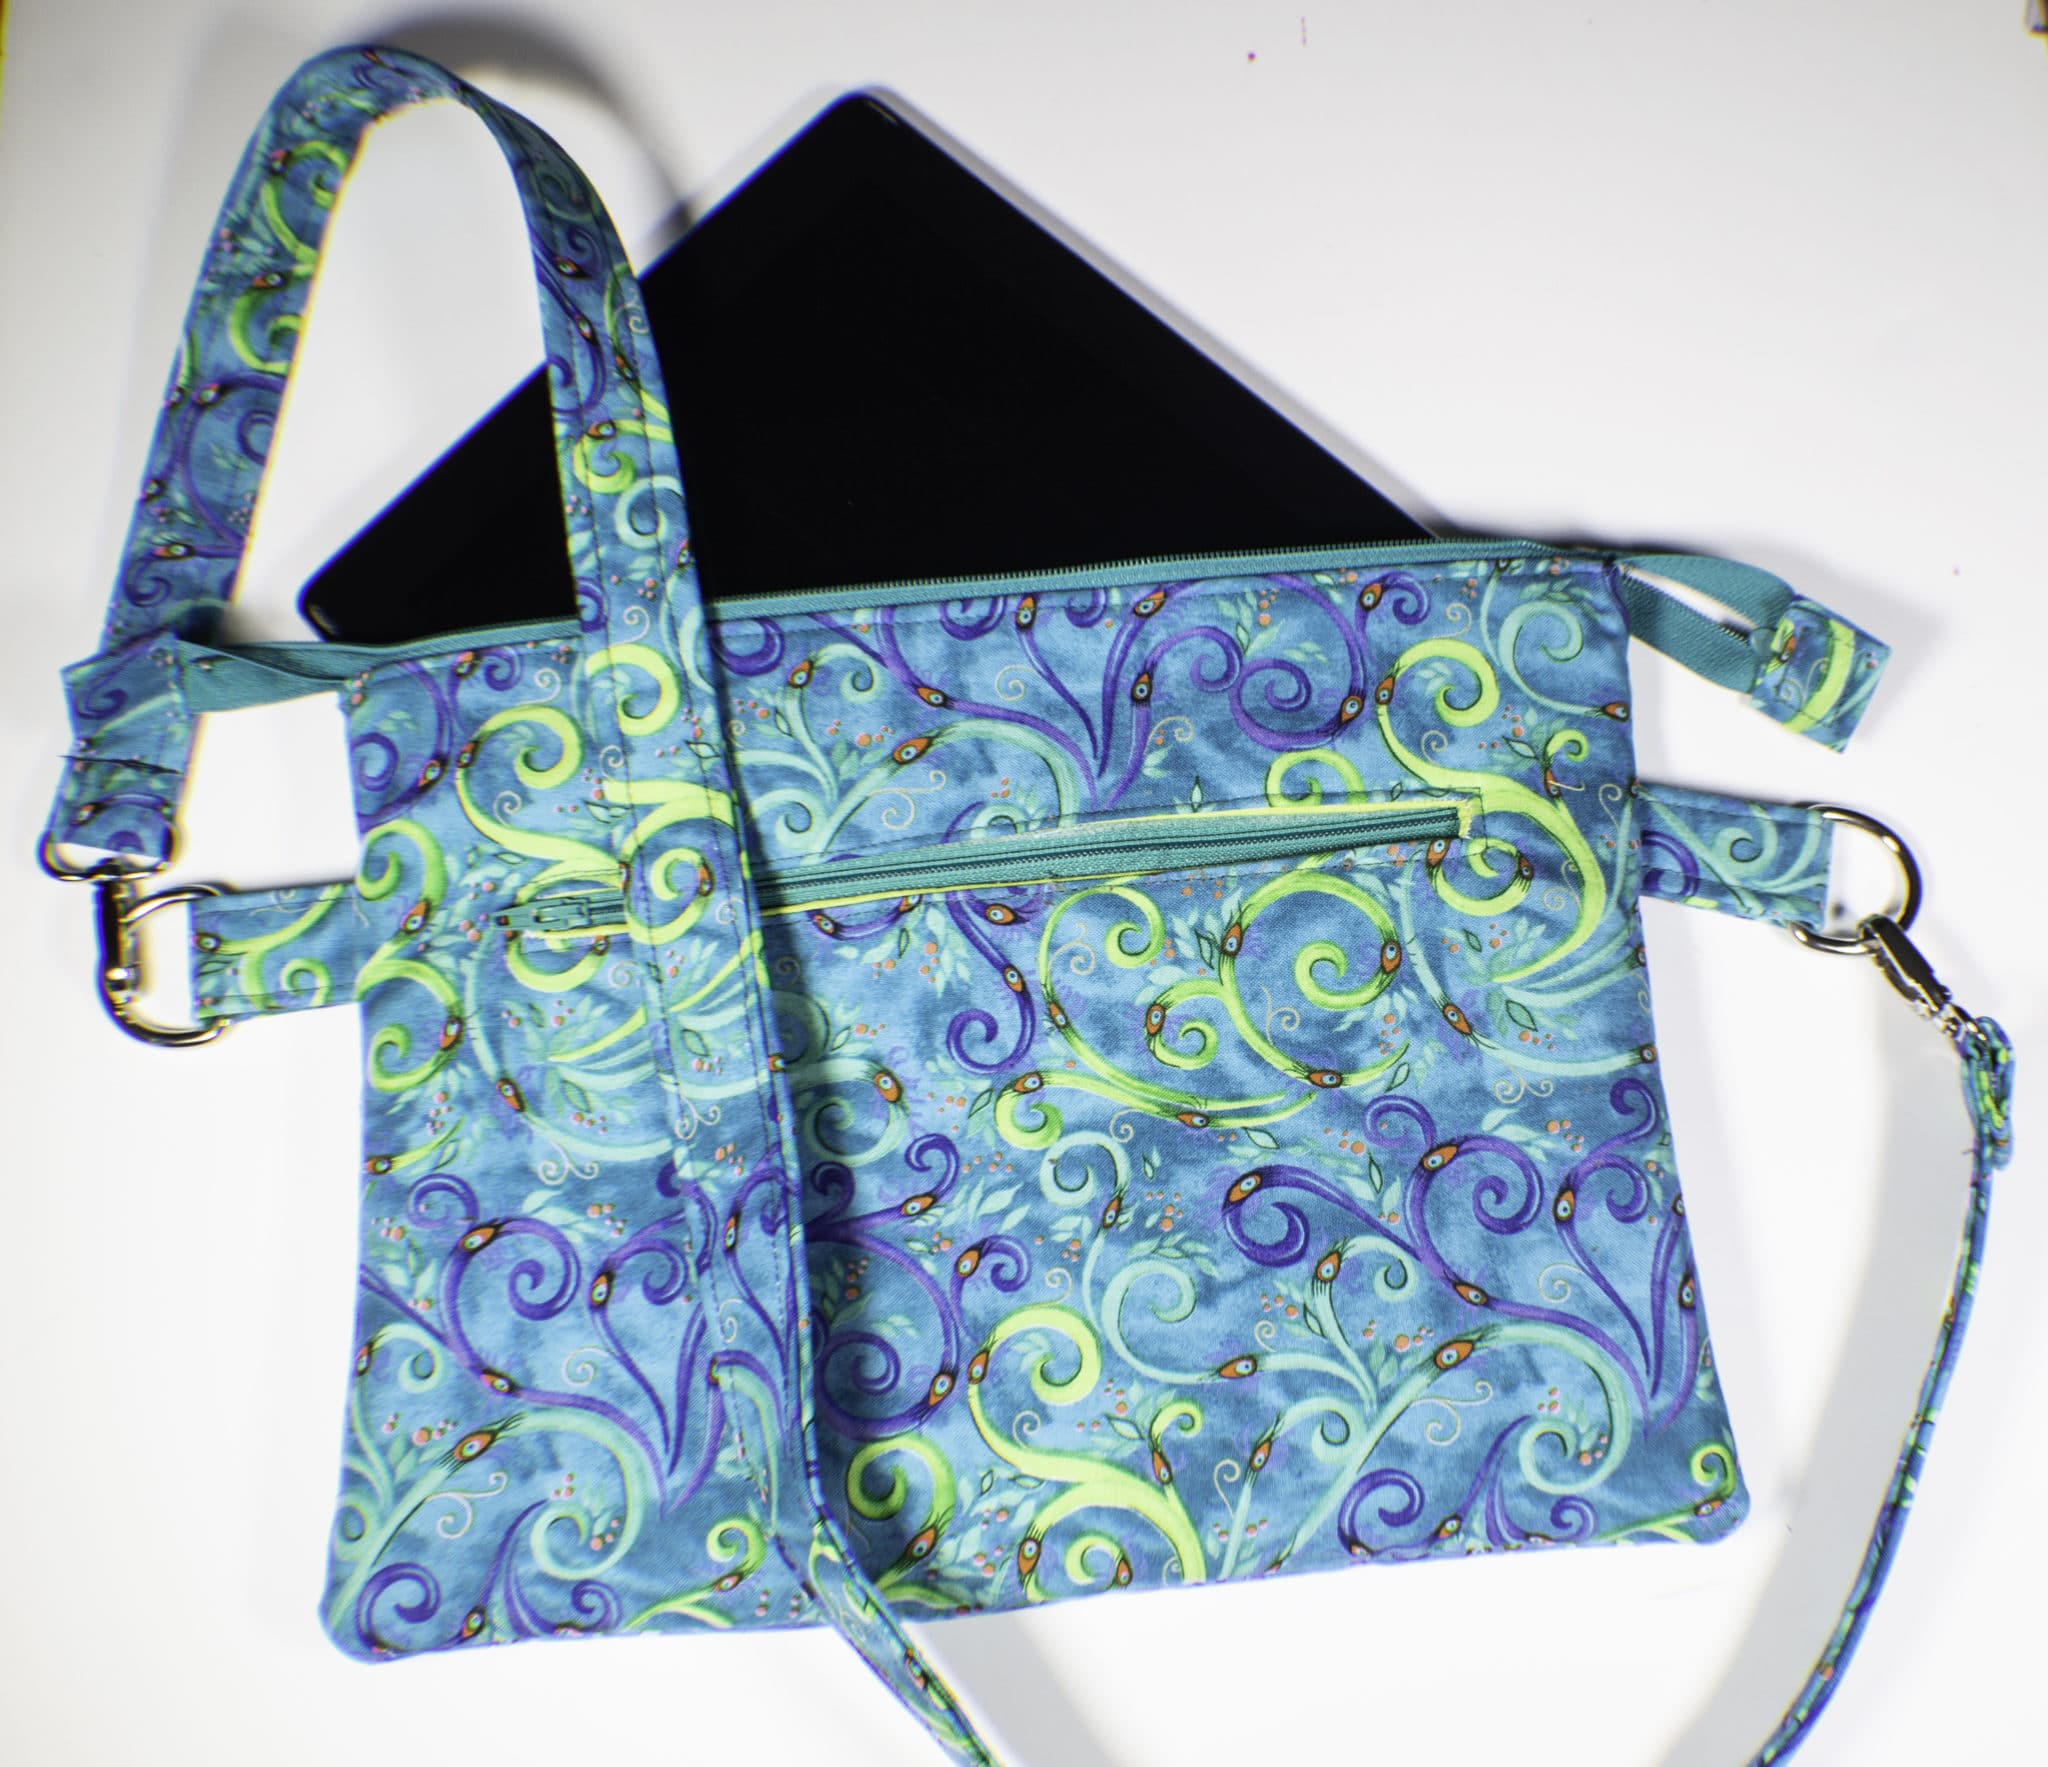
Turn the case through the opening in the lining and through the open zipper and press. Top stitch along the outside of the zipper and around the case for a more professional look and to prevent the lining from catching. Sew the opening in the lining closed using ladder stitch or on your machine.
Step 11: How to Make a Tablet Carrying Case
Make the strap in the same way that you made the D-Ring tabs. Add the swivel clips to the ends of the straps, turn the raw edges under and sew.
Step 12: How to Make a Tablet Carrying Case
Snap the strap to the D-Rings and you have finished your Tablet carrying case.
If you would like more sewing and crafting projects sign up for our email list and receive your free eBook of 15 free hand patterns and tutorials.


I’m excited to try this! I just started sewing, but have made several totes and think this would be a good next challenge. My tablet is 13 x 10, should I change the size of the pocket lining and it’s zipper or just keep them the same as you list? If I do change them, what size do you think I should make them? Thank you in advance!
Thank you for trying this project. I think I would add two inches to the pocket lining and the zipper so that you are using an 11″ zipper. I think that the zipper and the pocket will look more symmetrical with your carrying case given that your tablet is about 3″ larger than the one that I have. Please let me know if you have any other questions. I will be more than happy to answer them if I am able. Good luck with making this project. Diana
Thank you Diana! Just finished up a project this weekend, hope to start this bag next weekend! Sew excited! 🙂
I hope it works out for you. Thanks for giving it a try. Let me know if you need any other assistance. Good luck.
In the instructions for the first zipper, you don’t show sewing around that drawn box as you have in other videos. I stopped at this point in the tablet case to make sure if I do not sew around that drawn box, won’t the fabric to be more difficult to handle, as when you are to cut along the drawn line to the edges of the triangle.
That was my mistake. Definitely stitch around the box.
Thank you so much! I looked through other videos for confirmation. I used the instructions for the closet safe for a couple of other projects!
I love this bag I am going to make it for my daughters school chromebook. I was just wondering if you a version that I can print it out?
Yes, If you go to the bottom you will see an icon to print or PDF. Choose Pdf then print it out and that should work for you.
Just finished this bag. Easy fun project. Thanks for the good tutorial.
You are welcome. Glad you tried the project.