How to Make Burlap Flowers
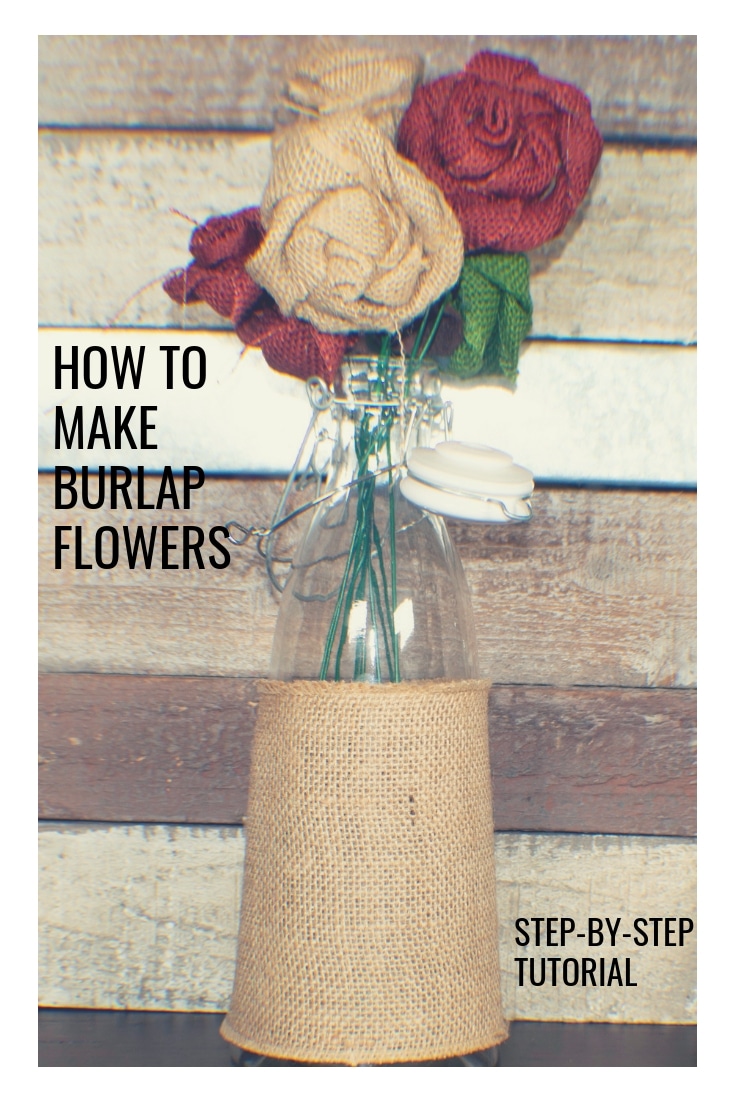
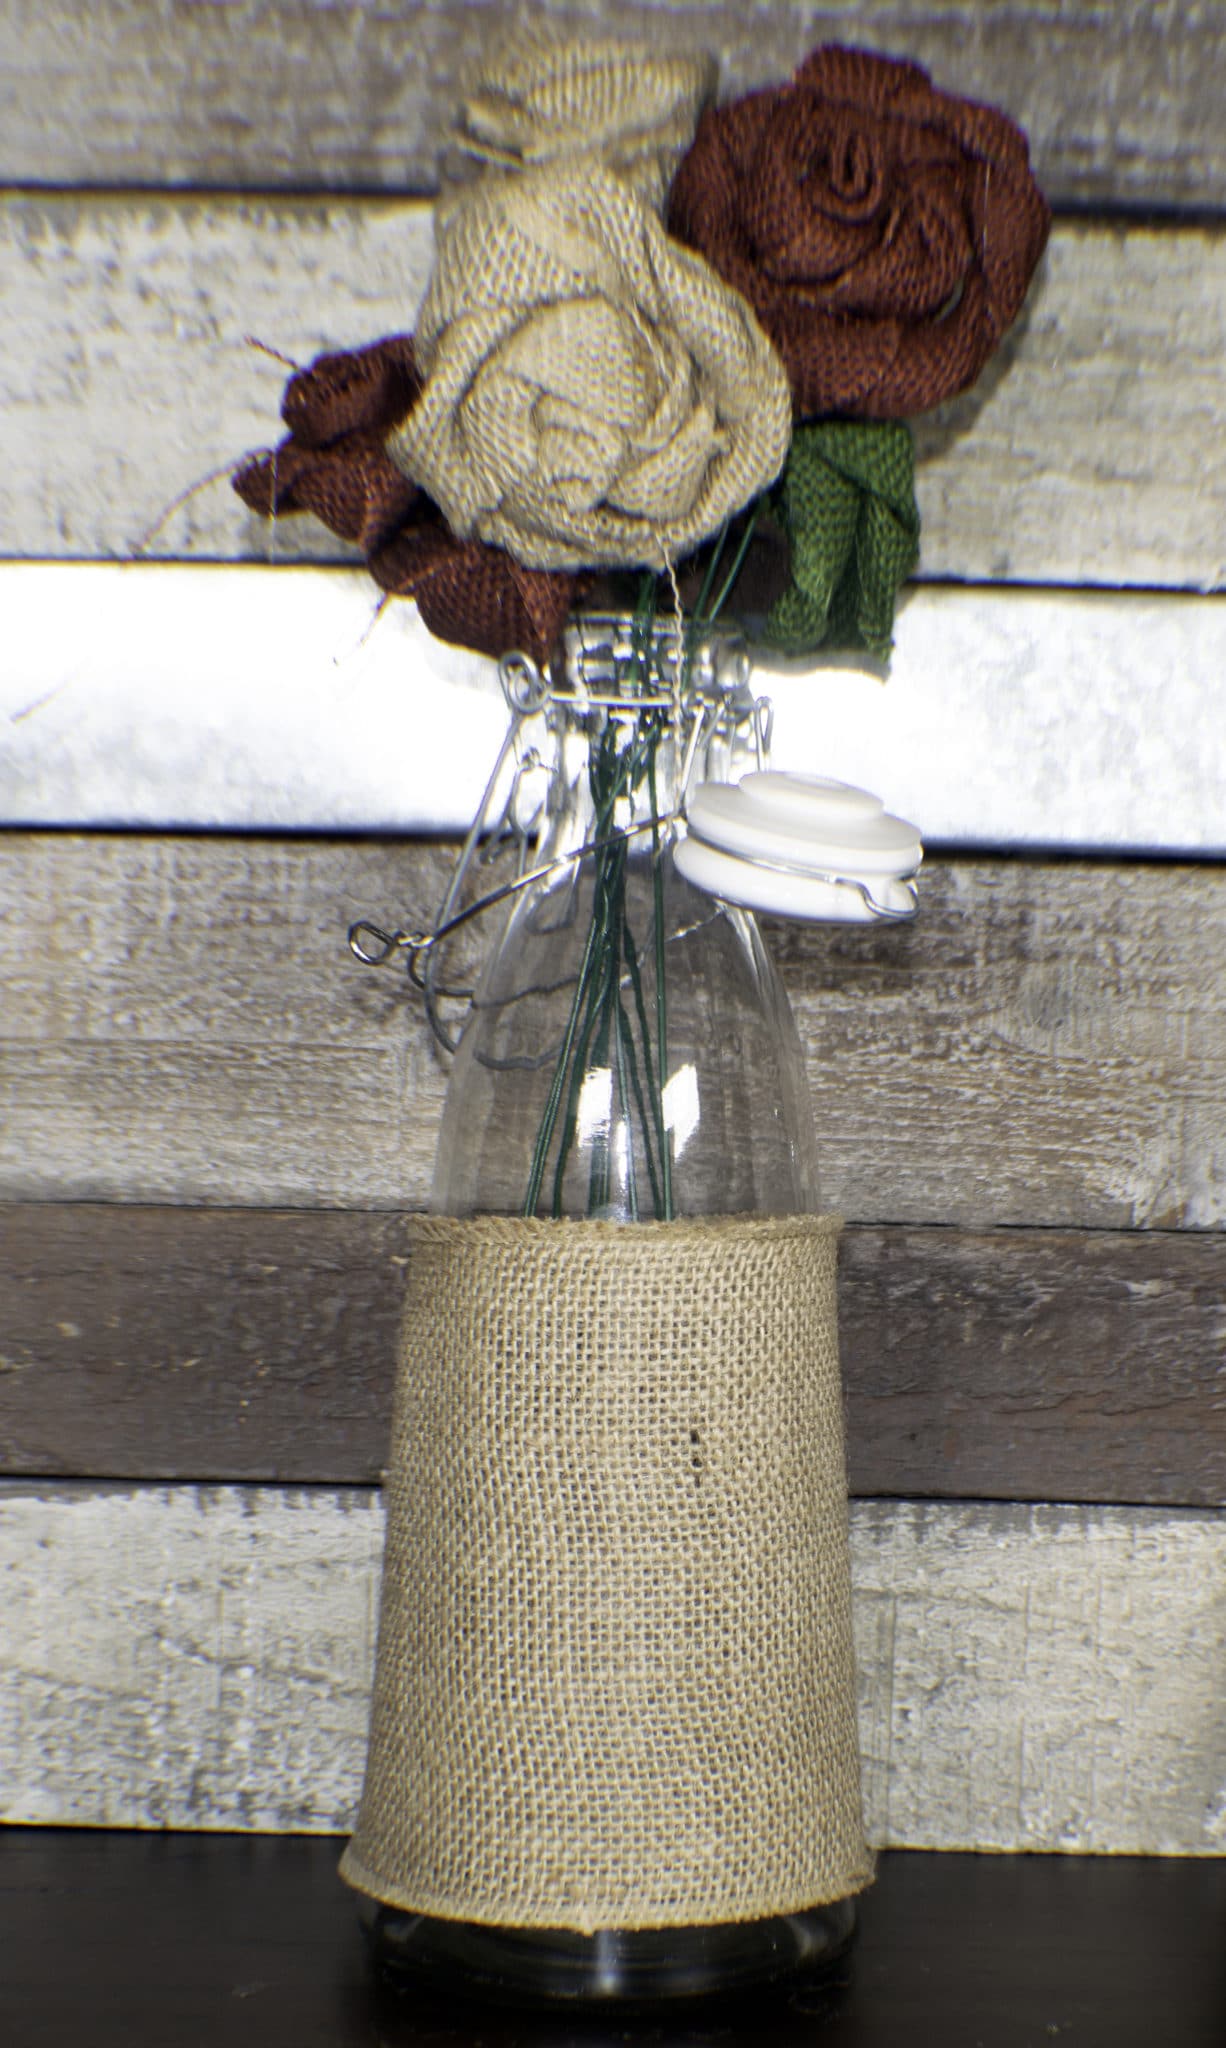
I had some burlap ribbon that I got on sale last year after Thanksgiving and completely forgot about it. I came across it today and thought I would make these rustic burlap flowers with it. This is a super simple project that comes out looking beautiful and rustic. This is a perfect home decor project for any time of the year. I used some burlap, hot glue and floral wire to make my burlap flowers or you could just as easily place these on a wreath or as another decorative element. I got all of my materials at my local craft store for very little money. Even the glass vase I used was on sale. I always love saving money and this was definitely a money saver.
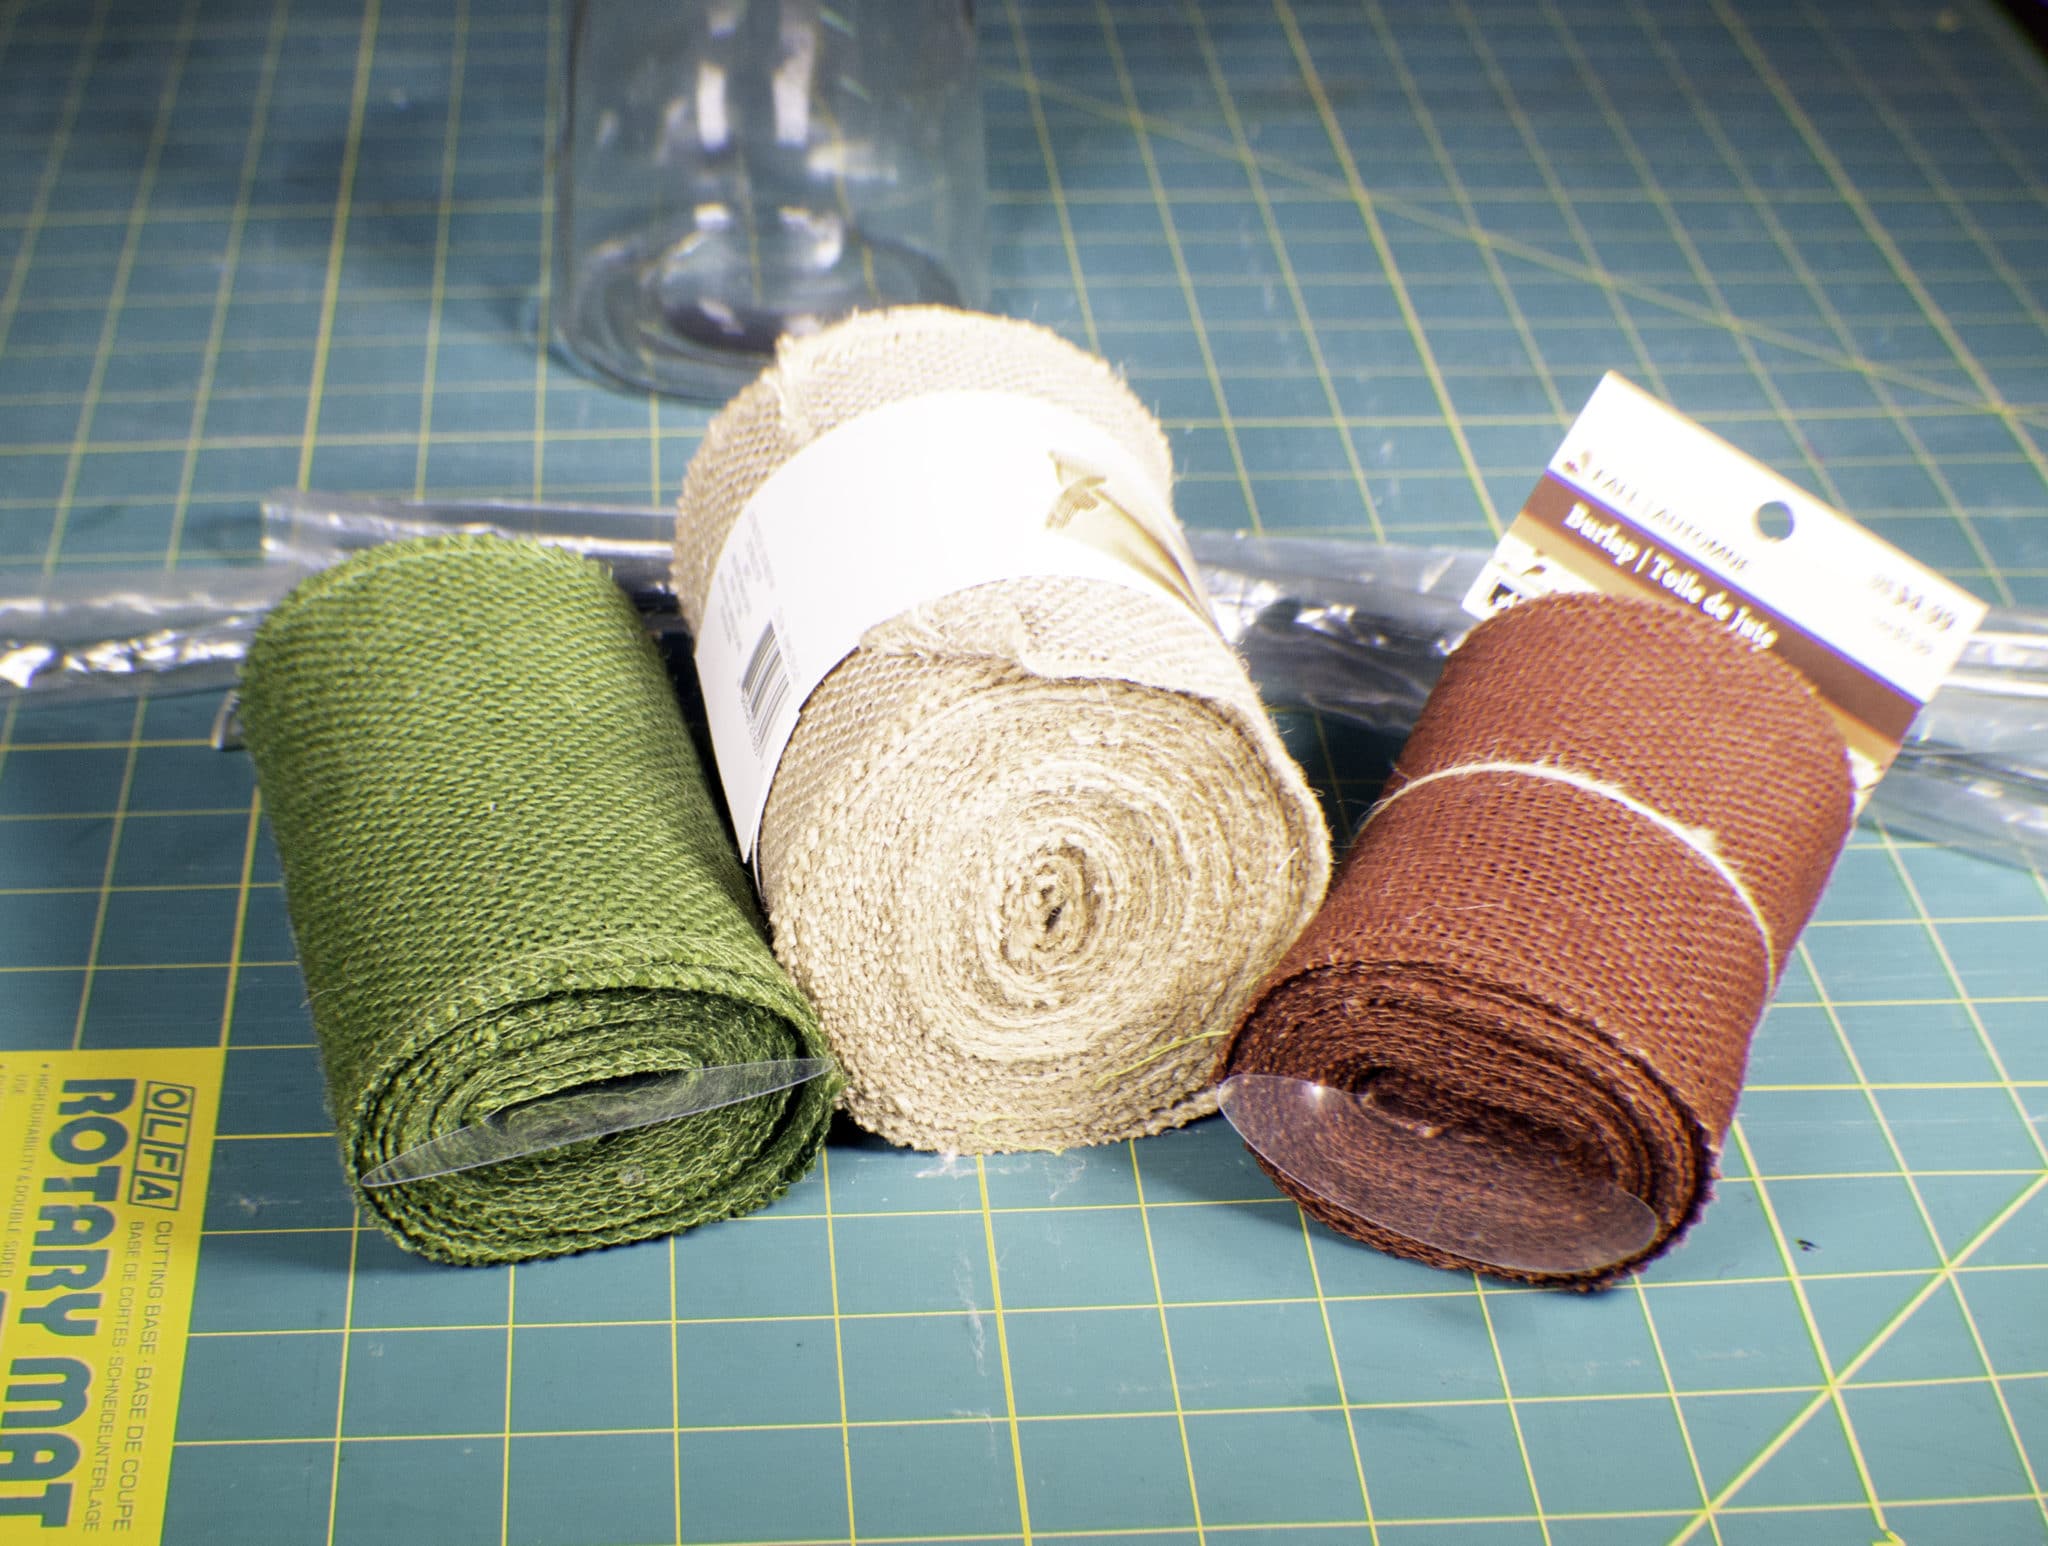
What you will Need:
- 3 colors of burlap ribbon that measures at least 2″ wide
- Hot Glue
- 1 coordinating felt square
- Floral Wire (Optional)
Step 1: How to Make Burlap Flowers
Cut 5 -6 pieces of ribbon 30″ long. My ribbon was 5″ wide so I cut it in half to measure 2 1/2″ wide. I don't think that I would go much wider than that.
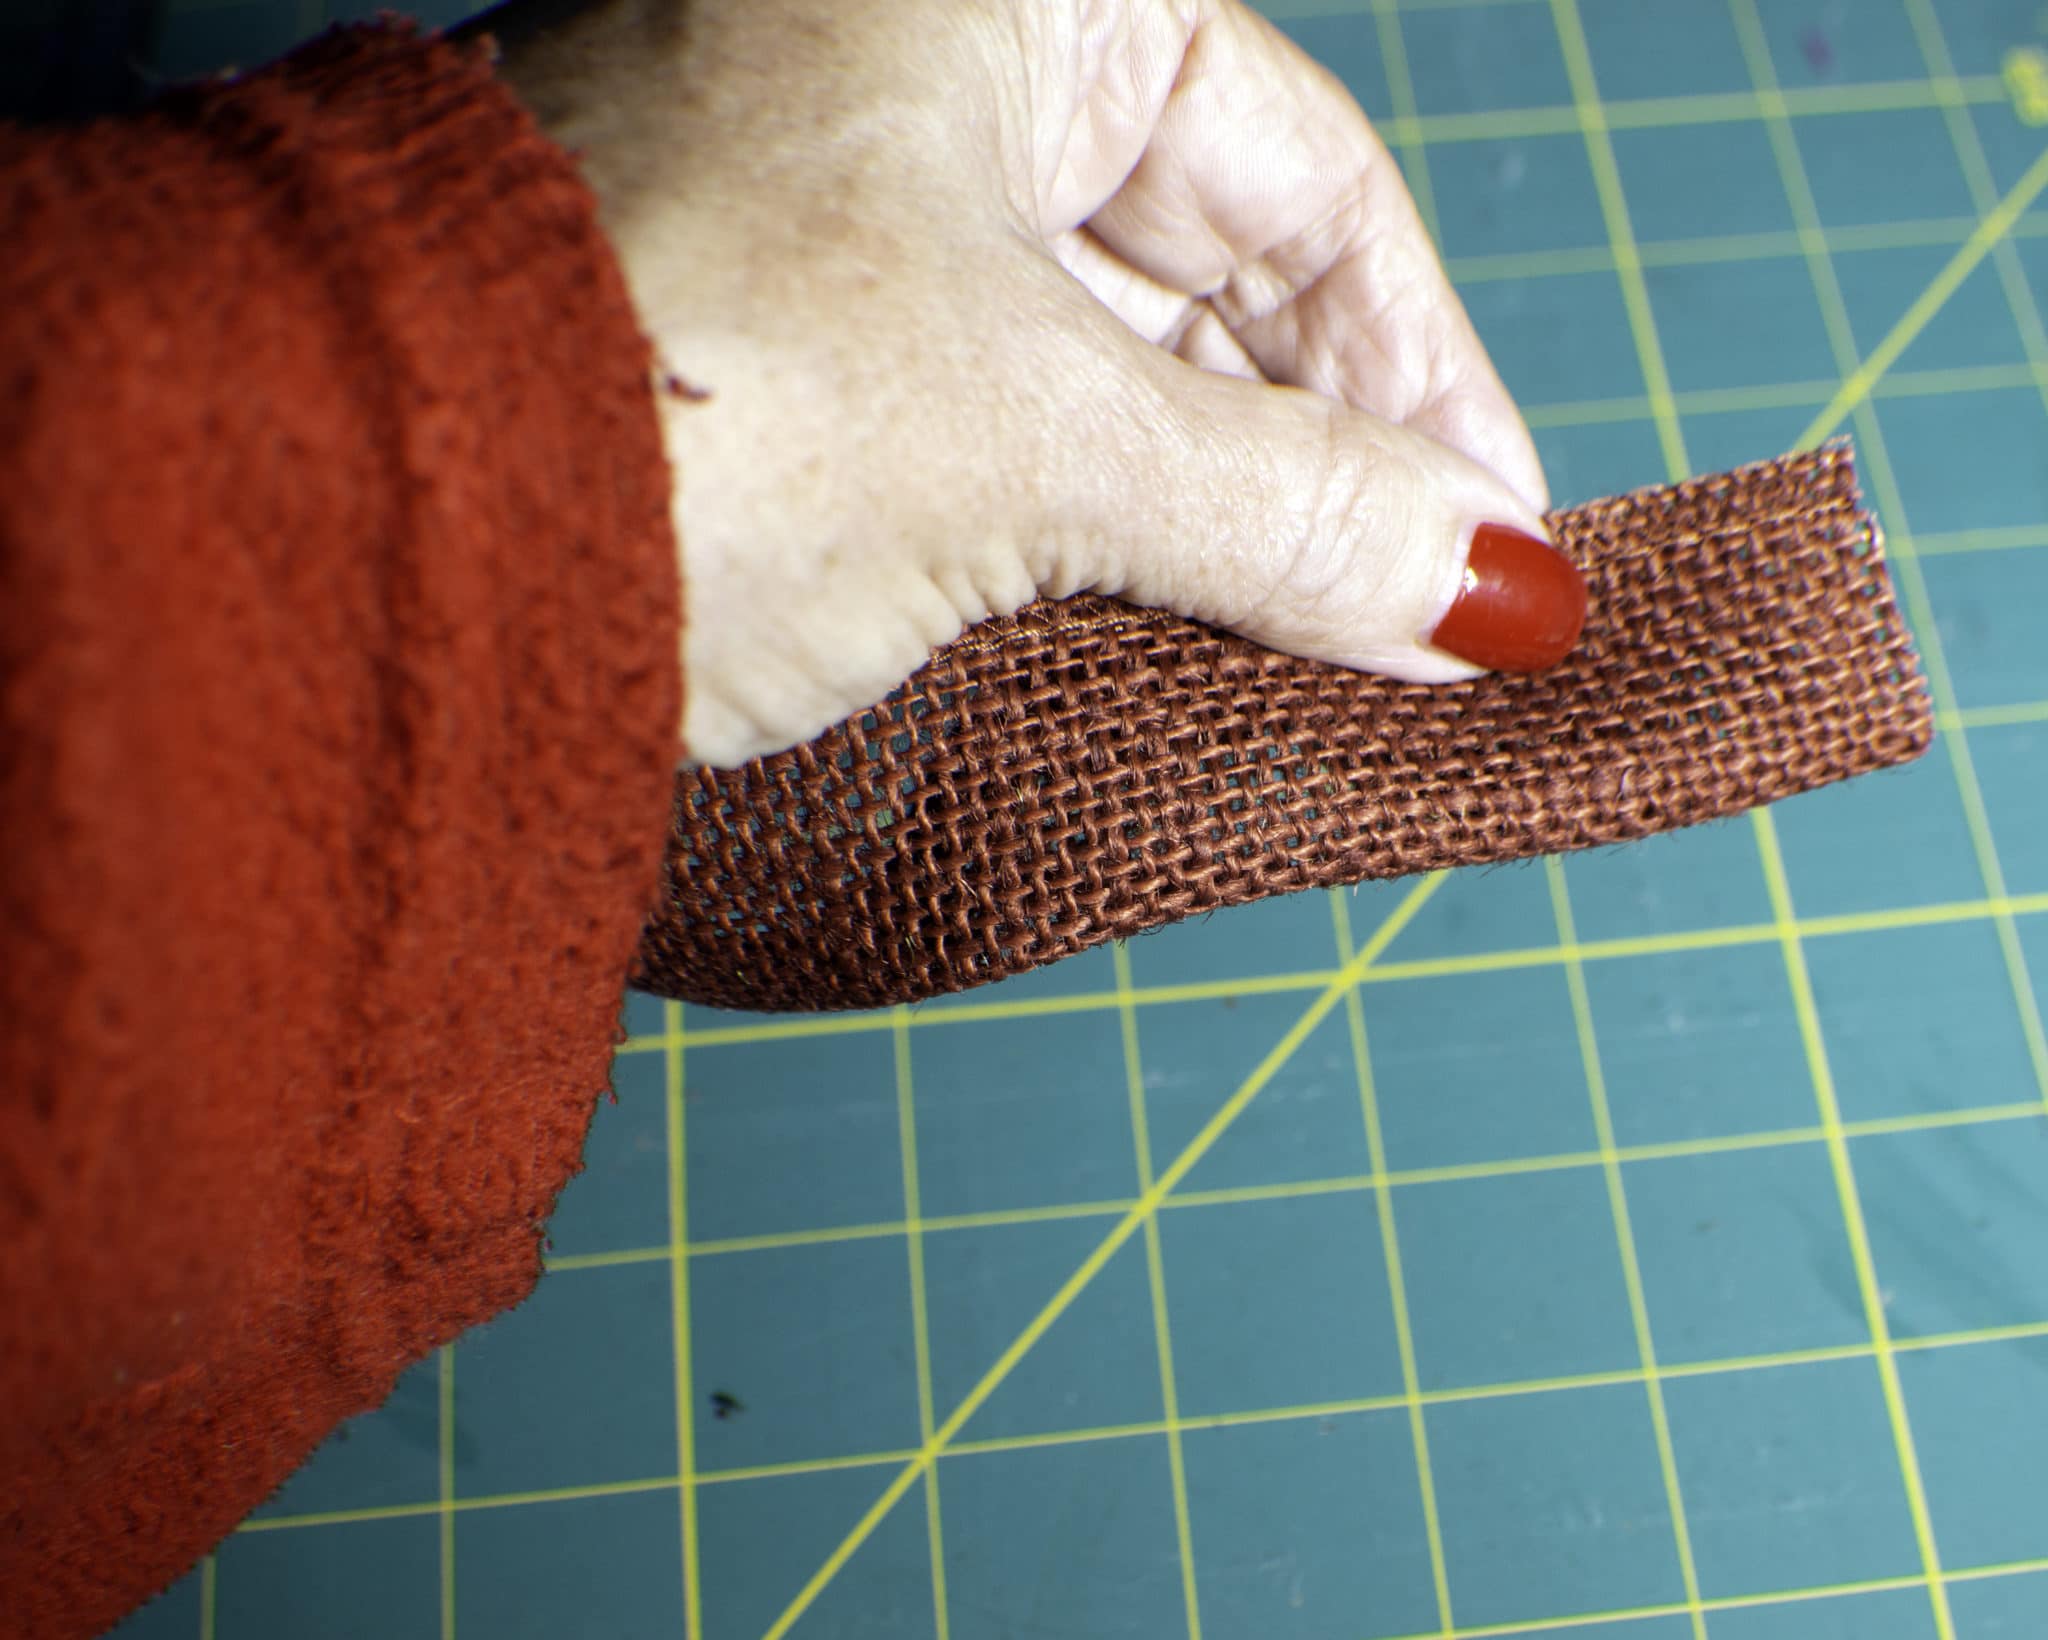
Step 2: How to Make Burlap Flowers
Take one end of the ribbon and fold it in half. Roll the ribbon a few times then stop. This will be the center of the flower. You no longer have to hold the ribbon in half.
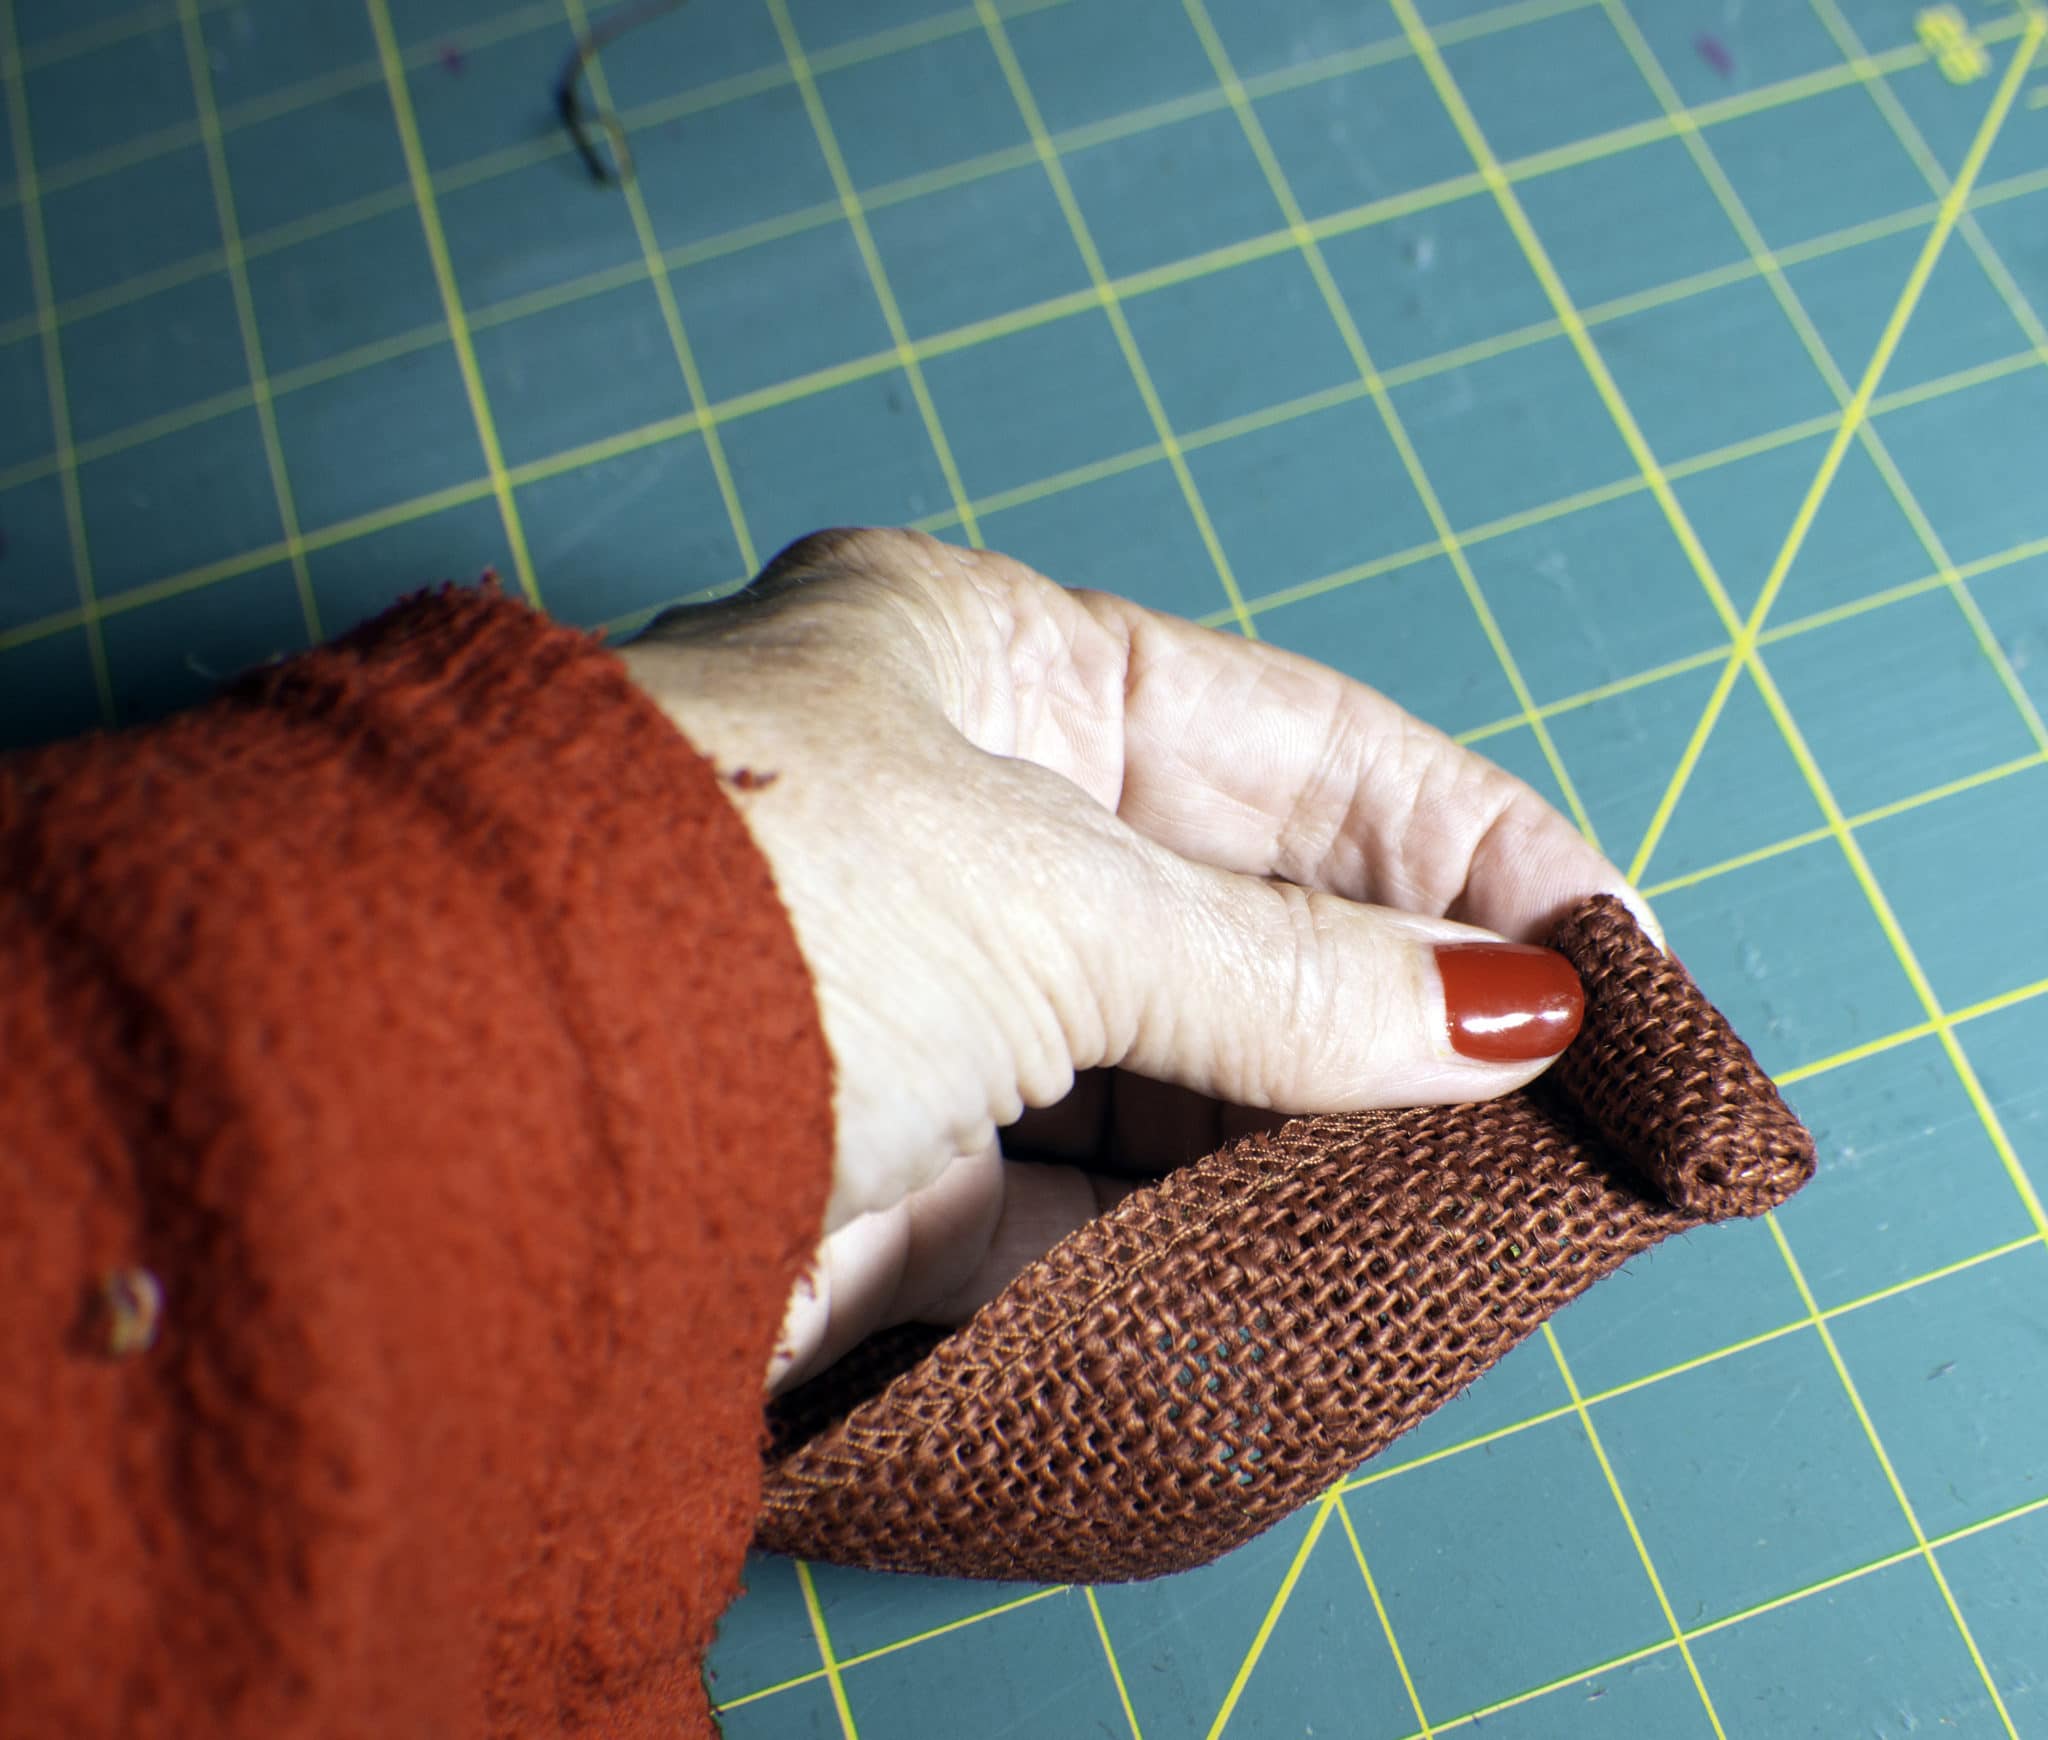
Step 3: How to Make Burlap Flowers
Begin twisting the ribbon as you rotate it around the center you just created. This creates the petals of the flower. Continue to hold the flower as you twist and rotate the ribbon.
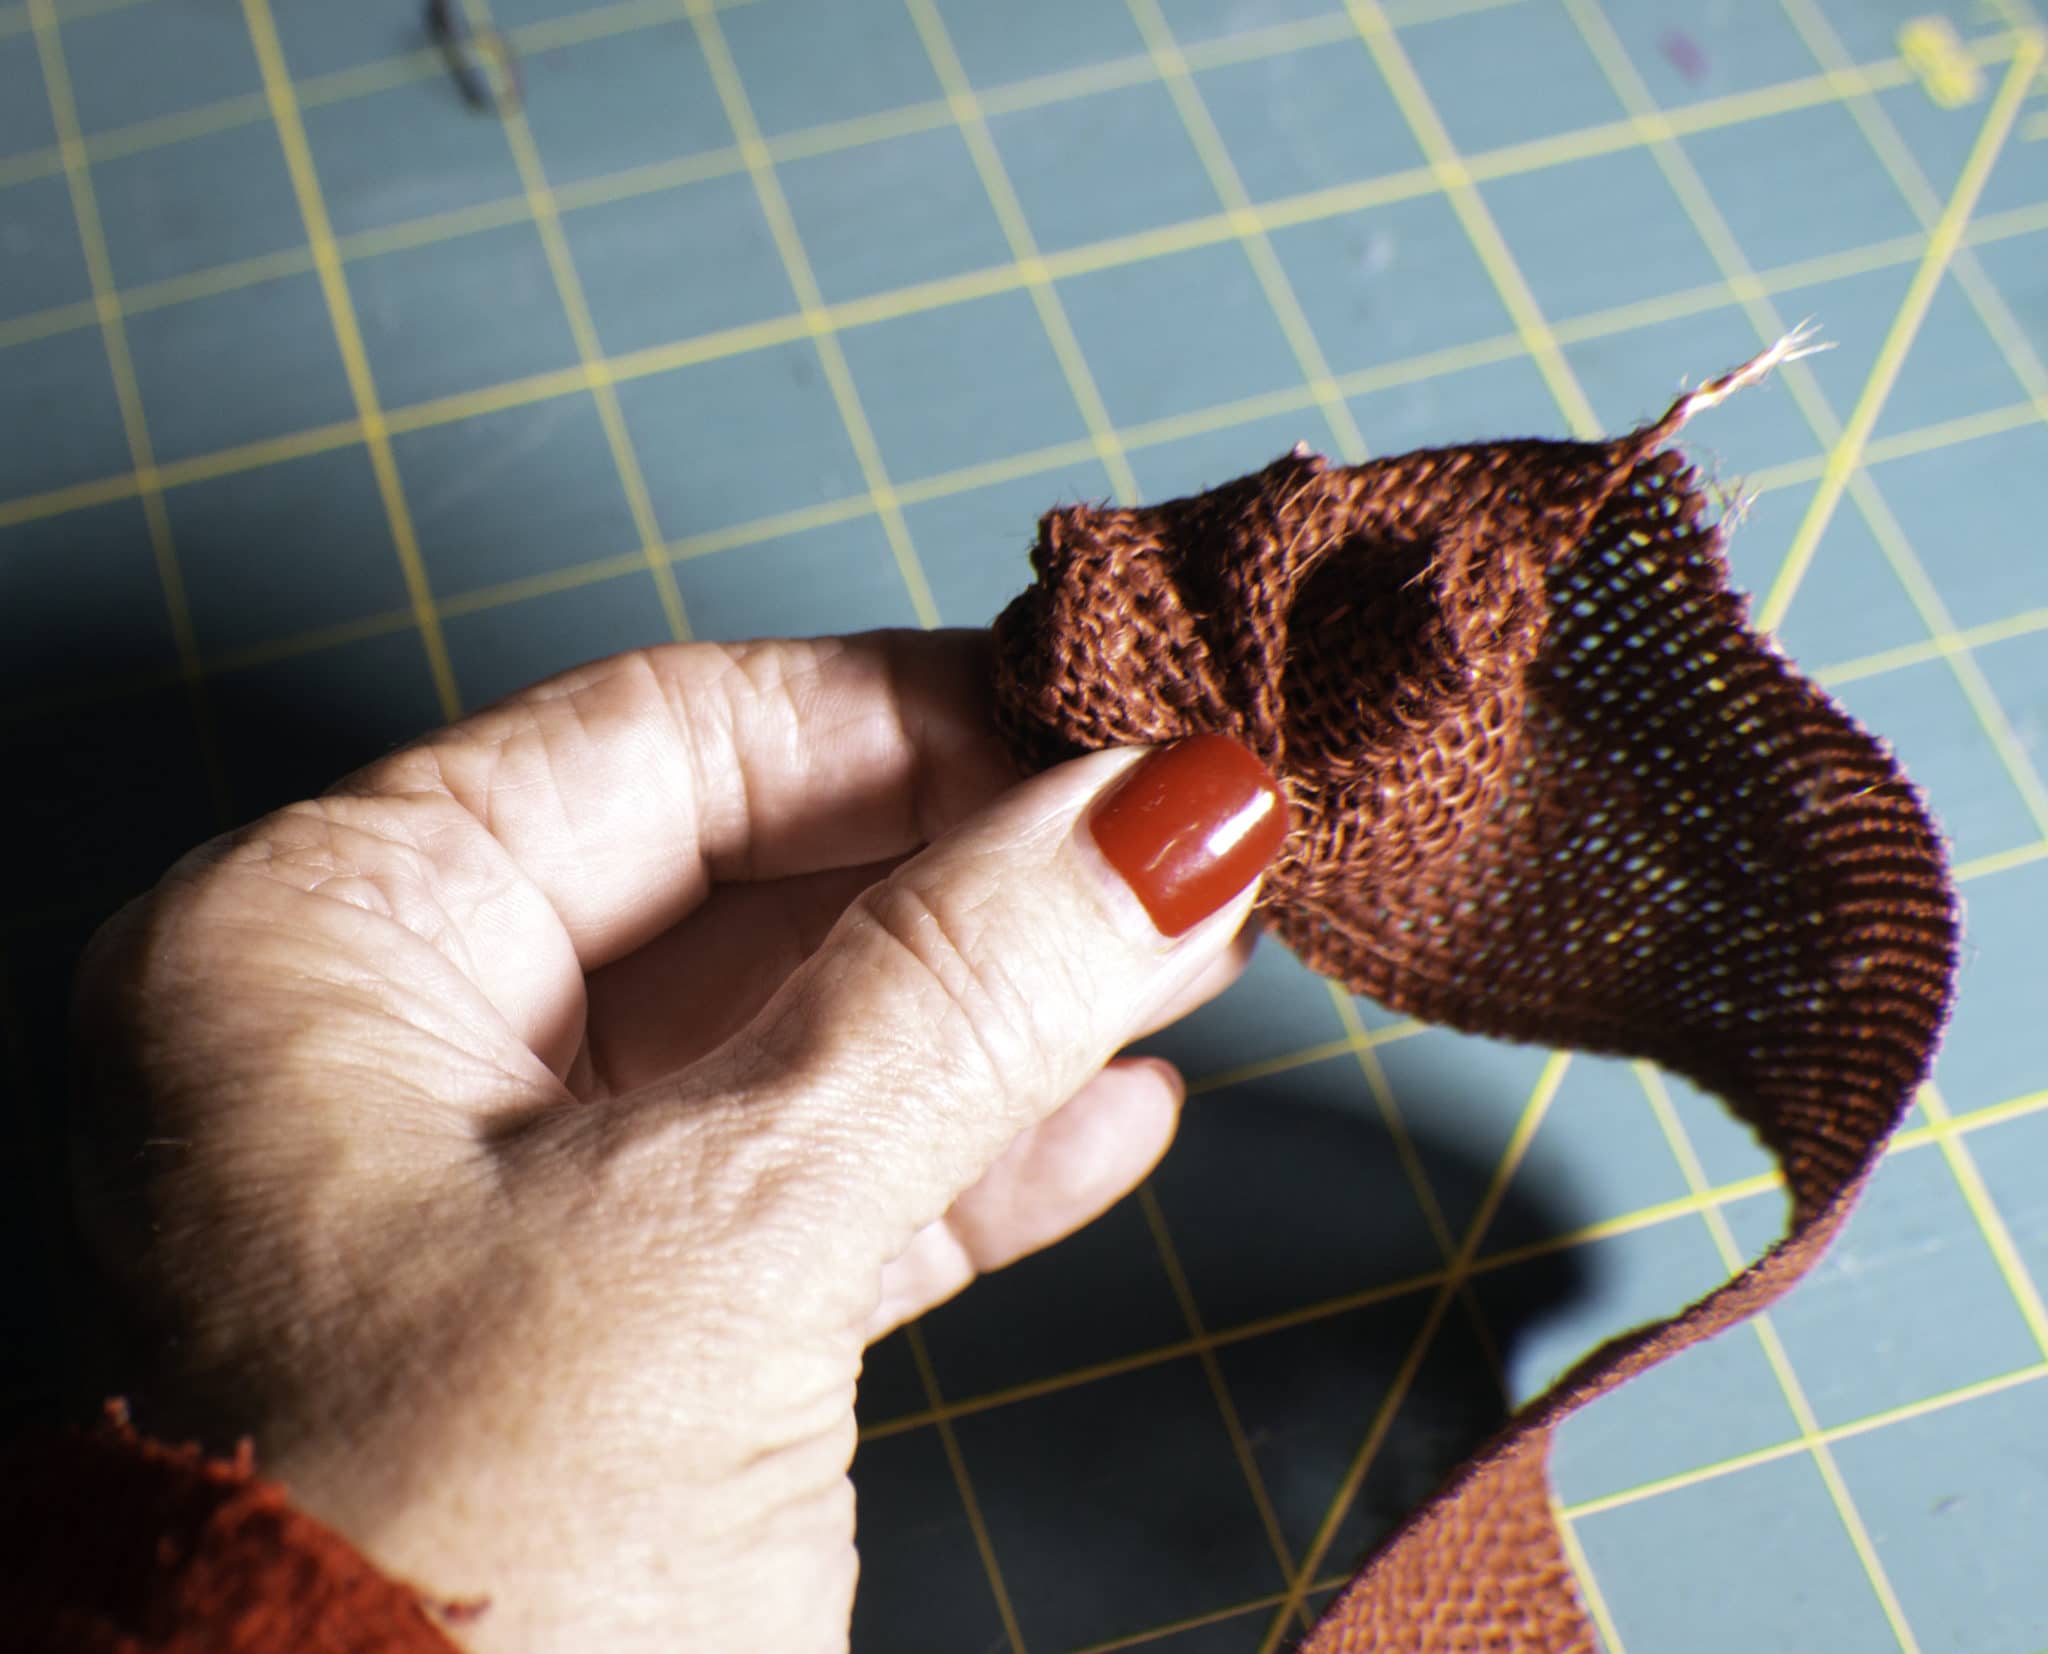
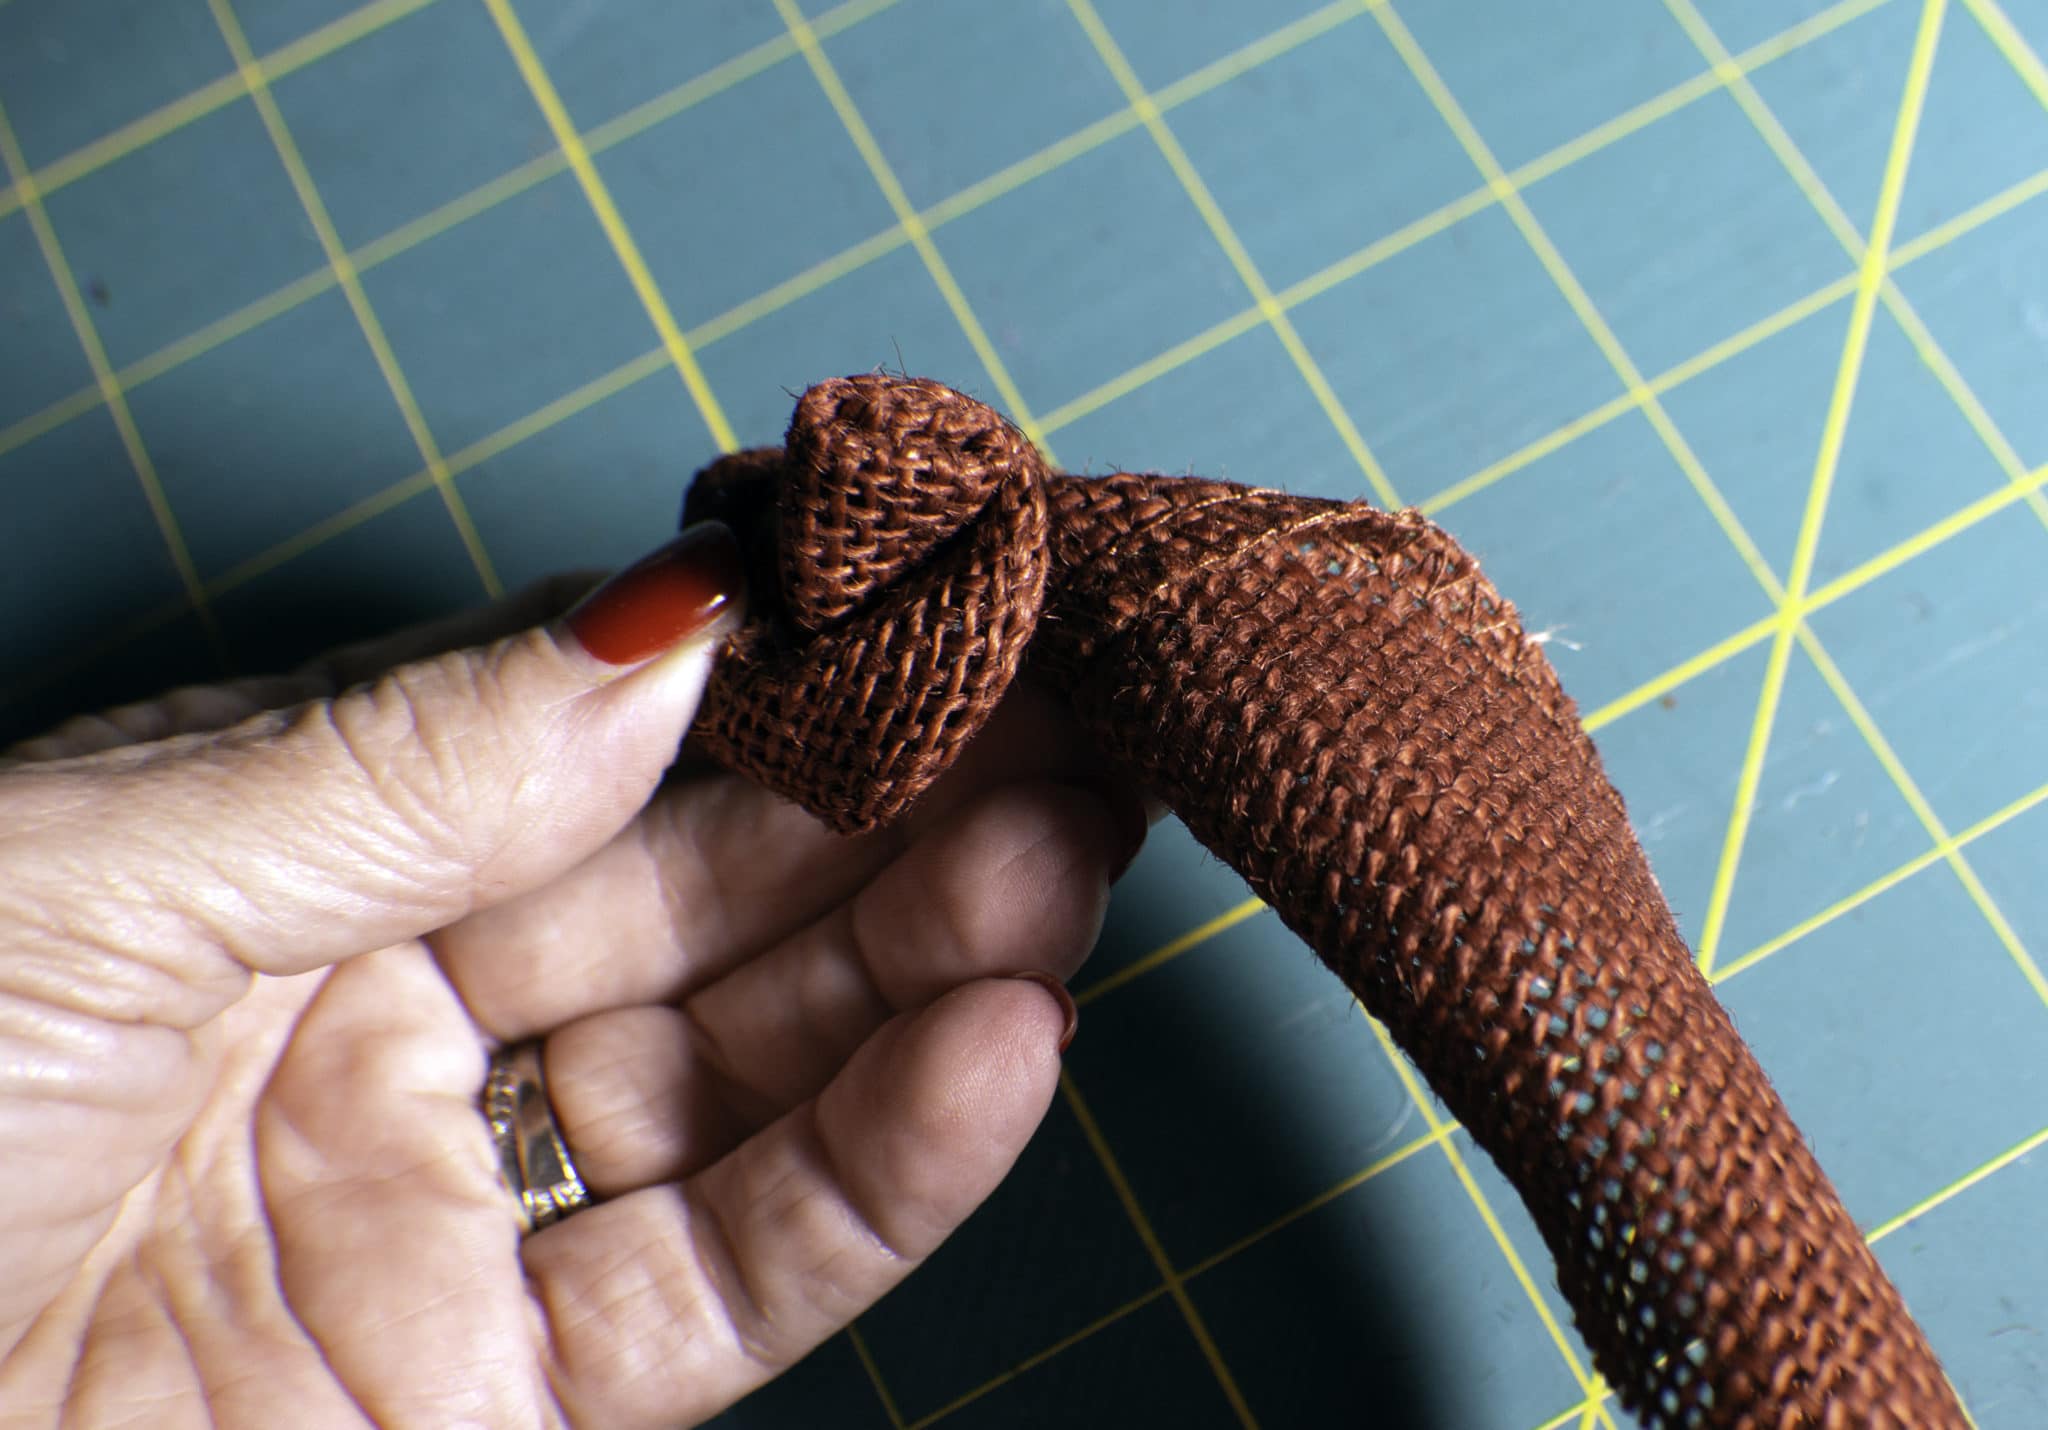
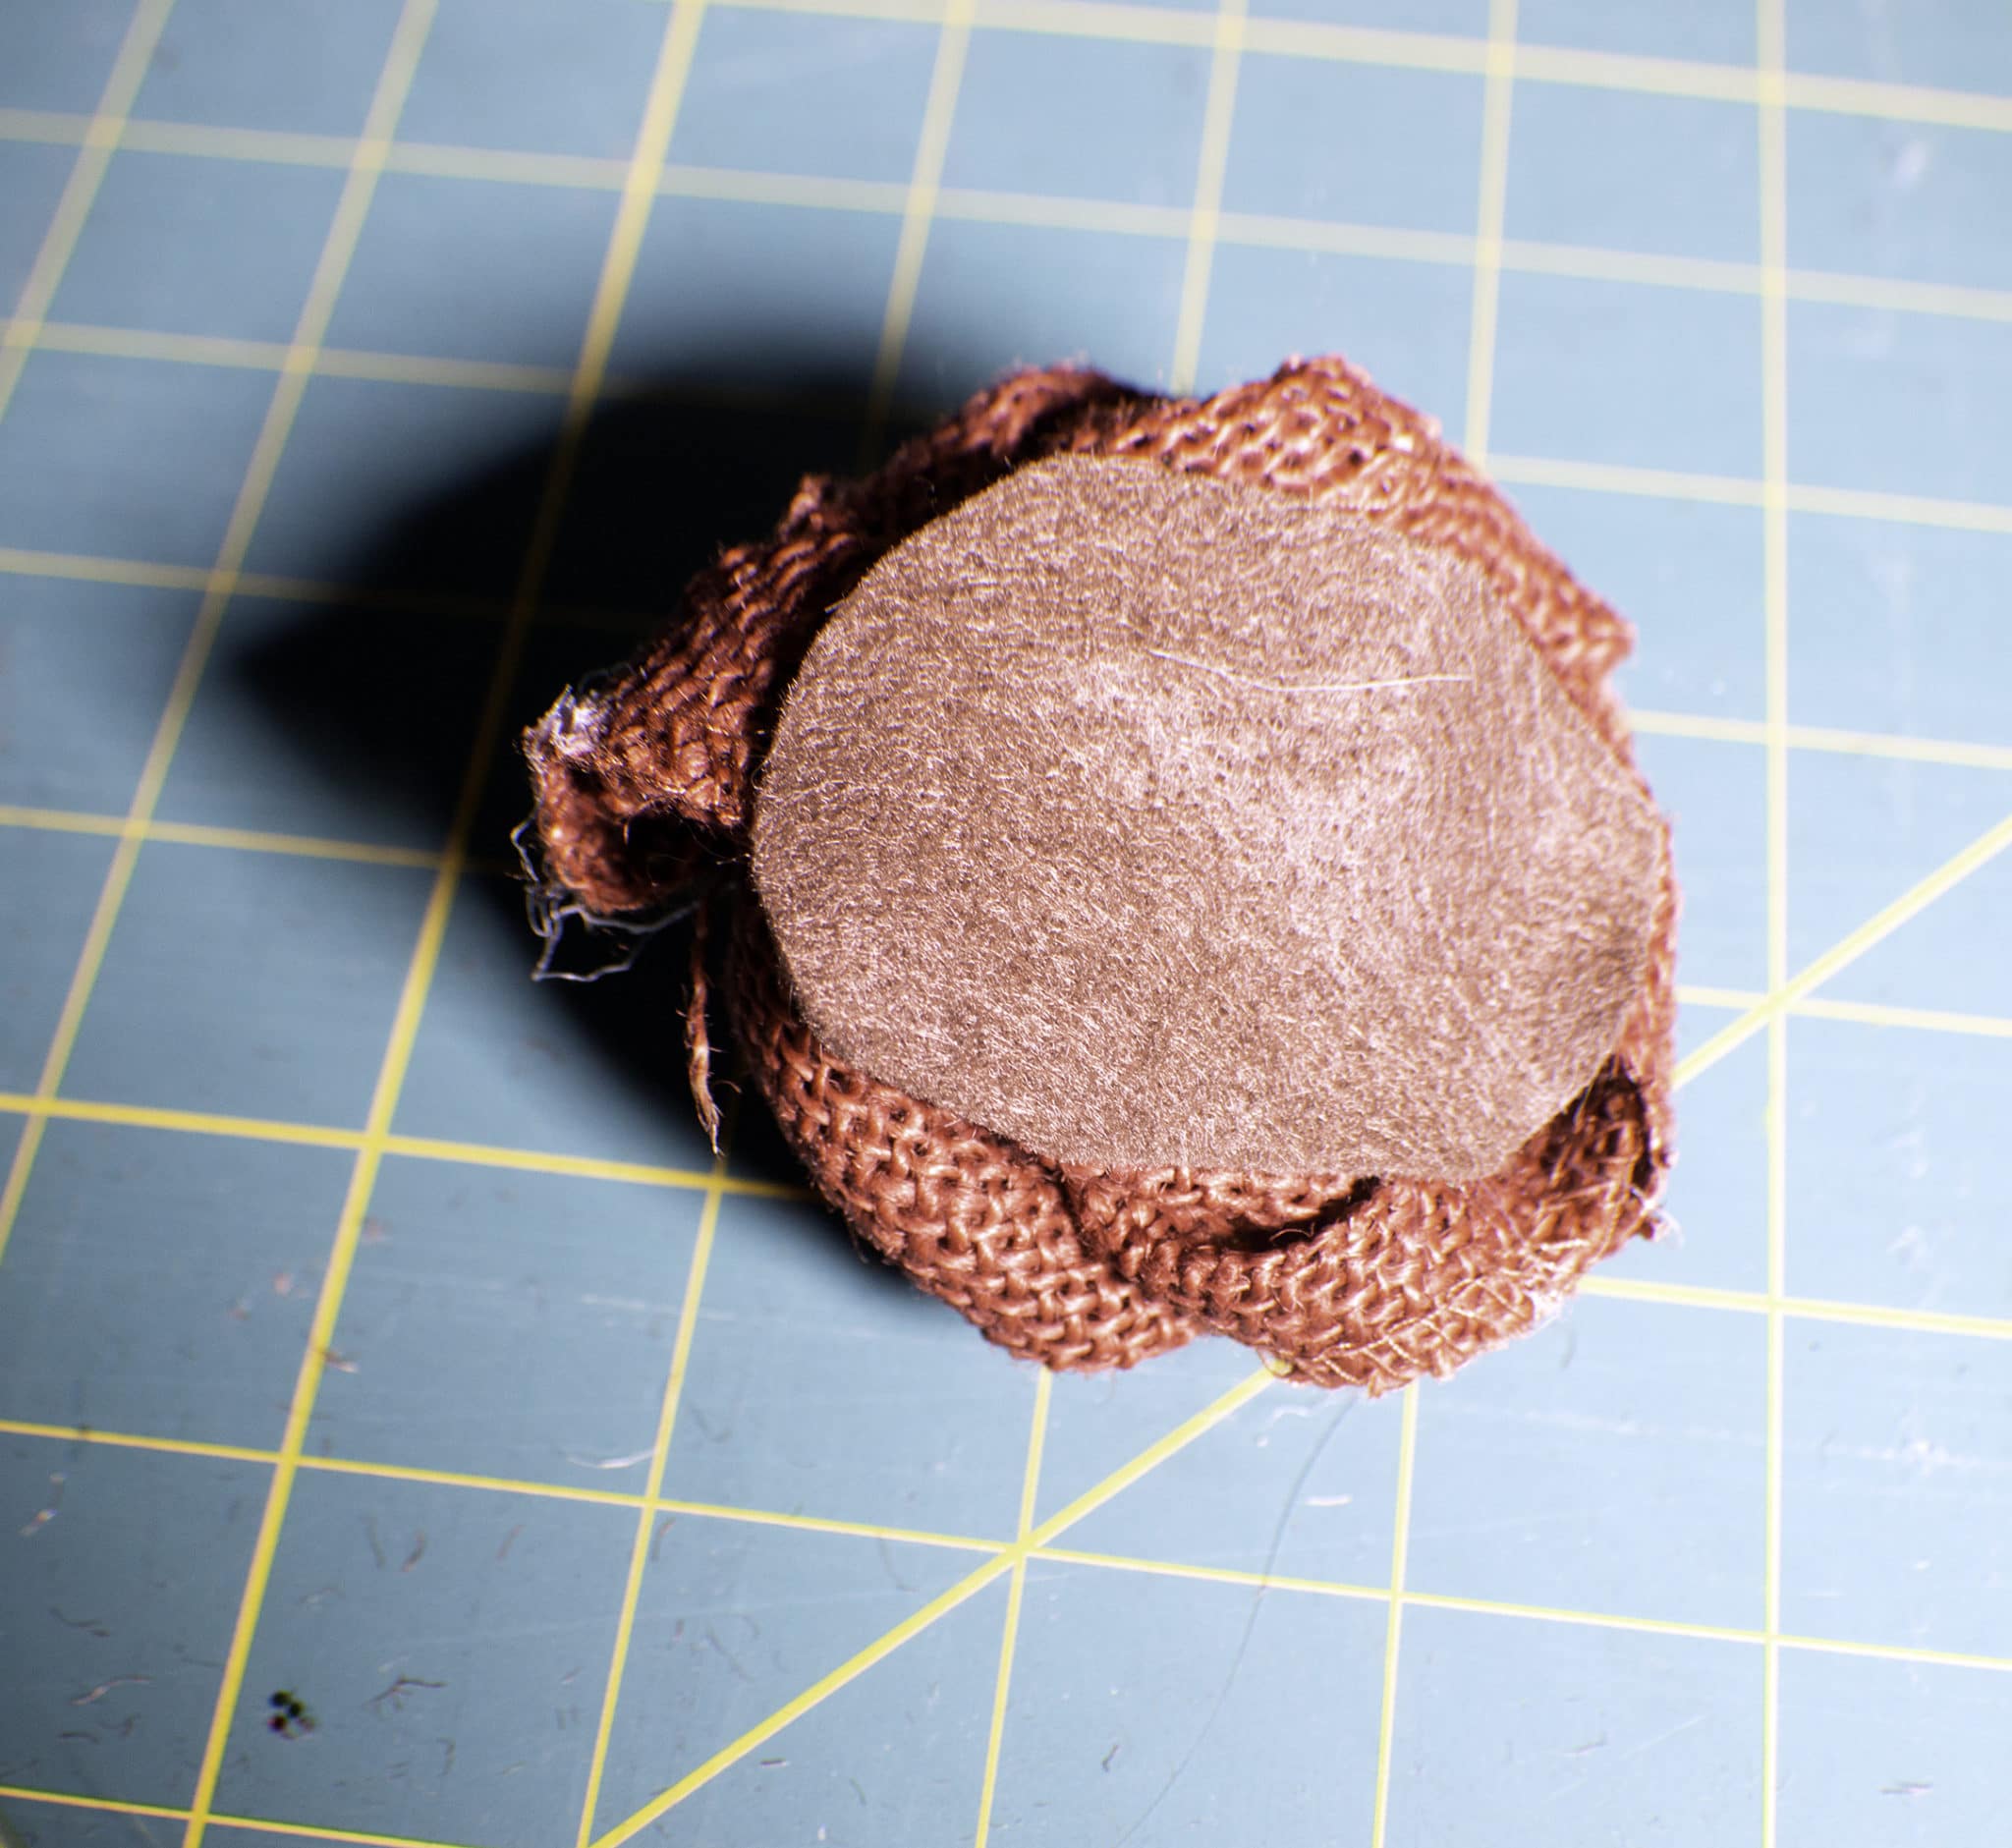
Step 4: How to Make Burlap Flowers
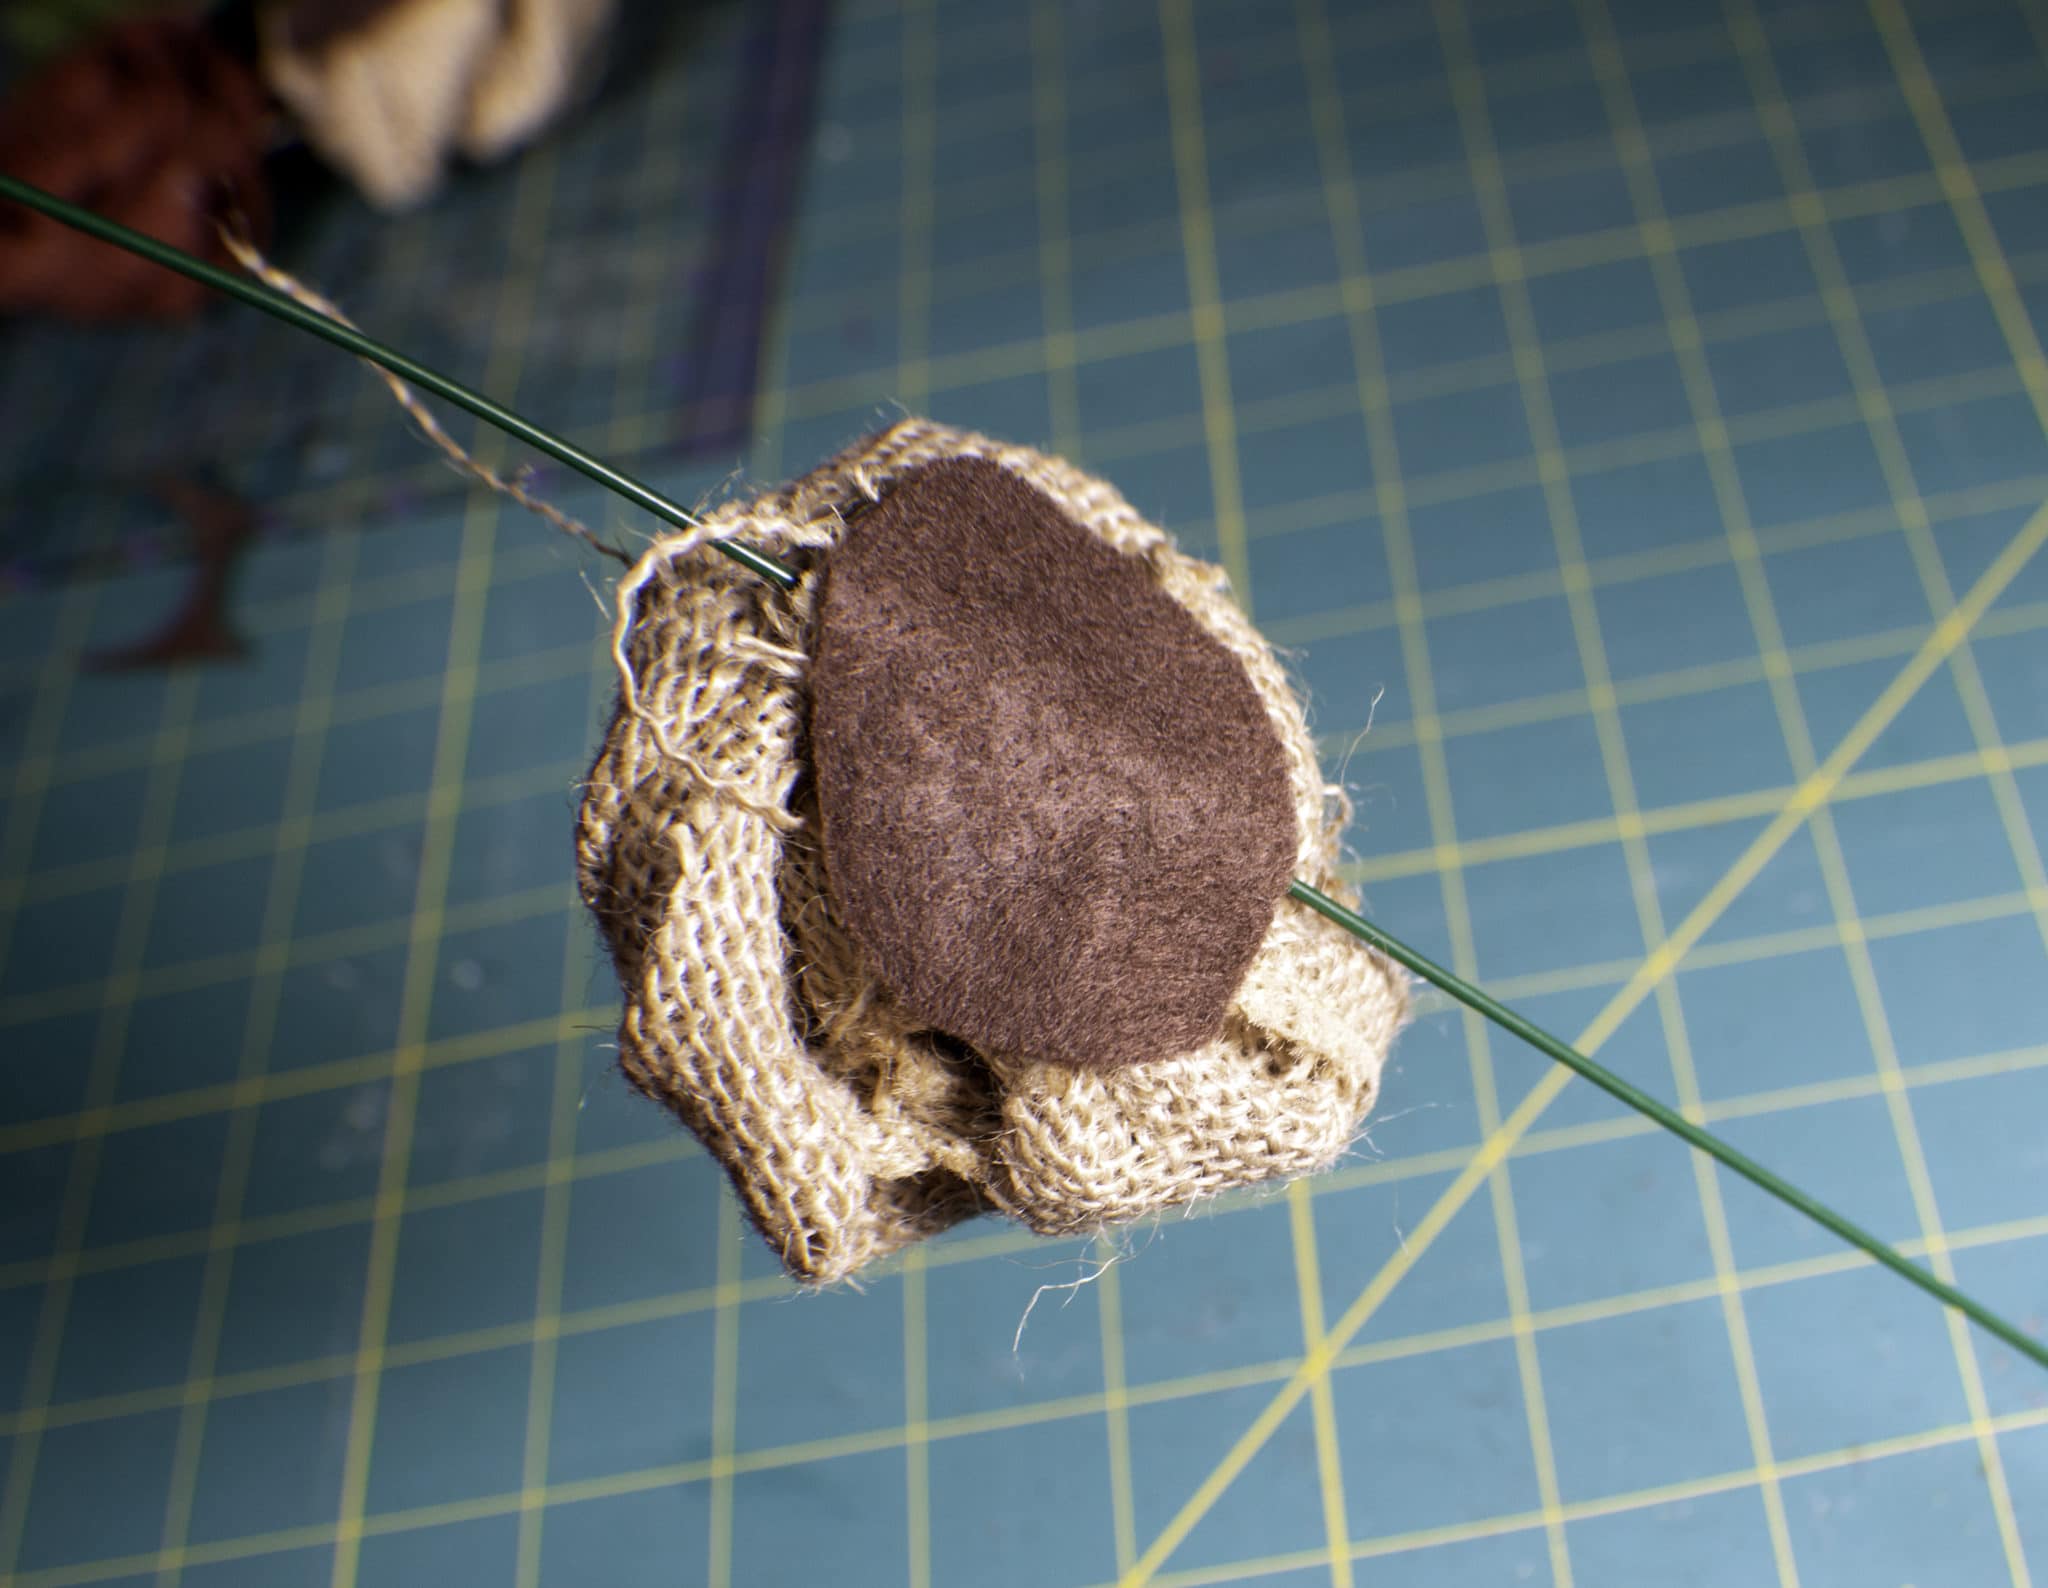
Once you get to the end, hot glue the end to the bottom of the flower. Add a circle of felt to the bottom to hold everything together. You may notice that some of the flower comes unwound. Just add a dollop of hot glue to secure it.

Step 5: How to Make Burlap Flowers
Add the floral wire to the bottom of the flower by poking it between the felt pieces and through the burlap. Twist the two halves of the wire together. Place into a container for a nice bouquet of burlap flowers.