
How to Make Fabric Pot Protectors
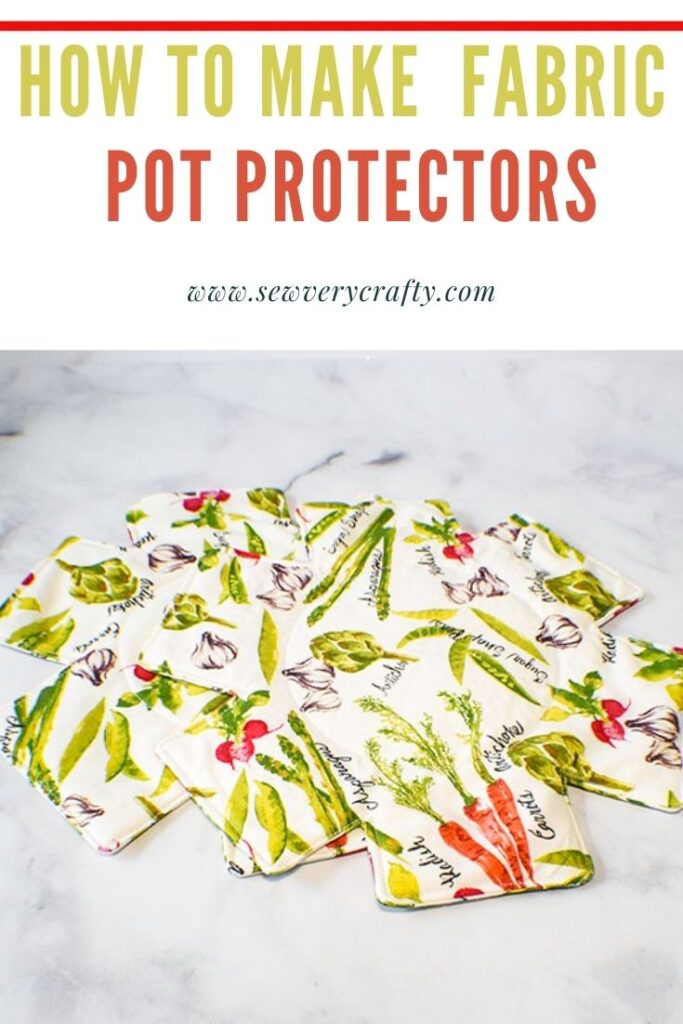
Tired of your pots and pans making noise when you put them away or take them out. Here is the solution to that problem. This is a super simple beginner sewing project that anyone can make. These fabric pot protectors are a terrific way to stop all that noise and protect your pots and pans at the same time. This is a fun and functional kitchen sewing project that can be made in minutes. I just love this simple swing project. I know you will too.This project was modified from one on Debsdays.com.
Choose some fun fabrics for your project like I did. I chose some fruit and vegetable fabrics for mine but there are loads of food fabrics at JOANN Fabric & Craft Stores![]() , Hobby Lobby, Fabric.com or onlinefabricstore.net to choose from. I got mine at JOANN Fabric & Craft Stores
, Hobby Lobby, Fabric.com or onlinefabricstore.net to choose from. I got mine at JOANN Fabric & Craft Stores![]() . This post contains affiliate links that if you click on them and make a purchase I may receive a small commission at no extra cost to you.
. This post contains affiliate links that if you click on them and make a purchase I may receive a small commission at no extra cost to you.
If you would like a video of this terrific project head over to YouTube and check out my video and while you are there subscribe to my free YouTube channel.

What you will need: How to Make Fabric Pot Protectors
- Pattern you can get by clicking on this link
- 1/4 yd fun fabric
- 1/4 yd quilt batting
- Standard sewing supplies
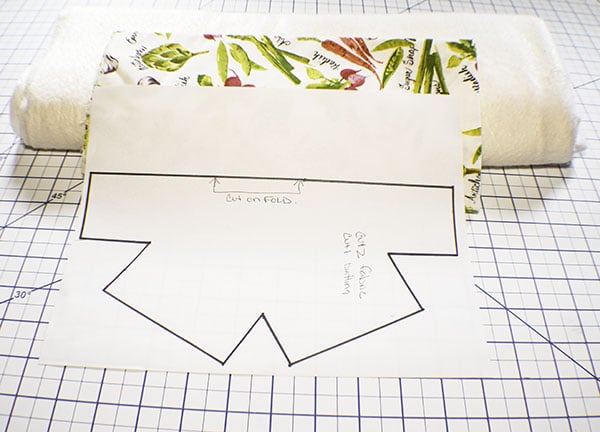
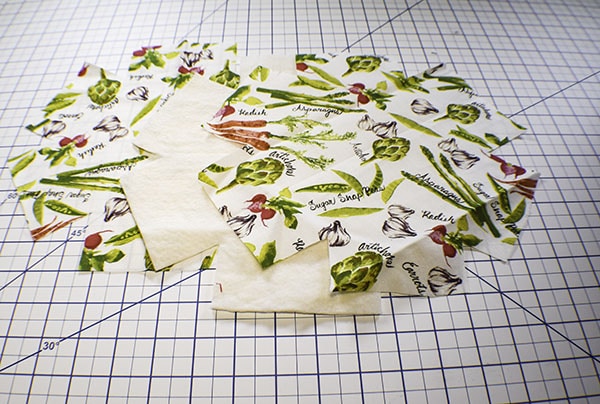
Step 1: Cut your fabrics
Using the pattern piece cut two fabric pieces on the fold and one batting piece on the fold.
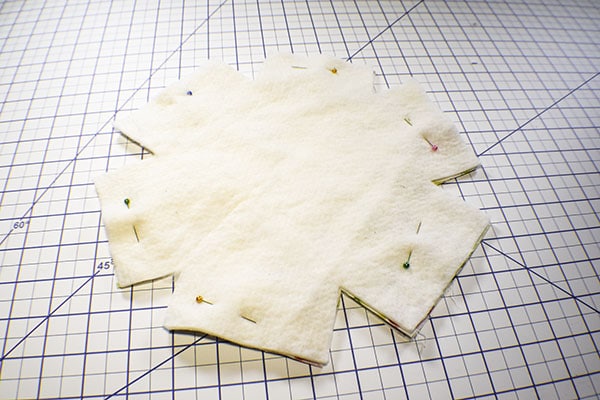
Step 2: layer your fabrics
Place the two fabric pieces right sides together on your work surface. Place your batting piece n top of the fabric pieces and pin.
Step 3: stitch your fabrics
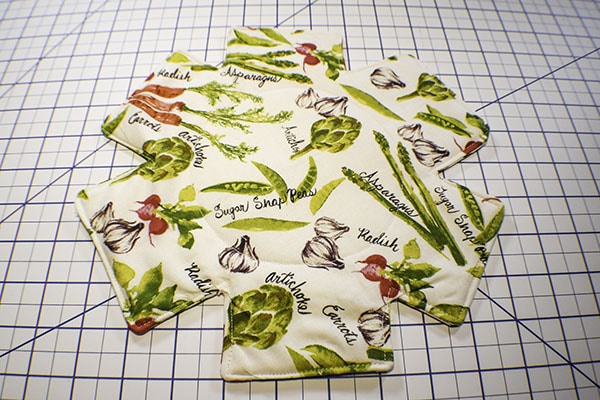
Stitch all the way around the piece leaving an opening on one of the arms of the piece for turning. Clip the notches between the arms without clipping through the stitching. Clip the corners.

Step 4: Turn your fabrics
Turn the piece right sides out through the opening you left and poke out the corners using a chopstick or a poking tool like That Purple Thang that you can get in my Amazon Shop. As an Amazon Associate I earn from qualifying purchases. Press thoroughly.
Step 5: Topstitch
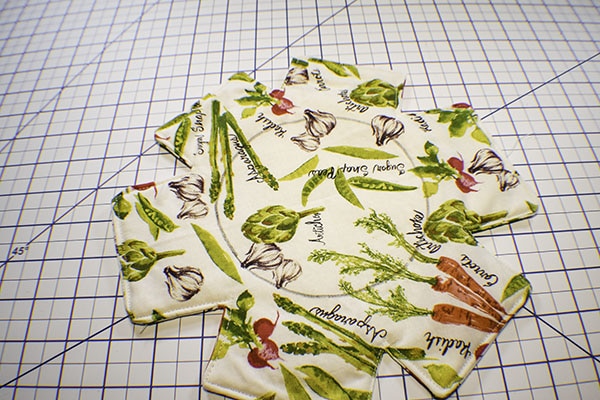
Topstitch all the way around the edge making sure to enclose the opening that you left. Using the pattern piece draw a circle using a Frixion heat erasable pen that you can also get in my Amazon Shop in the center of the pot protector and stitch all the way around. You have now finished your pot protector. Make them for all of your pots and pans and give them as gifts. They are perfect for that.
I hope you enjoyed this project. If you would like more sewing and crafting projects sign up for our newsletter and receive access to our free printables library.
If you would like video tutorials of some of Sew Very Crafty's most popular posts subscribe to our free YouTube channel here.


Missed most of your show as I was watching the table. Did you view this?
This was one of my first videos so I understand your criticism. I hope that I am getting better. I keep trying.